
Table of Contents >> Show >> Hide
- What Is Knockdown Ceiling Texture, Exactly?
- Tools and Materials You’ll Need
- Step-by-Step: How To Apply Knockdown Texture on a Ceiling
- Alternative Methods: Knockdown Without a Sprayer
- Common Mistakes (and How to Avoid Them)
- When to Call a Pro Instead
- Real-World Experiences: Lessons From Actually Doing It
- Final Thoughts
If you’ve ever stared at a bland drywall ceiling and thought, “This could really use some personality,” you’re exactly who knockdown ceiling texture was invented for. It’s a classic, slightly rustic look that hides sins (hello, tape lines and tiny dents) and makes a room feel more finishedwithout requiring the monk-like patience of a perfectly smooth level-5 finish. Even better, it’s totally DIY-able with the right tools, prep work, and a little timing magic.
In this guide, we’ll walk through how to apply knockdown texture on a ceiling step by step, what tools you actually need, how to avoid the most common mistakes, and a few alternative methods if you don’t own (or want to rent) a texture sprayer. Think of this as your friendly, slightly dusty roadmap to going from flat and boring to “Whoa, did you hire a pro?”
We’ll also finish with some real-world experiences and lessons learnedthe stuff you only find out after you’ve worn a fine layer of drywall dust for a full weekend. Let’s get that ceiling looking good.
What Is Knockdown Ceiling Texture, Exactly?
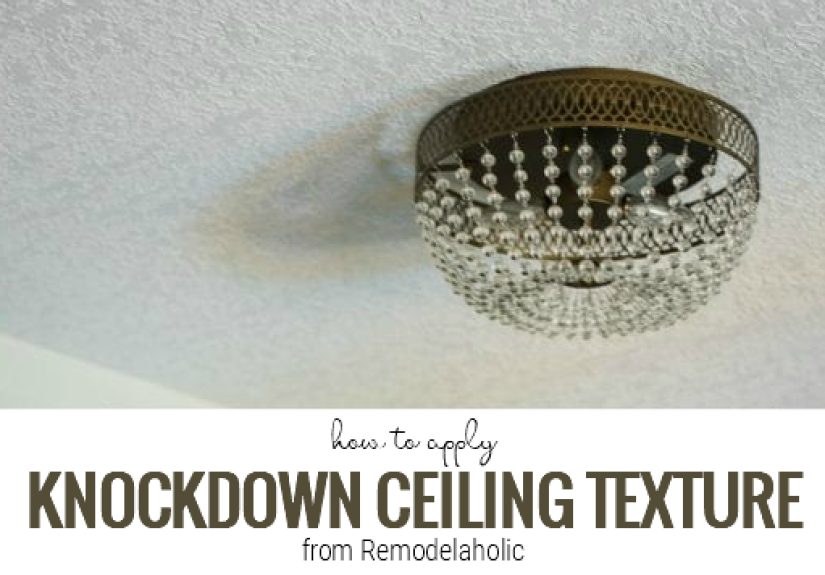
Knockdown texture is a drywall finishing style that starts with a splatter of watered-down joint compound and ends with a mottled, flattened pattern that looks a bit like stucco that’s been gently ironed out. It has more visual movement than a flat finish, but it’s less intense than heavy popcorn or super bumpy orange peel textures.
Here’s the basic idea:
- You spray or dab thin joint compound onto the ceiling, creating droplets or “stalactites.”
- You let it set for a short windowusually about 10–15 minutes, depending on temperature and humidity.
- You run a wide plastic knockdown knife or squeegee lightly over the surface, “knocking down” the peaks and leaving soft, flattened patches of texture.
The result is a subtle, organic pattern that:
- Hides imperfections in drywall, like minor waves, joints, and patches.
- Adds visual interest without screaming “look at my ceiling!”
- Can save money by reducing the need for ultra-high-level sanding and finishing.
It’s especially popular when you’re scraping off old popcorn and want a fresh texture that feels more current, or when you’ve done repairs and need to blend old and new ceiling surfaces together.
Tools and Materials You’ll Need
You don’t need a full contractor’s van to pull this off, but you do need the right basics. Most pros and DIY guides recommend a similar toolkit:
Core Materials
- Pre-mixed joint compound (all-purpose or lightweight) or dry texture mix
- Clean water for thinning the mud to a sprayable consistency
- Primer (for raw drywall or patched surfaces)
- Ceiling paint for finishing once the texture is dry
Tools for Mixing and Spraying
- 5-gallon bucket
- Paddle mixer attachment and drill
- Hopper gun and air compressor (rented or owned)
- Air hose and nozzle tips for the gun
Tools for Knocking Down
- 18–24 inch knockdown knife or rubber squeegee-style blade
- Extension pole for working from the floor
- Smaller 6–10 inch drywall knife for tight corners
Prep and Safety Gear
- Plastic sheeting, rosin paper, or drop cloths
- Painter’s tape to mask walls, fixtures, and trim
- Step ladder
- Safety glasses and a respirator or dust mask
- Hat or disposable hood (trust me on this one)
Is a sprayer absolutely required? For big ceilings, yes, it makes life much easier. For small patches or tiny rooms, you can use sponge or roller techniques insteadwe’ll talk about those in a bit.
Step-by-Step: How To Apply Knockdown Texture on a Ceiling
Step 1: Prep the Room and Ceiling
Knockdown texture is messy. Not “Oops, I spilled a little paint” messymore like “It snowed joint compound in my living room” messy. Take prep seriously.
- Move furniture out if possible. If not, cluster it in the center of the room and cover it with plastic.
- Cover the floor completely with plastic or heavy drop cloths.
- Mask the tops of walls, windows, doors, fan boxes, smoke detectors, and recessed lights.
- Remove vent covers and light trims when you can.
On the ceiling itself:
- Scrape off any loose material, flaking paint, or leftover popcorn.
- Repair dents, screw pops, and seams with joint compound and let them dry.
- Sand everything smooth and vacuum or wipe down dust.
- Prime bare drywall or patched areas so the texture bonds evenly.
Good prep doesn’t just make the texture look betterit also helps you avoid random peeling or weird spots months down the road.
Step 2: Mix the Texture Mud
The right consistency is half the battle. Too thin and your splatter will just run and drip. Too thick and you’ll get chunky blobs that won’t flatten cleanly.
A common target for knockdown texture is a consistency similar to pancake batter: thick enough to hold shape, thin enough to spray smoothly.
- Pour the recommended amount of water into your 5-gallon bucket.
- Add joint compound or texture mix gradually.
- Use a paddle mixer on a drill to blend until lump-free.
- Test by scooping some onto a drywall knife and tipping itideally, it should slowly slide off, not cling like paste and not run like water.
- Let it sit for about 10–15 minutes to fully hydrate, then remix lightly.
If you’re new to this, mix a little thicker at first, then slowly add water until it sprays well. It’s much easier to thin mud than to rescue a bucket of soupy compound.
Step 3: Load and Test Your Texture Sprayer
Follow the instructions for your specific hopper gun and compressor, but most setups look like this:
- Attach the hopper to the spray gun.
- Connect the gun to the compressor with the air hose.
- Install a medium nozzle (often in the 6–12 mm range) suitable for knockdown texture.
- Fill the hopper with your mixed mud to about halfway so it’s not too heavy.
Before you even glance at the ceiling, test the spray pattern on scrap drywall, plywood, or a big piece of cardboard:
- Set compressor pressure around 30–40 PSI (check your gun’s recommended range).
- Hold the gun about 18 inches from the surface.
- Sweep in a smooth, overlapping motion while pulling the trigger.
- Adjust pressure, nozzle, or your speed until you get droplets similar in size and density to what you want on the ceiling.
This is the “play” stepget comfortable here so you’re not experimenting overhead while mud rains down on your face.
Step 4: Spray the Ceiling
Once your pattern looks good on the test board, it’s showtime.
- Start in a corner and work your way across the room in consistent passes.
- Keep the same distance from the ceiling to avoid heavy and light spots.
- Overlap your passes slightly so you don’t leave bald streaks.
- Work steadily, but don’t rushyou want even coverage.
You’re aiming for a field of evenly sized splatters. They’ll look pretty scary at firstlike your ceiling broke out in drywall acnebut that’s exactly what you want before the knockdown step.
Step 5: Time It and Knock It Down
This is where knockdown texture earns its name. The trick is timing. Most pros recommend waiting just long enough for the splatter to lose its wet shine and turn slightly dull, typically around 10–15 minutes depending on the mud, temperature, and airflow.
When the texture is ready:
- Attach your knockdown knife to an extension pole if you prefer working from the ground.
- Hold the blade at a very shallow anglejust a few degrees off the ceiling.
- Lightly drag the knife across the surface in long, straight passes.
- Wipe off excess mud from the blade frequently onto your mud pan or a scrap bucket.
The key words here are lightly and shallow angle. You’re not scraping the texture off; you’re flattening the peaks into soft, spread-out islands. Too much pressure and you’ll smear everything into weird flat streaks. Too little and you’ll leave it spiky.
Work in the same direction across the room, then, if needed, do a second pass perpendicular to the first to even things out. Use a smaller knife for tight spaces around lights and corners.
Step 6: Let It Dry and Paint
Once the texture is knocked down, hands off. Let it dry completelyusually overnight. The next day:
- Inspect for ridges, drips, or obvious trowel lines. Lightly sand any problem spots.
- Vacuum or dust off the surface.
- Prime the texture if you used unprimed drywall or did heavy repairs.
- Finish with one or two coats of ceiling paint.
When the paint dries, you’ll see the final effect: a soft, mottled ceiling that looks intentional instead of “we ran out of time on the drywall.”
Alternative Methods: Knockdown Without a Sprayer
If renting a hopper gun feels like overkill for a small room or patch, you can still get a convincing knockdown look using hand tools and specialized sponges.
Method 1: Sponge Knockdown Texture
Many DIYers use a texture sponge for repairs or small ceilings.
- Thin your joint compound slightly (not as runny as spray mud).
- Dip a textured sponge into the mud and dab off the excess.
- Press the sponge onto the ceiling in a stamping motion, leaving raised blobs.
- Cover the area evenly, then wait until the texture dulls.
- Use a small knockdown knife to gently flatten the peaks, just like with sprayed texture.
This method is slower but gives you great control for blending new texture into existing knockdown, especially after a patch.
Method 2: Roller Knockdown Texture
Another option is to use a thick nap or special texture roller:
- Roll thinned joint compound onto the ceiling in a random pattern.
- Let it set briefly until it starts to firm up.
- Knock it down with a wide knife just as you would with sprayed texture.
This can work well in small rooms or when you don’t want to deal with compressed air, though the pattern may be less “speckled” and more swirled depending on your roller.
Common Mistakes (and How to Avoid Them)
Knockdown texture isn’t hard, but it is unforgiving if you rush or skip steps. Pros and drywall repair specialists see the same DIY mistakes over and over.
Mistake 1: Uneven Coverage
Heavy spots, bare patches, and weird stripes usually come from inconsistent spraying distance or speed. To avoid this:
- Keep the gun the same distance from the ceiling the whole time.
- Overlap passes slightly.
- Practice your rhythm on scrap before you hit the ceiling.
Mistake 2: Wrong Mud Consistency
If your mud is too thick, you’ll get chunky blobs that are hard to flatten and may look more like popcorn than knockdown. Too thin and it just runs, leaving drips and patchy areas.
The fix: mix slowly, test often, and adjust with small amounts of water or compound until it behaves predictably on a test board.
Mistake 3: Bad Timing on the Knockdown Step
Knocking down too soon smears the texture into flat streaks. Waiting too long can result in sharp edges and drag marks where the blade tears rather than glides.
Watch the sheen: as soon as the splatter loses its glossy wet look and turns matte but still soft, it’s go time. Test a small areaif it flattens easily without smearing, you’re in the sweet spot.
Mistake 4: Skipping Prep and Priming
Texture can hide a lot, but it can’t fix loose tape, flaking paint, or large gouges. Failing to repair and prime can lead to telegraphed seams, cracks, or peeling in the texture later.
Always repair, sand, and prime problem areas before you start. Texture is the finishing touch, not a magical eraser for bad drywall.
Mistake 5: Poor Blending on Patches
When you’re just repairing one section of a ceiling, the new knockdown needs to blend into the old pattern. If your droplet size or density is off, the patch will forever broadcast its existence.
Use sponge or small-area techniques, and carefully adjust your spray or dab pattern to match the surrounding texture before you knock it down.
When to Call a Pro Instead
There’s no shame in deciding that some ceilings are better handled by someone who does this all day.
Call in a professional if:
- Your ceilings are very high, vaulted, or hard to reach safely.
- You’re dealing with large areas of old popcorn that might contain asbestos (always test old popcorn before disturbing it).
- You’ve got extensive cracking or structural issues beyond simple cosmetic work.
- You tried once, it went badly, and you don’t want to live through that again.
For average-height ceilings in a typical room, though, a patient and careful DIYer can get very respectable results.
Real-World Experiences: Lessons From Actually Doing It
On paper, knockdown texture sounds simple: spray, wait, flatten. In real life, it’s more like learning a new dance routine while balancing on a ladder under a mist of wet gypsum. Here are some experience-based tips that don’t always make it into the basic how-to list.
Test Everything on Scrap First (Not Just the Sprayer)
Most people know to test the spray pattern, but it’s just as important to rehearse the knockdown pass itself. Grab a piece of scrap drywall, splatter some mud on it, wait, then practice dragging the knockdown knife over it.
You’ll get a feel for:
- How much pressure is “just enough” to flatten without smearing
- What the texture should look like at the perfect knockdown timing
- How often you need to wipe your blade clean
The first time you ever knock down texture should not be on the most visible ceiling in your house. Think of the scrap board as your low-stakes training ground.
Work in Manageable Sections
It’s tempting to spray the whole ceiling at once and then start knocking it down, but that’s a recipe for stress and uneven results. The texture doesn’t care that you’re tired and trying your bestit will dry on its own schedule.
A smarter approach is to break the room into sections you can comfortably knock down within the right time window. For example, you might spray a third of the ceiling, wait until it dulls, knock that down, then move on to the next third. Yes, it’s a bit more fiddly, but it keeps you from sprinting back and forth with a knife while the mud dries behind you.
Lighting Makes or Breaks the Finish
One of the sneaky realities about textured ceilings is that they’ll look different under different lighting. Harsh side lightingfrom windows or certain fixturescan make ridges and drag marks much more obvious.
When you’re inspecting your work, don’t just glance from the center of the room. Shine a work light at a low angle across the ceiling. This raking light will show you high spots, edges, and lines your regular overhead light might hide. It’s much better to touch up or lightly sand those areas before paint than to find them after you’ve put the ladder away.
Humidity and Temperature Are Silent Players
Every guide says “wait 10–15 minutes before knocking down,” but in practice, that number changes with your climate. On a hot, dry day with fans running, the texture might be ready in 5–8 minutes. On a cool, humid day, you might be waiting closer to 20 minutes.
Instead of watching the clock, watch the sheen. The moment that glossy, wet shine turns matte but still feels soft to the touch (tap it lightly with a knuckle or the flat of your finger), it’s time. Once you’ve done a room or two in your particular house and climate, you’ll get a feel for your own “normal” timing.
Your Arms Will Get a WorkoutPlan for It
Even with an extension pole, your shoulders and forearms will absolutely notice that you spent hours working overhead. Plan your day accordingly:
- Don’t schedule knockdown texture for the same day you move furniture, install cabinets, and run a marathon.
- Take breaks between sections so you don’t get sloppy from fatigue.
- Switch hands on the pole occasionally if you can, to keep one arm from completely mutinying.
It’s not brutal, but it’s more physical than it looks on a quick DIY video.
Perfection Is ImpossibleAim for “Consistently Imperfect”
Knockdown texture is inherently irregular. That’s the charm. If you go into it expecting every single flattened droplet to be exactly the same size and shape, you’ll drive yourself crazy.
What really matters is the overall impression: no glaring bald patches, no super-heavy blotches, and no obvious smear lines. A little variation actually makes the ceiling look more natural and less mechanical.
When you step back and look at the finished room, your eye takes in the whole field of texture, not that one slightly funny patch above the closet. Give yourself some graceyou’re aiming for “nicely done,” not “laboratory-grade uniform.”
The Payoff Is Bigger Than You Think
One of the best parts of adding knockdown texture is how much it can upgrade a space that otherwise hasn’t changed much. The walls may be the same color, the furniture may be identical, but once that ceiling looks clean, fresh, and intentionally finished, the whole room feels updated.
It’s also a great way to disguise patched areas from electrical work, plumbing fixes, or old repairs. Instead of living with a ceiling that looks like a quilt of different materials, you end up with one continuous, cohesive surface. That visual calm alone can make a DIY weekend (and a slightly sore neck) feel completely worth it.
Final Thoughts
Applying knockdown ceiling texture is one of those projects that looks intimidating until you break it into clear steps: prep, mix, spray (or dab), wait, knock down, and paint. With decent prep, the right consistency, and careful timing, a DIYer can absolutely get a professional-looking finish that hides imperfections and adds subtle character to any room.
Take your time on the test board, respect the mess factor, and remember: the ceiling doesn’t need perfection. It needs a consistent, soft texture that looks intentional and feels right for your space. Once you step back and see that mottled, finished surface overhead, you’ll wonder why you lived with flat, lifeless drywallor patchy repairsfor so long.


