
Table of Contents >> Show >> Hide
- Before You Start: 5-Minute Diagnosis (So You Fix the Right Thing)
- Way #1: Clean the Tracks and Drainage Like You Mean It
- Way #2: Lubricate the Right Parts With the Right Stuff
- Way #3: Adjust or Replace the Rollers (The Real MVPs)
- Way #4: Fix the Lock, Alignment, and Weatherstripping (Smooth + Secure + Less Drafty)
- Maintenance Plan (Because Future-You Deserves Nice Things)
- FAQ: Quick Answers to Common Sliding Window Repair Questions
- Real-World Experiences: 7 Lessons People Learn While Fixing Sliding Windows (About )
- 1) The track looks clean… until you wipe it
- 2) One sticky corner can ruin the whole window
- 3) Too much lubricant is a trap
- 4) Roller adjustment is the underused superpower
- 5) Taking photos saves your sanity
- 6) The “lock problem” is often an alignment problem
- 7) The best repairs are the ones you maintain
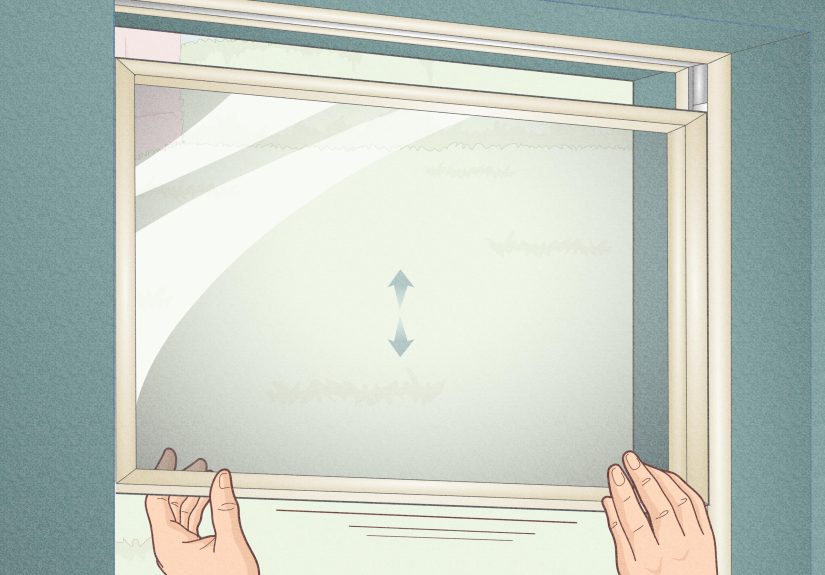
A sliding window is basically a tiny train: it runs on a track, rides on little wheels (rollers), and behaves beautifully
until crumbs, grime, and “mystery fuzz” move in and start paying rent. Then you get the classics: a window that sticks,
scrapes, won’t lock, leaks air, or feels like you’re trying to open a vault.
The good news? Most sliding window problems are not “replace the whole window” problems. They’re “clean it, tune it, and
swap a small part” problems. Below are four reliable repair paths, with clear symptoms, step-by-step fixes, and a few
“don’t do this unless you enjoy regret” warnings.
Before You Start: 5-Minute Diagnosis (So You Fix the Right Thing)
Common symptoms and what they usually mean
- Hard to slide / grinding sound: dirty track, dried lubricant, or worn/flat-spotted rollers.
- Sash drags on the frame: roller height is off, rollers are broken, or the frame/track is slightly bent.
- Won’t latch/lock: keeper (the catch) is misaligned, screws are loose, or the sash isn’t sitting square.
- Drafts or rattling: worn weatherstripping (often a fuzzy “pile” strip) or gaps from misalignment.
- Water in the track: clogged weep holes (the tiny drain paths) or debris in the sill channel.
Safety + “call a pro” moments
- If glass is cracked, the frame is rotten, or the window is high up and you can’t work safely: stop and get help.
- If you’re removing a large sash and it feels heavy or awkward: grab a helper (and your pride can stay in the garage).
- If the track is severely damaged or the frame is warped: parts might not solve it, and an installer may be needed.
Way #1: Clean the Tracks and Drainage Like You Mean It
This is the unglamorous fix that solves a surprisingly glamorous number of problems. Dirt in the track increases friction,
strains rollers, and can even keep the sash from sitting correctlymessing up locks and seals too.
What you’ll need
- Vacuum with a crevice tool
- Small nylon brush or old toothbrush
- Microfiber cloths or paper towels
- Mild dish soap + warm water (or a vinegar-and-water mix)
- Cotton swabs or a wooden skewer for corners
Step-by-step
-
Open the window and vacuum the track. Hit the bottom track first, then the top channel. Tracks collect
grit in corners like it’s competing in a hoarding show. -
Scrub with a damp brush. Use soapy water (or diluted vinegar solution) to loosen sticky grime. Work in
short sections so you can wipe up before it dries into a new hobby. - Wipe and fully dry. Moisture left behind can attract more dirt and make some lubricants less effective.
-
Clear the weep holes. Look for tiny drain openings on the exterior side of the bottom track/sill area.
Use a cotton swab or skewer gentlyno need to carve a tunnel to freedom. -
Test the slide. Move the sash back and forth slowly. If it’s already smoother, you may be done (yes,
really).
Quick example
If your slider feels “sticky” only near the fully closed position, the usual culprit is compacted debris in the corner of
the bottom trackexactly where the sash needs to seat to latch. A deep corner-clean often improves both sliding AND
locking without touching hardware.
Way #2: Lubricate the Right Parts With the Right Stuff
Lubrication is like seasoning: a little makes everything better; too much ruins the dish. For sliding windows, the goal is
a slick, clean glide without turning the track into a lint magnet.
Choose a window-friendly lubricant
-
Best all-around: a dry silicone or dry PTFE (Teflon) style spray that dries clear and
doesn’t stay oily. -
Avoid: thick grease in the track and oil-heavy sprays that stay wetthose can attract dust and gum up
faster.
Where to lubricate (and where not to)
- Do: a light pass on the track contact surfaces and roller path (after cleaning and drying).
- Do: a tiny amount on lock mechanisms if they feel stiff (wipe excess).
- Don’t: flood the channel. If it drips, you’ve gone from “repair” to “slip ’n slide.”
Step-by-step
- Start clean and dry. Lubricant over grit is just glitter over chaos.
- Apply sparingly. Short bursts, then wipe. You want a thin film, not a swimming pool.
- Cycle the sash. Slide it open/closed 10–15 times to distribute the lubricant evenly.
- Recheck friction points. If one section still drags, the issue is likely rollers or track damage.
Quick example
If your window slides okay in summer but feels like it’s moving through peanut butter in winter, lubrication and track
cleaning often solve it. Cold weather can make old grime stiffer, and a dry lubricant can help keep movement consistent.
Way #3: Adjust or Replace the Rollers (The Real MVPs)
If cleaning and lubrication didn’t bring the glide back, rollers are next. Most horizontal sliders ride on two rollers at
the bottom of the moving sash. Over time, rollers can wear flat, loosen, or breakmaking the sash drag on the track or
wobble out of alignment.
Signs your rollers are the problem
- The sash feels rough even on a clean, lubricated track.
- You hear scraping metal/vinyl (especially near the bottom).
- The sash tilts slightly or rubs the frame at one corner.
- It takes two hands and a pep talk to open the window.
Option A: Roller adjustment (fastest win)
Many sliders have small adjustment screws near the lower corners of the sash. Turning the screw raises or lowers the
roller height, which changes how the sash sits in the frame.
- Open the sash halfway. This relieves pressure and gives you access.
- Find the adjustment screws. Often on the side edge near the bottom, sometimes behind small caps.
- Turn in small increments. A quarter-turn at a time. Adjust both sides evenly to keep the sash level.
- Test slide + latch. The goal is smooth movement with a square, centered fit.
Option B: Roller replacement (still DIY-friendly)
Roller replacement varies by brand and window design, but the general flow is: remove sash, remove old rollers, match new
rollers, reinstall, then adjust. If you’re nervous, take photos before you remove anythingfuture-you will send
present-you a thank-you card.
Typical roller replacement workflow
-
Remove the sash (if your design allows it). Many slider sashes can be lifted into the top channel and
tilted out from the bottom. Some have stops or anti-lift deviceslook for small screws or tabs in the top track. - Set the sash on a stable surface. Protect corners and glass with a towel or cardboard.
-
Locate the rollers. Usually at the bottom corners in small housings. Remove screws carefully and keep
them together. -
Match the replacement part. Measure wheel diameter, housing shape, and screw placement. When in doubt,
bring the old roller to a hardware store or order using exact measurements. - Install the new rollers. Don’t overtighten screws into vinylsnug is good; stripped is sad.
- Reinstall the sash and adjust height. Aim for a smooth glide and an even gap along the frame.
Track issues: small fixes vs. “nope” fixes
- Small bend or pinch in a metal track: sometimes can be gently straightened.
- Cracked or badly chewed-up vinyl track liner: may need a replacement liner or professional repair.
- Severely warped frame: roller replacement won’t fix geometry; consider pro evaluation.
Quick example
A window that slides fine when open but “digs in” for the last 2 inches often has uneven roller height. A small adjustment
can level the sash so it seats without draggingoften improving security and air sealing at the same time.
Way #4: Fix the Lock, Alignment, and Weatherstripping (Smooth + Secure + Less Drafty)
Sliding windows are happiest when they’re square in the frame. If the sash sits too low, tilts, or wobbles, the lock
won’t meet the keeper cleanly and the weatherstripping can’t compress properly. This is where comfort, security, and
energy efficiency all hold hands.
A. Repair a lock that won’t latch
- Check for loose screws. Tighten the latch and keeper screws first.
-
Inspect alignment. Close the window slowly and watch where the latch meets the keeper. If they don’t
line up, loosen the keeper screws slightly, shift it, then retighten. - Clean the mechanism. Dirt and paint can jam a latch. Wipe clean before you blame the hardware.
-
Replace worn parts if needed. If the latch is cracked or the keeper is bent, replacement is usually
inexpensive and dramatically more satisfying than wrestling it daily.
B. Replace worn weatherstripping (the “why is it so drafty?” fix)
Many sliders use fuzzy pile weatherstripping along the meeting rails and frame edges. When it compresses flat or tears,
you get drafts, rattles, and sometimes whistling that makes your window sound like it’s practicing for a musical.
Weatherstripping steps (general approach)
- Identify the type. Common types include pile/brush, foam, or rubber/vinyl strips.
- Remove old material carefully. Pull it out gently and clean any residue.
- Measure twice. Cut new strips to length (clean cuts prevent gaps).
- Install snugly without binding. The seal should reduce air leaks but still allow smooth operation.
- Close and test. If the sash becomes hard to move, the strip may be too thick for that location.
C. Stop rattling and improve the fit
- Re-check roller adjustment: too low can cause rattle; too high can make it bind at the top track.
- Look for missing bumpers/stops: small plastic parts can prevent slamming and reduce wobble.
- Confirm the sash is fully seated: an “almost closed” sash won’t seal or lock consistently.
Quick example
If your window locks only when you lift the sash slightly, that’s a loud hint: the sash is sitting too low. Adjusting
rollers can bring the latch into alignment. If alignment is close but not perfect, moving the keeper usually finishes the
job.
Maintenance Plan (Because Future-You Deserves Nice Things)
- Monthly-ish: vacuum the track, especially if you have pets, kids, or a backyard that loves dirt.
- Twice a year: clean and apply a light dry lubricant if needed.
- Annually: inspect weatherstripping and locks; tighten loose hardware.
FAQ: Quick Answers to Common Sliding Window Repair Questions
What’s the #1 mistake people make?
Spraying a bunch of lubricant into a dirty track. It feels helpful for about 30 minutesthen it collects dust and becomes
a gritty paste. Clean first, then lubricate lightly.
Do I need special rollers for my window brand?
Often, yes. Roller assemblies differ by wheel diameter, housing shape, and mounting screws. If you can’t match it by
sight, match it by measurement (and bring the old roller along when shopping).
My window slides but leaks air. What should I do first?
Check weatherstripping and sash alignment. If the sash is slightly off-square, even perfect weatherstripping can’t seal
well. Roller adjustment and fresh pile seals are common fixes.
How do I know if the track is “too far gone”?
Deep cracks, severe deformation, or a track that visibly dips or twists can defeat roller fixes. Minor bends can sometimes
be corrected, but major damage often needs parts replacement or professional service.
Real-World Experiences: 7 Lessons People Learn While Fixing Sliding Windows (About )
Sliding window repairs have a funny way of humbling peopleusually right after they confidently announce, “This will take
five minutes.” In real homes, the “problem” is often a stack of smaller issues that gang up on the window at the same
time. Here are the most common experiences DIYers run into, and what they learn from them.
1) The track looks clean… until you wipe it
A track can appear “fine” and still be coated in a thin layer of grime that acts like sandpaper. Many people vacuum and
think they’re done, but the real improvement shows up after scrubbing the corners and drying everything completely. The
moment when the cloth comes away black is usually when the repair officially begins.
2) One sticky corner can ruin the whole window
A surprisingly common story: the window only sticks when closing, and the fix ends up being debris packed into the last
corner of the bottom track. That tiny wedge of gunk prevents the sash from seating properly, so the latch misses the
keeper and the seal can’t compress. Once that corner is cleared, the window suddenly feels “new,” and the lock behaves
againwithout replacing anything.
3) Too much lubricant is a trap
People often over-spray lubricant, expecting it to be like pouring syrup on pancakes (more is better, right?). Then the
track attracts dust, and the window becomes sticky againsometimes worse than before. The best “aha” moment is learning
that a thin, dry film is the goal, and wiping excess is part of the job, not an optional side quest.
4) Roller adjustment is the underused superpower
A lot of DIYers jump straight to parts replacement because rollers sound “mechanical” and therefore doomed. But on many
sliders, a small adjustment brings the sash back to level. That single tweak can stop scraping, reduce rattling, and make
the lock line up. It feels like cheatingexcept it’s just basic geometry.
5) Taking photos saves your sanity
When someone removes a sash and then can’t remember which screw went where, the mood shifts fast. The people who take
quick photos before and during disassembly tend to finish repairs calmly. The people who don’t… become experts in
creative vocabulary.
6) The “lock problem” is often an alignment problem
Many households live with a window that only locks if you push, lift, and whisper encouraging words. In many cases,
tightening the keeper screws and shifting it slightly solves the issue. And if the keeper can’t move enough, roller
adjustment often closes the gap. It’s less about “bad lock” and more about “the window isn’t sitting where it thinks it
is.”
7) The best repairs are the ones you maintain
People who clean tracks occasionally and keep weatherstripping in decent shape rarely face dramatic failures. The window
never gets the chance to become a “project.” The repair lesson is simple: sliding windows don’t need constant attention,
but they do appreciate the occasional spa day.


