
Table of Contents >> Show >> Hide
- Why Chalk Painted Herb Planters Are a “Small Effort, Big Payoff” Project
- Chalk Paint vs. Chalkboard Paint (Yes, They’re Different)
- Materials and Tools
- Step 1: Choose the Right Container Size (This Is Where Most People Go Wrong)
- Step 2: Clean and Prep Like You Mean It
- Step 3: Decide Your Design (Simple Looks Expensive, Trust Me)
- Step 4: Tape Off Label Areas (Optional, but Makes You Look Like a Pro)
- Step 5: Paint the Pot
- Step 6: “Season” the Chalkboard Area (So Your First Label Doesn’t Ghost Forever)
- Step 7: Seal for Durability (Especially Outdoors)
- Step 8: Plant Your Herbs the Right Way
- Step 9: Label Like a Person Who Has Their Life Together
- Care and Maintenance: Keep Herbs Alive (and Tasty)
- Troubleshooting: Fix Common Problems Fast
- FAQ
- Real-Life Experiences (500-ish Words of “What I Wish I Knew Before I Painted Everything”)
- Conclusion
If your kitchen counter has ever looked like a tiny jungle (two sad basil stems, one mint that’s plotting world
domination, and a rosemary twig pretending it’s a Christmas tree), you already understand the appeal of herb
planters. Now let’s make them prettier and more functional: DIY chalk painted herb planters that look
boutique-shop fancy, cost way less, and let you label things so you stop sniffing leaves like a suspicious raccoon.
This tutorial walks you through container choices, prep, chalk paint techniques, sealing for durability,
planting herbs the smart way, and keeping everything alive long enough to actually season dinner.
Why Chalk Painted Herb Planters Are a “Small Effort, Big Payoff” Project
Chalk-style finishes are popular for a reason: they’re forgiving, they dry fast, and they make even cheap pots look
intentionally rustic. Add labels and suddenly your herbs go from “random greenery” to “organized culinary confidence.”
Plus, these make excellent giftsespecially if you include basil, thyme, and a note that says: “Congrats, you’re now
responsible for three living things.”
Chalk Paint vs. Chalkboard Paint (Yes, They’re Different)
Let’s clear up the craft aisle confusion:
-
Chalk paint is a matte, velvety decorative paint (often used on furniture and pots). It’s meant for
that soft, lived-in look. - Chalkboard paint creates a writable surface you can label with chalk or a chalk marker.
You can use either depending on your goal:
make the pot look chalky (chalk paint) or make a label panel you can write on
(chalkboard paint). The best DIY herb planters often combine bothchalky outside, writable label area.
Materials and Tools
Planter options
- Terracotta pots (classic, breathable, inexpensive)
- Metal buckets or galvanized tubs (farmhouse vibes)
- Ceramic pots (sleek, heavier, often already cute)
- Mason jars or food cans (use as cachepots with a nursery pot inside)
- Wood planter box (great for multiple herbs in one place)
Painting supplies
- Chalk paint (or chalk-style spray paint)
- Optional: chalkboard paint (for label panels)
- Foam brush or angled brush; or spray paint if you like easy mode
- Painters tape (for crisp label rectangles or stripes)
- Sandpaper (220 grit) or sanding sponge
- Drop cloth / cardboard
- Cleaning supplies: dish soap, scrub brush, rubbing alcohol
Sealing and finishing
- Clear matte spray sealer or acrylic clear coat (indoor/outdoor)
- Optional: wax (for indoor decorative pots)
Planting supplies
- Quality potting mix (not garden soil)
- Optional drainage booster: perlite/pumice
- Herb starts or seeds
- Small stones/mesh (only if needed to keep soil from falling through holes)
- Plant saucers (especially for indoor planters)
Step 1: Choose the Right Container Size (This Is Where Most People Go Wrong)
Herbs are not complicated, but they do have opinions about space. A tiny pot can work for short-term indoor herbs,
but if you want them thriving (not merely surviving), choose containers that match root growth.
Quick sizing guide
- 6-inch pot: thyme, chives, oregano (small root systems)
- 8–10 inch pot: basil, cilantro, parsley (happier with room)
- 10–12 inch pot (or larger): rosemary, sage, mint (mint should usually be alone)
Also: make sure your pot has drainage holes. If it doesn’t, you can often drill one (terracotta is
easiest). No drainage = wet feet = root rot = sadness.
Step 2: Clean and Prep Like You Mean It
Paint doesn’t love dust, oils, or mystery residues from a garden center. Cleaning is the unsexy step that makes your
finish last.
- Wash the pot with warm water and dish soap; scrub off dirt and powdery clay.
- Rinse thoroughly and let dry completely (especially terracotta).
- Lightly sand glossy ceramic or already-painted surfaces so paint can grab.
- Wipe with rubbing alcohol to remove oils (especially for metal pots).
Pro tip: If your terracotta pot has that chalky white mineral stuff (efflorescence), scrub it off. That powder can
cause flaking laterlike a bad sunburn, but for your craft project.
Step 3: Decide Your Design (Simple Looks Expensive, Trust Me)
Before you paint, pick a style. The internet is full of gorgeous, complicated designs, but the best-looking herb
planters often use one of these clean approaches:
Design ideas that always work
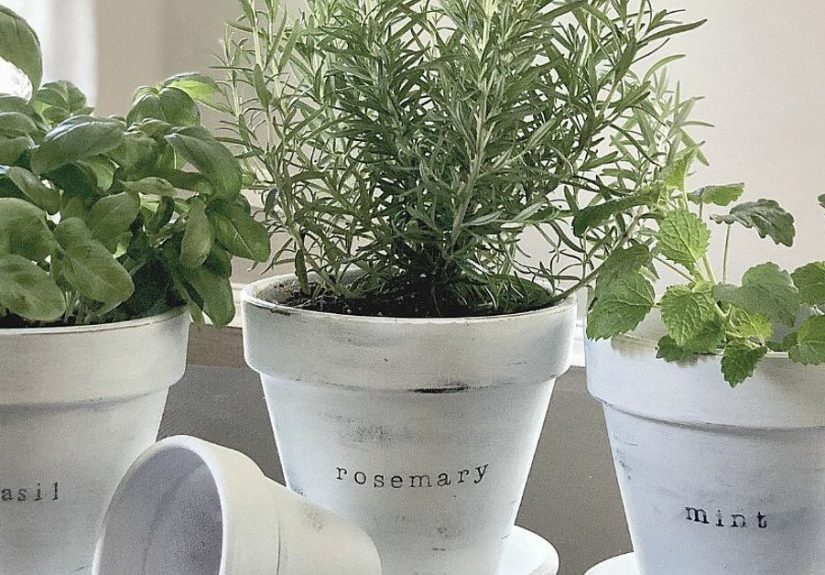
- Solid matte color with a handwritten label
- Dipped paint (bottom half painted, top half natural terracotta)
- Stripe around the middle
- Chalkboard label panel (a rectangle you can rewrite)
- Numbered set (cute for a windowsill lineup)
Step 4: Tape Off Label Areas (Optional, but Makes You Look Like a Pro)
If you want a chalkboard label panel, use painters tape to create a rectangle, oval, or band. Press tape edges down
firmly so paint can’t sneak underneath like it pays rent.
Step 5: Paint the Pot
Option A: Chalk paint (brush-on)
- Stir the paint well.
- Apply a thin first coat with a foam brush for fewer brush marks.
- Let dry (usually 20–60 minutes depending on humidity).
- Apply a second coat. Add a third only if coverage truly needs it.
For an aged look, once dry, lightly sand raised areas (rim, edges) and wipe away dust.
Option B: Chalk-style spray paint (fast and smooth)
- Work outside or in a well-ventilated area.
- Shake can thoroughly.
- Spray light coats from about 8–12 inches away.
- Rotate pot and repeat. Multiple light coats beat one drippy coat every time.
Option C: Add a chalkboard label panel
If you taped a label area, paint inside the taped shape with chalkboard paint after the base coat dries (or use
chalkboard paint on the full pot if you want maximum writeability). Remove tape carefully once paint is set but not
rock-hard to keep edges crisp.
Step 6: “Season” the Chalkboard Area (So Your First Label Doesn’t Ghost Forever)
Chalkboard surfaces work best if you prep them: rub the side of a piece of chalk over the whole label area, then
wipe it off with a dry cloth. This reduces “ghosting” (faint leftover words) and helps future labels erase cleanly.
Step 7: Seal for Durability (Especially Outdoors)
Sealing is what keeps your gorgeous finish from turning into “abstract peeling art” after a few waterings.
If your planter will live outdoors (or get splashed a lot), use a clear sealer rated for indoor/outdoor use.
Sealing rules that prevent regret
- Use thin coats of clear spray sealer for the most even finish.
- Let paint cure fully before sealing (check your paint label; often 24 hours).
-
Avoid sealing the chalkboard label area unless you’re using a product specifically made to keep it
writable. A heavy clear coat can make it less erasable. -
Don’t paint the inside of pots where soil stays wet, unless you’re lining with a nursery pot or
using a product intended for that purpose. It’s easier and usually smarter to keep interiors natural.
For indoor decorative planters (especially if you’ll use a nursery pot inside), wax can give a nice soft finish.
For planters that will be watered directly, spray sealers are usually more practical than wax.
Step 8: Plant Your Herbs the Right Way
Pretty planters are great, but the goal is edible success. Herbs like drainage, light, and the kind of watering that
doesn’t swing between “drought” and “swamp.”
Soil setup
- Use a potting mix designed for containers (lighter, better drainage than garden soil).
- If you tend to overwater, mix in extra perlite/pumice to increase airflow and drainage.
- Fill pot, leaving about 1 inch at the top so water doesn’t immediately overflow.
Herb pairing tips (so roommates don’t fight)
Not all herbs want the same lifestyle. Grouping by water needs makes life easier.
| Group | Herbs | Water Preference |
|---|---|---|
| Mediterranean crew | rosemary, thyme, sage, oregano | Let soil dry slightly between waterings |
| Moisture-lovers | basil, parsley, cilantro, chives | Even moisture (not soggy) |
| The unstoppable one | mint | Moderate moisture; ideally solo to prevent takeover |
Planting steps
- Add potting mix to the bottom.
- Loosen roots gently if the plant is root-bound.
- Place herb at the same depth it was in its nursery pot.
- Fill around it with potting mix, press lightly, and water thoroughly.
Step 9: Label Like a Person Who Has Their Life Together
For chalkboard label panels, write with chalk or a chalk marker. Chalk markers look crisp but can be harder to erase
depending on the surfacetest first. For permanent labeling, use an acrylic paint pen.
Label ideas beyond “Basil”
- Care reminders: “Water when dry” or “Full sun”
- Harvest notes: “Pinch tops weekly”
- Cooking cues: “Pasta nights” (rosemary would like to be involved)
Care and Maintenance: Keep Herbs Alive (and Tasty)
Light
Most herbs want bright sunaim for a sunny spot outdoors or your brightest window indoors. If you’re growing inside
in winter, supplemental lighting can help.
Water
Water when the top inch of soil feels dry for most herbs. Terracotta dries out faster than plastic or glazed pots,
so check more often. If you’re using saucers indoors, don’t let water sit there for daysroots hate that.
Feeding
Herbs generally don’t need heavy fertilizing. Overfeeding can encourage fast, floppy growth and dull the flavor.
If growth stalls, use a diluted liquid fertilizer occasionally rather than going full “protein shake” on your plants.
Harvesting
Regular harvesting keeps many herbs bushy. For basil, pinch above a set of leaves to encourage branching. For woody
herbs like rosemary, clip sprigs but avoid cutting into old, bare wood too aggressively.
Troubleshooting: Fix Common Problems Fast
Paint is peeling or flaking
- Cause: poor cleaning, moisture trapped in terracotta, or no sealer outdoors.
- Fix: sand loose paint, clean thoroughly, repaint thin coats, seal properly, and let cure longer.
Chalkboard label won’t erase cleanly
- Cause: label wasn’t “seasoned” or the surface got sealed with the wrong topcoat.
- Fix: try gently rubbing with chalk and wiping; for stubborn ghosting, use a slightly damp cloth and dry well.
Herbs keep dying (rude)
- Check drainage holes and don’t let pots sit in water.
- Make sure the potting mix is light and drains well.
- Increase sun exposure (many “indoor herb failures” are just “not enough light”).
FAQ
Can I use these planters for edible herbs safely?
In most cases, yesbecause the paint is on the outside of the pot, not on the leaves you eat. Still, it’s smart to
avoid painting the interior where soil stays wet. If you want extra peace of mind, use a nursery pot inside the
painted pot (a “cachepot” setup), so soil and water never touch the painted surface.
How long should I wait before planting?
Let paint dry fully, then allow additional time for curing if recommended by the paint/sealer labels (often about
24–48 hours). Rushing this step is how fingerprints become permanent décor.
What herbs are easiest for beginners?
Basil, chives, mint (in its own pot), thyme, and rosemary are popular starter choicesjust match the pot size and
sunlight to the herb’s needs.
Real-Life Experiences (500-ish Words of “What I Wish I Knew Before I Painted Everything”)
The first time I made chalk painted herb planters, I assumed the universe would reward my enthusiasm with instant
perfection. I was wrong. The universe rewarded me with peeling paint, smudged labels, and a basil plant that looked
personally offended by my choices.
Lesson one: terracotta is thirsty. I painted a pot that still had moisture in it (because I’m
impatient and the sun looked like it was “kind of” drying it). The next day, the finish had weird blotchy patches,
and a week later it started flaking around the bottomright where water splashes happen. Now I let terracotta dry
fully after washing, sometimes overnight, and I keep coats thin. Thin coats feel boring while you’re painting, but
they dry smoother and last longer. Thick coats feel satisfying until they crack like a dry desert lake bed.
Lesson two: tape is either your best friend or your enemy. I once taped a perfect label rectangle,
painted beautifully, then ripped the tape off like I was starting a lawnmower. The tape took half the paint with it.
Slow and steady wins this race. I now remove tape carefully when the paint is set but not fully cured, pulling it
back on itself at an angle. Crisp edges make your DIY look store-bought, and store-bought is the whole point of DIY
(right after “saving money” and “proving I can do it”).
Lesson three: chalkboard labels need training. The first time I wrote “BASIL” on a chalkboard panel,
it looked great… and then it never erased fully. Ever. It haunted the pot like a tiny herbal ghost. “Seasoning” the
chalkboard arearubbing chalk over it and wiping it offsounds like extra work, but it’s the difference between
reusable labels and a permanent reminder that you once planted cilantro and it bolted immediately.
Lesson four: sealers matter. I used a random glossy clear coat once because it was what I had in the
garage. It made the finish shiny (not the vibe) and the chalkboard label less writable (also not the vibe). These
days I pick a matte clear sealer rated for indoor/outdoor use and I apply it lightly. If I’m doing an actual
chalkboard label area, I either leave it unsealed or use a product meant to keep it erasable. And I always test on a
small spot firstbecause nothing says “craft tragedy” like sealing a chalkboard and realizing you’ve created a tiny
permanent billboard.
Finally, the plant side: I’ve learned that most herb “failures” are really light problems or drainage
problems. If herbs are indoors and sad, I move them to the brightest spot, rotate them weekly, and water
only when the top inch of soil is dry. If they’re outdoors and drowning, I stop “helping” so much. Herbs don’t need a
helicopter parent. They need sun, a pot that drains, and a human who remembers that “more water” is not a personality.
The good news? Once you dial in prep, thin coats, and a sensible sealer, these planters are genuinely easyand they
make you feel like the kind of person who casually snips fresh thyme for dinner on a Tuesday. Even if you’re still
wearing pajama pants. Especially if you’re still wearing pajama pants.
Conclusion
DIY chalk painted herb planters are a weekend-friendly project that upgrades your space and your cooking habits at
the same time. Keep your paint coats thin, seal smartly for your environment, plant herbs in well-draining potting
mix, and give them enough light to actually thrive. Then label everything like a tiny garden boss and enjoy the
simple luxury of fresh herbs on demand.


