
Table of Contents >> Show >> Hide
- Why Paper Peels Off Canvas (And How to Stop It)
- Best Adhesives for Paper-to-Canvas (A Practical Comparison)
- Supplies Checklist (So You Don’t End Up Gluing With Regret)
- Step-by-Step: How to Adhere Paper to Canvas (Matte/Gel Medium Method)
- Step 1: Prep the Canvas Like You Mean It
- Step 2: Prep the Paper (Yes, Even the Paper Has Feelings)
- Step 3: Apply Adhesive to BOTH Surfaces (Canvas + Paper)
- Step 4: Lay the Paper and Smooth It Without Wrinkling It
- Step 5: Dry Flat (Because Gravity Is a Real Team Player)
- Step 6: Seal the Top (So the Paper Isn’t Naked Out There)
- Special Scenarios (Because Not All Paper Behaves)
- Troubleshooting: Fix Bubbles, Wrinkles, and Lifting Corners
- Archival Notes (If You Want It to Last, Not Just Survive Photos)
- Finishing: Seal, Varnish, and Protect Your Work
- FAQs
- Conclusion
- Experiences: Real-World Lessons From Paper-to-Canvas Collage (Bonus Section)
Paper and canvas are a power coupleuntil they start acting like they’ve never met. One minute your collage looks flawless,
the next it’s bubbling like pizza dough in July. The good news: most “paper lifting off canvas” drama comes from a few fixable
thingswrong adhesive, un-prepped canvas, too much moisture, or the classic move of “I’ll smooth it later” (spoiler: later becomes never).
This guide walks you through how to adhere paper to canvas so it stays put, looks clean, and survives time,
handling, and the occasional overly enthusiastic dusting. You’ll get step-by-step instructions, adhesive comparisons, troubleshooting,
and finishing tipsplus a bonus “experience” section at the end so you can learn from the mistakes we all pretend we didn’t make.
Why Paper Peels Off Canvas (And How to Stop It)
Canvas is textured, flexible, and often pre-primed with acrylic gesso. Paper is flat, absorbent, and can expand or contract with moisture.
When you combine them, you’re basically hosting a tiny physics party. Peeling usually happens because:
- Not enough adhesive to fill the canvas weave (paper only sticks to the “mountain tops”).
- Too much water in the glue/medium, causing paper to wrinkle or swell.
- Uneven pressure during application (air gets trapped; bubbles move in; they never pay rent).
- Incompatible materials (oily paper, glossy magazine pages, or inks that react to acrylic mediums).
- Canvas flex (stretched canvas moves; stiff paper doesn’t; corners lift first).
Pick Your Canvas: Stretched vs. Panel
If you want the easiest life, start with a canvas panel or cradled wood panel with canvas.
A stretched canvas flexes when you press or when humidity changes, which can stress paper edges over time. You can still collage on stretched
canvasjust be extra careful with adhesive coverage and sealing.
Pick Your Paper: Thin, Thick, or “Why Is This Paper Shiny?”
Tissue paper, napkins, and rice paper bond easily but wrinkle if you look at them wrong. Watercolor paper and cardstock resist wrinkling
but can lift if the weave isn’t filled or if you don’t burnish well. Glossy magazine pages can work beautifully, but they may need extra
attention so the adhesive grabs the slick surface.
Best Adhesives for Paper-to-Canvas (A Practical Comparison)
The “best” adhesive depends on your paper weight, how archival you want to be, and how patient you feel today.
Here are the common choices artists use for paper collage on canvas:
| Adhesive | Best For | Pros | Watch Outs |
|---|---|---|---|
| Acrylic Matte Medium | Most collage papers | Brushes smoothly, dries flexible, can seal on top | Thin papers can wrinkle if overworked |
| Acrylic Gel Medium (soft/heavy) | Heavier paper, textured papers, thick collages | Fills canvas weave, strong bond, fewer bubbles | Can leave texture; choose soft gel for smoother finish |
| Decoupage Medium (e.g., Mod Podge) | Craft collages, decorative finishes | Easy, widely available, topcoat + glue in one | Not always ideal for fine-art archival goals |
| pH-Neutral PVA (archival PVA glue) | Paper-heavy collages, bookbinding-style bonding | Strong, dries clear, lay-flat behavior | Can dry fast; thin with a little water if needed |
| Wheat Starch Paste / Methyl Cellulose | Conservation-style paper work | Reversible (often with moisture), gentle on paper | More prep; best for paper-to-paper, less common for canvas art |
| Spray Adhesive | Large sheets, quick placement | Even coat, fast tack | Ventilation needed; overspray mess; not the most archival option |
Supplies Checklist (So You Don’t End Up Gluing With Regret)
- Canvas (panel or stretched) and paper of choice
- Acrylic matte medium or gel medium (soft gel for smoother results)
- Wide, soft brush or foam brush
- Brayer, old gift card, or silicone/rubber scraper for smoothing
- Scissors/craft knife + cutting mat
- Wax paper or parchment (to prevent sticking while burnishing)
- Optional: fine sandpaper (220–320), gesso, and acrylic varnish
- Optional: heavy books/flat weight for drying
Step-by-Step: How to Adhere Paper to Canvas (Matte/Gel Medium Method)
Step 1: Prep the Canvas Like You Mean It
-
Check the surface. If your canvas is very slick or glossy, lightly scuff it with fine sandpaper.
Wipe off dust with a dry cloth. -
Optional (but helpful): add a thin “grip” coat. Brush on a thin coat of matte medium (or a fresh coat of gesso)
and let it dry. This can improve adhesion and reduce soaking. -
Flatten if stretched. If you’re using stretched canvas, place a firm board behind the area you’ll burnish so you don’t
press the canvas into a trampoline.
Step 2: Prep the Paper (Yes, Even the Paper Has Feelings)
- Trim and test-fit. Arrange pieces dry first. Take a quick photo so you remember your layout when glue turns your brain into oatmeal.
- Mind the curl. If thick paper is curled, gently reverse-roll it or press it under books for a few minutes.
-
Ink check. If you’re using inkjet prints, let them cure fully. Do a small test with your medium to make sure the ink doesn’t smear.
(Pigment inks tend to behave better than dye inks.)
Step 3: Apply Adhesive to BOTH Surfaces (Canvas + Paper)
The most common beginner mistake is gluing only the canvas and hoping the paper “figures it out.” Give the paper a thin coat too.
Think of it like a handshakeboth sides participate.
- Brush a thin, even layer of matte medium onto the canvas area.
- Brush a thin coat on the back of the paper (especially for thicker paper). Work quickly but don’t panic.
- For very heavy paper or textured canvas weave, use soft gel medium instead of matte medium to fill the texture.
Step 4: Lay the Paper and Smooth It Without Wrinkling It
- Place the paper onto the canvas starting from one edge and lowering it gradually (like landing a plane, not dropping a pancake).
-
Put a sheet of wax paper on top and burnish from the center outward using a brayer or card.
This pushes air out and presses adhesive into the weave. - Wipe away squeezed-out medium at the edges with a damp cloth or cotton swab.
Step 5: Dry Flat (Because Gravity Is a Real Team Player)
- Let it dry flat. If possible, place wax paper over the collage and set a flat board + light weight on top.
- Avoid moving it around while drying. Wet paper shifts, and then your collage becomes “abstract” in a way you did not consent to.
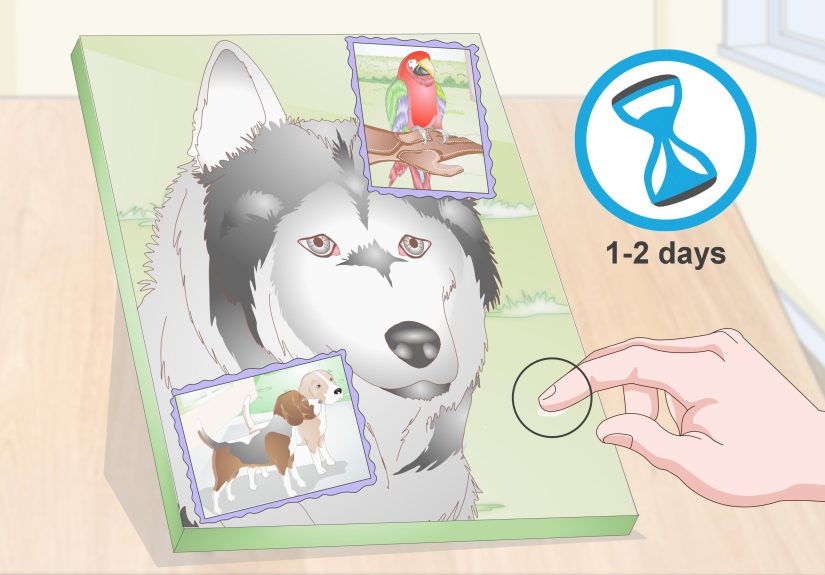
- Dry time varies (thin layers may set in 30–60 minutes; full cure can take longer). When in doubt, wait.
Step 6: Seal the Top (So the Paper Isn’t Naked Out There)
Once the paper is fully dry, brush a thin coat of matte medium over the top to seal it. Use light, confident strokes to avoid re-wetting
thin papers too much. Two thin coats are usually better than one gloopy coat.
Special Scenarios (Because Not All Paper Behaves)
Thin Paper (Tissue, Napkins, Rice Paper)
- Use soft gel medium or very light matte medium.
- Try the “pre-coat” trick: brush a thin coat of medium on the canvas first, let it get tacky, then place tissue.
- Burnish through wax paper using gentle pressuretissue tears easily.
Thick Paper (Watercolor, Cardstock, Book Pages)
- Use gel medium to fill weave and create a stronger bond.
- Apply adhesive to the back of the paper, not just the canvas.
- If edges lift, add a tiny amount of gel under the corner and burnish again.
Glossy Paper (Magazine Pages, Catalogs)
- Scuffing the back lightly can help adhesion (test firstsome inks rub off).
- Matte medium often reduces glare when you seal on top, creating a more uniform finish.
Inkjet or Laser Prints
- Let prints dry thoroughly before gluing.
- Test a small corner with your medium; some inks can smear when brushed.
- If smearing happens, consider a light spray fixative (used with good ventilation) and then glue once it’s dry.
Troubleshooting: Fix Bubbles, Wrinkles, and Lifting Corners
Bubbles
- Cause: air trapped or uneven adhesive.
- Fix: while wet, lift and re-lay if possible. If dry, use a sharp pin to make a tiny hole, inject a little medium with a brush tip,
then burnish through wax paper.
Wrinkles
- Cause: too much moisture or over-brushing thin paper.
- Fix: stop fussing. Let it dry. Some wrinkles relax. For stubborn areas, collage another piece on top or embrace the texture intentionally.
Corners Lifting
- Cause: not enough adhesive at edges, or canvas flex.
- Fix: slide soft gel under the corner, press down, burnish through wax paper, and weight it until dry.
Paper Looks Cloudy or Opaque
- Cause: some glues dry less transparent, or thick application traps moisture.
- Fix: use thinner coats; consider acrylic mediums that dry clearer for translucent effects.
Archival Notes (If You Want It to Last, Not Just Survive Photos)
If longevity matters, aim for acid-free paper and a stable adhesive. pH-neutral PVAs made for preservation and framing are designed
to dry clear, remain flexible, and resist becoming brittle over time. Conservation-style adhesives like wheat starch paste and methyl cellulose are valued
in paper conservation because they can be reversible with moisture and are gentle on paperthough canvas collage is usually a more permanent mixed-media setup.
Also: avoid mystery glues that yellow, stay rubbery, or smell like a chemistry exam. And if you use spray adhesive, do it with serious ventilation,
protect your area from overspray, and understand it may not be the top choice for archival fine-art longevity.
Finishing: Seal, Varnish, and Protect Your Work
- Seal: 1–2 thin coats of matte medium over paper to lock edges and unify sheen.
- Optional isolation coat: a clear acrylic medium layer can help before varnishing.
- Varnish: once fully cured, apply an acrylic varnish if desired for UV and scuff protection.
- Edges: paint canvas edges or wrap paper cleanly for a finished look.
FAQs
Can I use regular school glue?
You can for casual crafts, but it may re-soften with moisture, wrinkle thin papers, or age unpredictably. If you want better results,
use acrylic matte/gel medium or a pH-neutral PVA designed for paper and art.
Should I glue paper before or after painting the canvas?
Either works. Many artists like collaging early so they can paint over and integrate edges. If you collage late, seal the paper well
so paint and varnish behave consistently.
Do I need to gesso first?
If the canvas is raw or very absorbent, yes. If it’s pre-primed, you can often collage directlybut a thin “grip” coat of matte medium
can still improve bonding.
Can I remove paper once it’s glued down?
With acrylic mediums, removal is usually difficult without damaging the canvas or paper. Conservation adhesives may be more reversible,
but most canvas collage is best treated as permanent. Plan with test pieces and a “practice canvas” when trying new materials.
Conclusion
Adhering paper to canvas isn’t hardit just punishes shortcuts. Prep the surface, pick an adhesive that matches your paper weight,
coat both surfaces, smooth from the center outward, and seal the top once dry. Do that, and your collage stops being a temporary arrangement
and becomes an actual artwork that can handle time, handling, and the occasional curious fingertip.
Experiences: Real-World Lessons From Paper-to-Canvas Collage (Bonus Section)
If you’ve ever made a collage piece that looked perfect at night and suspiciously “wavy” the next morning, welcome to the clubmembership is free
and the only requirement is mild disbelief. One common experience happens with thin papers (like napkins or delicate tissue): you brush on your medium,
lay the paper down, and everything looks fine… until you brush over it “just one more time.” That’s the moment the paper decides it would rather become
a topographic map. The fix most artists eventually learn is surprisingly boring: fewer brush passes, lighter pressure, and burnishing through wax paper
instead of scrubbing directly on the surface. Thin paper rewards calm confidence and punishes nervous overworking.
Another classic story: the “mystery bubble” that appears after drying. You swear you smoothed it. You brayered it. You even stared at it intensely,
as if eye contact could intimidate air molecules. But bubbles can form when the canvas weave wasn’t fully filled or when adhesive coverage was uneven.
Artists who do a lot of collage often develop a habit of applying a slightly more generous (but still even) layer of soft gel medium on textured canvas,
then pressing from the center outward with a firm card through wax paper. The lesson here is simple: canvas texture is not a suggestionit’s a landscape,
and your adhesive needs to meet it where it lives.
Then there’s the experience of using thick paper (watercolor paper, book covers, heavy scrapbook sheets) and assuming “thicker = easier.”
Thick paper resists wrinkling, which is great, but it can lift at corners like it’s trying to wave hello. This is especially common on stretched canvas
that flexes when handled. Artists who sell or display collage work often switch to canvas panels for thick-paper collages, or they reinforce corners by
ensuring the back of the paper is coated toonot just the canvas. When a corner does lift, the most reliable save is sliding a small amount of soft gel
under the edge, burnishing, and weighting that spot until fully dry. It feels overly careful… right up until it works.
Ink and printing introduce a whole different category of lived experience: you adhere a beautiful inkjet print, start sealing it, and suddenly your
black text becomes “modern watercolor.” Many artists learn to do a tiny test swatch first, or they choose prints made with pigment inks when possible.
Others let prints cure longer or use a light fixative (with proper ventilation) before collaging. The practical takeaway is that “paper” is not just paper;
it’s also ink chemistry, coating chemistry, and how your adhesive interacts with both. Testing feels tediousuntil it saves your best piece.
Finally, there’s the finishing-stage experience: everything is glued down, but the surface looks unevensome areas shiny, some matte, some like they’re
wearing different outfits to the same event. This is where consistent sealing pays off. Many artists do one or two thin coats of matte medium over the
entire collage area to unify sheen and protect edges, then optionally varnish after cure for durability. The “experience” lesson is that collage isn’t done
when the paper sticks; it’s done when the surface looks intentional from every angle. And yes, this is also the moment you realize you touched wet medium
with your sleeve. Consider it a signature.


