
Table of Contents >> Show >> Hide
- Quick reality check: “painless” doesn’t mean “you feel nothing”
- Front splits vs. middle splits: what’s actually stretching?
- The injury-free rules of the road
- 10-minute warm-up for splits practice (actually painless)
- Front splits: the safest stretch sequence
- Middle splits: adductor-friendly progressions
- How long should you hold stretches? How often should you practice?
- A simple 4-week “splits without drama” plan
- Common problems (and the fixes that actually help)
- When to stop and get checked out
- Cool-down and recovery: keep your gains, lose the soreness
- Real-world experiences: what splits training actually feels like
- Conclusion
The splits look simple: two legs, one floor, zero mercy. But doing the splits well is less about “being flexible” and more about
“being prepared.” Prepared muscles stretch. Unprepared muscles file a complaint with your nervous system.
This guide will show you how to train for the splits injury-free with a warm-up that actually warms you up, stretches that make sense, and a plan
that doesn’t rely on wishful thinking or aggressively bouncing like a malfunctioning pogo stick. We’ll cover front splits and middle splits,
the muscles involved, the safest progressions, and the common mistakes that turn “mobility goals” into “why is my hamstring texting me in all caps?”
Quick reality check: “painless” doesn’t mean “you feel nothing”
Flexibility training should feel like strong stretchingtension, warmth, maybe a mild burnnot sharp pain, pinching,
numbness, or anything that makes you clench your jaw like you’re trying to chew through a seatbelt.
Use a simple 0–10 scale:
- 0–3/10: Light stretch. Good for warm-up and frequent practice.
- 4–6/10: Moderate stretch. Productive for improving range of motion.
- 7–10/10: Too spicy. Back off. Pain is not a shortcut; it’s a detour.
Front splits vs. middle splits: what’s actually stretching?
Front splits (right/left)
The front splits are mostly about length and control in the hamstrings (front leg) and hip flexors (back leg),
plus support from the glutes and deep hip muscles to keep your pelvis aligned.
Middle splits (straddle)
Middle splits target the inner thigh musclesyour adductorswith help from the hamstrings and hips. They often feel more “groin-y”
because… well, that’s where your adductors live. Cozy neighborhood.
In both versions, “flexibility” is only part of the equation. You also need:
heat (warm tissues), time (consistency), and control (strength).
The injury-free rules of the road
Rule 1: Warm up before you stretch
Stretching cold muscles is like trying to fold a frozen tortilla: it cracks. A proper warm-up raises body temperature and increases blood flow, making
tissues more pliable. Do 5–10 minutes of light movement (brisk walk, easy jog, cycling, jumping jacks) before you do deeper stretching.
Rule 2: Dynamic first, static later (most of the time)
Dynamic stretching (leg swings, lunges, controlled kicks) works great in warm-ups because it moves joints through range with muscle activation.
Static stretching (holding a position) is best after training or in a separate flexibility session when your goal is range of motionnot max power output.
Rule 3: No bouncing, no yanking
Ballistic (bouncy) stretching increases injury risk by forcing tissues past what they can control. Instead, move slowly, breathe, and let range develop.
Your hamstrings shouldn’t feel like they’re being negotiated with by a debt collector.
Rule 4: Your alignment matters more than your depth
A shallow split with clean alignment is saferand will progress fasterthan a deep split held together with twisting knees and a tilted pelvis.
Think: square hips for front splits; even weight and knees pointing up (as appropriate) for middle splits progressions.
Rule 5: Strength is the seatbelt for flexibility
If you only stretch, your joints end up doing the work your muscles should be doing. Adding strength (especially through the lengthened range) helps you
“own” the split instead of falling into it like a dramatic movie faint.
Good add-ons include:
- Glute bridges and hip thrusts (pelvic control)
- Split squats (hip flexor length + stability)
- Romanian deadlifts or hamstring sliders (hamstring strength)
- Cossack squats (adductors + middle-split pathway)
10-minute warm-up for splits practice (actually painless)
This warm-up is short enough that you’ll do it, but effective enough that you won’t regret it.
Step 1 (3–5 minutes): Get warm
- Brisk walking or easy cycling
- Light jog in place
- Jump rope (easy pace)
Step 2 (4–5 minutes): Dynamic mobility
- Leg swings (front-to-back): 10 each leg (control > height)
- Side leg swings: 10 each leg
- Walking lunges (gentle): 6–8 per side
- Lateral lunges: 6 per side
- Hip circles: 5 each direction per leg
Step 3 (1–2 minutes): Activation (optional but magical)
- Glute bridges: 10 reps (squeeze at top)
- Bodyweight good-mornings: 8 reps (hip hinge practice)
You should feel warm and mobilelike your joints got a software update.
Front splits: the safest stretch sequence
Do this for both sides. Spend a little more time on your tighter side, but keep it within reasonthis is not a custody battle.
1) Half-kneeling hip flexor stretch (with posterior pelvic tilt)
Why it works: Targets the hip flexors of the back legoften the biggest limiter in front splitswithout dumping into the low back.
- Start in a half-kneeling position (one knee down, other foot forward).
- Gently squeeze the glute on the kneeling side.
- Lightly tuck your pelvis (think “belt buckle up”).
- Shift forward slightly until you feel a stretch in the front of the hip/thigh of the back leg.
- Optional: reach the arm overhead on the kneeling side and add a small side bend away.
Dosage: 2–3 rounds of 20–40 seconds, breathing slowly.
2) Half split hamstring stretch (front leg)
Why it works: Lengthens the hamstrings with control and teaches a clean hip hinge.
- From kneeling, straighten the front leg and shift hips back.
- Keep your spine long; hinge at the hips instead of rounding your back.
- Flex the front foot gently (toes up) and keep the knee straight but not locked.
Dosage: 2–3 rounds of 20–40 seconds.
3) Figure-four (glute/outer hip)
Why it works: Tight glutes and deep hip rotators can limit hip motion and make your pelvis twist in the front split.
- Lie on your back, cross ankle over opposite knee.
- Pull the supporting leg toward you until you feel the stretch in the outer hip.
- Keep your shoulders relaxed; no rage-face required.
Dosage: 1–2 rounds of 20–40 seconds per side.
4) Supported front split progression (the “blocks are brave” method)
This is where you practice the position safelywithout face-planting into regret.
- Place yoga blocks (or sturdy books) under your hands.
- Slide into a split position slowly. Keep hips as square as possible.
- Stop at a strong stretch (4–6/10), then breathe for 3–6 slow breaths.
- Come out the same way you went in: slowly.
Tip: If your hips open to the side, don’t fight it with forcereduce depth, re-square, and earn the position.
Middle splits: adductor-friendly progressions
1) Butterfly stretch (gentle groin opener)
- Sit tall, bring soles of feet together, knees out to the sides.
- Hold ankles or feet. Keep spine long.
- Let knees drop naturallyno pushing down with your elbows like you’re closing a suitcase.
Dosage: 30–60 seconds, 1–2 rounds.
2) Frog stretch (go slow; you’re not a frog)
Why it works: Targets inner thighs in a controlled, supported position.
- Start on hands and knees. Bring knees wider than hips.
- Turn feet outward so inner ankles are on the floor.
- Shift hips back until you feel adductor stretch (no sharp groin pain).
Dosage: 20–45 seconds, 2 rounds.
3) Straddle hinge (active flexibility)
- Sit in a straddle. Sit on a folded towel if your pelvis tucks under.
- Hinge forward with a long spine, chest reaching forwardnot down.
- Keep kneecaps facing up as best as you can.
Dosage: 20–45 seconds, 2 rounds.
4) Supported middle split progression
Use your hands, blocks, or a chair for support. Slide feet out on socks/towels if needed, and stop before form breaks.
Think: controlled glide, not dramatic slip-and-slide.
How long should you hold stretches? How often should you practice?
For most adults training flexibility, a practical guideline is:
- Frequency: at least 2–3 days per week (more often can work if you manage intensity).
- Hold time: ~15–30 seconds per static stretch (some people do longer holds, but quality matters more than heroics).
- Reps: 2–4 rounds per stretch, aiming for about 60 seconds total per muscle group/joint area.
What about PNF stretching (contract-relax)?
PNF can be effective for improving range of motion when done gently and intelligently. Here’s a safe, simple version for hamstrings:
- Move into a comfortable hamstring stretch.
- Gently contract the hamstring (as if pressing the heel down) for 5–10 seconds at light-to-moderate effort.
- Relax for 2–3 seconds.
- Ease into a slightly deeper stretch for 20–30 seconds.
- Repeat 2–4 cycles.
PNF tip: Keep the contraction modest. If you’re shaking like a Chihuahua in a snowstorm, you’re trying too hard.
A simple 4-week “splits without drama” plan
Week 1–2: Build the base (3 sessions/week, 20–30 minutes)
- Warm-up (10 minutes)
- Front split sequence (10 minutes)
- Middle split sequence (5–10 minutes)
- Optional strength finisher: 2 sets of glute bridges + split squats
Week 3–4: Add control and depth (3–4 sessions/week)
- Keep warm-up the same
- Add 1–2 PNF cycles for hamstrings (1–2x/week)
- Increase supported split holds: 3–6 breaths, 3 rounds
- Add Cossack squats (2 sets of 6/side) for middle splits
Track progress with something simple: “How many blocks under my hands?” or “How far from the floor am I?” Small wins count.
If you’re improving millimeter by millimeter, congratulationsyou’re doing it correctly.
Common problems (and the fixes that actually help)
“My hamstring cramps when I stretch”
- Warm up longer (yes, really).
- Back off intensity to 3–5/10.
- Add gentle hamstring activation first (e.g., 6 slow bridges or light RDL patterning).
“I feel a pinch in the front hip”
- Reduce depth and focus on posterior pelvic tilt.
- Squeeze the glute on the back leg.
- Try a more upright hip flexor stretch angle (less deep lunge).
“My knees feel weird in the split”
- Check foot and knee alignment (don’t let the knee twist while the foot points elsewhere).
- Use more support (blocks/chair) and reduce range.
- Add strength work for stability (split squats, hamstring sliders).
“My lower back is doing all the work”
- Hinge from the hips with a long spine.
- Don’t force depth by rounding your back.
- Use props: sit on a folded towel for straddle work.
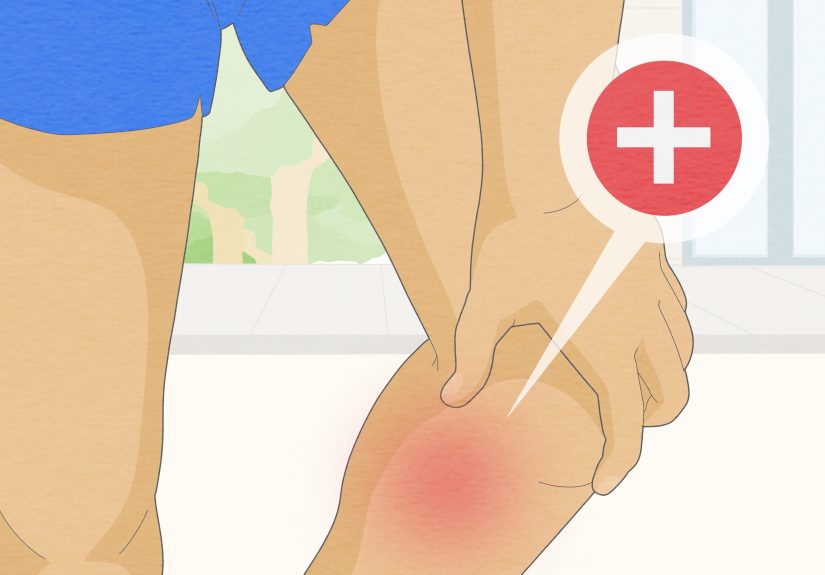
When to stop and get checked out
Flexibility training should challenge you, not injure you. Stop and consider a medical professional or physical therapist if you notice:
- Sharp, stabbing pain or a sudden “pop”
- Numbness, tingling, or pain that radiates down the leg
- Swelling, bruising, or significant weakness after stretching
- Pain that doesn’t improve after a few days of rest and gentle movement
Cool-down and recovery: keep your gains, lose the soreness
After a splits session, do 2–5 minutes of easy movement (walking) and a few gentle static stretches. Recovery basics matter:
- Alternate intense flexibility days with lighter days.
- Sleep like it’s part of training (because it is).
- Hydrate and eat enough protein to support tissue repair.
Real-world experiences: what splits training actually feels like
If you’re imagining a cinematic montageday one you touch your toes, day two you’re basically a human wishbonewelcome to the fantasy section.
Real splits progress is slower, weirder, and honestly a little fun if you treat it like a skill instead of a punishment.
Most people’s first big “aha” moment isn’t getting lower. It’s realizing the warm-up changes everything. One day you try a split cold and it feels like
your hamstring is a tight guitar string. The next day you do eight minutes of light cardio, leg swings, and lunges… and suddenly the same position feels
more like a firm stretch than a personal attack. That’s not placeboyour tissues are warmer, your nervous system is less defensive, and your body is more
willing to negotiate.
Another common experience: the tight side has opinions. Maybe your right front split is approaching respectable, while your left side feels like it’s
stuck in 2014. That’s normal. People often have one hip that rotates more easily, one hamstring that’s less tolerant, or one side that learned movement
patterns differently (sports, sitting habits, old injuries, etc.). The trick is to train both sides, but give the tighter side a small “extra set” rather
than a full-on interrogation.
Plateaus are also part of the package. You’ll feel like you’re improving, then nothing changes for two weeks, then suddenly your hands need one less block.
This is where splits training messes with your head: the progress isn’t always visible session-to-session. Your tissues adapt gradually, and your nervous
system needs repeated safe exposures before it lets you sink deeper. Think of it like earning trust. If you force it, your body tightens up. If you show up
consistently and stay in that 4–6/10 “productive discomfort” zone, it loosens the leash.
People also notice that strength work makes stretching feel safer. When you add glute bridges and split squats, your hips feel more stable in the bottom
position. You stop “hanging” on your joints and start feeling like you can control the pose. That confidence matters. In fact, many learners say the day they
finally felt progress was the day they stopped trying to melt into the floor and started trying to lift slightly out of the stretch while holding it.
That’s active flexibility: your muscles creating stability while you lengthen.
And yes, there’s an emotional side. The splits can trigger perfectionism because it’s a very visual goal: floor or no floor. But training goes better when you
celebrate the small victories: a cleaner hip position, less pinching, smoother breathing, a calmer nervous system, or getting into the same depth with less
warm-up time. Those changes mean your body is adapting. The floor is just one milestone, not the only report card.
Finally, most people learn that “painless” is a skill. Breathing slowly, relaxing the face and jaw, and letting the exhale soften the stretch feels almost
silly… until it works. The body tends to mirror your mental state. If you rush, you tense. If you breathe, you soften. Your splits practice becomes less of a
battle and more of a conversationone where your hamstrings gradually stop yelling and start cooperating.
Conclusion
Doing the splits injury-free is a mix of science and patience: warm up first, use dynamic movement to prepare your joints, lean on controlled static
stretches for flexibility, and build strength so you can own the range you gain. Train consistently, respect the “stretch dial,” and use props like blocks
to progress safely. With time, your splits will feel less like a dareand more like a skill you actually control.


