
Table of Contents >> Show >> Hide
- Step 1: Decide What You Want Your Pixie to Do
- Step 2: Get a Quick Read on Your Face Shape (Then Don’t Let It Boss You Around)
- Step 3: Match the Pixie to Your Hair Texture and Density
- Step 4: Choose Your Pixie “Category” (Yes, There Are Subspecies)
- Step 5: Find a Stylist Who Actually Likes Cutting Short Hair
- Step 6: Plan the Maintenance Like a Responsible Adult (Or at Least a Prepared One)
- Step 7: Have a Grow-Out Plan (Even If You Think You’ll Never Grow It Out)
- Common Mistakes That Make a Pixie Feel “Wrong” (When the Pixie Isn’t the Problem)
- Specific Examples: Matching Pixies to Real People (Not Just Perfect Photos)
- Conclusion: Your “Right Pixie Cut” Is the One That Fits Your Life
- Real-World Pixie Cut Experiences (About of Lessons People Actually Learn)
A pixie cut is a haircut, surebut it’s also a personality. It says, “I have places to be,” while quietly whispering,
“Also, I know where my cheekbones live.” The problem is that “pixie cut” isn’t one haircut. It’s a whole neighborhood:
soft pixies, textured pixies, long pixies, bixies, mixies, undercut pixies, curly pixies, and pixies that look effortless
(but have a surprisingly committed relationship with styling paste).
The good news: there’s a right pixie cut for almost everyone. The even better news: finding it isn’t about obeying strict,
outdated “rules.” It’s about matching the cut to your face shape, hair texture,
density, growth patterns, andmost importantlyyour real life.
(Because a haircut that needs 25 minutes of styling is adorable in theory and suspicious in practice.)
Step 1: Decide What You Want Your Pixie to Do
Before you look at inspiration photos for three hours and accidentally join a fandom called “Team Micro Fringe,” pause and ask:
what do you want this pixie cut to accomplish?
- Flatter your features: highlight eyes, cheekbones, jawline, or soften angles.
- Match your styling tolerance: wash-and-go, quick blow-dry, or “I enjoy sculpting hair like clay.”
- Work with your hair’s behavior: cowlicks, waves, curl shrinkage, or super-straight “falls where it wants.”
- Fit your lifestyle: gym, helmets, humid weather, corporate dress codes, or “I wear beanies 9 months a year.”
Your answers will guide everything: the length, the fringe, the taper at the nape, how textured the top should be, and how often
you’ll want trims.
Step 2: Get a Quick Read on Your Face Shape (Then Don’t Let It Boss You Around)
Face shape isn’t a cage. It’s more like a map. If you want a fast, practical method, measure the length of your face and compare
it to width, cheekbones, and jawline proportions. That gives you a starting point for round, oval, square, heart, or long/oblong.
From there, you can use shape ideas to balance and highlight. (Translation: you’re in charge. The geometry is just helping.)
Oval
Oval faces tend to play nicely with most pixie variations. You can go sleek and classic, edgy with an undercut, or soft with
wispy layers. The “decision” is usually less about what works and more about what vibe you want.
Round
Round faces often look great with pixies that add height at the crown or asymmetry in the fringe.
Think side-swept bangs, a longer top, or a slightly longer front piece. Avoid a perfectly uniform “helmet crop” if you want more
definitionunless you’re intentionally going for bold, graphic, and editorial.
Square
Square faces can be stunning in pixies that soften the corners. Texture is your best friend: airy layers, a broken-up
fringe, or feathered edges around the temples. A too-blunt micro fringe can look ultra-cool, but it’s a strong choicecommitment required.
Heart
Heart shapes (wider forehead, narrower chin) often pair well with pixies that bring a little attention down and forward:
side-swept bangs, a longer fringe, or a “long pixie” with face-framing pieces. You’re aiming for balance, not “hiding.”
Long/Oblong
If your face is longer, pixies with a fringe (wispy, curtain-ish, or side-swept) can visually shorten the face length.
You might skip extreme height on top unless you love that elongated, high-fashion silhouette.
Pro tip: face shape is only half the story. Also consider forehead height, neck length, ear prominence,
and whether you love or loathe having your sideburn area visible. Pixies are honest. They do not believe in “background characters.”
Step 3: Match the Pixie to Your Hair Texture and Density
Hair texture decides how a pixie behaves day-to-day. Density decides how much “stuff” you have to sculpt. Together, they determine whether your
pixie will look airy, plush, spiky, soft, or like it’s auditioning for a shampoo commercial.
Fine or Thin Hair
Fine hair can look incredible in a pixieespecially when the cut is shaped to create lift. Many stylists recommend keeping the top a bit longer,
building a clean silhouette, and using lightweight product to create the illusion of fullness. Too short all over can sometimes read flat,
depending on your growth pattern and density.
Thick Hair
Thick hair loves a pixie, but it needs smart debulking and texturizing so it doesn’t “puff” in unplanned directions.
Ask for internal layers and a tailored shape at the sides and nape. Thick hair can handle undercuts beautifully if you want an edgier profile.
Wavy Hair
Wavy pixies are the definition of “effortless” when the cut works with your pattern. Layers placed correctly will encourage waves to form in a flattering
direction. The key is leaving enough length for the wave to show (instead of cutting it so short it just looks slightly confused).
Curly or Coily Hair
Curly pixies can look sculptural and chic, but you’ll want a stylist who understands curl behavior, shrinkage, and curl-by-curl shape. The goal is a cut
that forms a great outline even when air-dried. If your hair is coily, ask how they plan to shape the crown and the sides so it’s balanced from every angle.
Straight Hair
Straight hair makes the pixie’s lines super visible. That’s great if you want a sharp, clean look. It also means any unevenness is easier to spot, so precision
matters. If you want softness, ask for texture through the top and fringe, plus product guidance so it doesn’t fall limp.
Step 4: Choose Your Pixie “Category” (Yes, There Are Subspecies)
The Classic Tapered Pixie
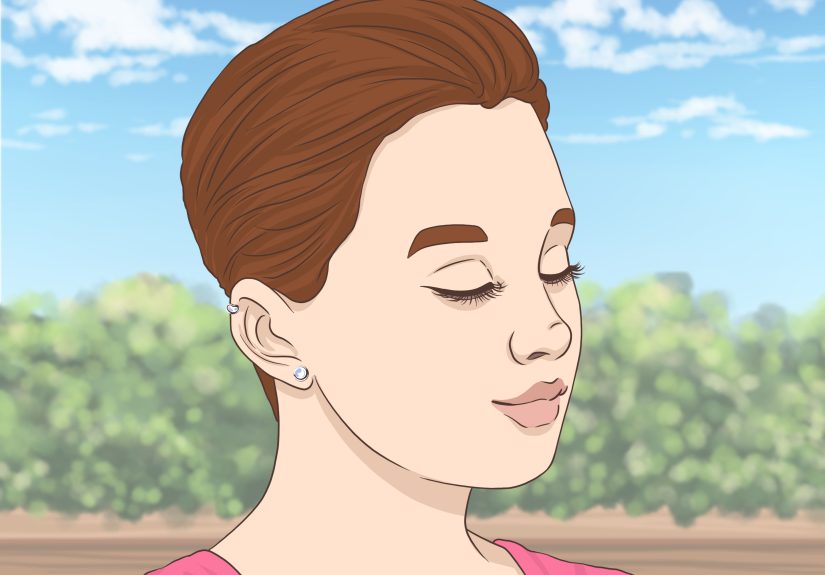
Shorter on the sides and nape, slightly longer on top. Timeless, clean, and easy to style. Great if you want a polished look that can go sleek or tousled.
The Long Pixie
More length through the top and fringe, sometimes with longer pieces around the ears. Ideal for first-time pixie people who want flexibility and a softer transition.
The Textured Pixie
Built for movement: choppy layers, piecey ends, and a lived-in vibe. This is the “I woke up like this” pixie (but still appreciates a good texturizing spray).
The Undercut Pixie
Short, tight sides (sometimes buzzed) with a longer top. Bold, modern, and especially helpful for thick hair. It’s also a great choice if you like a strong shape
and don’t mind frequent clean-ups.
The Bixie (Pixie + Bob)
Longer than a traditional pixie, with bob-like softness and layers. Great if you want a short cut that still feels swishy and forgiving as it grows.
The Mixie (Pixie + Mullet)
Edgier and more rock-and-roll, with choppier layers and a slightly longer back. It’s not everyone’s daily vibebut if it’s yours, it’s a whole moment.
The Soft/Whisper Pixie
Delicate, airy, and often less severe at the edges. Perfect if you want a pixie that reads romantic or modern-minimal instead of sharp and graphic.
Step 5: Find a Stylist Who Actually Likes Cutting Short Hair
Not every stylist specializes in short cuts, and that’s okayunless they’re holding scissors near your head. Pixies require strong shape, balanced proportions,
and a plan for how hair will grow out. Look for a stylist whose portfolio shows:
- Multiple pixie variations (not just one copy-paste crop)
- Different hair textures (fine, thick, curly)
- Clean tapers and balanced side profiles
- Before/after photos that look intentionally shaped
What to Say in the Consultation
Walk in with 3–6 inspiration photos, but be specific about what you like in each one:
“I love the longer fringe here,” “I want this nape shape,” “I like this amount of texture,” or “I don’t want my ears fully exposed.”
Photos are great, but your stylist needs to translate them to your hair and head shape.
- Discuss maintenance: Ask how often you’ll need trims to keep the shape looking intentional.
- Ask about your cowlicks: A crown cowlick can change where volume lives.
- Talk styling time: If you want 5-minute hair, say so.
- Agree on “how short”: Ears covered? Nape buzzed? Fringe above brows? Get clear.
Step 6: Plan the Maintenance Like a Responsible Adult (Or at Least a Prepared One)
Pixies can be low-effort daily, but they usually need more frequent shape-ups because growth shows quickly. Many people find that short cuts look best with
regular trims to keep edges clean and proportions balanced.
Easy Styling Routines by Hair Type
Straight Hair (Polished or Piecey)
- Towel dry and apply a pea-sized amount of lightweight styling cream.
- Blow-dry the top forward or to the side with fingers for direction.
- Finish with a tiny bit of paste to define ends (tiny means tinypixies do not need a scoop).
Fine Hair (Lift and Texture)
- Use a volumizing mousse at the roots.
- Blow-dry lifting at the crown, then tousle the top with fingers.
- Finish with a dry texture spray for grip (instead of heavy wax).
Wavy Hair (Encourage the Pattern)
- Apply a curl-enhancing cream or light mousse on damp hair.
- Scrunch, then air-dry or diffuse briefly.
- Use a small amount of pomade on ends if you want separation.
Curly/Coily Hair (Shape + Moisture)
- Use a leave-in conditioner plus a curl styler for definition.
- Dry gently (air-dry or diffuse), then fluff at the roots if needed.
- Refresh with water + a little product on day two instead of fully re-washing.
Protect Your Hair (Because Short Hair Can Still Get Beat Up)
Short hair often gets more heat styling than people expectespecially when trying to smooth the fringe or shape the crown. Limit damage by letting hair partially
air dry before blow-drying, using heat tools on dry hair, and going easier on heavy “long-lasting hold” products that can encourage breakage when over-combed.
Healthy hair makes a pixie look expensive. Stressed hair makes it look like it lost a fight with a beanie.
Step 7: Have a Grow-Out Plan (Even If You Think You’ll Never Grow It Out)
Life happens. So do weddings, job interviews, “I miss my ponytail” phases, and surprise humidity. Knowing how you’ll transition can make committing to a pixie
feel less intense.
- Expect stages: Pixies often go through a “shaggy in-between” phase. That’s normal.
- Use strategic trims: Keeping the nape tidy while letting the top grow prevents the “mushroom moment.”
- Try accessories: Headbands, clips, and bobby pins can style uneven lengths while you grow.
- Consider a bixie transition: Many people grow a pixie into a bixie, then into a bob.
Common Mistakes That Make a Pixie Feel “Wrong” (When the Pixie Isn’t the Problem)
- Going too short too fast: If you’re nervous, start with a long pixie or bixie.
- Ignoring hair behavior: Cowlicks and growth direction can change everything.
- Overusing product: Pixies need a dab, not a frosting session.
- Not discussing neckline and sideburns: These details affect how “soft” or “edgy” it looks.
- Assuming “short” equals “no maintenance”: Daily styling may be quick, but trims matter.
Specific Examples: Matching Pixies to Real People (Not Just Perfect Photos)
Example 1: Fine Hair + Busy Schedule + Wants Volume
A longer-top pixie with a side-swept fringe, gentle layering at the crown, and a clean taper at the sides gives the illusion of fullness without demanding
a full blowout routine. Add mousse at the roots and a light texture spray, and you’re out the door.
Example 2: Thick Hair + Loves Edgy Styles
An undercut pixie removes bulk where it matters and lets the top become the “feature.” The stylist can texturize the top for movement, so it styles easily
with paste. It’s bold, sculpted, and surprisingly practical for thick hair.
Example 3: Curly Hair + Wants a Soft, Modern Shape
A soft curly pixie that keeps enough length for curls to form, shaped to your curl pattern, can look polished even when air-dried. The key is a stylist who
understands curl shrinkage and builds a flattering silhouette from every angle.
Example 4: Round Face + Wants More Definition
A long pixie with asymmetrical fringe and crown height adds visual structure. Keeping the sides a bit closer and the top slightly lifted creates a more elongated,
balanced lookwithout trying to “change” your face.
Conclusion: Your “Right Pixie Cut” Is the One That Fits Your Life
The best pixie cut isn’t the shortest or the trendiestit’s the one that makes you feel like yourself on a random Tuesday, not just in the salon mirror.
Start with what you want your hair to do, match the cut to your texture and features, and choose a stylist who treats short hair like a craft.
Then keep it healthy, trim it regularly, and give yourself permission to experiment with styling.
Because the real secret to a great pixie cut is confidenceand a tiny jar of product you actually know how to use.
Real-World Pixie Cut Experiences (About of Lessons People Actually Learn)
If you ask people what surprised them most after getting a pixie cut, the answers are rarely about “liking it” or “not liking it.”
It’s usually about the little realities you don’t see in inspiration photos: how the cut changes your morning routine, how it feels in different weather,
and what you suddenly notice about your own features.
1) The “Wait, I Have a Head Shape?” Moment
A pixie cut makes the silhouette of your head part of the style. People often say the first week feels extra dramatic because the haircut is so honest.
Then something funny happens: you stop thinking about your head shape and start noticing your eyes, brows, cheekbones, and earrings. For many, the pixie
becomes less about “short hair” and more about “face-forward style.” It’s like your features get upgraded to lead actors.
2) Styling Is Faster… But More Specific
A lot of folks expect a pixie to be zero-effort. The truth is better: it’s usually quick effort. Instead of brushing and tying hair back,
you’re directing the top, defining the fringe, or adding texture in targeted spots. People who love pixies often say they like having a simple routine that
takes five minutes but still looks intentionalespecially when they learn the “less product, more finger-styling” trick.
3) Trims Become a Relationship (Not a One-Time Event)
One of the most common experiences is realizing how fast short hair changes shape. Many people report that the pixie looks “perfect” for a few weeks, then
suddenly crosses into “I need a cleanup” territory. That doesn’t mean the cut failedit means short hair is like a crisp white sneaker: it looks amazing,
but it appreciates maintenance. Once people plan trims ahead (even loosely), they enjoy the cut more because it stays in the “wow” zone longer.
4) Weather Has Opinions
Humidity can make textured pixies look delightfully tousled or unexpectedly fluffy. Cold weather makes you want hats, which can flatten the crown and create
“beanie bangs.” Wind can either give you a cool, editorial vibe or make your fringe stick to your forehead like it’s paying rent. The experienced pixie people
keep a mini toolkit: a travel paste, a small spray, and the ability to re-shape hair with their hands in 30 seconds.
5) The Confidence Curve Is Real
People often describe a confidence curve: day one feels thrilling and slightly terrifying; day three feels unfamiliar; week two feels like you’re starring in your own
life; and by week four, it’s normalin a good way. If there’s a universal takeaway, it’s this: the “right pixie cut” isn’t only about the haircut.
It’s about choosing a shape that fits your texture and lifestyle, then giving yourself a little time to see yourself in it.


