
Table of Contents >> Show >> Hide
- Why Wood Block Pumpkins Are Perfect for Pumpkin Patch Decor
- Tools and Materials You’ll Need
- Step-by-Step: How to Make Cute Wood Block Pumpkins
- Styling Your Wood Block Pumpkins in a Pumpkin Patch Display
- Safety, Durability, and Finishing Touches
- Common Questions About Wood Block Pumpkins
- Real-Life Experiences: What You Learn After Making a Few Sets
If you’ve ever stared at a pile of scrap wood and thought, “This could be something cute,” you’re absolutely right. One of the easiest, most charming fall DIYs you can make is a set of wood block pumpkins. They’re adorable, they don’t rot, and they’ll smile back at you from your pumpkin patch decor year after year.
In this guide, we’ll walk through exactly how to make cute wood block pumpkins for a cozy pumpkin patch vignette – the kind of porch or mantel display that looks straight out of a farmhouse catalog but costs more like a coffee run than a shopping spree. We’ll cover tools, materials, paint tricks, styling ideas, and a bunch of real-life tips so your pumpkins look intentionally rustic, not accidentally rough.
Grab those 2x4s, branch scraps, and your favorite orange paint – it’s pumpkin time.
Why Wood Block Pumpkins Are Perfect for Pumpkin Patch Decor
Before we dive into sawdust and paint, let’s talk about why wood block pumpkins are such a fall decor favorite:
- Budget-friendly: Most tutorials use scrap 2x4s, offcuts, or pallet wood, so your main “material” might already be in your garage.
- Beginner-friendly: Straight cuts, simple sanding, and basic acrylic or chalk paint. If you can hold a paintbrush and a screwdriver, you’re good.
- Durable: Unlike real pumpkins, these won’t mold, collapse, or mysteriously vanish after a squirrel conference.
- Customizable: Change up colors, patterns, lettering, and sizes to suit everything from farmhouse to modern decor.
- Perfect for “pumpkin patch” displays: Mix heights and widths, add a rustic sign, tuck in faux leaves, and you’ve got an indoor or porch-friendly pumpkin patch that stays cute all season.
In other words, this is exactly the kind of project you’ll want to repeat every fall… and then “accidentally” keep out until January.
Tools and Materials You’ll Need
Here’s a simple supply list to make classic wood block pumpkins. Adjust it to what you already have on hand.
Basic Materials
- Scrap wood blocks (2×4, 4×4, or similar), cut into various heights – think 4" to 10" tall for a nice mix
- Small branch pieces or wooden dowels for stems
- Acrylic or chalk paint in:
- Orange tones (traditional, burnt, or muted pumpkin shades)
- Optional: white, cream, or teal for variety
- Brown or dark wax / glaze (optional) for a distressed, farmhouse look
- Jute twine, raffia, or ribbon for bows
- Faux greenery, leaves, or small florals
- Hot glue sticks or strong craft glue
- Letter stencils or vinyl letters for “Pumpkin Patch” sign (optional)
Tools
- Miter saw or hand saw for cutting wood blocks
- Sanding block or power sander
- Paintbrushes and/or foam brushes
- Drill with small bit (if you want to inset stems)
- Hot glue gun
- Drop cloth or cardboard to protect your work surface
That’s it. Nothing fancy, nothing intimidating – just classic DIY basics.
Step-by-Step: How to Make Cute Wood Block Pumpkins
Step 1: Cut and Prep Your Wood Blocks
Start by cutting your scrap boards into pumpkin “bodies.” For a small pumpkin patch grouping, try something like:
- One 4" tall block (small)
- One 6" tall block (medium)
- One 8–10" tall block (large)
Use a miter saw for quick, straight cuts, or a hand saw if that’s what you have. Many popular tutorials rely on simple 2×4 and 4×4 cuts, proving you don’t need advanced tools to get a stylish result.
Once cut, sand all sides and edges. Focus especially on corners so they feel slightly rounded – that softer silhouette reads more “pumpkin” and less “mildly threatening rectangular block.” Wipe off dust with a dry cloth.
Step 2: Add a Base Coat of Paint
Now for the fun part: painting. Apply a base coat of orange (or your chosen color) to each block. Acrylic craft paint or chalk paint both work great for wood pumpkins.
Tips for your base coat:
- Use a slightly dry brush to avoid drips.
- Paint with vertical strokes to mimic the lines of a real pumpkin.
- Don’t stress about perfect coverage – a bit of wood peeking through adds character.
Let the paint dry completely before the next step. If you’re aiming for a more polished look, add a second coat.
Step 3: Add Dimension With Shading and Distressing
This is where your pumpkins start to look “designer,” not DIY-in-a-rush.
Try one or more of these easy techniques:
- Dry brushing lighter shades: Dip a dry brush in a lighter orange or cream, wipe most of it off on a paper towel, and lightly drag it along the vertical direction to create soft highlights.
- Adding “pumpkin ribs”: Use a slightly darker shade of orange or burnt umber to paint subtle vertical curves down each side, mimicking pumpkin ridges.
- Distressing edges: Lightly sand edges and corners again once the paint is dry to expose some raw wood for a farmhouse feel.
- Optional antiquing: Wipe on a little dark wax or glaze and then buff it off so it just sits in grooves and around edges.
Step back and check the balance. You want a bit of variation but not so much that it looks like each pumpkin belongs in a different house.
Step 4: Attach Stems to the Top
Cut short pieces of branch or dowel (about 1–2" tall) for the stems. Many makers love using real branches because they add instant texture and rustic charm.
You have two options here:
- Drilled stems: Drill a shallow hole in the center of the top of the block and glue the branch piece into it.
- Surface stems: Skip drilling and simply hot glue the stem directly onto the top.
Either method works. Drilling gives extra stability, but glue alone is usually fine for indoor decor that won’t be heavily handled.
Step 5: Dress Them Up With Bows and Greenery
Now comes the personality. Wrap jute twine, raffia, or ribbon around the base of each stem and tie a bow. Tuck in small faux leaves, berries, or tiny flowers as you go. Many wood pumpkin tutorials use a mix of jute, wired twine, and greenery for that layered, “styled but casual” look you see in farmhouse decor inspiration photos.
Ideas to try:
- Buffalo check ribbon for a farmhouse vibe
- Muted green eucalyptus sprigs for a modern look
- Rust-colored leaves and berries for classic fall warmth
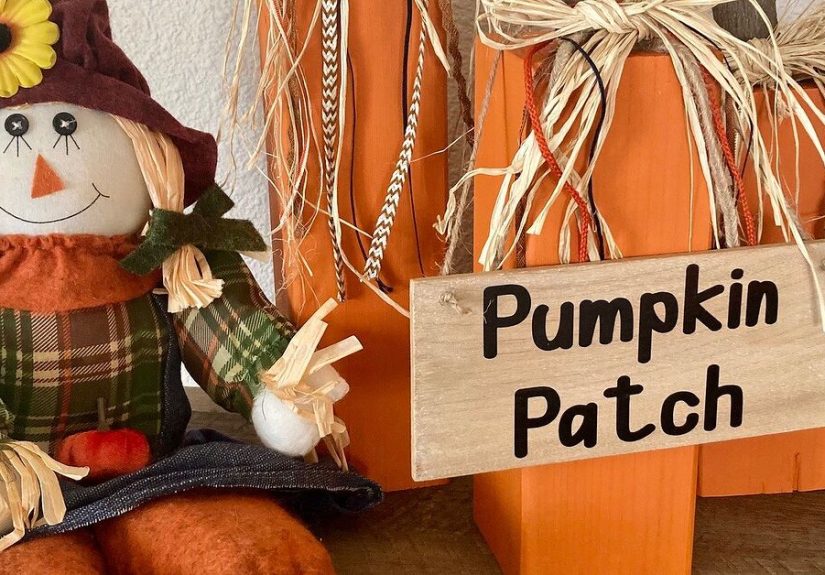
Step 6: Create a Matching “Pumpkin Patch” Sign
To turn a few pumpkins into a full pumpkin patch, make a simple coordinating sign.
- Use a longer scrap board or block as your sign base.
- Paint it in a neutral color like white, cream, or dark stain.
- Stencil or hand-letter “Pumpkin Patch,” “Farm Fresh Pumpkins,” or “Pick Your Own.”
- Lightly sand the edges for a worn, cozy look.
Many rustic decor sets pair wood block pumpkins with word blocks or signs that say “Pumpkin Patch” in an autumnal font – it instantly makes your display look intentional and styled.
Styling Your Wood Block Pumpkins in a Pumpkin Patch Display
Once your pumpkins and sign are ready, it’s time to play “mini stylist.” Here are some easy ideas for arranging your pumpkin patch decor.
On the Porch or Entryway
- Cluster pumpkins of different heights on one side of your front door.
- Add a lantern, a potted mum, and a cozy throw blanket draped over a chair.
- Layer real pumpkins and gourds in front for extra dimension.
Wood block pumpkins are especially handy on porches because they stand up to weather better than real pumpkins, especially if you seal them properly.
On a Mantel or Shelf
- Place your “Pumpkin Patch” sign in the center.
- Stagger wood pumpkins on either side, alternating heights.
- Weave a faux leaf garland or eucalyptus along the base for a soft, full look.
- Sprinkle in small candles or LED tea lights for evening glow.
On a Table or Tiered Tray
- Group two or three mini block pumpkins together as a centerpiece.
- Place them on a wood slice, tray, or runner to ground the display.
- Mix in tiny ceramic pumpkins, acorns, or pinecones for texture.
Because wood block pumpkins come in so many shapes and finishes – from distressed white to bright orange – they blend easily into both farmhouse and more modern fall decor styles.
Safety, Durability, and Finishing Touches
To keep your pumpkins looking good year after year, and to keep everyone safe, don’t skip these finishing steps:
- Seal the wood: If your pumpkins will live outside or on a covered porch, apply a clear sealer (polycrylic or outdoor-safe clear coat) to protect against moisture and fading.
- Sand sharp edges: Especially if kids will be moving them around, make sure all edges are smooth.
- Use appropriate adhesives: Hot glue is great for indoor decor; for outdoor or high-handling items, upgrade to a stronger construction or wood glue.
- Store carefully: Wrap in paper or bubble wrap and store them upright in a bin during the off-season so stems and embellishments don’t get crushed.
With a quick reseal or tiny paint touch-up every couple of years, your pumpkin patch can last through many fall seasons.
Common Questions About Wood Block Pumpkins
Do I have to use 2x4s?
Nope! 2x4s are popular because they’re cheap and everywhere, but you can use 4×4 posts, fence pickets, pallet wood, or even small wood cubes. As long as it’s thick enough to stand on its own, it can probably become a pumpkin.
What paint works best?
Acrylic craft paint is affordable, comes in a million colors, and dries quickly. Chalk paint is another favorite for a matte, farmhouse look that distresses beautifully. If you’re using your pumpkins outside, seal the paint with a clear topcoat.
Can I make this a kid-friendly project?
Absolutely. Pre-cut and sand the blocks yourself, then let kids pick paint colors, add polka dots, stripes, or faces, and help tie bows. Just keep them away from the saw, drill, and hot glue gun.
How long does this project take?
For a basic set of three pumpkins, active work time is often under 30–60 minutes, plus drying time between coats of paint. It’s totally realistic to knock this project out in an afternoon.
Real-Life Experiences: What You Learn After Making a Few Sets
Once you’ve made one set of wood block pumpkins, a funny thing happens: you start seeing “future pumpkins” everywhere. That leftover board from your last shelf install? Pumpkin. The short offcut from a deck project? Pumpkin with potential.
Here are some hard-earned lessons and small “aha” moments that usually come after a few rounds of pumpkin crafting.
1. Imperfect Wood Makes the Best Pumpkins
At first, most people reach for the “nice” wood – the flattest, smoothest, least knotty pieces in the pile. After a couple of projects, that flips. Knots, dings, and uneven grain suddenly become features, not flaws. A knot right in the center can look like a pumpkin’s natural curve, and slightly uneven edges create a more organic silhouette.
If a board looks a little too rough, that’s where paint and sanding come in. A solid coat of orange and a bit of distressing can turn “construction scrap” into “boutique fall decor” surprisingly fast.
2. Color Experiments Almost Always Pay Off
Traditional pumpkin orange is classic, but once you try unexpected colors – like soft sage, creamy white, or even muted teal – your whole pumpkin patch vibe changes. A row of all-orange pumpkins feels cozy and familiar; mix in a few white and teal pumpkins and suddenly your display looks like an intentional designer collection.
Many makers discover that painting one or two pumpkins in a contrasting color actually pulls the rest of the display together and makes it pop in photos. So if you’re on the fence about trying non-orange pumpkins, consider this your sign to go for it.
3. Little Details Take Them From “DIY” to “Decor Shop”
When your pumpkins feel a little underwhelming, it’s rarely the paint job that’s the problem – it’s the finishing touches. A simple jute bow is cute, but when you layer a patterned ribbon with twine, tuck in a tiny branch of greenery, and add a small charm or tag, the whole piece suddenly feels elevated.
Those small details also help your pumpkins fit into different decor styles. Swap rustic twine for velvet ribbon and your pumpkins instantly feel more elegant. Change greenery from bright leaves to muted eucalyptus and they start leaning modern instead of farmhouse.
4. Height and Scale Make Your Pumpkin Patch Look “Designer”
One of the biggest lightbulb moments is discovering how much difference height and scale make. Three pumpkins cut to the exact same height will always look a little flat. But mix one tall, one medium, and one short block, then angle them slightly – suddenly you get depth, movement, and that “styled” look you see in magazine spreads.
This same principle applies when you build your pumpkin patch vignette. Raising one pumpkin on a wood slice, tucking another slightly behind, and leaning your sign at a slight angle will make the whole display feel dynamic and intentional.
5. You’ll Want a Set for Every Space
Once people see how quick and inexpensive these are, they often end up making more sets than they planned. One for the front porch. One for the mantel. A tiny set for a tiered tray. A neutral set for a friend who loves minimalist decor. It’s a very slippery, very pumpkin-shaped slope.
The good news is that this is one of those rare DIYs that scales beautifully. You can batch-cut a stack of blocks, paint them in a couple of favorite color schemes, and assemble multiple pumpkin sets in one afternoon. It’s satisfying, relaxing, and a fun way to transition mentally into fall.
6. They Become Part of Your Fall Tradition
Maybe the best part of making wood block pumpkins is the tradition that comes with them. Every year, you get to pull out the box labeled “pumpkins,” unwrap your little wooden crew, and remember when you made them. You might add a new pumpkin or two each season, upgrading your color palette or finally making that “Pumpkin Patch” sign you’ve been thinking about.
Over time, your pumpkin patch decor becomes more than a seasonal display. It becomes a little scrapbook of your creativity – a reminder that some of the most charming things in your home started as nothing more than scrap wood and a good idea.
And honestly? That’s exactly what makes them so cute.


