
Table of Contents >> Show >> Hide
- What Are Gelatin Ice Cubes?
- What You’ll Need Before You Start
- How to Make Gelatin Ice Cubes: 13 Easy Steps
- Step 1: Choose Your Gelatin Flavor
- Step 2: Boil the Water
- Step 3: Pour Boiling Water Into a Bowl
- Step 4: Add the Gelatin Powder
- Step 5: Stir Thoroughly
- Step 6: Add Cold Water or Juice
- Step 7: Let the Mixture Cool Slightly
- Step 8: Prepare Your Ice Cube Tray
- Step 9: Pour Gelatin Into the Tray
- Step 10: Skim Off Foam
- Step 11: Refrigerate
- Step 12: Check for Firmness
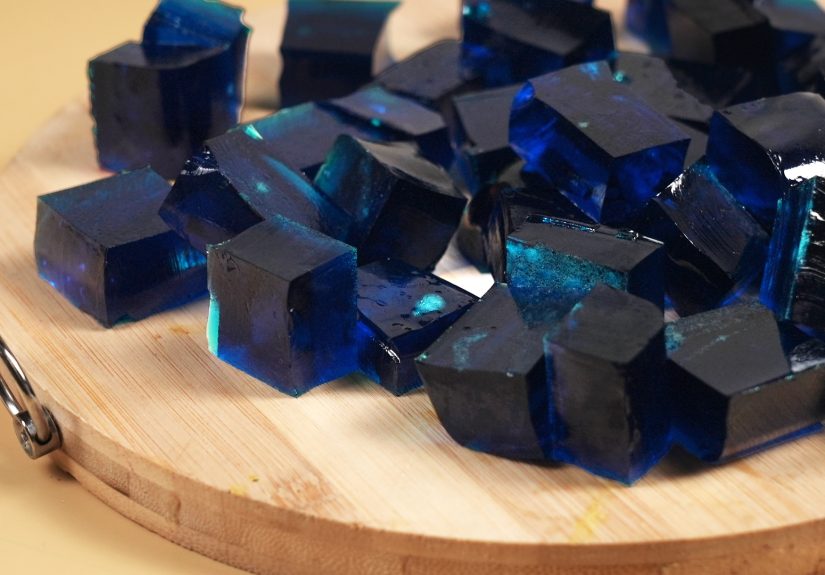
- Step 13: Remove and Serve
- Creative Variations to Try
- Common Mistakes (And How to Avoid Them)
- How to Store Gelatin Ice Cubes
- Personal Experiences & Real-Life Uses (Extended Guide)
- Final Thoughts
Gelatin ice cubes are one of those delightfully weird kitchen ideas that make people do a double take: “Wait… those are ice cubes?” Yes. Yes, they are. Sort of. These wiggly, colorful cubes are perfect for parties, kids’ drinks, dessert trays, themed events, or anytime you want to impress people with minimal effort and maximum jiggle.
This guide walks you through exactly how to make gelatin ice cubes step by step, explains why each step matters, and offers tips so your cubes come out crystal-clear (or boldly opaque, if that’s your vibe). Whether you’re prepping for a summer party or just bored on a Tuesday afternoon, gelatin ice cubes are easier than you thinkand way more fun.
What Are Gelatin Ice Cubes?
Gelatin ice cubes are cube-shaped gelatin treats made in ice cube trays. Unlike traditional ice, they don’t melt and water down drinks. Instead, they gently wobble, add flavor, and slowly release sweetness or fruitiness as they sit in a glass.
You’ll often see them used in:
- Kids’ birthday parties
- Mocktails and cocktails
- Holiday punch bowls
- Dessert boards and snack trays
Why Not Just Use Regular Ice?
Regular ice melts and dilutes drinks. Gelatin ice cubes add flavor, color, and novelty without wrecking your carefully mixed beverage. Plus, let’s be honestno one has ever described plain ice as “cute.”
What You’ll Need Before You Start
Ingredients
- 1 packet (about 3 oz) flavored gelatin
- 1 cup boiling water
- 1 cup cold water (or juice for extra flavor)
Tools
- Ice cube tray (silicone works best)
- Mixing bowl
- Whisk or spoon
- Measuring cup
How to Make Gelatin Ice Cubes: 13 Easy Steps
Step 1: Choose Your Gelatin Flavor
Pick a gelatin flavor that matches your drink or theme. Cherry and raspberry work well for red drinks, lemon or pineapple for summer mocktails, and lime for margarita-inspired treats.
Step 2: Boil the Water
Heat 1 cup of water until it reaches a full boil. This is crucialgelatin dissolves properly only in very hot liquid.
Step 3: Pour Boiling Water Into a Bowl
Use a heat-safe bowl. This is not the time to test your plastic container’s bravery.
Step 4: Add the Gelatin Powder
Slowly sprinkle the gelatin powder into the hot water rather than dumping it all at once. This helps prevent clumps.
Step 5: Stir Thoroughly
Whisk or stir for at least two minutes until the gelatin fully dissolves. The liquid should look clear (or evenly colored) with no grainy bits.
Step 6: Add Cold Water or Juice
Pour in 1 cup of cold water or juice and stir gently. Juice adds richness and makes your gelatin cubes feel more “grown-up.”
Step 7: Let the Mixture Cool Slightly
Allow the mixture to cool for about 5 minutes before pouring. This prevents warping flexible trays and reduces condensation bubbles.
Step 8: Prepare Your Ice Cube Tray
Place your tray on a flat surface or baking sheet. This makes transport to the fridge much less dramatic.
Step 9: Pour Gelatin Into the Tray
Carefully fill each compartment. If you want fruit inside, now’s the time to add small pieces.
Step 10: Skim Off Foam
If bubbles or foam form on top, gently skim them off with a spoon for clearer cubes.
Step 11: Refrigerate
Place the tray in the refrigerator for at least 2–4 hours. Do not freezegelatin hates freezing.
Step 12: Check for Firmness
The cubes should be fully set and jiggle when gently shaken. If they slosh, they need more time.
Step 13: Remove and Serve
Gently pop the cubes out and use immediately or store in an airtight container in the fridge.
Creative Variations to Try
Layered Gelatin Ice Cubes
Create layered cubes by letting one color set before adding another. It takes patience, but the results look impressive.
Alcohol-Infused Gelatin Cubes
Replace part of the cold water with alcohol (vodka or rum works best). Keep alcohol content moderatetoo much prevents setting.
Fruit-Filled Cubes
Add berries, citrus segments, or grapes. Keep pieces small so the cubes release cleanly.
Common Mistakes (And How to Avoid Them)
- Using too much liquid: Leads to weak cubes. Stick to the ratio.
- Freezing gelatin: Causes separation and rubbery texture.
- Adding alcohol too early: Heat destroys alcohol and affects setting.
How to Store Gelatin Ice Cubes
Store gelatin cubes in the refrigerator in a covered container for up to 3–4 days. Place parchment between layers to prevent sticking.
Personal Experiences & Real-Life Uses (Extended Guide)
The first time most people make gelatin ice cubes, it’s out of curiosity. The second time? Strategy. After watching guests hesitatethen laughthen reach for seconds, it becomes clear that these cubes are more than a novelty.
For kids’ parties, gelatin cubes solve the eternal problem of watered-down juice. Parents love them because drinks stay flavorful, and kids love them because… well, they jiggle. Using silicone trays shaped like stars or animals adds instant excitement.
In adult settings, gelatin ice cubes quietly level up drinks. A whiskey sour with lemon gelatin cubes slowly evolves in flavor instead of getting bland. At summer barbecues, layered gelatin cubes become conversation starters before anyone even takes a sip.
Home cooks often mention how forgiving gelatin cubes are. Mess up the color? Call it “artsy.” Uneven layers? That’s “handcrafted.” The stakes are refreshingly low compared to baking, yet the payoff feels high.
There’s also a meditative quality to making them. Stirring, pouring, waitinggelatin cubes reward patience without punishment. If you’re teaching kids basic kitchen skills, this project hits the sweet spot between supervision and independence.
Over time, many people develop their own system. Some swear by juice-only mixtures. Others keep multiple trays in rotation for different events. One surprisingly popular trick is matching cube color to glassware for a subtle design touch.
Perhaps the best part is how adaptable gelatin ice cubes are. They’re nostalgic without being childish, playful without being messy, and impressive without being exhausting. Once you’ve made them a few times, they stop feeling like a recipe and start feeling like a kitchen life hack.
Final Thoughts
Gelatin ice cubes are proof that small tweaks can create big delight. With minimal ingredients and a little creativity, you can turn everyday drinks into something memorable. They’re simple, customizable, and guaranteed to make people ask, “How did you make these?”


