
Table of Contents >> Show >> Hide
- Why This Project Is So Popular
- How a Self-Driving RC Car Actually Works
- Why TensorFlow Makes Sense for This Kind of Build
- Raspberry Pi Onboard: The Practical Winner
- MacBook Onboard: Technically Possible, Practically Ridiculous
- The Best Workflow: Train on a Bigger Machine, Drive on the Pi
- Model Choices: End-to-End, Detection, or Hybrid
- Common Mistakes That Make Smart Cars Look Dumb
- Which Setup Should You Choose?
- Final Verdict
- Extended Experience: What Building One Actually Feels Like
There is something delightfully unhinged about teaching a toy car to drive itself. It is part robotics lab, part computer vision playground, and part “what if my weekend project developed opinions about corners?” For makers, students, and curious engineers, a self-driving RC car is one of the most approachable ways to explore autonomous driving without needing a six-figure budget, a closed test track, or a legal team on standby.
The basic idea is simple: mount a camera on an RC chassis, capture what the car sees, feed those images into a TensorFlow-powered model, and translate the prediction into steering and throttle commands. The part that looks simple on YouTube, of course, is where all the fun chaos lives. Latency matters. Power matters. Camera angle matters. Weight matters. And if you mount the wrong computer on the car, your sleek little racer may turn into a rolling laptop stand with identity issues.
That is where the big question comes in: should you run the system onboard with a Raspberry Pi, or go full mad scientist and strap a MacBook to the car? Technically, both ideas live on the same planet. Practically, only one of them usually deserves your zip ties.
Why This Project Is So Popular
Self-driving RC cars hit a sweet spot. They are small enough to be affordable, fast enough to make mistakes exciting, and flexible enough to support everything from classic OpenCV lane following to end-to-end deep learning. You can build one as a classroom demo, a robotics club platform, a TensorFlow portfolio project, or just because your inner twelve-year-old wants to see a car think.
Unlike full-size autonomous vehicle systems, RC platforms let you iterate quickly. A bad model does not cause a traffic report; it usually causes a dramatic but manageable collision with a chair leg. That makes the platform ideal for learning imitation learning, edge AI, sensor fusion, data collection, and control loops. It is the kind of project that teaches real engineering lessons while still feeling like a hobby instead of homework.
How a Self-Driving RC Car Actually Works
At a high level, most TensorFlow RC car builds follow a clean pipeline:
1. Perception
A forward-facing camera captures images of the track, floor, or road-like path. Some builders add ultrasonic sensors, IMUs, or wheel encoders, but the camera usually does the heavy lifting. If the car cannot see clearly, the model cannot be smart, no matter how many buzzwords you feed it.
2. Inference
The image is processed by a machine learning model. In many hobby builds, that model predicts steering angle and throttle directly from the image. In others, the model detects lane lines, colored markers, obstacles, or stop signs, then a separate control layer decides how the car should move. TensorFlow is a strong fit because it gives you a familiar training workflow and several deployment paths for edge devices.
3. Control
The prediction has to be converted into actual motion. That means sending stable PWM signals to the steering servo and ESC. This is where software meets reality and reality says, “Nice model, but your steering jitter is adorable.” Clean motor control is just as important as model accuracy.
4. Feedback and Iteration
You test, crash, retest, change the camera angle, gather more data, lower the throttle, retrain, and eventually pretend the final result was your plan all along. That loop is the real curriculum.
Why TensorFlow Makes Sense for This Kind of Build
TensorFlow is useful here for two different jobs: training and deployment. Training is where you build and refine the model, usually on a more powerful computer. Deployment is where you run that model on the car. Those are related jobs, but they are not the same job, and mixing them up is how projects gain unnecessary drama.
For deployment, the sweet spot is usually TensorFlow Lite, often still called TFLite by practically everyone with a keyboard. It is designed for on-device inference, lower latency, and smaller models. In plain English, that means your RC car has a much better chance of making a steering decision before it has already introduced itself to a wall.
TensorFlow also gives you optimization options such as quantization, which can shrink model size and improve speed. That matters a lot on a Raspberry Pi, where every frame and every millisecond count. A beautifully accurate model that runs like a sleepy sloth is not an autonomous driving model; it is an expensive suggestion engine.
Raspberry Pi Onboard: The Practical Winner
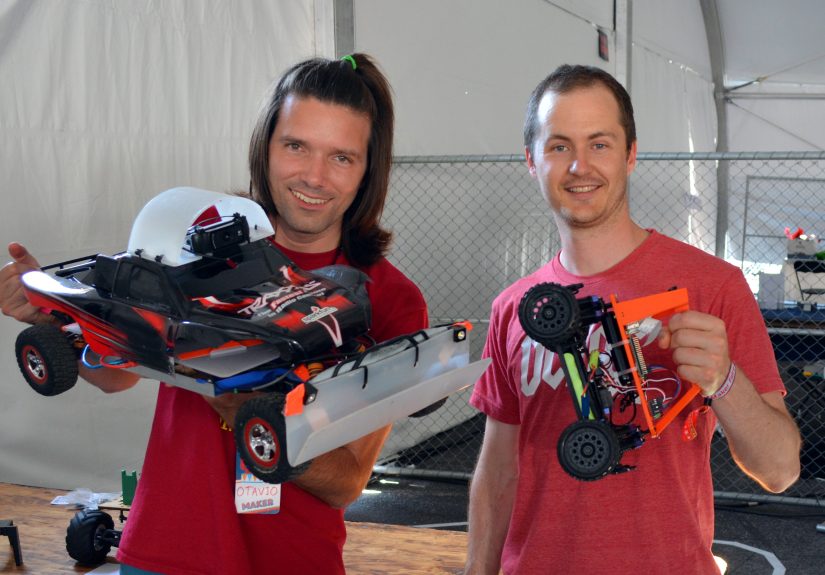
If you want a realistic onboard computer for a self-driving RC car, the Raspberry Pi is the default answer for good reason. It is small, light, inexpensive, well supported by the maker ecosystem, and already widely used in DIY autonomous car platforms. It fits the spirit of the project: capable enough to be useful, limited enough to teach discipline.
Why the Raspberry Pi Works
A Raspberry Pi can handle camera input, run a TensorFlow Lite model, and control steering and throttle in one compact package. For hobby-scale autonomy, that is a great deal. It is also much easier to power from a USB battery pack than a laptop, and mounting it on a 1/10-scale chassis does not make your RC car look like it is hauling office equipment.
For current builds, a Raspberry Pi 5 is usually the better choice if your budget allows it. A Pi 4 can still work, especially for lighter models and lower-speed tracks, but Pi 5 gives you more breathing room for computer vision and inference. That extra headroom matters when you are juggling camera capture, image preprocessing, prediction, and actuator control all at once.
What Else You Need
A Pi alone is not the whole car. A solid build usually includes:
- A wide-angle camera with a stable mount
- An RC chassis with enough room for electronics and battery weight
- A servo/PWM driver board for clean actuator control
- A reliable USB battery or regulated power system
- Cooling, cable management, and enough restraint to avoid “just one more add-on” syndrome
One important detail that beginners often overlook: Linux boards are not always ideal for generating precise timing pulses directly. That is why many builds use a PWM/servo controller board such as a PCA9685-based HAT or driver. It offloads the timing work and helps the Pi focus on the parts that actually require a brain.
How to Make a Pi Build Faster
If your model feels sluggish, do not immediately assume you need bigger hardware. First, reduce image resolution, simplify preprocessing, lower frame rate expectations, and quantize the model. A lean model that sees fewer pixels often outperforms a bloated model that tries to understand every pebble on the floor.
You can also add a Coral USB Accelerator if your project leans into object detection or other heavier inference workloads. That is especially attractive when you want local processing without pushing everything to the cloud. Just remember that Edge TPU deployment prefers fully quantized integer models, so your pipeline has to be designed with that in mind.
MacBook Onboard: Technically Possible, Practically Ridiculous
Now for the fun part. Can you mount a MacBook on an RC car and run TensorFlow onboard? In a pure engineering sense, yes. In the same way that you can eat soup with a wrench, but nobody should call it elegant.
A modern MacBook, especially an Apple silicon model, is excellent for model development, dataset cleanup, experimentation, and training workflows. TensorFlow on Mac has improved substantially, and Apple’s Metal acceleration can make a Mac a comfortable machine for prototyping. If you are collecting data from the RC car and training models in the pit area, a MacBook is a great teammate.
But as literal onboard hardware, the MacBook runs into several issues fast:
- Weight: A laptop is far too heavy for most RC platforms.
- Power: Supplying stable power onboard becomes awkward and inefficient.
- Control I/O: A MacBook does not natively behave like a robotics controller, so you will likely need extra hardware to bridge commands to servos and ESCs.
- Mechanical risk: RC cars crash. Laptops are surprisingly emotional about that.
- Mounting and cooling: “Aerodynamic MacBook sled” is not a respected chassis class.
So the better way to think about a MacBook is this: use it with the car, not as the car. It is fantastic for training, remote monitoring, SSH sessions, model conversion, and debugging. It is not the hardware you want bouncing around on a track like a very expensive roof rack.
The Best Workflow: Train on a Bigger Machine, Drive on the Pi
The most sensible architecture is a split workflow. Collect driving data on the RC car, move that data to your MacBook or desktop, train the model there, convert it for lightweight inference, then deploy the optimized model back to the Raspberry Pi.
This approach gives you the best of both worlds. The bigger machine handles the computationally heavier work, and the onboard device handles real-time driving. That is not just convenient; it mirrors how many real embedded AI workflows operate. The edge device is for inference, not for carrying your entire development environment around like camping gear.
A Typical Training Loop
- Drive the car manually and record camera frames plus steering/throttle values.
- Clean the dataset by removing crashes, bad laps, and weird lighting outliers.
- Train a model in TensorFlow or Keras.
- Evaluate it offline before trusting it with wheels.
- Convert to TensorFlow Lite.
- Apply quantization if needed.
- Deploy to the Pi and test at low speed.
- Repeat until the car stops acting like it learned driving from action movies.
Model Choices: End-to-End, Detection, or Hybrid
You do not have to solve the project with one giant neural network. In fact, many of the best hobby builds are hybrids.
End-to-End Steering Models
This is the classic route: feed camera images into a CNN and predict steering, sometimes throttle too. It is elegant and fun, especially for controlled tracks. It is also sensitive to lighting, camera shifts, and surface changes. Move the camera by half an inch, and your model may suddenly decide the concept of “left” is philosophical.
Object Detection or Sign Recognition
If you want the car to react to cones, stop signs, markers, or pedestrians made of cardboard and optimism, object detection can help. This is where optimized TensorFlow Lite models and optional accelerators become valuable.
Hybrid Computer Vision + ML
This is often the most practical path. Use traditional vision for line following or lane center estimation, and reserve deep learning for trickier perception tasks. Hybrid systems are easier to debug, lighter on compute, and often more robust for hobby tracks. Fancy is fun; stable is faster.
Common Mistakes That Make Smart Cars Look Dumb
Most self-driving RC failures are not caused by “bad AI.” They are caused by sloppy systems engineering.
- Too much speed: If your loop is slow, throttle must be modest.
- Messy data: Bad laps produce bad habits.
- Camera inconsistency: Tiny changes in angle can break performance.
- Ignoring power quality: Brownouts and noisy power make debugging miserable.
- Overcomplicated first builds: Start simple. The car does not need lidar, GPS, and existential awareness on day one.
Which Setup Should You Choose?
Choose Raspberry Pi Onboard If…
You want a practical, affordable, maker-friendly self-driving RC car that can actually be finished and tested without turning into a semester-long hardware opera.
Choose a MacBook for Development If…
You want a comfortable machine for training, debugging, visualization, and model conversion. It is an excellent workstation beside the track.
Choose “MacBook Onboard” If…
You are making a proof-of-concept art piece, a robotics joke with excellent cable management, or a social media post that begins with “I know this was a bad idea, but hear me out.”
Final Verdict
For a real self-driving RC car project, TensorFlow plus a Raspberry Pi is the sensible path. The Pi is small enough to ride onboard, capable enough to run optimized models, and well supported by the maker ecosystem. A MacBook is powerful and useful, but its natural habitat is the workbench, not the chassis. Use it to train the brain, not to become the backpack.
The beauty of this project is that it scales with your ambition. You can start with a simple lane-following model, add quantization, improve control, experiment with sign detection, and gradually build a miniature autonomy stack that teaches real skills. And when it finally makes a clean lap on its own, the feeling is spectacular. It is not just a toy car anymore. It is your tiny, stubborn, hard-earned robot driver.
Extended Experience: What Building One Actually Feels Like
One of the most memorable parts of building a self-driving RC car is how quickly it humbles you. On paper, the project sounds straightforward: camera in, TensorFlow model out, steering command sent, victory music plays. In real life, the first few test runs usually look like the car is late for an appointment and angry at furniture. That is not failure. That is onboarding.
The first surprise is how physical the project feels. You are not just writing code; you are negotiating with camera mounts, batteries, tire grip, servo twitch, and cable placement. Move the camera slightly higher, and the world seen by the model changes. Shift the battery to the rear, and cornering changes. Tighten one bracket too much, and vibrations show up in the video feed like the car drank three espressos. It becomes obvious very quickly that autonomous driving is not just software wearing a fancy name tag. It is a systems problem.
The second surprise is how emotional data collection becomes. You start out thinking you are gathering examples for a model. A few laps later, you realize you are also exposing every inconsistency in your own driving. One lap is smooth, the next is hesitant, and the one after that looks like you were briefly distracted by a butterfly. The model notices. It always notices. That is why experienced builders become almost obsessive about clean laps, repeatable throttle, and controlled tracks. Your car is learning from your habits, including the bad ones you hoped were private.
Then comes the moment when the model works just enough to be dangerous. The car starts holding the line for a few seconds, then drifts wide like it remembered an old grudge. Those partial successes are weirdly motivating. You can feel the project waking up. It is no longer random motion. It is imperfect intention. That is when most builders go from “This is a neat experiment” to “I must now spend an unreasonable amount of time making this tiny car more competent than it has any right to be.”
Running the car on a Raspberry Pi adds another layer of satisfaction because every improvement feels earned. Lowering the resolution, trimming the model, reducing latency, and stabilizing PWM output are not glamorous changes, but they make the car noticeably better. You learn to respect efficient engineering. A smaller, faster model often beats a larger, fancier one because real-time control rewards discipline more than ego.
And if you try the MacBook route for development, you learn a complementary lesson: powerful computers are wonderful for training and analysis, but robotics punishes anything that is physically awkward. The contrast becomes very clear. The MacBook is the strategist. The Raspberry Pi is the field operator. One belongs at the workbench; the other belongs on the vehicle.
By the end of the project, the best part is not even the clean autonomous lap, though that moment absolutely rules. The best part is that you begin to see every autonomous machine differently. You understand why latency matters, why data quality is everything, why “just add AI” is not a real engineering plan, and why a tiny car on a taped track can teach lessons that scale far beyond the hobby table. It starts as a fun experiment. It ends as a real education with wheels.


