
Table of Contents >> Show >> Hide
- Before You Start: The “Make It Stick” Prep (5–10 Minutes)
- Way #1: Star Stickers & Decals (Fastest, Cleanest, Most Forgiving)
- Way #2: Nail Stamping Stars (Sharp Lines, Infinite Patterns)
- Way #3: Hand-Painted Stars (Brush + Dotting Tool = Tiny Magic)
- How to Make Star Nail Art Last Longer (Without Babying Your Hands)
- Real-World Experience Notes: What You’ll Notice After You Try These (About )
- Conclusion
Star nails are the nail-art equivalent of throwing on sunglasses: instantly cool, weirdly confidence-boosting, and capable of making even a plain outfit look like you planned a whole vibe.
The best part? You don’t need a salon appointment or the steady hands of a brain surgeon. With the right approach, you can get crisp little stars, dreamy constellations, or full-on galaxy glam at home.
In this guide, you’ll learn three reliable methodsstickers/decals, stamping, and hand-painted starsplus prep and longevity tips that keep your stars looking shiny instead of… emotionally distressed.
Before You Start: The “Make It Stick” Prep (5–10 Minutes)
Most nail art fails for the same reason most diets fail: we skip the boring part and hope vibes will carry us. Prep is what makes star nail art look clean and last.
Quick prep checklist
- Clean nails: Remove old polish and wipe nails to remove oils (oily nails = peeling stickers and patchy polish).
- Shape + smooth: File into your preferred shape, then lightly buff ridges if needed (don’t sand your nail into a crime scene).
- Cuticle cleanup: Gently push back cuticles so stickers and top coat don’t lift at the edges.
- Base coat: One thin layer helps polish grip and reduces staining.
- “Cap” the edge: Lightly swipe the brush along the nail’s free edge (the tip) to help prevent early chipping.
Once your base is down, apply your background color (or sheer nude) and let it dry/cure fully. Star nail art is cute. Star nail art that smears because you touched it too soon is a tragedy.
Way #1: Star Stickers & Decals (Fastest, Cleanest, Most Forgiving)
If you want star nail art that looks deliberate without requiring a personal mentorship from a professional nail artist, stickers are your best friend.
They’re perfect for minimal “sprinkle” looks, accent nails, and constellation vibes.
What you’ll need
- Star nail stickers/decals (flat stickers are easiest; 3D stars/gems are extra but adorable)
- Tweezers (optional, but they save your sanity)
- Top coat (regular or gel top coatuse what matches your mani)
Step-by-step: sticker stars that don’t peel by tomorrow
- Start on fully dry polish. If your base color is still soft, the sticker can slide or lift later.
- Plan placement first. Hover the sticker over the nail to “audition” the look before you commit.
- Apply with light pressure. Place the sticker, then smooth outward so there are no bubbles or curled edges.
- Seal it like you mean it. Apply a top coat over the entire nail, including the sticker. For longer wear, do two coats.
- For gel manis: If you have it, a thin clear “structure” layer (like builder/structure gel) over stickers can help encapsulate details before top coat.
Design ideas that look expensive (but aren’t)
- Minimal star sprinkle: One tiny star near each cuticle on a sheer nude base.
- Accent constellation: Add 3–6 micro stars and connect them with faint dots (a toothpick or dotting tool works).
- French + star: Classic French tips with one metallic star on the ring finger.
- “Starry night” topper: Use a dark base (navy/black), then apply small stars near the tip like a night sky gradient.
Pro tips for sticker longevity
- Press edges down hard. The corners are where lifting begins.
- Keep lotion/oil off for a bit. Oils can weaken the seal right after application, so give your mani some time to fully set.
- Use a thicker top coat for 3D pieces. If your stars are raised (or have rhinestones), a “plump” gel-effect top coat helps lock them in.
Way #2: Nail Stamping Stars (Sharp Lines, Infinite Patterns)
Stamping is the cheat code for detailed nail art. You can get super crisp starstiny, perfect, repeatablewithout drawing each one by hand.
Once you learn the rhythm, it’s fast. (The rhythm is: move quickly, don’t overthink, and don’t panic.)
What you’ll need
- Stamping plate with star designs
- Stamper + scraper
- Stamping polish (highly pigmented and designed to pick up cleanly)
- Base color polish + top coat
- Polish remover + cotton pads and a small cleanup brush
Step-by-step: clean star stamps
- Prep the nail. Apply your base color and let it dry/cure fully.
- Apply stamping polish to the design. Cover the star engraving with a generous swipe.
- Scrape at an angle. Use the scraper at about a 45-degree angle to remove excess polish in one quick pass.
- Pick up the design fast. Roll the stamper over the design with light, even pressure.
- Transfer to the nail. Align and roll the stamper onto the nail to “print” the stars.
- Clean up. Use remover and a small brush around the edges.
- Seal the deal. Apply top coat gently to protect the stamped design.
Troubleshooting (because stamping has opinions)
- The star won’t pick up: Plate may have residue; clean it. Also check if you’re using true stamping polish.
- The design looks patchy: Try a firmer roll, a faster pickup, or a slightly thicker polish formula.
- Everything dries too fast: Work in smaller sections and keep tools ready before you open the polish.
- Smearing with top coat: Float the top coat lightly instead of pressing hard; let the brush “glide” to avoid dragging the design.
Stamped star designs you can do immediately
- Micro-star galaxy: Black base + silver/white stars + a shimmer top coat.
- Gold-star neutral: Sheer beige base + gold stars on two accent nails.
- Layered constellations: Stamp tiny stars first, then stamp a second layer in a different color slightly offset for dimension.
Bonus technique: “reverse stamping” (sticker-style stamped stars)
If you want multi-colored stars without painting inside tiny shapes on your nail, reverse stamping is a fun upgrade:
stamp the design onto the stamper, color it in while it’s on the stamper, let it dry, then lift and apply it like a decal.
It’s a little arts-and-crafts… in the best way.
Way #3: Hand-Painted Stars (Brush + Dotting Tool = Tiny Magic)
Hand-painted stars sound intimidating, but you don’t need to draw a perfect five-point star every time. Nail stars can be stylized:
little twinkles, simple outlines, or abstract starbursts. The goal is “cute celestial,” not “NASA blueprint.”
What you’ll need
- Thin liner/detail brush (or a nail art pen)
- Dotting tool (or a toothpick in a pinch)
- Opaque polish for stars (white, metallic, or bright color)
- Top coat
- Optional: striping tape or nail stencil for crisp negative-space stars
Option A: The easy “twinkle star” (fast + forgiving)
- Make a dot. Add a small dot of star color where you want the star.
- Pull tiny rays. With a thin brush (or toothpick), drag outward from the dot in 4 directions to create a simple twinkle: up, down, left, right.
- Add diagonals (optional). For a fuller “sparkle,” add two more smaller rays diagonally.
- Repeat with variety. Mix tiny twinkles with one or two larger ones to make it look intentional.
Option B: A simple five-point outline star (the “connect the dots” method)
- Place five guide dots. Lightly dot where each star point will belike a little circle of five dots.
- Connect in one continuous path. Draw lines connecting every other dot (you’re basically drawing the classic star shape you learned in school).
- Thicken carefully. If you want a bolder star, trace the lines once more after the first pass dries.
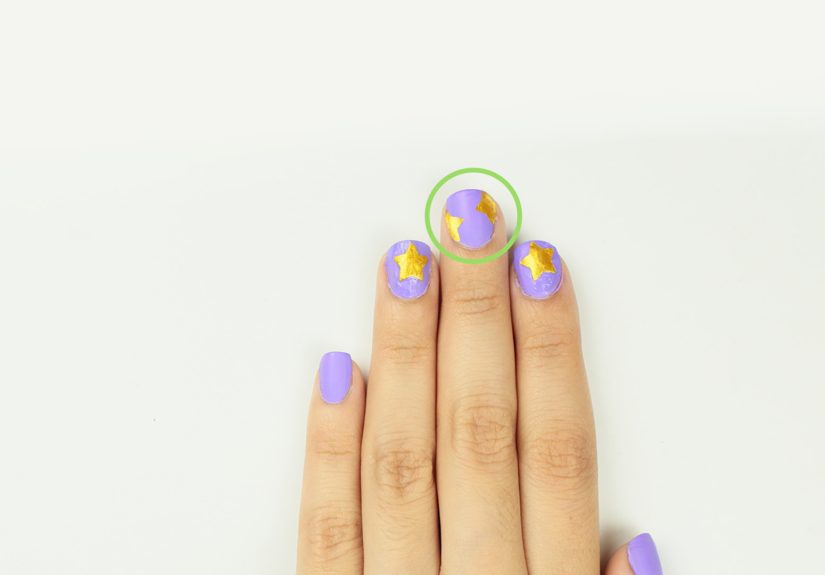
Option C: Crisp negative-space stars with tape/stencil
- Paint your base. Let it dry completely.
- Place a tiny star stencil (or carefully cut tape). Press edges down firmly.
- Sponge or brush color over it lightly. Thin layers help prevent seepage under the edges.
- Peel before fully dry. Lift carefully for sharp edges.
- Top coat. Seal it so the crisp lines stay crisp.
How to Make Star Nail Art Last Longer (Without Babying Your Hands)
You shouldn’t have to live like a Victorian aristocrat (“I can’t wash dishes; my stars are curing”) to keep your manicure intact.
Try these practical longevity moves:
- Use thin layers. Thick polish can wrinkle, dent, or take forever to dry.
- Cap the free edge. This tiny swipe at the tip helps reduce tip wear and chips.
- Reapply top coat mid-week. One extra layer 3–4 days later can refresh shine and reinforce edges.
- Gloves for wet chores. Water + detergent is basically a breakup text to your top coat.
- Don’t flood the cuticle. Polish and top coat should not pool at the baselifting starts there.
Real-World Experience Notes: What You’ll Notice After You Try These (About )
Let’s talk about what actually happens when you do star nail art at homebecause “simple DIY” on the internet sometimes means
“simple if you have unlimited patience and the hands of a tiny robot.” The good news is that star nails are one of the most forgiving designs out there.
Even when something goes slightly sideways, it can still look intentional. (The secret is that stars are supposed to be a little scattered and whimsical.
Congratulations: chaos is suddenly a feature.)
If you start with stickers, you’ll probably have an immediate moment of joy: “Wait… that’s it?” Yes, that’s it.
The most common learning curve is realizing that placement matters more than quantity. One perfectly placed star near the cuticle can look editorial,
while twenty stars can look like your nails joined a middle-school scrapbook club. Minimalism wins hereat least at first.
You’ll also notice that stickers behave best on a smooth, fully dry base. If your polish is even slightly soft, the sticker may shift or wrinkle when you top coat,
which is nail-art heartbreak in HD.
With stamping, your first attempt may be a little dramatic. People often press too hard (squishing the design) or move too slowly (letting the polish dry on the plate).
Once you find the speedapply, scrape, pick up, transferit suddenly clicks and feels like magic printing for your fingertips.
A funny thing happens after that: you become picky. You’ll start noticing how crisp the stars look and you’ll want everything crisp forever.
That’s when you experiment: layered colors, gradients, tiny constellations, maybe even a matte top coat over glossy stars for contrast.
Also, stamping teaches you discipline with cleanup. Keeping plates and tools clean isn’t glamorous, but it’s what makes the next design come out sharp.
Hand-painted stars are the most “art class” of the threeand that’s not an insult. You’ll feel yourself getting better in real time.
The first twinkle star might look a little lopsided, but by the fourth nail you’ll have a rhythm.
The trick is not aiming for perfection; aim for consistency. If all your stars share a similar style (thin rays, same polish opacity, similar scale),
the look reads cohesive even if one star is slightly… emotionally expressive.
This method also lets you customize like crazy: chunky stars on thumbs, micro stars near cuticles, or a single oversized star on an accent nail.
Across all three methods, the biggest “I didn’t know that mattered” discovery is how much top coat technique affects the final look.
A gentle, floating top coat preserves detail. A rushed, heavy-handed swipe can smear stamping or catch sticker edges.
Once you get that down, star nails go from “cute DIY” to “why does this look like a salon set?” And that, honestly, is the whole point.
Conclusion
Star nail art is one of the easiest ways to make your manicure look thoughtful, trendy, and funwithout requiring advanced skills.
Go with stickers for instant results, stamping for crisp repeatable designs, or hand-painted stars when you want full creative control.
Whichever method you choose, strong prep and smart sealing will keep your stars shining longer than your motivation to do dishes.


