
Table of Contents >> Show >> Hide
- Why Easy Teddy Bears Are Such a Great Beginner Project
- Before You Start: Choose the Right Materials
- Way 1: Make a Hand-Sewn Felt Teddy Bear
- Way 2: Sew a Simple Two-Piece Fleece Teddy Bear
- Way 3: Make a No-Sew Sock Teddy Bear
- Way 4: Crochet a Beginner Teddy Bear
- How to Make Any Easy Teddy Bear Look Better
- Common Mistakes Beginners Make
- Real-Life Experiences with Making an Easy Teddy Bear
- Conclusion
- SEO Tags
If you have ever looked at a teddy bear and thought, “That looks adorable, but my sewing skills are held together by hope and one bent needle,” good news: you can still make one. In fact, there are several easy ways to create a teddy bear at home, whether you prefer hand sewing, machine sewing, no-sew crafting, or crochet. The trick is not finding the fanciest method. The trick is picking the one that matches your patience level, your supplies, and your willingness to wrestle with fluffy fabric on a Tuesday night.
This guide walks through four beginner-friendly ways to make an easy teddy bear. You will learn what materials work best, which method fits your skill level, and how to avoid the classic mistakes that turn a sweet teddy into a vaguely haunted potato. We will also cover simple finishing ideas, safety tips, and real-life crafting experiences that make the whole project feel a lot more doable.
Why Easy Teddy Bears Are Such a Great Beginner Project
An easy teddy bear project gives you a little bit of everything: cutting, shaping, stuffing, and finishing. Unlike a shirt or pair of pants, a teddy bear does not care if your seam is not perfectly runway-ready. Bears are forgiving. In fact, a tiny wobble often adds character. One crooked smile later, and suddenly your bear looks “quirky” instead of “slightly wonky.” That is the magic of handmade charm.
Easy teddy bear patterns are also flexible. You can make one from felt, fleece, cotton, socks, or yarn. You can keep it flat and simple or go full grandparent-heirloom mode. You can personalize the face, add a ribbon, use scraps from an old baby blanket, or make one from a favorite shirt for a memory keepsake. The project can be fast, affordable, and surprisingly meaningful.
Before You Start: Choose the Right Materials
Best fabrics for an easy teddy bear
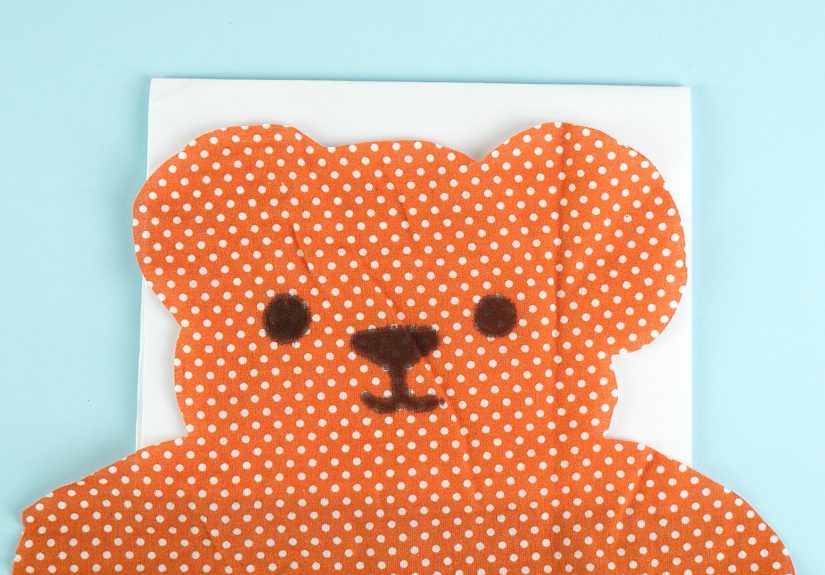
Felt is the easiest choice for many beginners because it does not fray much, cuts cleanly, and behaves nicely during hand sewing. If you want a simple hand-stitched teddy bear, felt is your polite, well-mannered friend.
Fleece or plush fabric makes a softer, cuddlier bear. It feels more like a classic stuffed animal, but it can stretch and shift while sewing. In other words, it is cute but occasionally dramatic.
Cotton fabric is easy to find and works well for printed or patchwork-style bears. It is less fluffy than fleece, but it is great if you want a bear with a playful pattern.
Socks are perfect for a no-sew or low-sew teddy-style project. They already have stretch, shape, and softness, which means they do a surprising amount of the heavy lifting for you.
Yarn is the go-to material for a crochet teddy bear. If you are comfortable making basic stitches, this option gives you a compact, durable, giftable little bear with lots of personality.
Stuffing and facial features
Use polyester fiberfill or similar toy stuffing to keep the bear soft and light. Stuff the smaller areas first, like the paws or head, before finishing the body. That makes it easier to shape the bear and avoid lumpy corners.
For the face, embroidery is usually the safest and simplest option. Safety eyes can look polished, but if the teddy bear is for a small child, embroidered eyes and nose are usually the better move. Buttons may look charming, but they are not a smart choice for little ones who still believe everything is secretly a snack.
Way 1: Make a Hand-Sewn Felt Teddy Bear
Why this method is easy
This is one of the best ways to make an easy teddy bear if you are brand new to crafting. Felt holds its shape well, the edges stay tidy, and you can sew the whole project by hand. No sewing machine. No panic. No late-night arguments with bobbin thread.
What you need
Two pieces of felt, paper for a simple teddy bear template, scissors, pins or clips, embroidery floss or strong thread, stuffing, and a needle. Optional extras include a ribbon, tiny felt patches, and blush for the cheeks if you want your bear to look like it has been complimented recently.
How to make it
Start by drawing or printing a very basic teddy shape: rounded head, small ears, plump body, and stubby arms and legs. Trace the pattern onto felt twice and cut out both pieces.
If you want details such as eyes, nose, mouth, or a belly patch, sew or glue them onto the front piece before joining the body. Doing this first is much easier than trying to decorate a stuffed bear that is already three-dimensional and silently judging you.
Next, place the two body pieces together and stitch around the edge with a blanket stitch or whipstitch, leaving a small opening near the side or bottom. Add stuffing little by little. Do not overstuff right away. A teddy bear should feel cuddly, not like a stress ball with ears.
Once you are happy with the shape, close the opening with the same stitch. Tie off the thread securely, trim the end, and add a ribbon around the neck if you want a classic teddy look.
Best use for this style
A felt teddy bear is perfect for craft nights, handmade gifts, classroom projects, and beginner sewing practice. It is also excellent if you want a flatter bear that works as nursery decor or a keepsake ornament.
Way 2: Sew a Simple Two-Piece Fleece Teddy Bear
Why this method is easy
If you want your teddy bear to feel more like a real plush toy, fleece is a great option. Many beginner plush patterns use only two or three main pieces, which keeps the sewing manageable. This method is ideal for people who want a cuddly result without diving into advanced toy construction.
What you need
Fleece or minky-style fabric, a simple teddy bear pattern, pins or clips, a sewing machine or hand needle, stuffing, scissors, and embroidery thread for the face.
How to make it
Cut two mirrored teddy body pieces using your pattern. Put the pieces right sides together, pin them, and sew around the edge with a small seam allowance. Leave an opening large enough to turn the bear right side out and add stuffing later.
After sewing, clip the curves carefully so the rounded areas turn smoothly. Turn the bear right side out through the opening. Use a chopstick, pencil eraser end, or similar blunt tool to gently push out the ears and arms. Gently is the keyword here. We are shaping a bear, not launching a rescue mission.
Stuff the head and limbs first, then the body. This helps the final shape look even and balanced. Once stuffed, close the opening with a ladder stitch for a neat finish. Embroider the eyes and nose, or attach child-safe features if the bear is for display rather than play.
How to make it look better fast
Use fleece with a little stretch for softness, but do not choose an extremely slippery fabric on your first try. Keep the face simple. Two tiny curved eyes and a triangle nose can do a lot of heavy lifting. If you are adding blush, go lightly. You want “sweet teddy,” not “bear just ran a 5K.”
Way 3: Make a No-Sew Sock Teddy Bear
Why this method is easy
This is the easiest teddy-inspired method for people who want a cute result with minimal tools. No-sew sock animals are popular because a single sock already gives you a soft tube shape. With stuffing, rubber bands or string, and a few decorative touches, you can make a bear-like stuffed toy in less time than it takes to choose a movie.
What you need
A clean sock, polyester stuffing or rice for weight if desired, rubber bands or strong string, felt scraps, glue suitable for fabric crafts, scissors, and optional ribbon.
How to make it
Fill the sock with stuffing until it is plump but still squeezable. Tie or band off the top. Shape a head by wrapping another band around the upper section. Then divide the lower area slightly to suggest a body. For ears, pinch the top corners and secure them with small bands or stitches. Even without a perfect pattern, the basic teddy silhouette starts to appear surprisingly fast.
Cut a small oval or muzzle shape from felt and glue it to the front. Add a tiny felt nose and either embroidered or drawn eyes if the bear is decorative. You can also tie a ribbon around the neck to hide the band and make the whole thing look more polished.
This method works especially well for craft sessions with older kids, gift toppers, dorm-room decor, and holiday projects. It is not the most heirloom-level option, but it is fun, fast, and delightfully low-pressure.
When to choose this style
Pick the no-sew sock teddy bear if you need a quick project, want to use household materials, or simply cannot face threading a needle today. We all have those days.
Way 4: Crochet a Beginner Teddy Bear
Why this method is easy
If you already know basic crochet, a beginner teddy bear is a fantastic next step. Many amigurumi-style bears rely on simple stitches, repeated rounds, and a small amount of shaping with increases and decreases. The finished bear is compact, customizable, and extremely giftable.
What you need
Worsted-weight yarn or plush yarn, a crochet hook in the recommended size, stuffing, tapestry needle, stitch marker, and embroidery floss or safe toy eyes if appropriate.
How to make it
Most crochet teddy bears begin with a magic ring and use single crochet in continuous rounds. You will typically make the head, body, arms, legs, and ears separately, then stuff and sew them together. That sounds like a lot, but each piece is small and repetitive, which makes the process easier than it first appears.
If you are a beginner, use smooth yarn in a medium color so you can see your stitches clearly. Dark fuzzy yarn may look magical in the final photo, but while you are learning, it can feel like counting stitches in a thunderstorm.
Keep the design simple: rounded body, small ears, short limbs. A scarf or bow can hide tiny imperfections and make the bear look intentionally styled. Crochet bears are especially good for baby gifts, shelf decor, and keepsakes because they travel well and hold their shape nicely.
Who should choose this method
This method is best if you prefer yarn crafts to sewing, enjoy repetitive handwork, or want a portable project you can work on while listening to music, watching TV, or pretending you are “just resting your eyes” with a crochet hook in your hand.
How to Make Any Easy Teddy Bear Look Better
Keep the face simple
Beginners often overcomplicate the face. Resist the urge. Small eyes, a neat nose, and a tiny mouth are usually enough. A simple face looks classic and sweet.
Use stuffing gradually
Add a little stuffing at a time and shape as you go. Too much stuffing too quickly can distort seams and create odd bulges. That is how your teddy gets a forehead with opinions.
Choose a manageable size
Small to medium bears are usually easier for beginners than giant plush projects. A modest size means less fabric, less stuffing, and less time fixing things.
Hide imperfections with accessories
Ribbons, scarves, tiny patches, bows, and contrast belly pieces can make a basic teddy bear look thoughtfully designed. This is one of crafting’s greatest life lessons: a well-placed bow fixes more than you would think.
Common Mistakes Beginners Make
Making the pattern too complicated: Start with basic shapes and few pieces.
Choosing tricky fabric first: Super fluffy faux fur looks amazing, but it can be frustrating for a first project.
Using unsafe embellishments for young children: Embroidery is usually safer than loose buttons or decorative beads.
Skipping test placement: Before sewing facial features permanently, place them lightly and step back. A one-inch shift can change “adorable bear” into “bear that knows your secrets.”
Rushing the finish: Neat closure stitches and well-shaped stuffing make a big difference in the final result.
Real-Life Experiences with Making an Easy Teddy Bear
The first time many people make a teddy bear, the result is rarely perfect, and that is part of the fun. One beginner crafter might start with felt because it seems safe and manageable, only to discover that the face takes longer than the body. Suddenly, twenty minutes are spent deciding whether the eyes should be cheerful dots or tiny sleepy curves. The bear itself comes together quickly, but the expression becomes a full artistic crisis. By the end, though, that little handmade face is exactly what makes the bear memorable.
Another common experience happens with fleece. At first, it feels wonderfully soft and professional. Then it starts sliding around while being sewn, and the maker realizes the fabric has its own personality. The ears may come out slightly uneven. One arm might seem just a little more enthusiastic than the other. Still, once the stuffing goes in and the neck ribbon is tied, the whole project transforms. What looked imperfect flat on the table suddenly looks warm, cuddly, and intentionally charming.
The no-sew sock version tends to create the most pleasant surprise. People often expect it to look childish or temporary, but when the sock is soft, the stuffing is shaped well, and the face is simple, it can turn out incredibly cute. This method also brings out creativity fast. Someone making one bear often ends up making three more: one with floppy ears, one with a plaid ribbon, and one that somehow turns into a “bear-ish creature” that still gets adopted immediately by a child or friend.
Crochet teddy bears create a different kind of experience. They are slower, but also calming. Many crafters describe the process as relaxing once the pattern rhythm starts to make sense. You do a few rounds, check the shape, add stuffing, and gradually watch a bear appear out of what was recently just yarn and optimism. There is a special satisfaction in sewing on the tiny ears and seeing the whole personality click into place.
Perhaps the most meaningful experience comes when the teddy bear is made from something personal: an old baby blanket, a parent’s flannel shirt, or leftover fabric from a nursery project. In those cases, the bear becomes more than a craft. It becomes a keepsake. The seams matter less. The small asymmetries matter less. What matters is that the finished bear carries a memory with it.
That is really the secret of an easy teddy bear. It is not just about making a stuffed toy. It is about making something with your hands that feels personal, comforting, and a little bit joyful. Even if your first bear is imperfect, it still becomes proof that you made something real. And the second bear is almost always better. The third one? That is usually when people start saying dangerous things like, “Maybe I should make a whole bear family.”
Conclusion
If you want to make an easy teddy bear, you have more than one good option. A felt teddy bear is perfect for hand sewing and beginner confidence. A fleece bear gives you that classic soft plush feel. A no-sew sock bear is fast, budget-friendly, and fun. A crochet teddy bear works beautifully for anyone who prefers yarn to fabric. There is no single best method. The best method is the one you will actually finish.
Start simple. Keep the face sweet. Use materials that cooperate instead of fight back. Most of all, let the project be fun. Handmade teddy bears do not need factory perfection to be lovable. Sometimes the tiny quirks are exactly what make them impossible to forget.


