
Table of Contents >> Show >> Hide
- Why Plastic Bags Work Surprisingly Well as Decorative Material
- Before You Start: Prep the Bags the Right Way
- How To Make Plastic Bag Decorations That Actually Look Good
- Design Tips That Make DIY Plastic Bag Décor Look Better
- Mistakes To Avoid
- Where To Use Plastic Bag Decorations
- What I Learned From Actually Making Decorations Out of Plastic Bags
- Conclusion
If you have a drawer, cabinet, or mysterious bag-of-bags situation that opens like a clown car every time you touch it, congratulations: you already own craft supplies. Plastic bags may not look glamorous at first glance, but with a little folding, cutting, twisting, and sheer creative audacity, they can become flowers, garlands, wreaths, pom-poms, seasonal party décor, and surprisingly charming little accents for your home.
The secret is to stop looking at plastic bags as bags and start looking at them as material. They are lightweight, flexible, colorful, easy to cut, and gloriously inexpensive because, well, they are already in your house plotting their takeover. When reused thoughtfully, they can become playful decorations for parties, holidays, kids’ rooms, porches, gift wrapping, and even everyday home styling.
This guide walks you through the smartest ways to turn plastic bags into decorations that actually look intentional, not like your recycling bin wandered into the living room. We’ll cover how to prep the bags, which techniques work best, what kinds of décor you can make, and how to avoid the common mistakes that make DIY projects look more “yard sale at 7 a.m.” than “wow, you made that?”
Why Plastic Bags Work Surprisingly Well as Decorative Material
Plastic bags have a few traits that make them unexpectedly useful for DIY décor. First, they hold shape better than tissue paper but remain easier to manipulate than cardboard or hard plastic. Second, they come in a range of colors, opacities, and finishes, which means you can mix glossy white shopping bags with translucent produce bags or bold store-logo bags for contrast. Third, they can be braided, looped, scrunched, folded, or cut into strips to create texture.
That texture is the real magic. A puffed plastic bag can mimic a flower petal. Thin strips can act like ribbon. Loops can become fringe. Braided strands can be wrapped around wreath forms or used as garlands. Cut the material into continuous strips and you can even make plarn, or plastic yarn, which opens the door to crocheted or woven decorative pieces.
In other words, plastic bags are not glamorous on the hanger, but they clean up nicely.
Before You Start: Prep the Bags the Right Way
1. Clean and dry them completely
If the bags were used for groceries, give them a gentle wash with hot, soapy water and let them dry fully before crafting. This step matters. Damp bags are harder to cut neatly, harder to glue, and way more likely to smell like a forgotten onion, which is not the vibe for a festive wreath.
2. Sort by color, thickness, and texture
Not all plastic bags behave the same way. Thin produce bags work well for layered flowers and airy bows. Thicker grocery bags are better for weaving, spirals, and sturdy garlands. Matte bags create a softer look; shiny bags bring more drama. If you want your decorations to look cohesive, sort first and craft second.
3. Trim off bulky seams and handles
For many projects, especially flowers and plarn, the bottom seam and handles get in the way. Flatten the bag, trim those areas off, and keep the smooth center section. This makes cutting more accurate and your final project far less lumpy.
4. Keep safety in mind
Plastic melts, so keep your finished decorations away from candles, hot bulbs, radiators, and any other heat source that seems eager to ruin your afternoon. If you want glowing décor, use battery-powered LED lights only.
How To Make Plastic Bag Decorations That Actually Look Good
Plastic Bag Flowers
Flowers are one of the easiest and prettiest ways to reuse plastic bags. They work as bouquet fillers, wreath accents, napkin-ring toppers, wall décor, and party backdrops. To make them, cut several rounded petal shapes from flattened plastic, stack them, pinch the center, and secure with floral wire, twine, or a small twist tie hidden under tape.
For a fuller bloom, use 8 to 12 layers and vary the petal sizes. For a looser, modern look, keep the petals oversized and slightly asymmetrical. Thin white bags make great peonies or roses, while bright store bags create pop-art blooms that look fun in a craft room or kid’s party setup.
You can also twist long strips into rosettes. Roll the strip from one end, coil it like a cinnamon bun, then pinch the bottom and secure it. Glue several rosettes to a hoop, branch, or wreath form and suddenly your plastic stash looks suspiciously boutique.
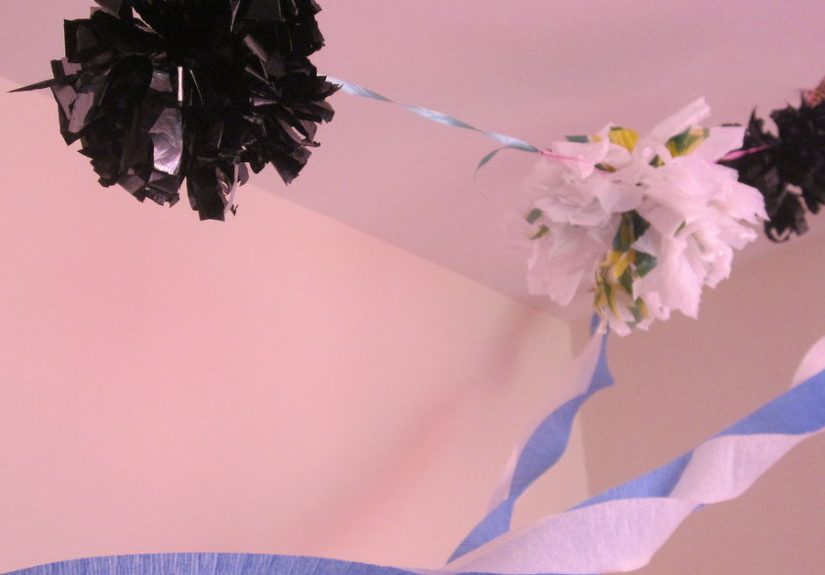
Plastic Bag Garlands and Streamers
If you want maximum visual payoff for minimal effort, garlands are the MVP. Cut bags into strips, loops, circles, or tassels, then tie or thread them onto twine. Alternate colors for a cheerful party look, keep it tonal for something more grown-up, or use metallic gift ribbon in between for a little extra sparkle.
One of the easiest versions is the tassel garland. Cut a bag into long fringe strips, leaving an uncut band at the top. Roll that band around a piece of string and tie it in place. Repeat until you have enough tassels to create a full garland for a mantel, headboard, window, porch railing, or dessert table.
Another smart option is a puff garland. Wad small pieces of plastic into soft puffs and secure them at intervals along a string. It creates a cloud-like texture that works especially well for baby showers, birthday parties, or whimsical bedroom décor.
Pom-Poms and Hanging Puffs
Plastic bag pom-poms are wonderfully ridiculous in the best way. They are light, fluffy, weather-resistant, and oddly festive. Cut multiple bags into strips, stack them, tie them in the center, and fluff each strand outward until the whole thing resembles a cheerleader pom-pom that switched careers and entered interior design.
These are perfect for party ceilings, photo backdrops, playrooms, or outdoor gatherings where paper pom-poms might wilt. Use monochrome pom-poms for a cleaner aesthetic, or go full confetti explosion with mixed colors.
Wreaths and Wall Hangings
A wreath is where plastic bag décor starts looking surprisingly polished. Wrap strips around a wire or foam wreath form, then build on top of that base with flowers, loops, bows, braided strands, or mini tassels. If you want a seasonal look, change the palette: soft pastels for spring, citrus tones for summer, rust and cream for fall, silver and white for winter.
You can also create a wall hanging by tying plastic strips onto a dowel or branch in rows. Think of it as a low-cost woven tapestry without the part where you spend half your life learning loom vocabulary. Vary the strip lengths for a cascading effect, and add beads, jute, or dried twigs if you want the piece to feel more layered.
Seasonal Decorations
Plastic bags shine during holidays because they can be transformed into large, lightweight décor without much cost.
For fall, stuff orange bags or wrap orange strips around a ball of crumpled paper to make pumpkins. Add a wrapped handle or twig stem and a bit of raffia. For Halloween, cut black trash bags like paper snowflakes to create giant spider webs for porches, windows, or walls. For winter parties, use white bags to make snowball garlands or icy-looking wreaths. For birthdays, twist bags into bows, fringe curtains, or oversized faux flowers for a photo area.
The beauty of seasonal plastic bag décor is that it can go big without going broke. You can decorate a whole party corner with materials that were headed for the trash five minutes earlier.
Plarn Decorations
If you want something more durable, turn bags into plarn by cutting them into loops and linking them into one long strand. Once rolled into a ball, plarn can be crocheted, braided, or woven into decorative pieces like coasters, hanging baskets, placemat-style wall art, mini mats for planters, or even sculptural bowls for dry display.
Plarn décor has a more textured, handmade look than smooth folded-bag projects. It works especially well if your style leans boho, eclectic, or crafty in a charming way rather than a minimalist “I own three objects” way.
Design Tips That Make DIY Plastic Bag Décor Look Better
Stick to a color story
If every bag color goes into one project, the result can feel chaotic. Pick two to four colors and repeat them throughout the decoration. White, tan, and green look fresh and natural. Black and orange are perfect for Halloween. Pink, peach, and cream work well for floral pieces.
Mix plastic with better-looking materials
One of the easiest upgrades is pairing plastic with twine, ribbon, beads, branches, dried flowers, cardstock, or fabric scraps. The contrast makes the project feel intentional and helps disguise the fact that your “petals” once carried cereal and toothpaste.
Use repetition
One flower may look like a random experiment. Twelve flowers arranged in a wreath look like décor. Repetition creates visual rhythm, and visual rhythm tells people you did this on purpose.
Go big or go subtle
Plastic bags look best when you either commit to volume or keep the accents small and clean. A giant party garland works. A tiny lonely plastic bow in the middle of your wall does not. Choose statement piece or refined detail; avoid awkward middle ground.
Mistakes To Avoid
Using dirty bags: No one wants décor with mystery crumbs.
Skipping drying time: Moisture makes bags slippery, wrinkly, and harder to assemble.
Over-gluing: Too much glue can create hard lumps and visible strings. Use small amounts and let structure do some of the work.
Ignoring proportions: If your wreath base is large, your flowers and bows should scale up too.
Putting plastic near heat: This is décor, not a science experiment.
Where To Use Plastic Bag Decorations
These projects work especially well in places where lightweight, temporary, or weather-resistant décor makes sense. Try them on party tables, kids’ birthdays, classroom doors, craft rooms, porch rails, laundry rooms, play spaces, and holiday entryways. They are also great for community events, Earth Day projects, or low-budget celebrations where you want cheerful décor without buying a cart full of one-time-use decorations.
If your home style is sleek and modern, use plastic bag decorations sparingly as quirky accents. If your style is colorful, family-friendly, or maximalist, go ahead and let the garland take over the mantel like it pays rent.
What I Learned From Actually Making Decorations Out of Plastic Bags
The first time I tried turning plastic bags into decorations, I fully expected the result to look like a craft emergency. I assumed I would end up with a strange shiny blob, regret my choices, and quietly stuff everything back into the cabinet where bags go to multiply. Instead, I learned something useful: plastic bags are one of those materials that look terrible right up until the moment they suddenly don’t.
My first successful project was a flower garland. Not because I possessed rare artistic genius, but because I ran out of patience before I ran out of bags. I cut a pile of petals in different sizes, layered them, twisted the centers, and strung them together. On the table, they looked like grocery chaos. Once they were hanging across a window, though, they caught the light beautifully. The thin plastic made the flowers look almost translucent, which gave them a floaty, cheerful quality that paper probably wouldn’t have had.
The next lesson was that color matters more than perfection. A slightly uneven flower still looks good if the palette is consistent. But even a carefully made flower can look messy if it includes six random shades plus a pharmacy logo screaming across the petals. Sorting bags before starting saved me more frustration than any fancy tool ever could.
I also discovered that plastic bag decorations reward volume. One pom-pom looks a little sad. Ten pom-poms look like a party. One tassel looks like you lost a bet. A full tassel garland looks playful and intentional. Plastic has a lightweight puffiness that really comes alive when repeated, so I learned to stop judging individual pieces too harshly before seeing the full arrangement.
Another surprise was durability. Paper decorations often droop, wrinkle, or tap out the second humidity enters the room. Plastic bag decorations are much tougher. They can survive a porch party, a child bumping into them, and a suspicious amount of enthusiastic redecorating. That made them especially useful for temporary holiday displays and family events where nothing stays pristine for long anyway.
Of course, not every experiment was a masterpiece. I made one wreath that looked like a salad having a breakdown. I made another project with too much glue, and it hardened into something that could probably survive reentry from space. But those flops taught me to keep shapes simple, mix plastic with nicer textures like twine or ribbon, and let the material do what it wants to do instead of forcing it into a role better suited to silk or paper.
Most of all, the experience changed the way I look at everyday waste. Not every plastic bag deserves a second act as décor, and not every craft idea is worth the trouble. But some of them absolutely are. When you can turn a pile of throwaway material into flowers for a party, a wreath for a door, or a garland that makes a room feel festive, the project feels less like crafting and more like creative problem-solving with scissors.
And honestly, that may be the best part. You are not just making decorations. You are rescuing perfectly usable material from a boring fate and giving it a new job. That is satisfying, a little funny, and far more stylish than a stuffed kitchen drawer full of crinkly regret.
Conclusion
Learning how to turn plastic bags into decorations is really about learning to see possibility in ordinary material. With a little prep and a good eye for color, plastic bags can become flowers, garlands, wreaths, tassels, pumpkins, spider webs, and textured plarn décor that adds personality without costing much. The best projects are simple, repeated, and thoughtfully styled, with enough creativity to transform “trash” into something you would actually want to hang up.
So the next time that overflowing bag stash threatens to avalanche out of the cabinet, don’t panic. That is not clutter. That is a future centerpiece, wreath, party backdrop, or very dramatic pom-pom moment waiting to happen.


