
Table of Contents >> Show >> Hide
- Turn a Few Basic Materials into a Showpiece Floor Lamp
- Why Choose a Concrete and Wood LED Floor Lamp?
- Materials & Tools You’ll Need
- Step-by-Step: How to Build Your Concrete & Wood LED Floor Lamp
- Step 1: Design your proportions
- Step 2: Build and prep the concrete form
- Step 3: Prepare the wood post
- Step 4: Secure the post for the pour
- Step 5: Mix and pour the concrete base
- Step 6: Remove the form and refine the base
- Step 7: Install the LED strip or channel
- Step 8: Wire it safely
- Step 9: Finish the wood
- Step 10: Final assembly and test
- Design, Styling & Placement Ideas
- Safety, Durability & Smart Upgrades
- Budget & Build-Time Snapshot
- Real-World DIY Experiences & Lessons Learned (Extra Insights)
- Conclusion: A Custom Lamp That Earns the Spotlight
Turn a Few Basic Materials into a Showpiece Floor Lamp
If you’ve ever priced a modern concrete and wood LED floor lamp and thought,
“That’s…adorable, but my wallet said no,” this project is for you.
With a bag of concrete mix, a simple wood post, and an LED strip or bar,
you can build a sculptural, minimalist lamp that looks straight out of a
high-end design shopwithout the high-end drama.
This DIY concrete and wood LED floor lamp is sleek, stable, energy-efficient,
and surprisingly beginner-friendly. Think Scandi-meets-industrial: a clean
wooden column rising from a solid concrete base, lit by a warm, continuous
ribbon of LEDs. It works in living rooms, bedrooms, home offices, entryways,
or that weird empty corner you’ve been ignoring for six months.
Below, we’ll walk through the materials, step-by-step build, lighting and
wiring tips, finishing ideas, safety notes, and real-world lessons learned
from makers who’ve poured concrete, wired lamps, and lived to brag about it.
Why Choose a Concrete and Wood LED Floor Lamp?
1. Modern style that behaves like furniture
Concrete brings weight and permanence; wood adds warmth and texture; LEDs
add that sleek modern glow. Together, they create a floor lamp that feels
more like a piece of custom furniture than a random light from a big-box
aisle. The vertical wood element draws the eye up, while the concrete base
anchors the room visually and physically.
2. Stability you can trust
Unlike flimsy metal poles with wobbly feet, a concrete base gives you serious
stability. That’s a win for homes with kids, pets, or a healthy fear of gravity.
Design your base with enough footprint and weight so the lamp won’t tip if
bumpedespecially important with a tall, slim column.
3. LED efficiency and ambience
LED strips or linear LED bars are cool-running, low-profile, and energy
efficient. You get a soft, continuous light line instead of a glaring bulb,
and you can choose warm white for cozy vibes or a tunable strip for mood
lighting. Bonus: they last for tens of thousands of hours, so you’ll forget
what replacing bulbs even feels like.
4. Customizable for any space
Adjust the height, base size, wood species, LED brightness, and finish to match
your style: rustic farmhouse, Japandi, industrial loft, or minimalist “I only
own three objects” aesthetic. This project scales beautifullyfrom a small
accent light to a dramatic 6-foot sculpture.
Materials & Tools You’ll Need
Core materials:
- Quick-setting concrete or standard concrete mix
- Form for the base (melamine box, plastic tub, or DIY form)
- 1 solid wood post or laminated boards (e.g., pine, oak, walnut, or reclaimed wood)
- LED strip or LED channel light (preferably 24V or 12V, good CRI, warm white 2700K–3000K)
- LED power supply/driver compatible with your strip and plug-in voltage
- Quality cord set (grounded if applicable), plug, and inline or foot switch
- Cable management: channel, clips, or routed groove in the wood
Tools & extras:
- Circular saw, miter saw, or handsaw for wood
- Drill/driver and bits
- Chisel or router (for LED channel or wiring groove)
- Mixing bucket, trowel or mixing stick
- Sandpaper (120–220 grit), wood stain or oil, clear sealer
- Level and measuring tape
- Painter’s tape, screws, scrap wood for bracing
- Safety gear: gloves, dust mask, safety glasses
Step-by-Step: How to Build Your Concrete & Wood LED Floor Lamp
Step 1: Design your proportions
Decide on the overall height (commonly 48–70 inches). A good starting point:
a concrete base about 8–10 inches square and 2–3 inches thick, paired with
a 3×3 or 4×4 wood post. Sketch your lamp with rough dimensions, LED placement
(front channel, side slot, or back-glow), and switch location. A few minutes
planning now saves an hour of “why is this cord here?” later.
Step 2: Build and prep the concrete form
Create a leak-proof form from melamine, plywood lined with plastic, or a
sturdy container. Melamine is ideal because it releases cleanly and leaves a
smooth surface. Seal the corners with caulk or hot glue so wet concrete
doesn’t escape. Mark the center or the point where your wood post will sit.
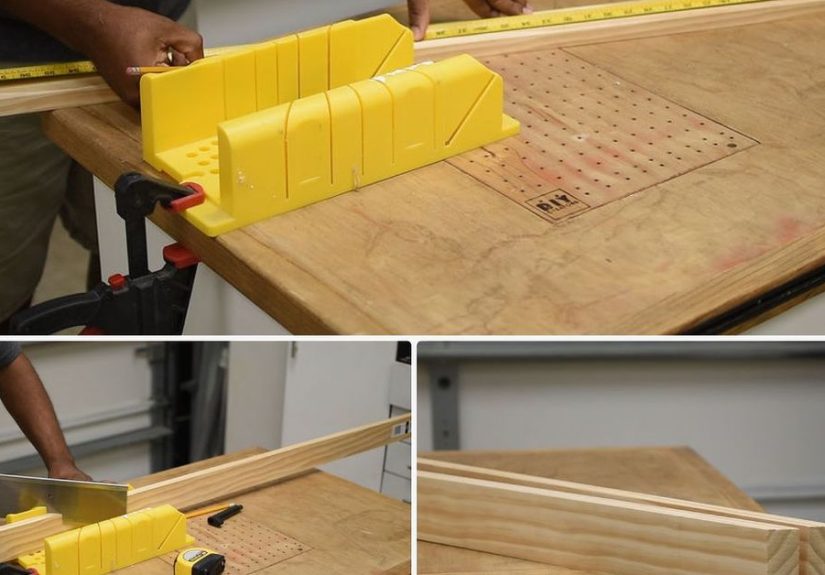
Step 3: Prepare the wood post
Cut your post to length. If you want a recessed LED strip, route or chisel a
shallow channel along one edge sized to fit the LED profile. Dry-fit the LED
channel to make sure it sits flush. Lightly sand the post to remove splinters.
Don’t stain or seal yet; finishing is easier after assembly.
Step 4: Secure the post for the pour
You have two main options:
-
Cast-in method: Stand the post in the form before pouring,
bracing it from all sides so it stays perfectly vertical. This creates a
seamless connection but requires careful alignment. -
Post-bolted method: Embed anchor bolts or sleeves in the
concrete, then bolt the post on later. This makes transport, repair, and
adjustments easier.
Step 5: Mix and pour the concrete base
Mix the concrete to a thick, pourable consistencylike oatmeal that’s had a
responsible amount of water. Pour into the form in layers, tapping the sides
to release air bubbles. If the post is already in place, pour carefully around
it without knocking it off plumb. Use a level to confirm the post is straight.
Let the concrete cure fully according to the manufacturer’s instructions.
Step 6: Remove the form and refine the base
Once cured, remove the screws from the form and gently tap it apart. Sand any
sharp edges with masonry paper. You can:
- Keep the raw industrial look
- Polish lightly for a smoother finish
- Seal with a penetrating concrete sealer for stain resistance
Step 7: Install the LED strip or channel
Attach an aluminum LED channel in the routed groove or along one face of the
post. This helps with heat dissipation and gives a clean, professional look.
Run the LED strip inside the channel according to the manufacturer’s
polarity marks. Leave enough lead wire to route down to the base and out to
the power supply.
Step 8: Wire it safely
For a plug-in lamp:
- Use a UL-listed cord set, switch, and driver rated for your LEDs.
- Follow color coding carefully (hot, neutral, ground where applicable).
- House all connections in appropriate junction boxes or enclosures.
- Never work with the lamp plugged in; test only after all connections are secure.
If you’re not confident with wiring, have a licensed electrician handle this
part. A gorgeous lamp is useless if it’s not safe.
Step 9: Finish the wood
Mask off the LED channel, then sand the wood smooth. Finish with stain,
tinted oil, or a clear matte polyurethane for a natural modern look.
Warm-toned woods like oak or walnut contrast beautifully with cool grey concrete.
Step 10: Final assembly and test
Tidy up the wiring path, secure the driver (often hidden at the back of the
base or underneath), and attach felt pads to protect your floors. Plug in,
hit the switch, and bask in the soft LED glow of something you built with
your own handsand wet concrete splashes.
Design, Styling & Placement Ideas
1. Minimalist corner glow
Place the lamp a few inches from the wall so the LED wash creates a vertical
light column. This trick visually raises the ceiling and makes the room feel
taller and calmerperfect for small apartments.
2. Industrial loft statement
Pair a raw concrete base with a darker stained post and warm white LED.
Position near exposed brick, metal shelving, or leather furniture to nail
that “designer loft” mood without needing the actual loft.
3. Organic modern
Use reclaimed wood with visible grain and a soft natural oil finish. The
contrast between weathered wood and crisp LED light adds character and keeps
the lamp from feeling too cold or minimal.
Safety, Durability & Smart Upgrades
A floor lamp is both decor and electrical appliance, so treat it like both.
Use components rated for indoor use, avoid overcrowding junctions, keep cords
away from pinch points, and periodically check for loose connections or damage.
Add a smart plug or smart switch for voice control and automated schedules:
“Turn on lamp at sunset” feels a lot more luxe when the lamp itself looks custom.
For durability, sealed concrete resists stains and hairline dusting, while a
quality topcoat on the wood protects against scratches and UV fade. If your
lamp sits in a busy traffic zone, make the base slightly wider or heavier for
extra stability.
Budget & Build-Time Snapshot
Most DIYers can build a concrete and wood LED floor lamp over a weekend,
allowing for concrete curing and finish drying. Depending on your choices
reclaimed vs. premium hardwood, basic vs. high-end LED systemyou can often
land well below the price of comparable designer pieces while ending up with
something unique to your home.
Real-World DIY Experiences & Lessons Learned (Extra Insights)
After watching and analyzing multiple builds of concrete and wood LED lamps,
a few patterns show uplittle human moments that don’t always make the
polished tutorial cut but absolutely shape your success.
First: alignment obsession. Many makers admit their first pour left the post
just a bit off-plumb. It doesn’t sound like a big deal until you stand back
and your “minimalist masterpiece” looks like it partied too hard. The fix:
over-brace. Use at least two directions of scrap-wood supports, check with a
level from multiple sides, and recheck five minutes after the pour before the
mix starts to firm up.
Second: underestimating LED quality. A lot of people grab the cheapest LED
strip they can find, only to hate the harsh blue-white cast or see hot spots
instead of a smooth line. Upgrading to a high-CRI warm white strip with a
proper aluminum channel diffuser instantly makes the lamp feel premium. It’s
the difference between “DIY experiment” and “boutique hotel lobby.”
Third: cord regret. Builders often wish they had planned the cord exit more
thoughtfully. A centered exit through the back of the base or a hidden notch
near the floor keeps the look clean and prevents tripping. Think about where
the nearest outlet is before you pour, not after.
Fourth: finishing patience. Real-world DIYers report that rushing the sanding
and sealing is the fastest way to cheapen the overall effect. A quick extra
pass with fine-grit sandpaper, a dust wipe, and a careful coat of oil or
poly on the wood elevates everything. The same lamp with a blotchy, rushed
finish looks like a school project; with a smooth finish, it reads “custom
designer piece.”
Finally, there’s the satisfaction factor. People who’ve built their own
concrete and wood LED floor lamps tend to talk about them more than almost
any other DIY decor project. It’s large-scale enough to feel impressive,
functional enough to use every day, and simple enough that once you’ve done
one, you start sketching variationsa double-post version, a slimmer base,
integrated shelves, color-changing LEDs for movie nights. The project becomes
a gateway into thinking about lighting as something you design, not just buy.
So when someone walks in and says, “Where did you get that lamp?” you get to
smile and say, “Oh, that? I made it.” And honestly, that flex alone is worth
the bag of concrete.
Conclusion: A Custom Lamp That Earns the Spotlight
A DIY concrete and wood LED floor lamp blends design, function, and durability
in one clean silhouette. With thoughtful planning, safe wiring, quality LEDs,
and a bit of patience, you can create a statement piece that anchors your
room, saves energy, and shows off your DIY skills every single time you flip
the switch.
SEO Summary for Publishers
including materials, wiring tips, styling ideas, and safety basics.
sapo:
Learn how to create a modern DIY concrete and wood LED floor lamp that looks
like a designer piece but costs a fraction of retail. This in-depth guide
walks you through planning, pouring a stable concrete base, building and
finishing a sleek wooden column, installing efficient LED lighting, and
styling your lamp for any room. Perfect for Hometalk-style makers who want
custom lighting, real-world tips, and a project that delivers both function
and serious visual impact.


