
Table of Contents >> Show >> Hide
- Why a DIY Electric Fireplace and TV Wall Is So Popular
- Before You Build: Plan the Wall Like a Pro
- Design Ideas That Make the Wall Look Custom
- Tools and Materials You May Need
- Step-by-Step: How to Build a DIY Electric Fireplace and TV Wall
- Common Mistakes to Avoid
- How Much Does a DIY Electric Fireplace and TV Wall Cost?
- of Real-World Experience: What This Project Actually Feels Like
- Final Thoughts
There are home projects that quietly improve a room, and then there are home projects that walk in wearing sunglasses and instantly become the main character. A DIY electric fireplace and TV wall absolutely belongs in the second category. It can turn a plain living room into a polished focal point, hide the visual chaos of wires and devices, add cozy ambiance without hauling in firewood, and make the whole space look more expensive than your budget may care to admit.
That said, this project lives at the intersection of design dreams and “measure twice, cut once, then measure again because drywall is forever.” The good news is that a fireplace TV wall is one of the most achievable statement builds for a confident DIYer. Electric fireplaces are far easier to work with than wood-burning or gas units, and many models are designed for wall-mount or recessed installation. With the right plan, you can build a clean, custom-looking feature wall that feels intentional rather than like a television happened to drift over a heater and set up camp.
This guide walks through how to plan, build, and finish a DIY electric fireplace and TV wall that looks great, works safely, and does not leave you staring at a crooked screen while questioning your life choices.
Why a DIY Electric Fireplace and TV Wall Is So Popular
The appeal is easy to understand. First, an electric fireplace gives you the look of a fire without venting, chimney work, gas lines, or the maintenance that comes with traditional fireplaces. Second, a TV wall creates a natural focal point for a living room, basement, bedroom, or bonus room. Put the two together, and you get style, warmth, and function in one tidy package.
It is also a flexible design feature. You can go modern with a slim linear firebox, dark paint, and flat-panel built-ins. You can go farmhouse with painted shiplap and a chunky wood mantel. You can go dramatic with tile, stone veneer, fluted wood, or a plaster-look finish. In other words, this project can look sleek, rustic, cozy, minimal, or “I definitely have my life together,” even when your junk drawer says otherwise.
Before You Build: Plan the Wall Like a Pro
Choose the Right Electric Fireplace Type
Not all electric fireplaces install the same way. Some are wall-mounted and hang from brackets, while others are recessed or partially recessed into a framed opening. If you want that built-in custom look, a recessed unit is usually the better choice. If you want a faster install with less framing depth, a wall-mounted model can still look sharp, especially on a bump-out feature wall.
Pay close attention to the manufacturer’s installation instructions before you buy. That sounds obvious, but this is where many DIY plans go sideways. Some fireplaces need specific framing dimensions, fresh-air space, or minimum clearances above the unit. Others have heat vents at the front rather than the top, which affects how close a TV or mantel can sit above the firebox. Translation: the model you choose determines the wall you build, not the other way around.
Decide Whether You Need a Bump-Out Wall
A bump-out wall, sometimes called a chase wall, is one of the smartest ways to handle this project. Instead of carving into an existing wall and hoping there are no surprises hiding inside, you build a shallow framed wall in front of the original one. This makes it easier to run power, conceal low-voltage cables, create a recessed TV niche, and install the fireplace with a more polished finish.
A bump-out can also improve proportions. If your room has a large blank wall, a feature wall adds depth and weight so the fireplace and TV feel built in rather than stuck on. In small rooms, keep the bump-out shallow so it adds style without eating all your floor space.
Think About TV Height Early
One of the biggest mistakes with a fireplace TV wall is mounting the television too high. It may look dramatic, but your neck will file a formal complaint during movie night. If you are placing the TV above the fireplace, it helps if the firebox sits relatively low on the wall. A tilt mount can also improve comfort. In some rooms, the best move is a slightly smaller TV paired with better viewing height rather than a giant screen mounted near the ceiling like a sports bar.
Plan the Electrical Setup
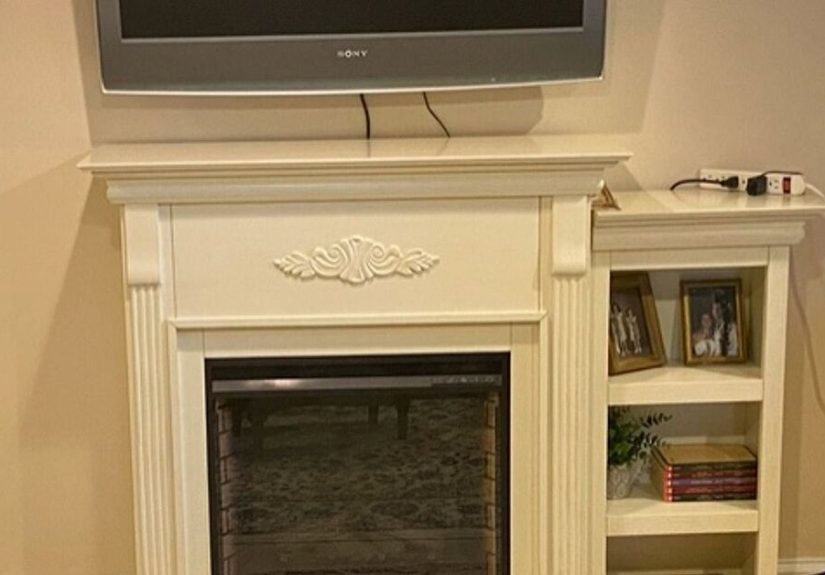
This is the part where design meets reality. Most electric fireplaces should be plugged directly into a wall outlet or installed according to the manufacturer’s hardwiring instructions. Extension cords and power strips are not the move here. Your TV and fireplace should also have their own properly planned power access. If your wall does not already have outlets where you need them, adding outlets may be part of the project.
Also plan for low-voltage cable routing for HDMI, streaming boxes, soundbars, or gaming consoles. A beautiful wall loses some sparkle when a spaghetti curtain of cords is hanging underneath it.
Design Ideas That Make the Wall Look Custom
A successful DIY electric fireplace and TV wall is not just about getting the hardware in place. It is about making the whole thing look balanced. Here are a few design strategies that work especially well:
- Match widths thoughtfully: A fireplace and TV that feel proportionate to each other create a more intentional design.
- Add built-ins: Shelves or cabinets on one or both sides make the wall feel architectural.
- Use texture: Shiplap, slatted wood, tile, stone veneer, limewash, or plaster finishes keep the wall from looking flat.
- Include a mantel if it fits your style: A mantel can visually break up the height and soften the big black rectangle effect.
- Paint with purpose: Dark paint can help the TV visually recede, while lighter finishes create a bright, airy focal point.
- Consider a recessed TV niche: This can create a flush, built-in look that feels more high-end.
If you want the TV to blend in more when it is off, designing around it matters. Symmetry, built-ins, and layered finishes do a lot of visual heavy lifting. The goal is for the wall to look like a complete composition, not a TV bolted above a mood heater.
Tools and Materials You May Need
Your exact list depends on the design, but a typical project may include a stud finder, level, drill/driver, miter saw, circular saw, drywall tools, framing lumber, screws, TV mount, outlet boxes, in-wall cable management kit, drywall or paneling, trim, fireplace unit, and your chosen finish materials such as paint, tile, or wood cladding. If you are adding outlets or modifying wiring and you are not comfortable with electrical work, this is an excellent moment to call in a licensed electrician and protect both your wall and your eyebrows.
Step-by-Step: How to Build a DIY Electric Fireplace and TV Wall
1. Mark the Full Layout
Start by mapping everything on the wall with painter’s tape. Mark the fireplace opening, TV location, mantel if you are using one, shelves, and any side cabinets. Step back and look at it from across the room. This is the cheapest design revision you will ever make, so use it. If the TV feels too high, it probably is. If the fireplace looks too small for the wall, it probably is.
2. Locate Studs and Add Structural Backing
Find the wall studs and note their locations. Your TV mount should be attached to studs or proper framing support, not just drywall anchors. If you are building a new bump-out, add solid blocking where the TV mount will go. Think of this as future-you insurance. One day, when you upgrade the TV, you will thank present-you for not leaving mystery hollow spots behind the wall.
3. Frame the Bump-Out or Fireplace Opening
Build the new wall or framed opening according to the fireplace manufacturer’s dimensions. Double-check the rough opening size, required clearances, and whether the unit is zero-clearance on the sides or back. Some models need attention to the top area, air inlets, or finishing material overhang. The framing must support the wall assembly without placing pressure on the fireplace itself.
If you are using side built-ins, frame those at the same time so the overall wall stays symmetrical. Even a simple pair of shallow shelves can make the whole feature look intentional.
4. Add Electrical and Cable Routing
Install or have installed the necessary outlets for the fireplace and TV. Ideally, place the TV outlet behind the screen and the fireplace outlet where the manufacturer specifies. Add low-voltage pass-throughs or cable channels so cords can travel neatly inside the wall assembly. This is also the time to plan for a soundbar, game console, media box, or LED lighting if those are part of your setup.
Do not cut corners here. A clean cable plan is one of the biggest differences between a polished build and one that still looks half temporary. It is hard to feel proud of your “custom media wall” when an extension cord is peeking out like it pays rent there.
5. Install the Fireplace
Once framing and power are ready, install the electric fireplace using the provided brackets, screws, or mounting method. If it is a recessed model, slide it into the opening and secure it according to the instructions. If it is wall-mounted, attach the bracket carefully and confirm it is level before hanging the unit. Test the fireplace before you close up any final access panels or trim.
Make sure air inlets and outlets are not blocked by finish materials. This matters for both performance and safety. Decorative materials may look great, but not if they interfere with airflow.
6. Finish the Wall Surface
Now comes the part everyone on social media edits into a magical before-and-after reveal. Drywall, mud, sand, prime, and paint if you want a clean contemporary finish. Install shiplap or wood slats if you want texture. Use tile or stone veneer if you want a more dramatic fireplace wall. If you are using heavy finish materials, confirm your structure and substrate are appropriate.
Keep scale in mind. Large-format tile looks modern and calm. Narrow slats add rhythm. Painted shiplap feels cozy. Faux stone can work beautifully when used with restraint. The best finish is not the one with the most personality per square inch. It is the one that works with the rest of your room.
7. Mount the TV
Mount the TV only after the wall finish is complete and fully cured. Attach the wall mount to the studs or solid blocking, not to hopes and dreams. Use a level, follow the mount instructions, and recruit a second person for the final lift. If the screen sits a bit high, a tilting or pull-down mount can improve viewing comfort.
8. Add Built-Ins, Mantel, or Styling Details
This is where the wall becomes a feature rather than a construction project. Install floating shelves, side cabinets, a mantel, or decorative niches. Style lightly. A few books, baskets, ceramics, or art pieces can soften the technology and make the wall feel lived in. Do not overdo it. The point is to support the focal wall, not create a gift shop around your TV.
Common Mistakes to Avoid
- Ignoring the manual: Manufacturer instructions are not optional reading material.
- Mounting the TV too high: A dramatic wall should not require chiropractic follow-up.
- Using power strips or extension cords: Plan proper power instead.
- Skipping stud attachment: TVs belong on solid support, not drywall bravado.
- Blocking vents or inlets: Airflow matters for safety and performance.
- Choosing the fireplace first and the room second: Scale and proportion matter just as much as features.
- Forgetting future access: Make it possible to reach plugs, connections, or service points if needed.
How Much Does a DIY Electric Fireplace and TV Wall Cost?
Costs vary wildly based on size and finish level, but a modest DIY build can be surprisingly reasonable compared with a full custom millwork project. Your main expenses are the fireplace unit, TV mount, framing lumber, electrical work, drywall or wall finish materials, paint, and optional shelving or cabinetry.
A budget-friendly version with simple framing and paint may stay in the lower range. A more custom version with tile, built-ins, slat walls, or a recessed niche will cost more. The encouraging part is that even a medium-budget build often looks much more expensive than it is, which is basically the home-improvement equivalent of finding a great blazer on clearance.
of Real-World Experience: What This Project Actually Feels Like
If you talk to people who have built a DIY electric fireplace and TV wall, their stories tend to sound surprisingly similar. The project usually starts with inspiration and optimism. They see a gorgeous photo online and think, “How hard can it be?” The answer, of course, is that it is not impossible, but it does have a talent for turning one weekend into three weekends and one supply run into seven. Still, most DIYers say the payoff is worth it because the wall changes the whole room in a way few other projects can.
One common experience is that the planning stage takes longer than expected, and that ends up being a very good thing. People often realize they need to adjust the fireplace size, lower the TV, widen the feature wall, or change the shelf layout after taping it out. What looked perfect in a mockup can feel oddly narrow or too tall in real life. The homeowners who are happiest with the final result are usually the ones who were willing to slow down and revise the plan before cutting material.
Another recurring lesson is that hiding cords and adding proper outlets makes a bigger difference than expected. Many DIYers start out excited about finishes like shiplap, tile, or slat walls, then later admit that the true hero of the project was the clean cable management. Once the wires disappear, the wall suddenly looks intentional and custom. Without that step, even a beautiful fireplace can feel unfinished.
There is also the emotional roller coaster of the “ugly middle,” that awkward phase where the room looks worse before it looks better. The old wall is partly demoed, tools are everywhere, there is drywall dust in places that seem to violate the laws of physics, and your living room feels like a small hardware store with worse lighting. This is the moment many DIYers briefly wonder whether they should have just bought a nice candle and moved on. Then the fireplace goes in, the wall gets painted, the TV is mounted, and the whole thing suddenly clicks.
People also talk about how much they enjoy the finished wall day to day. The fireplace adds ambiance even when the heat is off, which means the room feels cozy year-round. The TV wall helps define the furniture layout. Guests notice it immediately. Families use the room more. And homeowners often say the build gave them confidence to take on bigger finish carpentry or accent wall projects later, because they learned how much careful measuring, straight lines, and patience can do.
Perhaps the most relatable experience of all is this: once the wall is done, nobody remembers the frustrating parts nearly as vividly as they remember the first evening they sat down, turned on the flames, watched the screen glow above it, and thought, “Okay, yes. This was absolutely the right amount of dramatic.”
Final Thoughts
A DIY electric fireplace and TV wall can completely transform a room, but the best results come from balancing design with practicality. Choose the fireplace based on real installation requirements, not just a pretty product photo. Keep the TV at a comfortable height. Give the project proper power and cable planning. Build with structure in mind. Then finish the wall in a way that complements your home instead of fighting it.
Done right, this project delivers the rare home-upgrade trifecta: it looks good, functions well, and makes the room feel instantly more inviting. That is hard to beat. And unlike some “statement features,” this one does not just sit there looking expensive. It actually earns its keep every single day.


