
Table of Contents >> Show >> Hide
- Why DIY Home Decor Works (Even If You’re “Not Crafty”)
- Start Smart: A 15-Minute Plan That Prevents “Oops, That’s Neon”
- Your DIY Decor Toolkit (Small, Mighty, and Not Fancy)
- 10 High-Impact DIY Home Decor Projects (With Time, Cost, and Skill)
- 1) Peel-and-Stick Wallpaper Accent Wall
- 2) Paint a Door for Instant “Custom Home” Energy
- 3) Thrift Flip a Small Piece of Furniture
- 4) Upgrade Picture Frames (Then Build a Gallery Wall)
- 5) DIY Wall Shelves for Function + Style
- 6) Swap Hardware (Cabinets, Dressers, Doors)
- 7) Add Plug-In or Battery Wall Lighting
- 8) Refresh Textiles: Pillows, Curtains, and Throws
- 9) Make “Decorative Storage” the Star
- 10) Paint Tricks: Colorblocking, Ombre, or Geometric Shapes
- Room-by-Room DIY Decor Ideas
- Renter-Friendly DIY: Look Bold, Leave No Trace
- Common DIY Mistakes (And How to Fix Them Without Crying)
- Make It Look Expensive (Even When It’s Not)
- Conclusion: Your Home Should Look Like You Live There (On Purpose)
- Real-World DIY Home Decor Experiences DIYers Commonly Share (Extra )
Want your home to look like you hired a designer… without selling a kidney? Welcome to the world of DIY home decorwhere paint, peel-and-stick wallpaper, thrift finds, and a little audacity can turn “meh” rooms into “wait, did you renovate?” spaces.
This guide is built for real life: busy schedules, real budgets, and the very real possibility that you own exactly one screwdriver and it’s missing the bit you need. We’ll cover high-impact projects, renter-friendly options, and the small upgrades that make a room feel intentional instead of accidental.
Why DIY Home Decor Works (Even If You’re “Not Crafty”)
DIY isn’t about perfectionit’s about control. You get to choose the vibe, the colors, the texture, and the “this makes me happy” details. The best part? A lot of budget-friendly home decor upgrades don’t require power tools, advanced skills, or a dramatic montage set to inspirational music.
Most successful DIY decor projects share three traits:
- They’re visible. Walls, lighting, and textiles change what you notice first.
- They’re repeatable. A small win (like new hardware) builds confidence for bigger wins (like an accent wall).
- They’re reversible. Especially for renters: removable options mean style without commitment.
Start Smart: A 15-Minute Plan That Prevents “Oops, That’s Neon”
Before you start painting everything in sight, do this quick planning routine:
1) Pick One “Hero” Change
Choose a single statement upgrade: an accent wall, a dramatic gallery wall, a thrifted furniture flip, or a bold wallpaper moment. One hero change gives your room a point of view.
2) Choose a Simple Color Strategy
Keep it easy: one main neutral + one accent color + one warm material (wood, brass, woven texture). If you love bold color, you can still keep the palette tightbold doesn’t have to mean chaotic.
3) Measure Twice, Buy Once
Measure walls, windows, and furniture. DIY is fun until you realize your “standard curtain length” is actually “short pants for your windows.”
Your DIY Decor Toolkit (Small, Mighty, and Not Fancy)
You don’t need a workshop. You need a few basics that save time and prevent mess:
- Painter’s tape + drop cloth: Crisp edges, fewer regrets.
- Level: Because “crooked but confident” is still crooked.
- Stud finder + anchors: For shelves and heavier wall decor.
- Utility knife + smoothing tool: For peel-and-stick wallpaper and liner projects.
- Sandpaper / sanding sponge: The difference between “flipped” and “flaked.”
- Basic cleaning supplies: Decor sticks better to clean surfaces than to mystery grime.
If you’re painting, prepping matters more than fancy brushes: clean, patch, sand lightly, and protect floors. It’s not glamorous, but neither is scraping paint off a baseboard at midnight.
10 High-Impact DIY Home Decor Projects (With Time, Cost, and Skill)
Below are projects that consistently deliver “wow” without requiring a PhD in Pinterest.
1) Peel-and-Stick Wallpaper Accent Wall
Time: 1–3 hours | Cost: $$ | Skill: Beginner-friendly
Peel-and-stick wallpaper is the cheat code for renters and commitment-phobes. Use it on a single wall, inside a closet, on stair risers, behind bookshelves, or even on a ceiling for a “designer did this” moment.
- Clean the wall (dust is the enemy of adhesion).
- Start straightuse a level or plumb line.
- Work slowly, smoothing as you go to avoid bubbles.
- Trim edges with a sharp blade for a clean finish.
Pro tip: Choose a smaller space (like a powder room) if you want big impact fast.
2) Paint a Door for Instant “Custom Home” Energy
Time: 2–6 hours (including drying) | Cost: $ | Skill: Beginner
Painting an interior door (or even just the trim) gives a surprisingly upscale look. Pair it with new knobs or handles and your home suddenly feels more intentionallike it drinks sparkling water unironically.
3) Thrift Flip a Small Piece of Furniture
Time: Half-day to weekend | Cost: $–$$ | Skill: Beginner/Intermediate
Start with something small: a nightstand, side table, or bar cart. The secret isn’t expensive paintit’s prep:
- Clean thoroughly (degrease if needed).
- Lightly sand for better adhesion.
- Prime if the surface is glossy or stained.
- Paint in thin coats and let it cure properly.
Finish with updated hardware for a high-end look on a thrift-store budget.
4) Upgrade Picture Frames (Then Build a Gallery Wall)
Time: 1–3 hours | Cost: $ | Skill: Beginner
Gallery walls look curated when frames share something in common: color, finish, or matting style. You can paint mismatched frames the same color for instant cohesion. Then mix art, photos, textiles, and small objects for personality.
If you’re nervous, lay it out on the floor first. Your floor is basically your rehearsal stage. Your wall is opening night.
5) DIY Wall Shelves for Function + Style
Time: 2–5 hours | Cost: $$ | Skill: Intermediate (or confident beginner)
Floating or bracket shelves give you vertical storage and display space. Style them like a designer:
- Stack books horizontally and vertically.
- Add one sculptural object (ceramic, wood, metal).
- Include something living (plant) or textured (woven basket).
- Leave breathing roomblank space makes items look intentional.
6) Swap Hardware (Cabinets, Dressers, Doors)
Time: 30–90 minutes | Cost: $–$$ | Skill: Beginner
New knobs and pulls are tiny, but they read like a renovation. Match finishes across a room for a more cohesive look (or mix metals thoughtfullylike a rebel with a plan).
7) Add Plug-In or Battery Wall Lighting
Time: 1–2 hours | Cost: $$ | Skill: Beginner
Lighting changes everything. Plug-in sconces or battery-operated wall lights can create symmetry and mood without hardwiring. Place them on either side of a bed, mirror, or sofa to make your space feel “designed.”
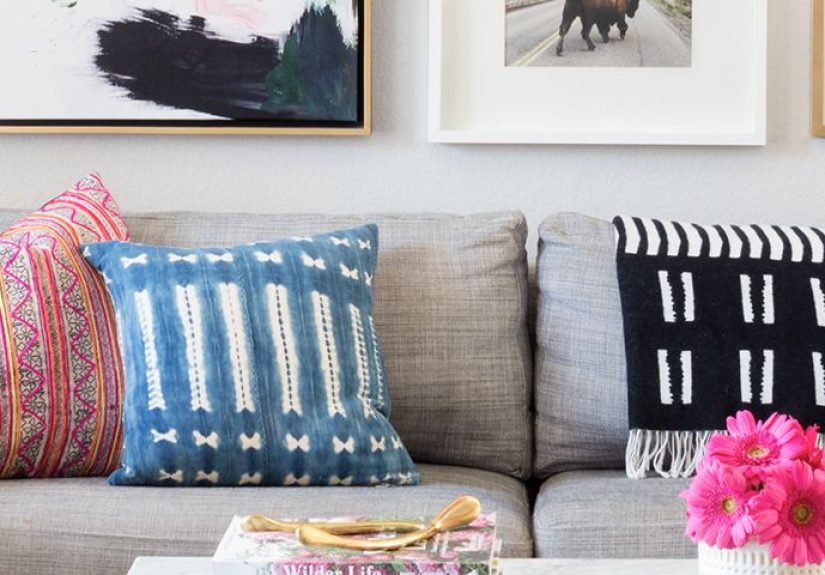
8) Refresh Textiles: Pillows, Curtains, and Throws
Time: 1 hour | Cost: $–$$ | Skill: Beginner
Textiles are the fastest way to change a room’s season and style. A simple formula: two solids + one pattern + one texture. Example: linen pillow + cotton pillow + striped pillow + chunky knit throw.
9) Make “Decorative Storage” the Star
Time: 1–3 hours | Cost: $ | Skill: Beginner
A stylish home is usually just an organized home in a good outfit. Try labeled baskets, a pegboard wall, or a mini entryway drop zone. When storage looks good, you’re more likely to use it (and less likely to create a Chair of Doom covered in clothes).
10) Paint Tricks: Colorblocking, Ombre, or Geometric Shapes
Time: Weekend | Cost: $ | Skill: Intermediate
If a plain wall feels boring, paint can do more than “beige, but a different beige.” Try a geometric painted mural, a two-tone wall, or an ombre gradient. Tape carefully, start with the lightest color, and remove tape at a backward angle while paint is still slightly tacky for cleaner lines.
Room-by-Room DIY Decor Ideas
Living Room
- Accent wall ideas: peel-and-stick wallpaper, painted arch, or picture-frame molding effect.
- Wall decor: gallery wall, oversized art, or a tapestry for texture.
- Quick upgrade: swap lampshades or add a plug-in sconce pair for mood lighting.
Bedroom
- DIY headboard illusion: wallpaper panel or painted rectangle behind the bed.
- Nightstand thrift flip: paint + new pulls = instant boutique look.
- Soft upgrades: add a throw, new pillow covers, and one textured rug layer.
Kitchen
- Hardware swap: cabinets and drawers get a facelift in under an hour.
- Open shelving moment: one small shelf for mugs or cookbooks adds charm.
- Renter-friendly pop: peel-and-stick accents on a pantry door or shelf backing.
Bathroom
- Small-space wallpaper: big payoff with less material (and less panic).
- Upgrade towel hooks: practical and visual.
- Style storage: baskets, trays, and matching bottles make it feel spa-like.
Entryway
- Mini mudroom vibe: hooks + small shelf + basket = functional landing zone.
- Mirror strategy: makes small spaces feel bigger and brighter.
- Rug runner: pattern hides dirt while looking intentional.
Renter-Friendly DIY: Look Bold, Leave No Trace
If you rent, you can still have personalityjust choose projects that are removable or easy to patch. Renter-friendly rules that keep your deposit from fleeing the scene:
- Use removable solutions: peel-and-stick wallpaper, removable hooks, and temporary decals.
- Test first: try wallpaper in a small corner to confirm it removes cleanly.
- Avoid heat zones: don’t apply wallpaper where heat could be an issue (like a working fireplace).
- Patch like a pro: spackle, sand, touch-up paint. The holy trinity of “it was always like this.”
Common DIY Mistakes (And How to Fix Them Without Crying)
Paint Bleed Under Tape
Fix it by lightly sanding the edge once dry and touching up with a small angled brush. Next time: burnish tape edges and don’t overload the roller.
Wallpaper Bubbles
Lift and re-smooth if possible. If it’s stubborn, use a pin to release air and smooth outward. Work slowly and keep the surface clean.
Crooked Gallery Wall
Use a level and consistent spacing. If you already hung it… call it “organic” and adjust the worst offenders first.
Furniture Paint That Chips
That usually means poor prep or not enough curing time. Lightly sand, clean, and add a protective topcoat where appropriate.
Make It Look Expensive (Even When It’s Not)
Designer rooms don’t look good because everything is pricey. They look good because everything looks considered. Here’s how to fake that:
- Repeat finishes: match metal tones across a room for cohesion.
- Scale matters: one oversized piece of art often looks more expensive than many tiny ones.
- Layer textures: combine smooth (glass), soft (linen), and natural (wood/woven).
- Edit ruthlessly: fewer items, better placement, more impact.
Bonus move: add one “surprise detail” like a painted ceiling, patterned closet interior, or a bold door color. It’s the decor equivalent of a great jacket.
Conclusion: Your Home Should Look Like You Live There (On Purpose)
DIY home decor isn’t a test you can failit’s a process you refine. Start with one project that makes you excited to walk into the room. Then stack small wins: hardware, lighting, textiles, wall decor. Over time, your space becomes more personal, more functional, and more “you.”
If you only remember one thing, make it this: high impact doesn’t require high stress. Choose projects that fit your time, your budget, and your patience level. Your future self (and your floors) will thank you.
Real-World DIY Home Decor Experiences DIYers Commonly Share (Extra )
The internet loves a perfect before-and-after, but real DIY life includes crooked tape lines, surprise wall textures, and the mysterious disappearance of the only Phillips-head screwdriver. Here are experience-based lessons DIYers commonly reportaka the stuff you learn after you’ve done a project once and sworn you’d “never do that again” (until next weekend).
1) The “Prep Tax” Is Real
Many DIYers say their first furniture flip took twice as long as expected because they skipped prep. Cleaning, sanding, and priming can feel like the boring opening act, but it’s what keeps paint from peeling and wallpaper from falling like a sad sticker. The shared wisdom: if it feels slow at the beginning, it saves you from redoing the whole thing later.
2) Small Spaces Are Confidence Builders
A powder room, closet, or a single accent wall is where people learn wallpaper skills without committing their entire living room to the cause. DIYers often recommend starting where you can close the door if it looks weird for a day. It’s not hidingit’s “letting the design marinate.”
3) Measurements Beat Vibes
People regularly mention buying curtains “because they looked right,” then realizing they’re too short (or too long in a way that screams “I gave up”). The common fix: measure windows, decide if you want a puddle, a break, or a clean hem, and hang rods higher than you think to make ceilings feel taller.
4) The Right Light Changes Everything
One of the most repeated DIY takeaways is that lighting upgrades deliver the fastest “grown-up home” effect. DIYers report that adding plug-in sconces, warmer bulbs, or layered lighting instantly made the same furniture look more expensive. It’s like your room stopped being interrogated by overhead lighting and started being gently admired.
5) Thrift Flips Are Half Treasure Hunt, Half Editing
DIYers love thrifting because it’s affordable and uniquebut they also say the best results come from selecting pieces with good “bones.” Solid wood, stable frames, and simple shapes flip more beautifully than wobbly, damaged pieces. The shared mantra: don’t buy a problem you’re not excited to solve.
6) Adhesives and Walls Have Opinions
Renters often talk about testing removable products first. Some paints, wall textures, and humidity levels can affect how peel-and-stick products behave. The practical lesson: test in a hidden corner, clean surfaces thoroughly, and remove slowly to reduce damage.
7) “Done” Beats “Perfect”
A classic DIY experience is getting stuck chasing perfectiontouching up one tiny spot until the wall looks worse. Many DIYers recommend stepping back, checking the project in normal lighting, and accepting minor imperfections. Those little quirks are usually invisible to guests (and if someone notices, they can earn the honor of holding your paint tray next time).
8) The Best Decor Has a Story
DIYers often say the projects they love most aren’t the trendiestthey’re the most personal. A thrifted frame holding a meaningful photo, shelves styled with travel finds, or a painted door color that makes you happy every time you walk by. The takeaway: trends can inspire you, but your home feels best when it reflects your real life.


