
Table of Contents >> Show >> Hide
- What Is a DIY Leaf Bowl?
- Why Make a Leaf Bowl Instead of Buying One?
- Materials You Will Need
- Step-by-Step Tutorial: How to Make a DIY Leaf Bowl
- Step 1: Prepare Your Work Area
- Step 2: Choose and Cover Your Mold
- Step 3: Arrange Your Leaves Before Gluing
- Step 4: Apply the First Layer of Mod Podge or Fabric Stiffener
- Step 5: Add the First Leaves
- Step 6: Build the Bowl Shape
- Step 7: Wrap and Shape
- Step 8: Let It Dry Completely
- Step 9: Remove the Leaf Bowl from the Mold
- Step 10: Seal and Finish
- DIY Leaf Bowl Variations
- Common Mistakes and How to Avoid Them
- How to Style a DIY Leaf Bowl
- Best Places to Use a Leaf Bowl
- How Long Does a DIY Leaf Bowl Last?
- DIY Leaf Bowl Experience: What I Learned From Making One
- Conclusion
Some crafts politely whisper “seasonal decor.” A DIY leaf bowl walks into the room wearing a cable-knit sweater, holding a pumpkin spice latte, and announcing that your coffee table has finally joined autumn. The best part? You do not need a pottery wheel, a professional studio, or a suspiciously expensive craft kit. With a few faux leaves, Mod Podge or fabric stiffener, plastic wrap, and a simple bowl or balloon as a mold, you can create a lightweight decorative bowl that looks charming, handmade, and just imperfect enough to say, “Yes, I made this, and yes, I survived the sticky phase.”
This project is ideal for fall decorating, Thanksgiving centerpieces, handmade gifts, kids’ craft afternoons, and anyone who believes leaves deserve a promotion from “yard debris” to “home decor.” In this guide, you will learn how to make a leaf bowl step by step, which materials work best, how to avoid common mistakes, and how to style your finished piece so it looks intentional rather than like a squirrel started an interior design business.
What Is a DIY Leaf Bowl?
A DIY leaf bowl is a decorative bowl made by shaping leaves over a mold and stiffening them with a craft medium. Most versions use artificial fall leaves because they are flexible, colorful, easy to layer, and less likely to crumble than real dried leaves. The leaves are brushed with Mod Podge, fabric stiffener, or a similar decoupage medium, then left to dry into a bowl shape.
There are several popular versions of this craft. The easiest method uses faux leaves and Mod Podge or fabric stiffener over an upside-down bowl. Another version uses a balloon as the mold, creating a rounded, organic shape. A more sculptural option uses air-dry clay pressed with real leaves to create a leaf-imprinted dish. For this article, we will focus mainly on the faux-leaf decoupage bowl because it is beginner-friendly, affordable, and wonderfully forgiving.
Why Make a Leaf Bowl Instead of Buying One?
Buying seasonal decor is easy. Too easy, honestly. One minute you walk into a store for toothpaste, and the next minute you are holding three velvet pumpkins and a ceramic fox named Gary. Making a DIY leaf bowl gives you something more personal. You can choose the color palette, size, shape, finish, and style. Want a rustic orange-and-burgundy bowl for a farmhouse table? Done. Prefer gold leaves for a glam Thanksgiving centerpiece? Also done. Want a moody woodland bowl that looks like it belongs in a fairy tale with excellent lighting? Absolutely.
This craft is also budget-friendly. Many supplies can be found at dollar stores, craft stores, or already in your home. It is a low-risk project for beginners because the materials are inexpensive and the process does not require advanced artistic skill. If you can brush glue, overlap leaves, and wait patiently for things to dry, you are already highly qualified.
Materials You Will Need
Basic Supplies
- Artificial fall leaves, preferably fabric leaves without thick plastic stems
- Mod Podge, Mod Podge Stiffy, or fabric stiffener
- A foam brush or soft craft brush
- Plastic wrap
- A medium bowl to use as a mold
- Wax paper, parchment paper, or a covered work surface
- Scissors
- Optional: clear acrylic spray sealer or glaze
- Optional: gold paint, metallic wax, glitter, or acrylic paint for accents
Choosing the Right Leaves
Artificial leaves are usually the easiest choice for a DIY leaf bowl. They bend without breaking, keep their color, and hold up well during brushing and drying. Look for thin fabric leaves rather than stiff plastic ones. Fabric leaves absorb the stiffener better and create a softer, more natural shape. If the leaves have bulky plastic veins or stems, trim those away before starting. Thick stems can prevent the leaves from lying flat against the mold.
Real leaves can be used, but they require more preparation. Fresh leaves may curl as they dry, while brittle leaves can crack when coated. If you want to use real leaves, choose flexible leaves that are not fully dried out. Press them between paper towels under heavy books for a day or two, or lightly iron them between sheets of wax paper using low heat. The goal is to flatten them without turning them into leaf confetti.
Step-by-Step Tutorial: How to Make a DIY Leaf Bowl
Step 1: Prepare Your Work Area
Cover your table with wax paper, parchment paper, newspaper, or an old plastic tablecloth. This craft is not wildly chaotic, but Mod Podge has a gift for appearing in places you did not invite it. Keep a damp cloth nearby for quick cleanup and wear an apron if you are emotionally attached to your shirt.
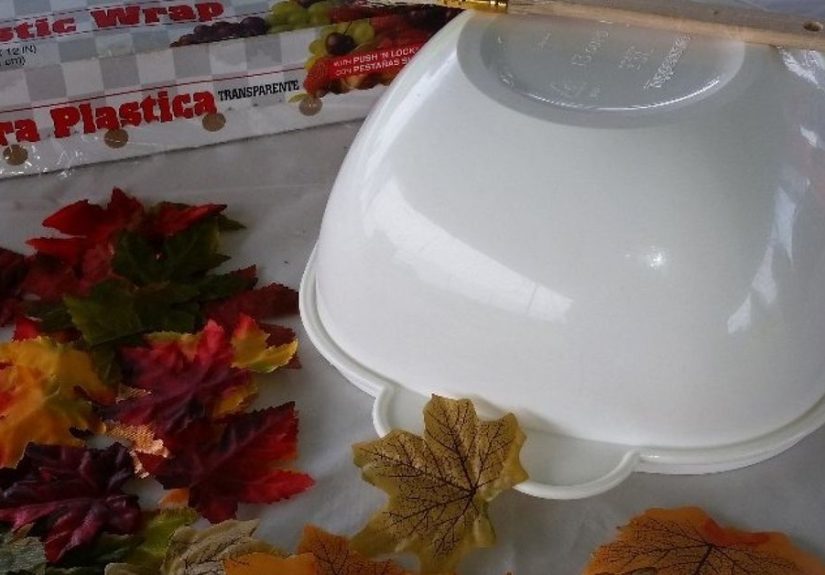
Step 2: Choose and Cover Your Mold
Turn a bowl upside down. This bowl will act as the mold for your leaf bowl. A rounded cereal bowl creates a classic shape, while a shallow mixing bowl makes a wider decorative dish. Cover the outside of the bowl with plastic wrap, smoothing it as much as possible. The plastic wrap prevents the leaves from sticking permanently to the bowl, which is important unless you want your kitchen bowl to become part of the craft forever.
Step 3: Arrange Your Leaves Before Gluing
Before opening the Mod Podge, do a dry layout. Place the leaves over the bowl to see how they overlap and where the colors look best. Put larger leaves near the center and use smaller leaves around the edges. Overlap each leaf by at least one-third so the finished bowl has strength. If you leave too many gaps, the bowl may collapse or look patchy.
This is also the moment to remove plastic stems. If a leaf refuses to lie flat, trim the thick vein from the back or gently bend it with your fingers. The flatter the leaves sit now, the better the bowl will dry later.
Step 4: Apply the First Layer of Mod Podge or Fabric Stiffener
Brush a generous layer of Mod Podge or fabric stiffener over the plastic-wrapped bowl. Start at the top center of the upside-down bowl, which will become the bottom of your finished leaf bowl. Do not be stingy. A thin, timid layer will not give the leaves enough grip. You want the surface wet enough for the leaves to cling, but not so wet that they slide down like they are escaping a craft crime scene.
Step 5: Add the First Leaves
Place your first leaf at the top center of the mold. Brush more Mod Podge over the leaf, pressing gently with the brush so it conforms to the bowl shape. Add the next leaf so it overlaps the first. Continue building outward and downward. Work slowly, pressing each leaf into place and brushing medium over the top.
Alternate colors and leaf shapes for a natural look. For example, combine maple-shaped orange leaves with smaller red and yellow leaves. If you prefer a cleaner design, use one color family, such as copper, gold, and amber. The design should feel layered, not random. Think “forest floor, but edited by a stylist.”
Step 6: Build the Bowl Shape
Continue adding leaves until you reach the desired depth. For a small candy-sized decorative bowl, cover about one-third of the outside of the mold. For a deeper bowl, extend the leaves farther down the sides. Keep the rim uneven and organic, or trim the edges later for a cleaner silhouette.
Make sure there are no major holes in the structure. Small gaps can look pretty, especially if the bowl is used with fairy lights or decorative filler, but large gaps can weaken the piece. Add extra leaves anywhere the bowl looks thin.
Step 7: Wrap and Shape
Once the leaves are arranged, place another sheet of plastic wrap over them. Press gently to help the leaves hug the mold. This top layer can help keep stubborn leaves from lifting while the stiffener begins to set. Do not press so hard that you squeeze out all the adhesive. Gentle pressure is enough.
After about an hour, peel back part of the top plastic wrap to let air reach the leaves. If the entire bowl remains sealed under plastic, it can take much longer to dry. Gradually expose more of the surface as it firms up.
Step 8: Let It Dry Completely
Drying time depends on the thickness of the leaves, the amount of Mod Podge, humidity, and airflow. Overnight drying is usually best. A fan can help, but avoid using high heat, which may warp plastic leaves or create a cloudy finish. Patience is the least glamorous supply in this project, but it is also the one that prevents floppy bowl tragedy.
Step 9: Remove the Leaf Bowl from the Mold
When the leaves feel dry and firm, carefully lift the plastic wrap away from the bowl mold. Then gently separate the leaf bowl from the wrap. Go slowly around the edges first. If any area feels damp or rubbery, place it back on the mold and let it dry longer.
Once removed, the bowl should hold its shape. If it feels too flexible, brush on another coat of Mod Podge or fabric stiffener and let it dry again. A second or third coat can make the bowl sturdier.
Step 10: Seal and Finish
For a smoother, more durable finish, spray the bowl with a clear acrylic sealer or glaze in a well-ventilated area. This can reduce tackiness and add extra strength. Choose matte for a natural look, satin for a soft glow, or gloss if you want the leaves to look polished and vibrant.
Important note: this DIY leaf bowl is decorative. It should not be used for unwrapped food, soup, salad, or anything that requires washing like regular dishware. Use it for wrapped candy, pine cones, acorns, faux berries, ornaments, potpourri, battery-operated tea lights, or as a festive catchall for keys and tiny seasonal treasures.
DIY Leaf Bowl Variations
1. Balloon Leaf Bowl
Instead of using an upside-down bowl, inflate a balloon and place it in a cup or small container to hold it steady. Brush Mod Podge over the top of the balloon and layer leaves around the curved surface. This creates a more rounded bowl with a delicate, handmade look. The balloon method is fun, but it can be trickier because leaves may slide. Work in small sections and use plenty of overlap.
2. Air-Dry Clay Leaf Bowl
For a more permanent version, roll out air-dry clay and press a real leaf into the surface to capture the veins. Cut around the leaf shape, place the clay inside a shallow bowl to curve, and let it dry. Once hardened, paint it with acrylic paint and seal it. This version is excellent for jewelry dishes, desk trays, or handmade gifts.
3. Metallic Leaf Bowl
Use faux leaves in gold, copper, bronze, or champagne tones. A metallic leaf bowl looks beautiful on a holiday table and transitions easily from fall to winter. Add a few pearl beads or small ornaments, and suddenly your DIY project looks like it knows what a tablescape is.
4. Natural Woodland Bowl
Choose muted leaves in olive, brown, rust, and tan. Style the finished bowl with pine cones, dried orange slices, cinnamon sticks, and mini pumpkins. This version works well with rustic, cottagecore, farmhouse, and nature-inspired decor.
5. Kids’ Craft Leaf Bowl
For children, use larger faux leaves, washable craft glue mixed with a little water, and a small plastic bowl mold. The finished bowl may be more flexible than an adult version made with fabric stiffener, but the process is fun, sensory, and creative. Expect sticky fingers. Possibly sticky elbows. Maybe one sticky sock. Crafting builds memories.
Common Mistakes and How to Avoid Them
Using Leaves That Are Too Stiff
Plastic leaves with heavy veins often pop away from the mold. Choose thin fabric leaves or remove the thick stems. If your leaves are wrinkled, flatten them before use by placing them under books or gently ironing them between protective sheets on low heat.
Not Overlapping Enough
A leaf bowl needs overlapping layers for strength. Leaves that barely touch will separate when dry. Aim for generous overlap, especially near the base and rim.
Removing the Bowl Too Soon
The outside may feel dry while the inner layers are still damp. If the bowl bends or sags when you remove it, place it back on the mold and let it dry longer. Drying overnight is usually safer than rushing.
Skipping the Plastic Wrap
Plastic wrap is not decorative, glamorous, or exciting, but it is essential. Without it, the leaves may stick to the mold. Then you are not making a leaf bowl; you are creating a bowl wearing a leaf sweater.
Expecting It to Be Food-Safe
Most decoupage leaf bowls are not food-safe. Even dishwasher-safe craft sealers are generally meant for decorative surfaces rather than direct food contact. Use your bowl for display, wrapped treats, or dry decorative items only.
How to Style a DIY Leaf Bowl
A DIY leaf bowl looks lovely as a centerpiece on a dining table, coffee table, console, mantel, or entryway bench. Fill it with mini pumpkins for Thanksgiving, ornaments for early winter, wrapped candies for guests, or pine cones for a natural look. You can also place a battery-operated tea light inside the bowl so the light glows through the gaps between the leaves.
For a modern style, keep the filling simple. One large white pumpkin in a gold leaf bowl can look elegant and clean. For a rustic look, layer the bowl on a wood tray with candles, dried wheat, and linen napkins. For a playful family table, fill it with wrapped chocolates and prepare for it to become mysteriously empty by dessert.
Best Places to Use a Leaf Bowl
- Dining table: Use it as a Thanksgiving centerpiece with faux berries and mini gourds.
- Entryway: Create a seasonal catchall for keys, coins, and wrapped mints.
- Mantel: Pair it with garland, candles, and framed autumn prints.
- Desk: Use a small clay leaf bowl for paper clips, rings, or office odds and ends.
- Gift table: Fill it with wrapped candy at a fall party or harvest event.
How Long Does a DIY Leaf Bowl Last?
A faux-leaf bowl can last for several seasons if stored carefully. Keep it away from moisture, direct heat, and heavy objects. When fall is over, wrap it loosely in tissue paper and place it in a sturdy storage box. Avoid crushing it under heavier decorations. It may be handmade, but it does not deserve to be flattened by a ceramic turkey.
If the bowl becomes slightly tacky over time, apply a thin coat of clear acrylic spray sealer and let it cure fully before storing or displaying. If a leaf lifts, use a small brush to add more Mod Podge underneath, press it down, and allow it to dry.
DIY Leaf Bowl Experience: What I Learned From Making One
The first time I made a DIY leaf bowl, I had the confidence of a person who had watched several craft tutorials and therefore believed gravity would cooperate. It did not. My first few leaves slid down the side of the bowl like tiny autumn sleds. The problem was not the idea; it was my technique. I had used too little Mod Podge and expected the leaves to behave like wallpaper. Leaves, even fake ones, enjoy drama.
Once I added a thicker layer of medium and started working from the top center outward, everything became easier. The center leaf acted like an anchor. Each new leaf overlapped the previous one, and the shape began to make sense. I also learned that trimming the stems matters more than it seems. One stubborn plastic stem can lift an entire section and create a bump that looks less “organic handmade charm” and more “craft project with a secret elbow.”
Another lesson: plastic wrap is both helpful and annoying. It protects the mold and helps release the bowl, but it can wrinkle. Those wrinkles may transfer slightly to the inside of the finished piece. At first, I worried about that. Then I realized the bowl was made of layered leaves, not surgical equipment. A few soft wrinkles actually made it look more natural. Handmade decor should have personality. Otherwise, it might as well be a factory-made bowl with a barcode and trust issues.
Drying was the true test of patience. I wanted to peel the bowl off after a few hours, but it still felt flexible. Leaving it overnight made a huge difference. By morning, the structure was firmer and easier to remove. I added a second coat to the outside, especially around the rim, because the rim takes the most handling. That extra coat made the bowl feel more finished.
Styling the finished bowl was the most satisfying part. I tried pine cones first, which looked rustic and cozy. Then I added wrapped caramel candies, which looked festive and disappeared suspiciously fast. A battery-operated tea light gave the prettiest effect because the glow came through the spaces between the leaves. It turned a simple craft into something that looked surprisingly elegant in the evening.
If I made the project again, I would choose a tighter color palette from the beginning. My first bowl had orange, red, yellow, brown, and one extremely enthusiastic green leaf that looked like it had missed the fall memo. A more coordinated mix creates a cleaner result. I would also use fabric stiffener for a firmer bowl if I planned to store and reuse it year after year. Mod Podge works well, but fabric stiffener can give the leaves a more structured hold.
The biggest takeaway is that a DIY leaf bowl is not about perfection. It is about texture, color, layering, and the small joy of making something seasonal with your hands. It is affordable, relaxing, and just messy enough to feel like a real craft. You finish with a decorative piece that looks warm, personal, and cheerful. And when someone asks where you bought it, you get to say, “I made it,” which is the crafting equivalent of a victory lap.
Conclusion
A DIY leaf bowl is one of those rare crafts that is simple enough for beginners but pretty enough to earn a permanent spot in your fall decor rotation. With artificial leaves, Mod Podge or fabric stiffener, plastic wrap, and a basic bowl mold, you can create a handmade centerpiece that feels cozy, creative, and completely customizable. The secret is to choose flexible leaves, overlap generously, let the bowl dry fully, and remember that it is decorative rather than food-safe.
Whether you style it with pine cones, wrapped candy, mini pumpkins, or glowing battery candles, a leaf bowl brings instant autumn charm to your home. It is inexpensive, beginner-friendly, and wonderfully adaptable. Plus, it gives you a good reason to say, “I’m crafting,” while surrounded by leaves and glue like a very festive woodland inventor.


