
Table of Contents >> Show >> Hide
- Why Make a DIY Mini Succulent Pot?
- Best Succulents for Mini Pots
- Materials You Need
- Choosing the Right Mini Pot
- Best Soil for a DIY Mini Succulent Pot
- How to Make a DIY Mini Succulent Pot
- Design Ideas for a Mini Succulent Pot
- Where to Place Your Mini Succulent Pot
- How to Water a Mini Succulent Pot
- Common Mistakes to Avoid
- DIY Mini Succulent Pot Gift Ideas
- Long-Term Care and Repotting
- Extra Experience Notes: What Making Mini Succulent Pots Teaches You
- Conclusion
A DIY mini succulent pot is one of those tiny home projects that looks suspiciously easyand, happily, actually is. You do not need a greenhouse, a ceramic studio, or the mysterious confidence of someone who owns twelve pairs of pruning shears. With a small container, fast-draining soil, one healthy succulent, and a little creative styling, you can build a charming desk plant that brings texture, color, and personality to a shelf, windowsill, office corner, dorm room, or coffee table.
The magic of mini succulents is that they deliver “I have my life together” energy in a container small enough to fit beside your coffee mug. They are sculptural, forgiving, and wonderfully varied: rosette-shaped echeverias, striped haworthias, plump sedums, trailing burro’s tail, and compact jade plants can all turn a plain pot into a miniature garden scene. But while succulents have a reputation for being low-maintenance, they are not plastic décor with leaves. They still need the right pot, the right soil, enough light, and careful watering.
This guide walks you through how to make a DIY mini succulent pot from start to finish, including container ideas, planting steps, design tips, care advice, and real-life experience notes that can save your tiny plant from becoming a tiny tragedy.
Why Make a DIY Mini Succulent Pot?
A mini succulent pot is affordable, beginner-friendly, and highly customizable. It can be a weekend craft, a handmade gift, a small-space garden, or a way to rescue a lonely baby succulent from a nursery tray. Unlike large container gardens, mini pots do not require heavy lifting, expensive materials, or much floor space. They also make excellent party favors, teacher gifts, office decorations, and windowsill collections.
The best part is the creative freedom. You can keep the look earthy with terra-cotta and gravel, modern with a white ceramic pot, playful with painted patterns, or rustic with a repurposed teacup. A mini succulent pot can be minimalist, boho, cottagecore, desert-inspired, or so cute it looks like it should have its own tiny zip code.
Best Succulents for Mini Pots
Not every succulent is ideal for a tiny container. Some grow fast, stretch dramatically, or develop deep root systems that become cramped too quickly. For a mini succulent pot, choose compact, slow-growing varieties that tolerate shallow containers and bright indoor light.
Good Mini Succulent Options
Haworthia is a favorite for small pots because it stays compact, handles bright indirect light well, and has striking striped or translucent leaves. Echeveria offers the classic rose-shaped succulent look, though it needs strong light to keep its tight form. Gasteria grows slowly and has thick, patterned leaves that look beautiful in simple pots. Jade plant cuttings can work well in mini containers, especially when kept pruned. Sedum varieties add texture and may trail slightly over the edge for a softer look.
If you are making a mixed mini succulent pot, group plants with similar light and watering needs. A succulent that loves dry soil should not be paired with a humidity-loving tropical plant. That is not a friendship; it is a scheduling conflict with roots.
Materials You Need
The supply list is short, which is one reason this project is so satisfying. You can keep it simple or add decorative details depending on your style.
- A small pot, about 2 to 4 inches wide, preferably with a drainage hole
- Cactus or succulent potting mix
- One small succulent or a few compatible cuttings
- A spoon, chopstick, or small trowel
- Decorative top dressing, such as pea gravel, small stones, or horticultural grit
- A saucer or tray to protect furniture
- Optional: acrylic paint, paint pens, stencils, twine, labels, or mini decorations
The most important materials are the pot and soil. Succulents dislike sitting in waterlogged soil, so drainage is not a cute bonus featureit is the difference between “thriving plant” and “sad green pudding.”
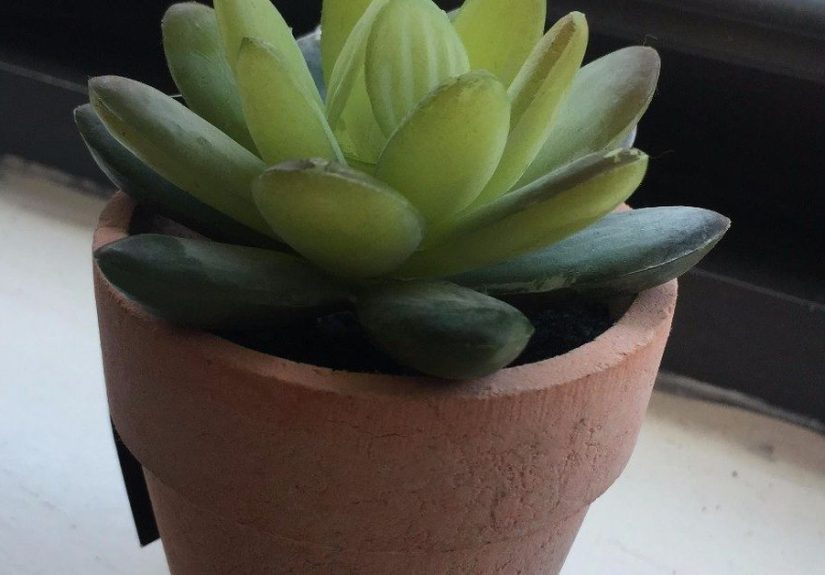
Choosing the Right Mini Pot
The best pot for succulents has a drainage hole. This allows excess water to escape and helps air reach the roots. A tiny pot without drainage can look adorable, but it requires very careful watering because water has nowhere to go. If you are a beginner, choose drainage every time. Your future self will thank you, probably while not cleaning up root rot.
Terra-cotta is a classic choice because it is porous and helps moisture evaporate more quickly. Ceramic pots are also excellent when they include a drainage hole. Plastic nursery pots work well too, especially if you slip them inside a decorative outer container. This “pot-in-pot” method lets you remove the inner pot for watering and drainage, then place it back when it stops dripping.
Creative Container Ideas
You can turn many small objects into mini succulent pots if they are clean, safe, and able to drain. Try tiny terra-cotta pots, espresso cups with drilled holes, shallow ceramic bowls, thrifted ramekins, candle jars, small wooden boxes lined appropriately, or even mini concrete planters. Just avoid containers that may contain toxic residues, rust heavily, or hold moisture in a way that damages the plant.
If you use a decorative container without a hole, do not add a thick layer of rocks at the bottom and assume it solves drainage. It often creates a perched water zone where moisture lingers near the roots. A better option is to keep the succulent in a small nursery pot with drainage, then place that inside the decorative container.
Best Soil for a DIY Mini Succulent Pot
Use a cactus or succulent mix rather than regular houseplant soil alone. Succulent mixes are designed to drain faster and hold more air around the roots. If you only have standard potting soil, improve it with gritty materials such as perlite, pumice, coarse sand, or fine gravel. The goal is a mix that feels loose and crumbly rather than dense and muddy.
A simple beginner-friendly blend is two parts cactus mix with one part perlite or pumice. For a very small pot, this extra drainage is helpful because tiny containers can swing quickly between too wet and too dry. The soil should hold enough moisture for the roots to drink, then dry out within a reasonable time.
How to Make a DIY Mini Succulent Pot
Step 1: Prepare the Pot
Start with a clean container. If it has been used before, wash it and let it dry. If your pot has a large drainage hole, place a small piece of mesh, coffee filter, or broken pottery shard over the hole to keep soil from falling out. Do not block the hole completely; the point is to keep the soil in while letting water escape.
Step 2: Add Succulent Soil
Fill the pot about two-thirds full with succulent mix. Gently tap the pot to settle the soil, but do not pack it down tightly. Succulent roots need air as much as they need moisture. Packed soil can hold water too long and make it harder for roots to breathe.
Step 3: Remove the Succulent from Its Nursery Pot
Carefully slide the plant out of its nursery container. If the roots are wrapped tightly in a circle, loosen them gently with your fingers. Remove any dead leaves near the base of the plant. These old leaves can trap moisture and invite pests, so consider this the plant version of clearing out junk mail.
Step 4: Position the Plant
Place the succulent in the mini pot so the crown of the plant sits slightly above the soil line. Do not bury the leaves. If the lower leaves touch wet soil constantly, they may soften or rot. Center one plant for a clean modern look, or place the tallest plant slightly off-center if you are designing a small arrangement.
Step 5: Fill Around the Roots
Add more soil around the root ball using a spoon or small scoop. Use a chopstick to guide soil into tight spaces. Press lightly to stabilize the plant, but keep the mix airy. Leave a small gap between the soil surface and the rim of the pot so water does not immediately run over the edge.
Step 6: Add a Top Dressing
A thin layer of gravel, grit, or small decorative stones gives the pot a polished finish and helps keep soil from splashing onto the leaves. Keep the layer thin so the soil can still dry properly. Choose colors that complement the plant: white gravel for a clean look, warm pebbles for desert style, or black lava rock for dramatic contrast.
Step 7: Wait Before Watering
If the roots were disturbed during planting, wait a day or two before watering. This gives tiny root injuries time to callus. When you do water, water the soil thoroughly until excess drains from the bottom, then empty the saucer. After that, wait until the soil is dry before watering again.
Design Ideas for a Mini Succulent Pot
A mini succulent pot can be as simple or detailed as you like. For a clean desk accessory, use a single rosette succulent in a white ceramic pot with pale gravel. For a rustic farmhouse look, plant a haworthia in terra-cotta and tie jute twine around the rim. For a playful gift, paint a tiny face on the pot and use a spiky succulent as “hair.” Yes, it is silly. Yes, people will smile.
If you are creating a tiny landscape, use one focal succulent, one low-growing accent, and a few small stones. Avoid overcrowding. Mini arrangements look full at first, but succulents need airflow and room to grow. A pot stuffed like a subway at rush hour may look cute for a week and then start dropping leaves in protest.
Where to Place Your Mini Succulent Pot
Most succulents prefer bright light. Indoors, a sunny windowsill or a spot near a bright window is usually best. South- and west-facing windows often provide strong light, while east-facing windows offer gentler morning sun. If your succulent begins stretching toward the light, the stem elongates, or the color fades, it likely needs a brighter location.
Rotate the pot every week or two so the plant grows evenly. Mini succulents are small, but they are not shy about leaning toward the sun like they are trying to overhear a better conversation across the room.
How to Water a Mini Succulent Pot
The golden rule is simple: water deeply, then let the soil dry. Do not mist succulents as the main watering method. Misting usually wets the leaves and soil surface without giving the roots a proper drink. Instead, water the soil directly until water drains from the bottom of the pot.
Because mini pots hold less soil, they can dry faster than larger containers. However, that does not mean they need constant water. Check the soil first. If it still feels damp, wait. During warmer growing months, a mini succulent might need water every one to two weeks depending on light, temperature, humidity, and pot material. In winter, many succulents grow more slowly and need less frequent watering.
Common Mistakes to Avoid
Using a Pot Without Drainage
A no-drainage pot is possible for experienced growers, but it is risky for beginners. If you love a decorative container without a hole, use it as a cachepot and keep the plant in a removable nursery pot inside it.
Choosing Regular Potting Soil Only
Regular potting soil can stay too wet for succulents, especially in small containers. Use a cactus mix or amend standard soil with gritty material to improve drainage and aeration.
Watering on a Strict Calendar
Plants do not read calendars. Watering every Saturday sounds organized, but the soil may still be wet from last Saturday. Always check the soil before watering.
Giving Too Little Light
Low light can cause stretching, weak growth, and dull color. If your mini succulent looks tall, thin, or tilted, move it closer to a brighter window gradually.
Overdecorating the Soil Surface
Decorative stones are attractive, but thick layers can slow drying. Keep top dressing thin and avoid sealing the soil with glue, resin, or heavy decorative material.
DIY Mini Succulent Pot Gift Ideas
A handmade mini succulent pot makes a thoughtful gift because it feels personal without being complicated. For birthdays, paint the pot in the recipient’s favorite color. For holidays, add a small wooden tag with a message. For weddings or showers, use matching tiny pots as favors. For teachers, coworkers, or neighbors, choose a hardy haworthia or jade cutting and include a simple care card.
A good care card might say: “Bright light, water only when dry, do not let me sit in water, and please do not love me to death with the watering can.” Succulents appreciate emotional boundaries.
Long-Term Care and Repotting
Mini succulents can live in small pots for a while, but they are not frozen in time. Eventually, roots may fill the container, growth may slow, or the plant may become top-heavy. Repot when roots circle tightly, grow through the drainage hole, or when water runs straight through without moistening the mix.
When repotting, move up only slightly in pot size. A huge pot around a tiny succulent can hold extra wet soil, increasing the risk of rot. Choose a container about one inch wider than the current pot and refresh the soil with a fast-draining mix.
Extra Experience Notes: What Making Mini Succulent Pots Teaches You
After making a few DIY mini succulent pots, you begin to notice that this project is less about “planting something tiny” and more about learning the rhythm of container gardening. The first lesson is restraint. Beginners often want to add more soil, more water, more plants, more rocks, more decorations, and perhaps a tiny ceramic frog named Harold. But mini succulent pots usually look and grow best when you keep the design simple.
One of the most useful experiences is learning how pot material changes watering. A terra-cotta mini pot dries quickly, especially on a sunny windowsill. A glazed ceramic pot holds moisture longer. A plastic nursery pot tucked inside a decorative cup may stay damp for several days. Once you understand this, succulent care becomes less mysterious. You stop asking, “How often should I water?” and start asking, “How fast does this specific pot dry in this specific spot?” That question is much smarter and far less likely to end in mushy leaves.
Another experience is discovering that light matters more than perfect styling. A mini pot may look adorable on a bookshelf, but if that shelf is across the room from a window, the plant may stretch and weaken. The prettiest location is not always the healthiest location. A good compromise is to place the succulent in bright light most of the week, then move it temporarily to the dining table or desk when you want to show it off. Think of it as giving your plant both a home and occasional stage time.
Mini pots also teach patience. Succulents grow slowly, and that is part of their charm. You do not need to fuss over them daily. In fact, fussing is often the problem. The healthiest mini succulents are usually owned by people who check the soil, rotate the pot, remove dead leaves, and then leave the plant alone. It is a refreshing hobby for anyone who tends to overmanage things. The succulent says, quietly but firmly, “I appreciate the enthusiasm, but please put down the watering can.”
There is also a design lesson in scale. A large chunky stone that looks elegant in a garden bed can look like a meteor strike in a two-inch pot. Fine gravel, tiny pebbles, miniature labels, and small cuttings usually work better. When decorating, view the pot from the angle where it will be displayed. A desk pot is often seen from above and the side, while a windowsill pot may be seen mostly from the front. Adjust the plant placement accordingly.
One practical tip from experience: make several pots at once if you are already opening a bag of soil. The setup and cleanup take almost as long for one pot as for five. Line your workspace with newspaper or a tray, prepare all containers first, then plant in batches. This is especially helpful for gifts, party favors, or small collections. You can create a cohesive set by using the same pot color with different succulent shapes, or the same plant variety in different painted pots.
Finally, mini succulent pots are a gentle reminder that small projects can change a room. A single tiny plant on a windowsill can soften a workspace, brighten a bathroom shelf with enough light, or make a nightstand feel more intentional. It is not a dramatic renovation. It will not knock down walls or require a spreadsheet. But it adds life, texture, and a little handmade charm. And sometimes, that is exactly the kind of project a home needs.
Conclusion
A DIY mini succulent pot is simple, affordable, and surprisingly satisfying. The key is to combine creativity with good plant care: choose a container with drainage, use fast-draining succulent soil, plant gently, water only when dry, and give your succulent plenty of bright light. Once you understand those basics, the design possibilities are endless. You can create a modern desk planter, a rustic windowsill accent, a tiny gift, or a miniature desert garden that looks like it belongs in a home magazinejust smaller, cuter, and less likely to demand a renovation budget.
Note: This article is written for web publishing and is based on real gardening best practices from reputable U.S. horticultural and home-improvement sources. No source links or citation placeholders are embedded in the article body to keep the HTML clean for publication.


