
Table of Contents >> Show >> Hide
- Why a DIY Woven Paper Basket Is Worth Making
- Materials and Tools
- Before You Start: Design It Like a Pro
- Step-by-Step Tutorial: DIY Woven Paper Basket
- Design Variations You Can Try
- Troubleshooting Common Problems
- Kid-Friendly and Classroom-Friendly Version
- Eco-Friendly Crafting Tips
- 500-Word Experience Notes: What Makers Usually Learn After the First Few Baskets
- Conclusion
Some crafts look cute on Pinterest and then immediately betray you in real life. This is not one of those crafts.
A DIY woven paper basket is practical, low-cost, beginner-friendly, and surprisingly classy when done well.
You can make one from cardstock, construction paper, recycled magazine pages, or even cereal boxes that have bravely completed their breakfast duties.
In this guide, you’ll get a complete, web-ready, step-by-step tutorial with design choices, sizing math, troubleshooting, and pro finishing tips.
We’ll also cover eco-friendly options, kid-friendly adaptations, and real-world maker experience notes so your basket looks less “first attempt”
and more “I absolutely meant for it to look this good.”
Whether you need a handmade gift container, desk organizer, entryway catchall, or tiny snack basket that says
“Yes, I’m organized now,” this tutorial gives you everything you need.
Why a DIY Woven Paper Basket Is Worth Making
A woven paper basket checks almost every craft box:
- Budget-friendly: Most materials are already in your home.
- Skill-building: You practice measuring, cutting, patterning, and assembly.
- Eco-smart: Great project for upcycling newspaper, mailers, and cereal boxes.
- Customizable: You can change size, colors, handle style, and weave pattern.
- Actually useful: Holds craft supplies, cards, keys, wrapped treats, and more.
Unlike many “look-at-it-don’t-touch-it” crafts, this one can survive daily use when reinforced correctly.
Materials and Tools
Core materials
- 1 base sheet (cardstock or lightweight cardboard, 8.5×11 in or larger)
- 8–20 weaving strips (paper, cardstock, or cereal box strips)
- Glue (PVA craft glue or glue stick for light projects)
- Optional: clear-drying sealant (Mod Podge-style topcoat)
Tools
- Ruler (metal preferred for cleaner cuts)
- Pencil and eraser
- Scissors or craft knife + cutting mat
- Clips or clothespins (to hold rim while glue dries)
- Bone folder or spoon back (for crisp folds)
Paper choice guide
If you want a display basket, construction paper works. If you want a basket that handles real use, go with cardstock
or recycled cereal box strips. Mixed media works beautifully too: cardstock base + decorative paper wefts.
Before You Start: Design It Like a Pro
Great baskets begin with planning. Here’s the simple formula:
- Final basket width = base weave width
- Final basket height = length of vertical strips folded upward
- Wall stability = number of woven rows + rim lock
For your first basket, use this beginner template:
- Base: 6 in x 6 in
- Strip width: 0.75 in
- Vertical strip count per side: 8 (even numbers weave cleaner)
- Wall height: 3 in
Even strip counts make your corners cleaner and your pattern easier to maintain.
Step-by-Step Tutorial: DIY Woven Paper Basket
Step 1: Build the slotted base panel
Cut a base panel from sturdy paper or thin cardboard. Draw a 1-inch border around the outer edge.
Inside that border, draw parallel cut lines spaced evenly (about 0.5 to 0.75 inch apart).
Do not cut through the border.
Think of this base as your “loom.” The uncut border is what keeps your structure from collapsing into modern art.
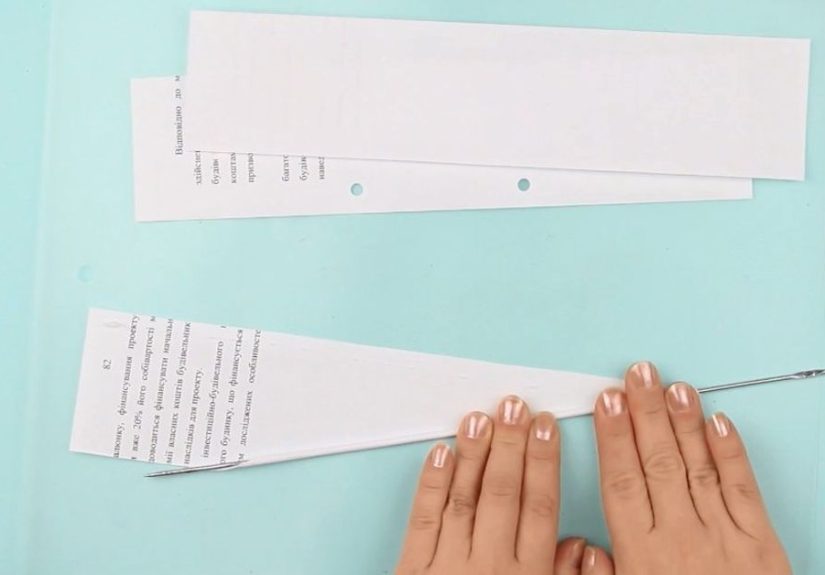
Step 2: Cut weaving strips
Cut long strips from contrasting paper. Make them slightly longer than the width of the slotted area
so you have room to secure edges. Keep strip widths uniform for a cleaner look.
Tip: If your first rows feel floppy, switch to slightly thicker strips or double-layer each strip with glue.
Step 3: Weave the base (over-under pattern)
Weave strip one through the slots in a simple over-under pattern. For strip two, reverse the pattern
(under-over). Continue alternating each row.
Push each row snugly against the previous one. Tight packing improves strength and reduces gaps.
Secure strip ends with tiny dots of glue on the back or along the border.
Step 4: Raise and define the walls
Once the base is woven, pre-crease along the border lines with your ruler edge.
Fold the outer tabs/strips upward to create vertical walls.
If your basket uses separate vertical uprights, tape or glue them in place at equal spacing before weaving wall rows.
Step 5: Weave wall rows
Start at one corner and weave horizontal strips around the upright walls.
Maintain the alternation logic:
- If row one begins “over” at upright A,
- row two should begin “under” at upright A.
This creates a true checker weave and helps lock the structure.
Step 6: Lock the rim
At your target height, fold excess upright strips inward and glue them under the top woven row.
Add one final “rim strip” around the inside top edge to hide raw ends and increase durability.
Clip with clothespins while drying for crisp, professional edges.
Step 7: Add a handle (optional, but very cute)
Cut a strip 1 to 1.5 inches wide and long enough to arch over the basket.
For strength, laminate two strips together with glue (grain directions opposite if possible).
Attach inside the basket walls with glue + reinforcement tabs.
Step 8: Seal and finish
Brush on a thin protective coat to reduce dust absorption and improve stiffness.
Let dry completely before loading with items.
If your basket is for dry storage (clips, gift tags, ribbon scraps), one coat is enough.
For heavier use, apply two light coats.
Design Variations You Can Try
1) Cereal box color-pop basket
Cut strips from printed cereal box panels and alternate colors/pattern zones.
You get instant graphic contrast without buying patterned paper.
2) Danish heart-inspired mini basket
Use two folded, slotted heart panels and weave them together to form a tiny hanging treat holder.
Great for holiday trees, classroom exchanges, and handmade gift tags.
3) Newspaper rope basket hybrid
Roll newspaper into tubes, flatten slightly, and weave around a bowl mold.
This creates a sturdier, rustic texture that looks shockingly sophisticated once painted.
4) Pattern-play basket
Alternate strip widths (e.g., 0.5 inch + 1 inch) or color rhythm (two dark, one light)
for a modern geometric look.
Troubleshooting Common Problems
“My basket is wobbling.”
Cause: Loose weave or weak base paper.
Fix: Pack rows tighter, reinforce base with a second layer, and add a rim strip.
“The corners look messy.”
Cause: Uneven strip spacing and rushed folding.
Fix: Mark corner guides, pre-crease folds, and trim ends before gluing.
“Strips keep slipping out.”
Cause: Ends not anchored.
Fix: Glue strip ends under border/rim and press with clips while drying.
“It tears when I weave.”
Cause: Paper too thin or cuts too close.
Fix: Increase border width and use heavier stock for warp/base.
“It looks flat, not polished.”
Cause: No finish details.
Fix: Add top rim band, edge inking, label tag, or a contrasting handle.
Kid-Friendly and Classroom-Friendly Version
Want a version for younger makers? Keep it simple and safe:
- Use pre-cut strips and blunt scissors
- Choose wider strips (1 inch) for easier weaving
- Limit basket height to 2 inches
- Use glue sticks for low-mess assembly
- Turn the project into a color/pattern game
This adaptation is great for fine motor practice, visual sequencing, and patient focus.
Bonus: kids are usually very proud of anything that can hold candy.
Eco-Friendly Crafting Tips
A DIY woven paper basket is one of the easiest ways to turn “recycling bin maybe-later” into “organized now.”
Try these sustainability upgrades:
- Use junk mail envelopes for patterned strips
- Repurpose cereal boxes for structural bands
- Use newspaper for internal reinforcement layers
- Reuse ribbon scraps as basket handles
- Store lightweight items to extend basket life
This approach respects the reduce-reuse hierarchy while still giving you a useful, stylish object.
500-Word Experience Notes: What Makers Usually Learn After the First Few Baskets
The first experience most people report with a woven paper basket is pure optimism. You cut a few strips, line things up,
and think, “How hard can this be?” Then row three happens. One strip shifts, the corner drifts, and suddenly your basket
resembles a tiny architectural model from a post-apocalyptic design school. This is normal.
By the second or third basket, one huge insight appears: tension beats speed. Makers who slow down and snug each row
tightly end up with cleaner walls and sharper corners. People who rush usually need “emergency glue diplomacy” later.
It’s not that fast crafters failit’s that weaving rewards rhythm more than velocity.
Another common lesson is that paper personality matters. Construction paper is friendly and colorful, but it can soften quickly
when handled a lot. Cardstock is less dramatic and much more dependable. Recycled cereal box strips are the surprise overachiever:
they’re sturdy, free, and printed graphics can look intentionally modern when arranged thoughtfully. A lot of makers start with pretty
paper and end with practical paper by basket number four.
Corners are where confidence is earned. Almost everyone struggles at first with bulging corners or uneven side heights.
The fix is wonderfully boring: measure, pre-crease, and keep strip spacing consistent. People who skip pre-creasing often say,
“My wall won’t stand up.” People who pre-crease say, “I cannot believe that worked so well.” It really is the difference between
floppy and functional.
Finishing also changes everything. Many first-time baskets stop at “technically complete,” which means exposed strip ends and a soft rim.
Makers who add one inside rim strip and a light seal coat are usually shocked by how store-bought the basket suddenly feels.
The structure tightens, the top edge looks intentional, and the basket survives daily life instead of living a short, dramatic career.
There’s also a psychological pattern that comes up in workshops and family craft sessions: weaving is calming once the over-under logic
clicks. The early minutes require attention, but once the pattern settles in, people get quiet in a good way.
It becomes repetitive, meditative, and oddly satisfyinglike organizing a drawer, but prettier.
For parents and teachers, the “experience win” is often not the finished basket; it’s the moment kids self-correct a pattern mistake.
When they notice “this row should start under, not over,” that’s sequencing and problem-solving in action.
Add color choices and measurement, and the project quietly turns into cross-disciplinary learning disguised as fun.
Finally, experienced makers almost always recommend making two baskets back-to-back. The first one teaches mechanics.
The second one teaches style. On basket two, you choose better color contrast, trim cleaner edges, and adjust height on purpose.
That second basket is where most people go from “I followed a tutorial” to “I made this design.”
And yes, you will start looking at every empty cereal box like it has a destiny. That’s not clutter.
That’s creative inventory.
Conclusion
A DIY woven paper basket is one of the rare crafts that delivers on all fronts: easy entry, creative freedom, practical use,
and eco-friendly potential. With the over-under structure, consistent strip spacing, a locked rim, and a simple finish coat,
your basket can move from “cute craft” to “daily organizer” in one afternoon.
Start with a small basket, learn the rhythm, then scale up. Try one minimalist design and one bold upcycled version.
Once you get the technique, you can create gift baskets, drawer organizers, party favors, holiday holders, and desktop catchalls
without buying fancy materials.
In short: cut strips, weave patiently, glue smart, and enjoy the moment your paper turns into something genuinely useful.


