
Table of Contents >> Show >> Hide
- Why images matter in a Word document
- Method 1: Use the Insert tab to add images in Word
- Method 2: Drag and drop an image into the document
- Method 3: Copy and paste an image into Word
- What to do after you insert the image
- Tips for making images look better in Word
- Common problems and how to fix them
- Which of the three methods is best?
- Real-world experiences with adding images in Word
- Final thoughts
Adding images to a Microsoft Word document sounds simple until Word decides to act like it has its own creative vision. You drop in a picture, and suddenly it is huge, tiny, floating into your paragraph, or parked in the wrong zip code entirely. The good news is that adding images in Word is actually easy once you know the three methods that work best.
Whether you are building a school report, a business proposal, a flyer, a recipe sheet, or a family newsletter with far too many vacation photos, Word gives you several quick ways to insert pictures and get them looking polished. In this guide, you will learn how to add images to a Microsoft Word document using the Insert tab, drag and drop, and copy and paste. You will also learn how to resize pictures, wrap text around them, and avoid the classic “Why is my image covering half the page?” moment.
Note: Menu names can vary a little between Word for Windows, Word for Mac, and Word for the web, but the basic process is very similar.
Why images matter in a Word document
Pictures do more than make a document look pretty. They can explain an idea faster than a paragraph, break up walls of text, and make your document easier to scan. A screenshot can show a software step in seconds. A chart can turn boring numbers into something your reader might actually notice. A product photo can make a proposal feel more professional. In other words, images are the overachievers of document design.
That said, throwing a random image into a document without formatting it is like wearing running shoes with a tuxedo. It technically works, but it does not look intentional. So before you start inserting pictures, it helps to know the cleanest ways to do it.
Method 1: Use the Insert tab to add images in Word
This is the most reliable and beginner-friendly method. If you want the classic, no-surprises route, the Insert tab is your best friend.
How to insert a picture from your computer
- Open your Word document.
- Click where you want the image to appear.
- Select the Insert tab on the ribbon.
- Choose Pictures.
- Select the source, such as This Device or Picture from File.
- Find your image file, select it, and click Insert or Open.
This method is ideal when you already have a saved image on your computer, such as a JPG, PNG, or screenshot. It gives you control over exactly which file you are inserting, and it usually behaves more predictably than copying from a browser.
Other image sources in the Insert menu
Depending on your version of Word, you may also see options like Stock Images, Online Pictures, OneDrive, or even images from your mobile device. These options are handy when you do not already have the picture saved locally. For example, stock images are useful when you need something polished and generic, like a background image for a flyer or an icon for a report.
If you are working on a professional document, the Insert menu is usually the best place to start because it keeps your workflow organized. Instead of hunting through browser tabs and copy commands, you are pulling the image into Word in a more direct way.
Best time to use this method
- When the image file is already saved on your computer
- When you want the most stable insertion method
- When you are building a polished document for school or work
- When you want access to stock or online image options from inside Word
Method 2: Drag and drop an image into the document
If you love speed, drag and drop is the “I have things to do” method. It is quick, intuitive, and very satisfying when it works smoothly. You simply open the folder that contains your image, then drag the image file directly into the Word document and drop it where you want it.
How to drag and drop a picture into Word
- Open your Word document.
- Open File Explorer on Windows or Finder on Mac.
- Locate the image you want to use.
- Click and hold the image file.
- Drag it into your Word document window.
- Release the mouse button to drop the image into place.
That is it. No tabs, no dialog boxes, no extra clicking. It is wonderfully efficient, especially when you are inserting multiple images one after another.
Why people like drag and drop
Drag and drop feels natural because it matches the way many people organize files on a desktop. If you are designing a brochure, adding step-by-step screenshots, or building a visual handout, this method can save time. It is especially useful when your images are already sitting in a folder next to your document.
The one catch is that drag and drop can be a little finicky depending on your setup, open windows, or version of Word. If the image does not land where you expected, do not panic. Word is not judging you. It is just being Word. In that case, click the image, then use the layout tools to reposition it.
Best time to use this method
- When your image files are already open in a folder
- When you want the fastest desktop method
- When you are adding multiple pictures in a row
- When you prefer a visual workflow
Method 3: Copy and paste an image into Word
This method is perfect when the image is already on your screen or stored on your clipboard. Maybe you copied a screenshot, a chart from another Office app, or an image from a website you are using for reference. Instead of saving the file first, you can often paste it directly into Word.
How to copy and paste an image
- Copy the image from its original location.
- Click inside your Word document where you want the image to go.
- Press Ctrl + V on Windows or Command + V on Mac.
You can also use the Paste command from the Home tab or right-click in the document and select Paste. If the image came from another Office app, Word often handles it very smoothly. If it came from a browser or a screenshot tool, results can vary a little based on formatting, image quality, and source.
Why copy and paste is so handy
Copy and paste is great for quick tasks. Imagine you are creating a training guide and need to show what a software button looks like. Take a screenshot, copy it, and paste it directly into Word. Done. No separate file management required. It is also useful when pulling a chart from Excel into a report or reusing an image from PowerPoint in meeting notes.
Still, this method can bring extra formatting baggage with it, especially if the source is a web page. If the image looks fuzzy or oddly spaced after pasting, try saving the image first and inserting it with Method 1 instead.
Best time to use this method
- When working with screenshots
- When copying from Excel, PowerPoint, or another Office app
- When you need speed more than perfection
- When you do not want to save a separate image file first
What to do after you insert the image
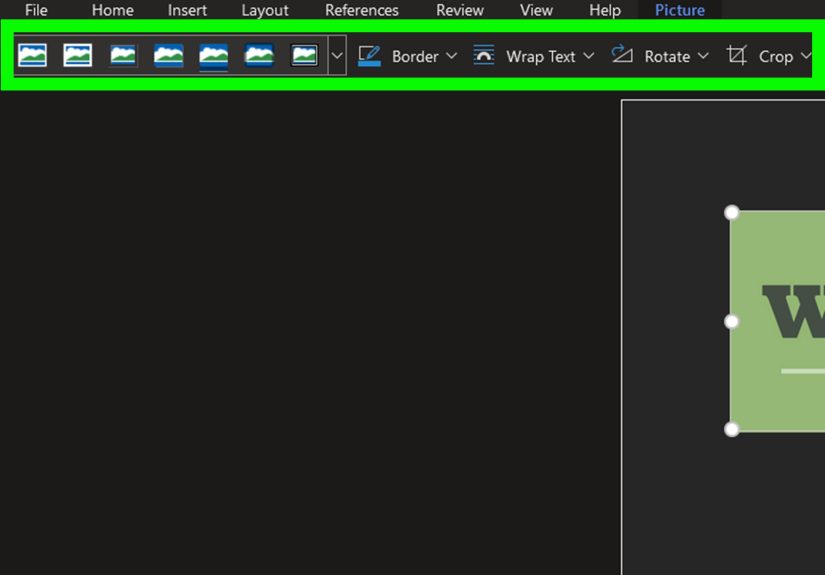
Adding the image is only half the job. After the picture lands in your document, you usually need to make it behave. This is where Word’s picture formatting tools come in.
Resize the image
Click the image, then drag one of the corner handles inward or outward. Using the corner handles keeps the picture proportionate, which is a fancy way of saying your dog will still look like a dog and not a stretched balloon animal.
Wrap text around the image
By default, Word often inserts pictures in line with text, which means the image behaves like a giant text character. That is helpful for simple documents, but not always for stylish layouts. If you want text to move around the image, click the picture and choose a wrap option such as Square, Tight, Top and Bottom, Behind Text, or In Front of Text.
For most everyday documents, Square is the easiest wrap setting. It lets the text flow around the edges of the picture while keeping the layout neat. If you want more freedom to place the image anywhere on the page, this is usually the setting to try first.
Move the image
Once text wrapping is enabled, you can drag the image to a better location. If you want it to stay anchored in one place, look for options like Fix Position on Page. If you want it to move along with nearby text as you edit, choose Move with Text.
Crop or adjust the picture
If the image includes extra background or unnecessary edges, use the Crop tool. You can also experiment with brightness, contrast, artistic effects, and picture styles if you want your document to look a little less “plain spreadsheet cousin” and a little more polished.
Tips for making images look better in Word
Use high-quality images
A tiny, blurry image will not magically become sharp because it is in a Word document. Start with the best quality image you have, especially for resumes, marketing materials, or anything you plan to print.
Keep spacing consistent
If you insert several images, align them consistently and leave enough white space around them. Crowded images make a document feel messy, even if the content is excellent.
Add captions when needed
If the image explains something important, give it a caption. A simple line such as “Figure 1. Sales dashboard for Q1” can make a document easier to follow, especially in reports and academic writing.
Add alt text for accessibility
If the image carries meaning, add alt text so screen readers can describe it to people who cannot see the image. Right-click the picture and choose View Alt Text or Edit Alt Text. Write a short description that explains what matters in context. If the image is purely decorative, you can mark it as decorative instead.
Choose the right default wrap setting
If you insert pictures often and hate changing the layout every single time, Word lets you change the default image wrap behavior in its advanced options. That can save you a surprising amount of clicking over time.
Common problems and how to fix them
The image is too big
Click the picture and drag a corner handle inward. If it still looks wild, use the Size settings in the picture formatting tools.
The image will not move where you want
Check the wrap setting. If it is set to In Line with Text, Word will keep treating it like a text character. Change it to Square or another wrapping option so you can move it more freely.
The picture disappeared behind text
It may be set to Behind Text. Change the wrapping style or use the Selection Pane if needed to find and select it.
The pasted image looks strange
If a copied image arrives blurry, misaligned, or with odd formatting, save the image first and then use the Insert method. Copy and paste is convenient, but it is not always the cleanest choice.
Which of the three methods is best?
The answer depends on what you are doing.
- Use Insert when you want the most reliable and professional method.
- Use drag and drop when speed matters and your image files are already open in a folder.
- Use copy and paste when you are working with screenshots, charts, or images already on your clipboard.
For most formal documents, the Insert method wins because it gives you the cleanest workflow. But in real life, many people bounce between all three methods depending on the situation. That is not cheating. That is efficiency.
Real-world experiences with adding images in Word
If you have ever worked on a Word document under deadline pressure, you already know that inserting an image is not always the dramatic event it becomes in your head. Most of the time, it is simple. The real challenge is getting the image to look like it belongs there instead of appearing as if it crash-landed from another dimension.
One common experience happens when someone is creating a school assignment or office report and decides, at the last minute, that the document needs screenshots. They copy a screenshot, paste it into Word, and feel brilliant for about seven seconds. Then the image shows up at a weird size, the paragraph spacing goes wonky, and suddenly they are negotiating with the wrap settings like a hostage mediator. This is exactly why knowing all three insertion methods is so useful. If copy and paste gets messy, switching to Insert can clean things up fast.
Another familiar scenario is working on a flyer, event handout, or simple newsletter. You have a folder full of photos, so drag and drop feels like the obvious choice. It usually is. It is quick, smooth, and perfect for building a draft. But after the images are in place, you still have to do the grown-up part: align them, resize them, and make sure the text does not look like it is trying to escape around the edges.
Then there is the professional document experience. Maybe you are preparing a proposal, onboarding guide, product sheet, or training manual. In this case, the Insert tab tends to feel safest. You select the exact file, place it deliberately, and format it with less chaos. It is not the flashiest method, but it is dependable, and dependable is a beautiful thing when your boss expects the document in ten minutes.
People also learn quickly that image placement in Word is part science, part patience, and part accepting that Word has opinions. You may want the image in one spot, while Word gently suggests somewhere else. The fix is usually simple: adjust text wrapping, move the anchor, or change the picture position. Once you understand that Word is following layout rules rather than plotting against you personally, the process becomes much less frustrating.
Over time, most users settle into a rhythm. They use Insert for saved files, drag and drop when moving fast, and copy and paste for screenshots. That mix works because real documents are messy, deadlines are real, and nobody wants to spend half an hour arguing with a picture of a pie chart. The more you practice, the more natural it feels, and before long you are the person casually telling other people, “Just change the wrap setting.” That is when you know you have seen things.
Final thoughts
Learning how to add images to a Microsoft Word document is one of those small skills that pays off everywhere. It helps with school projects, business reports, marketing materials, personal documents, and just about anything else that looks better with a visual. The good news is that Word gives you three easy ways to do it: use the Insert tab, drag and drop, or copy and paste.
The trick is not just inserting the picture, but knowing what to do next. Resize it carefully, choose a smart text wrap option, move it into place, and add alt text when it matters. Do that, and your document will look cleaner, read better, and feel much more professional. In other words, your image will stop behaving like a rebellious toddler and start acting like part of the team.


