
Table of Contents >> Show >> Hide
- Step 1: Decide What You’re Really Buying (Hint: It’s Not “Just an Oven”)
- Step 2: Choose Your Configuration (Range vs. Cooktop + Wall Oven)
- Step 3: Pick the Right Installation Style (Freestanding vs. Slide-In vs. Drop-In)
- Step 4: Choose Your Fuel Type (Gas vs. Electric vs. Induction vs. Dual Fuel)
- Step 5: Size It Correctly (Measure Twice, Save Your Sanity)
- Step 6: Don’t Ignore Ventilation (Your Future Self Will Thank You)
- Step 7: Focus on Performance Specs That Actually Matter
- Step 8: Choose Features You’ll Use (Not Features That Impress the Sales Tag)
- Step 9: Safety and Code Stuff (Unsexy, Unskippable)
- Step 10: A Simple Decision Guide (Pick Your “Best” in 3 Minutes)
- Shopping Checklist for Remodelers (Save This Before You Click “Buy”)
- Real-World Remodel Lessons (Experiences People Wish They’d Heard First) 500+ Words
- Conclusion: Your “Best” Range or Oven Is the One That Fits Your Kitchen and Your Life
If you’re remodeling your kitchen, choosing a range or wall oven is one of those decisions that feels simpleuntil you realize it affects your cabinets, electrical, ventilation, and whether you’ll be eating takeout while a contractor mutters the words “backorder.” The good news: you don’t need a culinary degree (or a sixth sense) to pick the right setup. You just need a smart plan, a tape measure, and the humility to admit your “signature dish” might be microwave popcorn.
This guide walks you through the choices that actually matterfuel type, configuration, size, ventilation, features worth paying for, and the remodeling “gotchas” that can turn a simple appliance swap into a small architectural event.
Step 1: Decide What You’re Really Buying (Hint: It’s Not “Just an Oven”)
A cooking appliance is part appliance, part infrastructure. In a remodel, you’re also choosing:
- Layout impact: range vs. cooktop + wall oven changes cabinet design and workflow.
- Utility requirements: gas line capacity, 240V electrical circuits, or both.
- Ventilation demands: hood size, ducting route, and airflow power.
- Daily experience: how quickly water boils, how evenly cookies bake, and how annoying cleaning becomes.
Quick definitions (so we speak the same kitchen language)
- Range: cooktop + oven in one unit (freestanding, slide-in, or drop-in).
- Cooktop + wall oven: separate units; cooktop in the counter, oven built into cabinetry.
- Single vs. double oven: one cavity vs. two cavities (either stacked wall ovens or double-oven ranges).
- Convection: a fan circulates hot air for more even cooking (sometimes “true convection” adds a heating element near the fan).
Step 2: Choose Your Configuration (Range vs. Cooktop + Wall Oven)
In remodels, this choice is the fork in the road. Pick based on space, ergonomics, and budgetnot vibes (even though the built-in look is very tempting).
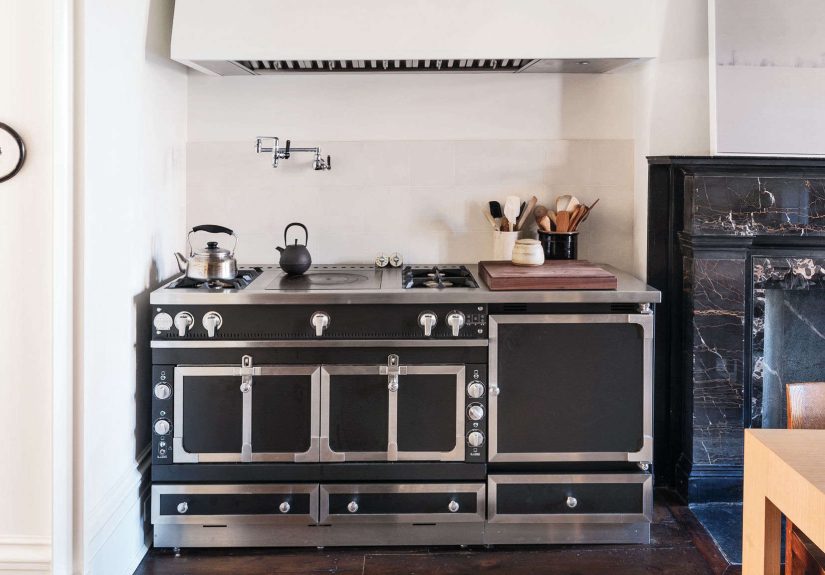
Option A: A range (the popular, practical all-in-one)
Best for: most kitchens, most budgets, and anyone who wants fewer moving parts (literally and figuratively).
- Pros: typically less expensive; simpler installation; great for standard 30-inch openings; fewer cabinets to customize.
- Cons: bending to use the oven; less layout flexibility; if one part fails, the whole unit is out of commission.
Option B: Cooktop + wall oven (the “I’m serious about this kitchen” setup)
Best for: cooks who bake often, households that want the oven at a comfortable height, or layouts where the cooktop belongs on an island.
- Pros: better ergonomics; flexible layout; you can choose different “levels” (e.g., premium wall oven with a simpler cooktop).
- Cons: usually higher cost; more cabinetry work; often more electrical planning; installation can be more complex.
A practical rule of thumb
If your kitchen is small to average and you’re prioritizing a smooth remodel: choose a range. If your remodel is major (new cabinets, reworked layout) and you want comfort and flexibility: consider cooktop + wall oven.
Step 3: Pick the Right Installation Style (Freestanding vs. Slide-In vs. Drop-In)
This is where design meets reality. It’s also where people accidentally buy the wrong thing and learn what “return policy” really means.
Freestanding ranges
- Look: finished sides; often a backguard (controls at the rear).
- Why you’d choose it: easiest swap; usually more budget-friendly; flexible placement.
Slide-in ranges
- Look: a more built-in appearance; controls typically at the front; sits between cabinets with minimal gaps.
- Why you’d choose it: sleek design; uninterrupted backsplash; easier to reach controls without leaning over burners.
Drop-in ranges
- Look: designed to “drop in” with cabinetry support; more integrated.
- Why you’d choose it: specific cabinet designs or replacing an existing drop-in setup.
Remodeling tip: If you’re changing from freestanding to slide-in (or vice versa), plan for countertop edges, filler strips, and whether your backsplash will suddenly reveal a mysterious rectangle of “old tile history.”
Step 4: Choose Your Fuel Type (Gas vs. Electric vs. Induction vs. Dual Fuel)
This is the part that inspires debates at dinner parties, right after “Is a hot dog a sandwich?” Here’s the calm, practical breakdown.
Gas ranges
Why people love them: responsive heat control, visible flame, great for sautéing and charring, and they work during many power outages (though modern ignition systems may still need electricity).
Remodeling considerations:
- Ventilation matters more: gas cooking produces combustion byproducts, so a ducted hood is a big quality-of-life upgrade.
- Gas line capacity: higher-BTU “pro-style” ranges may require a plumber to confirm supply size and pressure.
Electric radiant (coil or smooth-top)
Why it works: typically lower price, widely available, and simpler installation when there’s already the correct electrical hookup.
Tradeoffs: can be slower to respond than gas or induction; smooth tops are easy to wipe but can show scratches if cookware is dragged like it’s training for a marathon.
Induction (the quiet overachiever)
Why it’s trending: induction heats the pan directly using magnetic energy, which can mean faster boiling, steady simmering, and a cooktop that’s easier to clean because spills are less likely to bake onto a super-hot surface. It’s also typically more energy-efficient than gas and traditional electric cooking.
Reality checks:
- Cookware compatibility: you need magnetic cookware (many stainless and all cast iron work; some “fancy” non-magnetic sets do not).
- Electrical planning: may require a 240V circuit and potentially electrical upgrades in older homes.
- Cooking feel: different from gasmore like precise “dial in the number” control than “watch the flame.”
Dual fuel (gas cooktop + electric oven)
Why it exists: many home cooks want gas responsiveness on top and the even, dry heat of an electric oven for baking. Dual fuel tries to give you bothat a typically higher price and with both gas and electrical requirements.
Step 5: Size It Correctly (Measure Twice, Save Your Sanity)
Most remodel mistakes aren’t dramatic. They’re 1/2-inch problems that become 3-week delays.
Standard widths
- 30 inches: the default for most U.S. kitchens and replacement projects.
- 36 inches: a common “upgrade” size (often in higher-end or pro-style ranges).
- 48 inches and up: for big kitchens and serious cookingalso serious ventilation and budget.
Depth, door swing, and handles
Appliance depth can change how your kitchen feels. Some slide-in ranges sit flush with counters; others protrude. Add a chunky handle and an open oven door, and suddenly your walkway is a gymnastics course.
Wall oven sizing (if you go built-in)
Wall ovens commonly come in standard widths (often 24, 27, or 30 inches), and cabinet cutouts matter more than the label on the box. In remodels, cabinet design should follow the exact installation specs for the model you choosenot the other way around.
Step 6: Don’t Ignore Ventilation (Your Future Self Will Thank You)
Ventilation is the unsung hero of kitchen comfort. It reduces smoke, grease, and lingering odors that can make your home smell like last Tuesday’s salmon until next Tuesday.
Ducted vs. ductless
- Ducted (to outdoors): best performance for heat, moisture, and pollutants.
- Ductless (recirculating): easier to install, but relies on filters and generally removes less heat and moisture.
How powerful should your hood be?
Hood power is often measured in CFM (cubic feet per minute). Bigger isn’t always bettervery high CFM can require makeup air depending on local code and home tightness. A balanced choice is usually the sweet spot.
Match hood size to cooktop size
As a practical starting point, many pros recommend a hood that’s at least as wide as your cooking surface (and often a bit wider). This matters even more with high-heat cooking, frequent frying, or powerful gas burners.
Step 7: Focus on Performance Specs That Actually Matter
Manufacturers love bold numbers. Your job is to figure out which numbers change your Tuesday-night dinner.
Cooktop performance: high heat and low simmer
- Gas: look for a strong high-output burner and a true low simmer burner.
- Induction: check element size variety (small for butter, big for stockpots) and whether there’s a power boost feature.
- Bridge elements: helpful for griddles or long pansmore common in induction and some electric models.
Oven performance: convection, consistency, and capacity
If you bake often, prioritize even heating and reliable temperature control. Convection can help with browning and multi-rack cooking, but it’s not magic for every recipesome delicate bakes still do better on conventional settings.
Capacity: what fits your real life?
A lot of 30-inch ranges hover around the “family dinner” capacity range (often around 5 cubic feet, give or take). Bigger is helpful for sheet pans, turkeys, and holiday cookingbut only if you’ll actually use it. Otherwise, you’re paying to heat a small auditorium.
Step 8: Choose Features You’ll Use (Not Features That Impress the Sales Tag)
Features can be awesome. They can also be “one more thing to break.” Here’s a grounded way to choose.
Worth considering
- Convection modes: especially if you roast often or bake on multiple racks.
- Temperature probe: fantastic for roast chicken, prime rib, and “I refuse to guess” cooking.
- Easy-clean surfaces: sealed burners, continuous grates, or smooth tops you can wipe quickly.
- Steam-clean option: handy for lighter messes between deep cleans.
- Control lock / safety lock: particularly important with front controls and households with kids or pets.
Nice-to-have (if it fits your habits)
- Air fry: convenient, but not always a replacement for a dedicated air fryer if you want “maximum crisp, minimum wait.”
- Smart features: useful for notifications and remote preheat in some households; unnecessary in others.
- Warming drawer: great for entertainers; irrelevant if your parties are mostly you and a TV remote.
Step 9: Safety and Code Stuff (Unsexy, Unskippable)
Safety features aren’t glamorous, but they prevent the kind of “excitement” nobody wants in a kitchen.
Anti-tip protection
Freestanding ranges are designed to be installed with anti-tip brackets. Make sure your installer actually installs them. It’s one of those tiny parts that does a huge job.
Front-mounted knobs and accidental activation
Front controls can be greatuntil a bump turns into an unintended “preheat.” If you’re shopping slide-in models, prioritize control lock features and consider knob guards if your household includes curious kids, pets, or adults who gesture wildly while telling stories.
Clearances and combustibles
Clearance requirements vary by appliance and local code. In general, plan adequate vertical clearance to cabinets and use a proper hood or protective surface as required. Always follow the installation instructions for the exact model you choose and confirm local requirements.
Electrical and gas planning
Many electric ranges and induction ranges require a 240V outlet and a dedicated circuit. For gas ranges, you’ll need a safe, code-compliant gas connection and (ideally) robust ventilation. In a remodel, confirm utilities earlybefore cabinets are finalizedso you don’t end up redesigning your kitchen around a junction box.
Step 10: A Simple Decision Guide (Pick Your “Best” in 3 Minutes)
| Your Cooking Reality | What to Prioritize | Great Fit |
|---|---|---|
| You bake weekly (cookies, bread, casseroles) | Even oven performance, convection, reliable temperature | Electric or dual fuel range; or wall oven setup |
| You cook fast weeknight meals | Quick heat response, easy cleanup | Induction range (if cookware + electrical work) |
| You love searing and high-heat cooking | Powerful burner/element + strong ventilation | Gas or induction + serious hood |
| Your kitchen is small and the remodel is modest | Standard size, simple installation, value | 30″ freestanding or slide-in range |
| You want the oven at a comfy height | Ergonomics, cabinet planning | Cooktop + wall oven |
Shopping Checklist for Remodelers (Save This Before You Click “Buy”)
- Measure: width, depth, height, and cabinet cutout (not just “it looks like 30 inches”).
- Confirm utilities: gas line and shutoff location; electrical requirements and circuit capacity.
- Plan ventilation: duct route, hood size, CFM, and whether makeup air may be required.
- Pick installation type: freestanding vs slide-in vs drop-in (match your cabinet plan).
- Prioritize the right features: convection, probe, control lock, easy-clean design.
- Check service availability: a great range is less great if nobody local can service it.
- Read the installation guide early: it’s the most honest document in the whole process.
Real-World Remodel Lessons (Experiences People Wish They’d Heard First) 500+ Words
Remodel advice is everywhere, but the best lessons come from what happens after the shiny new appliance arrives. Here are real-world patterns that homeowners and remodelers commonly reportshared here as practical “experience notes” so you can avoid the classic kitchen plot twists.
1) The “It’s 30 inches… ish” surprise
One of the most common remodel stories starts with confidence and ends with a frantic tape measure. A homeowner replaces an old freestanding range with a sleek slide-in, assuming standard sizing means everything will line up like a LEGO set. Then the new range arrives and reveals two truths: first, the fit depends on the exact cutout and surrounding countertop edges; second, older kitchens can be charmingly inconsistent. The fix might be simple (a filler strip or trimming), or it might trigger a chain reaction (countertop adjustment, backsplash patch, or cabinet modification). The lesson: treat measurements like a contract, not a vibe. Confirm cutout specs before ordering, and remember that handles and control panels can affect how far the unit sticks out.
2) Ventilation regret is real (and it smells like last month’s bacon)
People rarely regret buying a better hood. They frequently regret not planning for it. A common “experience” sequence: someone upgrades to a more powerful cooktop (gas with higher output or a pro-style range), keeps an old recirculating microwave hood, and then wonders why the kitchen feels hot and smoky during searing or stir-frying. They wipe cabinets more often, the air feels heavier, and the smoke detector joins the conversation at the worst time. Later, they upgrade to a ducted hood and immediately notice the difference: less lingering odor, less grease film, and a kitchen that feels calmer. The lesson: if you’re spending on cooking performance, spend some planning energy on ventilation. Duct routes are easiest to solve during a remodelwhen walls and ceilings are still negotiable.
3) Induction: the honeymoon is fast, but the cookware question is forever
Induction converts a lot of skeptics after the first pot of pasta water boils at warp speed. People love the steady simmer, the easy wipe-down, and the fact that the cooktop doesn’t keep radiating heat like a space heater after you turn it off. But induction remodel “experience notes” have two recurring themes. First: cookware. Many households discover half their pots are not magnetic, and replacing cookware can be an unexpected extra cost. Second: power planning. In older homes, adding or updating a 240V circuit can be straightforwardor it can uncover an electrical panel that is already at capacity. The lesson: induction is amazing when the kitchen infrastructure supports it. Before you fall in love with the features list, do a quick “magnet test” on your cookware and talk to an electrician early if your home is older.
4) Double ovens are either life-changing or… just extra preheat
For bakers and holiday hosts, double ovens can feel like unlocking a new level in the kitchen game. You can roast in one cavity and bake in the other, or keep one oven at a lower temp for warming. But for some households, the second oven becomes a once-a-year feature that mainly preheats itself in solidarity. A frequent remodel lesson is that a single larger oven with strong convection meets everyday needs better than a split setupunless you truly cook multiple dishes at different temperatures often. The lesson: match the oven layout to your calendar, not your aspirations. If you host big gatherings and bake often, double ovens can be worth it. If your busiest cooking day is “pizza Friday,” you might be happier investing in better ventilation, induction performance, or a more reliable single-oven model.
5) The best appliance is the one you can service
Finally, a very practical experience from remodelers: local service availability matters. Premium brands and feature-packed models are excitinguntil a small part fails and the nearest authorized service tech is booked for weeks. Many experienced homeowners now choose appliances with strong local support, even if that means skipping the fanciest screen or the most futuristic mode. The lesson: before buying, check who services the brand in your area and what warranty coverage looks like. A kitchen is a daily-use space; downtime is expensive in frustration alone.
Conclusion: Your “Best” Range or Oven Is the One That Fits Your Kitchen and Your Life
The definitive remodeling approach is simple: choose the configuration that matches your layout, pick the fuel type that fits your cooking habits and infrastructure, size everything with precision, and plan ventilation like it’s part of the appliance (because it is). Do that, and you’ll get a kitchen that feels better every daywhether you’re baking sourdough or reheating leftovers like a champion.


