
Table of Contents >> Show >> Hide
- First, Know Your Brass: Solid, Plated, or Lacquered?
- Brass Cleaning Supplies: What You’ll Actually Use
- The Golden Rule: Start With a Gentle Wash
- How To Clean Tarnished Brass: 6 Methods That Work
- Method 1: Vinegar + Salt + Flour Paste (The “Pantry Power Trio”)
- Method 2: Lemon + Salt (Fast, Classic, and Satisfying)
- Method 3: Lemon + Baking Soda Paste (Gentle Polish for Stubborn Spots)
- Method 4: Ketchup (The Weird One That Works)
- Method 5: Mild Commercial Brass Polish (When You Want the Shortcut)
- Method 6: Soak-and-Swish (Best for Small, Unlacquered Items)
- How To Clean Lacquered or Brass-Plated Items (Without Wrecking Them)
- Detail Work: Getting Tarnish Out of Grooves, Engraving, and Texture
- How To Keep Brass Shiny Longer (Because You Have Better Things to Do)
- Mistakes to Avoid When Cleaning Tarnished Brass
- Quick Scenarios: What Should You Do If…?
- FAQ: Brass Cleaning Questions People Actually Ask
- Real-World Experiences: What Cleaning Tarnished Brass Actually Feels Like (Plus Lessons Learned)
Brass is the extrovert of the metals world: warm, golden, always ready to show off… until it isn’t. Then it turns moody, blotchy, and dulllike it stayed up too late doom-scrolling in a humid bathroom. That “tarnish” is a normal chemical reaction between brass and air, moisture, skin oils, and household chemicals. The good news: most tarnished brass can be cleaned at home with simple supplies and a little patience. The even better news: you don’t have to scrub like you’re trying to erase your browser history.
This guide walks you through safe, effective ways to clean tarnished brasswhether it’s a candlestick, a doorknob, a drawer pull, or a vintage find that looks like it survived three decades in a basement. We’ll cover how to figure out what kind of brass you’re dealing with, the best cleaning methods for each situation, what to avoid (so you don’t “clean” the finish right off), and how to keep brass shiny longer. At the end, you’ll also get real-world cleaning experiences and lessons learnedthe kind you usually only get after making a few “oops” decisions.
First, Know Your Brass: Solid, Plated, or Lacquered?
Before you pick a cleanerDIY or store-boughtfigure out what’s on the surface. Brass items generally fall into three categories: solid brass, brass-plated, or lacquered brass. Cleaning the wrong way can scratch plating, cloud lacquer, or strip protective coatings and make tarnish come back faster.
Quick clues you can use (no lab coat required)
- Magnet test: Brass itself isn’t magnetic. If a magnet strongly sticks, the item is likely steel/iron underneathoften meaning it’s brass-plated. (Not every non-magnetic item is solid brass, but a strong “stick” is a big hint you’re dealing with a base metal.)
- Look at worn edges: On brass-plated pieces, high-contact spots (corners, edges, knobs) may reveal a different color underneath. Solid brass should look consistent throughout.
- Shiny, “sealed” look: Many fixtures and hardware pieces are lacquered to slow tarnish. Lacquer can look like a smooth, clear coat. Tarnish on lacquered brass often appears where the coating is scratched or failing.
- When in doubt: Treat it like plated or lacquered and start with the gentlest method. You can always step up the cleaning power. You can’t un-scratch a finish.
Brass Cleaning Supplies: What You’ll Actually Use
You don’t need a hazmat suit or a toolbox the size of a small car. Start simple and build only if needed.
Basics (safe for most brass situations)
- Microfiber cloths or soft cotton rags
- Mild dish soap
- Warm water
- Soft toothbrush (for grooves and details)
- Soft towel for drying
DIY “tarnish fighters” for unlacquered solid brass
- White vinegar
- Table salt
- All-purpose flour
- Lemon
- Baking soda (use gently)
- Ketchup (yes, really)
Optional (when you want the shortcut route)
- Commercial brass polish (follow label directions)
- Protective wax (like paste wax or car wax) for longer-lasting shine
The Golden Rule: Start With a Gentle Wash
Even when brass looks “tarnished,” part of what you’re seeing may just be grimehand oils, dust, cooking residue, and that mysterious sticky film that appears on anything in a kitchen. Washing first prevents you from rubbing dirt into the metal and accidentally making tiny scratches.
Step-by-step gentle wash (safe for plated or lacquered brass, too)
- Mix warm water with a few drops of mild dish soap.
- Dip a soft cloth into the soapy water, wring it out well, and wipe the surface.
- Use a soft toothbrush for crevices and detailsgentle pressure only.
- Rinse with a clean damp cloth (don’t soak lacquered or plated pieces unless you’re sure it’s safe).
- Dry immediately and completely with a soft towel.
- Buff lightly with a dry microfiber cloth to restore warmth and even out the finish.
If the brass looks great after this step: congratulations, you just saved yourself from unnecessary chemistry. If it’s still dull or blotchy: time for targeted tarnish removal.
How To Clean Tarnished Brass: 6 Methods That Work
The methods below are best for unlacquered solid brass (or sturdy brass items where you’ve confirmed the finish can handle it). If you suspect your piece is brass-plated or lacquered, stick to soap-and-water cleaning and gentle buffing, or use a polish specifically labeled safe for plated/lacquered surfaces.
Method 1: Vinegar + Salt + Flour Paste (The “Pantry Power Trio”)
This is one of the most popular DIY brass cleaners because it’s effective, easy to apply, and clings to vertical surfaces like candlesticks and door hardware.
- Mix vinegar, salt, and flour into a thick paste (think: frosting, not soup).
- Apply a thin layer to the tarnished brass with a soft cloth.
- Let it sit brieflythen gently rub in small circles.
- Rinse thoroughly with warm water.
- Dry immediately, then buff with a microfiber cloth.
Pro tip: Don’t let acidic pastes camp out on brass for ages. A “quick visit” is usually enough, and overdoing it can dull the finish.
Method 2: Lemon + Salt (Fast, Classic, and Satisfying)
Lemon is naturally acidic, and salt provides mild scrubbing power. This combo is great for small items and spot-treating tarnish.
- Cut a lemon in half.
- Sprinkle salt on the cut side.
- Rub the lemon gently over the brass (small circles, light pressure).
- Use a toothbrush for textured areas.
- Rinse well and dry immediately.
If you’re cleaning something with fine detail (like ornate drawer pulls), keep the salt from packing into grooves. You want shiny brass, not a salty science experiment.
Method 3: Lemon + Baking Soda Paste (Gentle Polish for Stubborn Spots)
Baking soda is mildly abrasive, so this works best when you need a bit more “lift” than lemon alonebut you still want to be careful, especially on older or sentimental pieces.
- Mix lemon juice with a small amount of baking soda to form a paste.
- Apply with a soft cloth and rub lightly.
- Rinse completely and dry right away.
- Buff until the surface looks even.
Use this sparingly on delicate finishes and avoid it entirely on thin plating unless the product is specifically labeled safe.
Method 4: Ketchup (The Weird One That Works)
Ketchup contains mild acids (tomatoes, vinegar) and can loosen tarnish surprisingly wellespecially on larger pieces where you want a spreadable cleaner. It’s also great when you realize you’re out of vinegar but somehow have three ketchup packets in every drawer.
- Apply a thin layer of ketchup to the brass.
- Let it sit briefly.
- Wipe with a soft cloth, then rinse thoroughly.
- Dry completely and buff.
Important: Rinse extremely well. Dried ketchup residue is not the “antique finish” anyone is looking for.
Method 5: Mild Commercial Brass Polish (When You Want the Shortcut)
Store-bought brass polishes can be fast and effective, especially for heavily tarnished pieces. The key is to pick a product appropriate for your finish (solid brass vs plated vs lacquered) and follow the label. Many polishes also leave a protective film that slows future tarnish.
- Test the polish on a hidden area first.
- Use a soft clothavoid rough pads.
- Polish lightly, then buff until the shine looks even.
- Remove all residue from crevices (toothbrush helps).
Method 6: Soak-and-Swish (Best for Small, Unlacquered Items)
For small pieces like solid brass candlestick parts, screws, or hardware (that you’ve removed from furniture), soaking can help loosen tarnish and grime in hard-to-reach places.
- Start with a gentle soapy soak and brush clean.
- If needed, use a mild acidic solution (like diluted vinegar in water) for a short soak.
- Rinse thoroughly, dry immediately, and buff.
Avoid soaking brass-plated or lacquered pieces unless you’re sure it’s safewater can sneak into seams and create new problems.
How To Clean Lacquered or Brass-Plated Items (Without Wrecking Them)
Lacquered and plated brass look great… right up until someone attacks them with an abrasive cleaner like they’re sanding a deck. If your brass item is lacquered or plated, your best strategy is: clean gently, dry completely, and protect the finish.
Best approach
- Use warm water + mild dish soap + a soft cloth.
- Use a soft toothbrush for details (light pressure).
- Rinse with a damp cloth instead of running water over the piece.
- Dry immediately and buff with microfiber.
If lacquer is failing (peeling, cracking, cloudy patches), polishing over it can make things look worse. In that situation, consider leaving the patina, touching up only gently, or consulting a professional refinisherespecially for antiques or valuable fixtures.
Detail Work: Getting Tarnish Out of Grooves, Engraving, and Texture
Brass loves ornate designs. Tarnish loves them more. Here’s how to clean the fancy parts without turning your item into a scratched-up regret.
- Toothbrush technique: Dip a soft toothbrush into your chosen cleaner and use small, controlled strokes.
- Cotton swabs: Great for corners, ridges, and tight seamsespecially on hardware.
- Rinse like you mean it: Cleaner residue left in grooves can dry white, sticky, or dull. Rinse thoroughly and wipe out details.
- Dry immediately: Water spots and streaks show up fast on shiny brass. Dry first, buff second.
How To Keep Brass Shiny Longer (Because You Have Better Things to Do)
Brass tarnishes because it’s reactive. You can’t change its personality, but you can help it behave. After cleaning, a little protection goes a long way.
Easy prevention checklist
- Buff dry every time: Especially for bathroom and kitchen brass, where water and humidity are constant.
- Handle less, wipe more: Skin oils speed up tarnish. A quick microfiber wipe after heavy handling helps.
- Use a protective wax: A thin coat of paste wax or car wax can create a barrier and slow oxidation.
- Keep it away from harsh cleaners: Spray cleaners, bleach, and strong detergents can dull brass and damage finishes.
Think of wax like sunscreen for your brass: it doesn’t make it immortal, but it can prevent it from aging before its time.
Mistakes to Avoid When Cleaning Tarnished Brass
Here’s how most brass “cleaning disasters” happen: enthusiasm + the wrong tool. Avoid these common mistakes and your brass will thank you by not looking worse.
- Going abrasive too soon: Steel wool and harsh scouring pads can scratch brass and destroy plating.
- Leaving acidic cleaners on too long: Vinegar and lemon are helpfulbut they’re still acids.
- Over-polishing antiques: On collectible pieces, patina can be part of the value and the charm.
- Ignoring the finish type: Lacquered brass needs gentle cleaning, not aggressive polishing.
- Letting it air-dry: Water spots can show up quickly. Dry immediately for a clean finish.
Quick Scenarios: What Should You Do If…?
…your brass is only lightly tarnished?
Start with soap and water, dry, then buff. If it still looks dull, spot-clean with lemon and a soft cloth.
…your brass has dark, heavy tarnish?
Try vinegar-salt-flour paste or a gentle commercial brass polish (after testing a hidden spot). Work in sections and rinse thoroughly.
…your brass is brass-plated?
Stick to soap and water. Avoid abrasive pastes and aggressive rubbingplating is thin and can wear through.
…your brass is lacquered?
Clean gently with soapy water and a soft cloth, dry immediately, and avoid polishes unless labeled safe for lacquered brass.
FAQ: Brass Cleaning Questions People Actually Ask
How often should I clean brass?
It depends on location and use. High-touch, high-humidity brass (like bathroom hardware) may need quick wipe-downs weekly and a deeper clean occasionally. Decorative brass in a dry room might only need seasonal attention.
Can I use Bar Keepers Friend on brass?
Some people doespecially on sturdy brass itemsbut it can be too aggressive for delicate finishes or plated pieces. If you use it, choose a gentle formulation, test first, and avoid heavy scrubbing.
Will cleaning remove the “antique look”?
Yes, it can. Tarnish and patina are part of that aged appearance. If you like the antique vibe, clean gently and focus on removing grime rather than polishing to a mirror shine.
Why does brass tarnish so fast after I clean it?
Common reasons include humidity, frequent handling, leftover cleaner residue, and lack of a protective barrier. Thorough rinsing, immediate drying, and a light protective wax can help slow the comeback tour.
Real-World Experiences: What Cleaning Tarnished Brass Actually Feels Like (Plus Lessons Learned)
If you want the truth about brass cleaning, it’s this: the first 90 seconds are pure hope, the middle is mild doubt, and the end is either triumphor you staring at a streak thinking, “How did I make it worse?” I’ve seen (and learned from) the most common brass-cleaning plot twists, and they’re worth sharing because they’ll save you time, frustration, and a few dramatic sighs.
The first time I cleaned tarnished brass was on a thrifted set of candlesticks that looked like they’d been stored in a seaside cave. I went in overconfident with a lemon-and-salt approach and discovered a key rule: texture changes everything. On smooth surfaces, the lemon worked quickly and felt almost magical. On detailed areas, the salt tried to move in permanently. I spent more time digging out salty paste from decorative grooves than I did removing tarnish. Lesson learned: use salt sparingly on ornate pieces, and keep a soft toothbrush and a damp cloth nearby so you can lift residue before it dries.
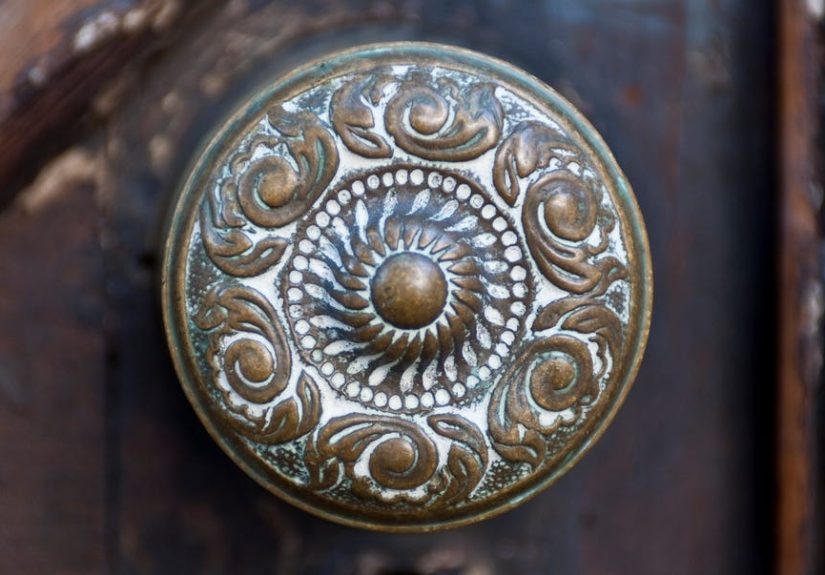
Another memorable moment involved a “solid brass” doorknob that absolutely refused to shine evenly. I cleaned, rinsed, buffedstill blotchy. Turns out, it was brass-plated, and I was basically polishing a thin layer like it was a cast-iron skillet. The finish wasn’t failing because the cleaner was bad; it was failing because the strategy was wrong. That’s when the magnet test became my best friend. Now, if a magnet sticks hard, I immediately switch to the gentle soap-and-water routine, then a careful microfiber buff. It’s less dramatic, but it’s also how you avoid rubbing through plating and revealing the sad gray metal underneath.
The biggest “brass plot twist” is lacquer. Lacquered brass is like brass wearing a raincoatshiny, protected, and not interested in your homemade paste. I once spent way too long wondering why a vinegar-flour paste wasn’t doing much, only to realize the surface had a clear protective coating. The tarnish was forming where that coating had tiny cracks, so I was cleaning around the problem instead of addressing it. The fix wasn’t “more scrubbing.” It was “gentler cleaning and accepting that damaged lacquer needs a different plan.” Sometimes that means living with a little patina. Sometimes it means professional refinishing, especially if the piece is antique or sentimental. Either way, the lesson is consistent: if your brass resists polishing like it’s holding a grudge, stop and reassess the finish.
I’ve also learned the value of working in sections. Brass shows streaks when residue dries on the surfaceespecially after acidic cleaners. Doing one manageable section at a time (apply, clean, rinse, dry, buff) keeps the finish more even. It also prevents the classic mistake of letting cleaner sit too long because you got distracted. (We’ve all been there: you set something “for a few minutes,” then suddenly it’s 30 minutes later and you’re negotiating with dried paste.)
Finally, the most underrated part of brass cleaning is the last step: protection. The first time I waxed a freshly cleaned brass piece, I felt like I’d unlocked a cheat code. Tarnish didn’t vanish forever (brass is still brass), but it slowed down dramatically. That meant fewer deep cleans and more quick wipe-downswhich is exactly the kind of low-effort maintenance future-you will appreciate. So if you take one “experience-based” tip from this section, make it this: clean it, dry it, buff it, then protect it. Brass is high-maintenance by nature, but it doesn’t have to become your full-time job.


