
Table of Contents >> Show >> Hide
- First, Know What Cleaning Can and Cannot Do
- What You Need to Clean Vinyl Records the Right Way
- How to Do a Quick Dry Clean Before Every Play
- How to Deep Clean a Vinyl Record by Hand
- When a Manual Record Washer Makes More Sense
- Vacuum and Ultrasonic Cleaning: Worth It?
- How to Clean the Stylus, Because the Record Is Only Half the Story
- The Biggest Vinyl Cleaning Mistakes to Avoid
- How to Store Records So They Stay Clean Longer
- A Simple Cleaning Routine That Actually Works
- Real-World Experiences: What Cleaning Vinyl Records Actually Feels Like
- Final Thoughts
Note: This article is based on real-world record-care guidance and rewritten in original language for web publication.
Vinyl records are wonderfully dramatic. They spin. They crackle. They make you feel like you have taste, even when you are still alphabetizing your collection by “whatever was closest to the turntable.” But if your favorite album has started sounding more like a campfire than a clean pressing, it may not be ruined. It may just be dirty.
That is the good news. The slightly less glamorous news is that vinyl record cleaning is not a one-swipe miracle. A dusty LP, a fingerprint-covered thrift-store find, and a record with years of baked-in grime each need a slightly different approach. The goal is simple: remove dust, debris, oils, and static without damaging the grooves, the label, or your dignity.
This guide walks through how to clean your vinyl records properly, what tools actually help, what mistakes to avoid, and how to keep your records sounding fresh long after cleaning day is over. If you have been wondering how to clean vinyl records so they sound just like new, this is your no-nonsense, groove-friendly roadmap.
First, Know What Cleaning Can and Cannot Do
Before you break out a brush and start acting like a record-restoration wizard, it helps to set expectations. Cleaning can dramatically reduce pops, crackle, static noise, and muffled sound caused by surface dust, oily fingerprints, smoke residue, and grime packed into the grooves. In many cases, a proper deep clean can make an older LP sound shockingly better.
What cleaning cannot do is reverse physical damage. If a record is scratched, warped, gouged, or worn down from years of being played with a damaged stylus, no cleaning method will magically turn it into a mint copy. Think of it this way: cleaning removes dirt, but it cannot un-scratch history.
That distinction matters because many people assume noisy records are automatically “bad pressings” or “worn out.” Sometimes they are. But often, they are just filthy. And that is a much more fixable problem.
What You Need to Clean Vinyl Records the Right Way
You do not need a laboratory, a hazmat suit, or a second mortgage. For most collectors, a few basic tools cover nearly everything:
Basic vinyl cleaning supplies
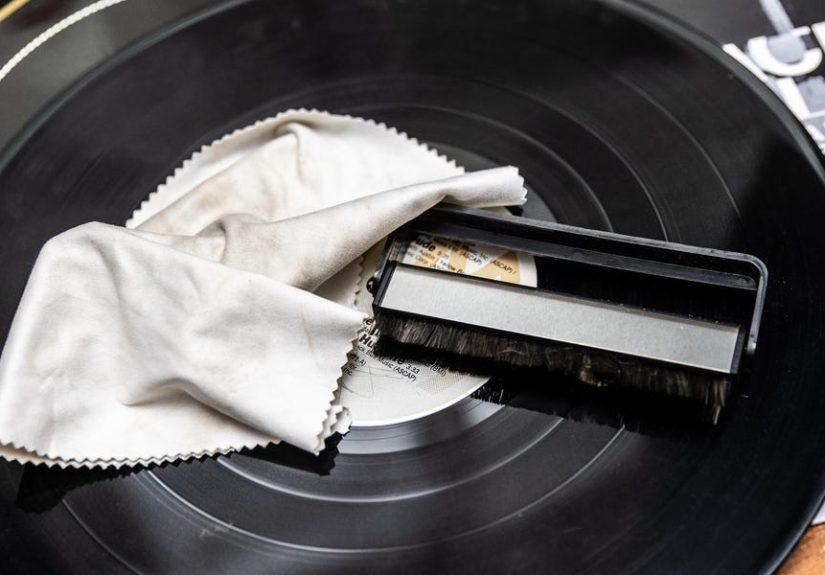
- Carbon fiber or anti-static record brush
- Microfiber cloths or a dedicated record-cleaning cloth
- Record cleaning solution made for vinyl
- Distilled water for rinsing, if needed
- A stylus brush or stylus cleaning gel
- Anti-static inner sleeves for storage
Optional but helpful upgrades
- Manual record washer system
- Vacuum record cleaning machine
- Ultrasonic cleaner for large or valuable collections
- Label protector for wet cleaning
- Drying rack made for LPs
The keyword here is dedicated. Use products intended for vinyl records. Your LP is not a dinner plate, a mirror, or a shower door. Household glass cleaner, paper towels, rough cotton rags, and random spray bottles from under the sink are not part of this love story.
How to Do a Quick Dry Clean Before Every Play
If your records are already in decent shape, dry cleaning is the easiest habit to build. It is fast, low-risk, and surprisingly effective for everyday dust and static control.
Step 1: Put the record on the turntable
Let the platter rotate normally. A spinning record makes it much easier to lift dust evenly instead of pushing it around like confetti at a bad office party.
Step 2: Use a carbon fiber brush
Hold the brush lightly on the surface so the bristles contact the grooves. Let the record spin a few revolutions. Then gently angle the brush toward the outer edge and lift away the dust. Do not mash the brush down like you are scrubbing a grill. Light pressure works better.
Step 3: Inspect the surface
If the record still has visible smudges, fingerprints, or stubborn dirt, stop there and move to a wet clean. Dry brushing is excellent for loose dust, but it is not meant to dissolve oily grime.
This quick routine helps reduce static, prevents dirt from getting dragged through the grooves during playback, and keeps your stylus from becoming a tiny snowplow.
How to Deep Clean a Vinyl Record by Hand
For used records, garage-sale gems, flea-market rescues, or LPs that sound noisy even after brushing, a deeper clean is the move. Hand-cleaning works well when done carefully.
Step 1: Prepare a clean workspace
Lay the record on a clean, flat, lint-free surface. If you have a label protector, use it. If not, be extra careful to avoid soaking the center label. A wet label can wrinkle, fade, or peel, which is a terrible reward for your good intentions.
Step 2: Apply record cleaning solution to a cloth or brush
Do not spray aggressively all over the record like you are misting houseplants. Apply a modest amount to a dedicated cleaning cloth or record brush, then work it onto the grooves. Follow the direction of the grooves, not across them.
Step 3: Gently clean in circular motions
Move around the record in the same direction as the groove path. This helps lift dirt without grinding it deeper into the playing surface. Focus on areas with fingerprints or visible residue, but keep your touch light.
Step 4: Rinse if the solution requires it
Some fluids are one-step formulas, while others work best with a distilled-water rinse. If rinsing is recommended, use distilled water rather than tap water. Tap water can leave behind minerals, and your record deserves better than surprise crust.
Step 5: Dry completely
Use a clean microfiber cloth to blot and wipe gently with the grooves, then allow the record to air-dry fully before placing it back in a sleeve or playing it. Never put a damp record back into a paper inner sleeve unless your goal is to create a brand-new mess.
When a Manual Record Washer Makes More Sense
If you buy used vinyl often, a manual record washer system can be a smart middle ground between hand-cleaning and a powered machine. These systems typically use soft internal brushes and a cleaning bath to wash deeper into the grooves while keeping the label dry.
They are popular because they are more thorough than a quick surface wipe, less expensive than vacuum or ultrasonic machines, and easy to use in batches. If you came home with fifteen dusty records from a weekend crate dig and now feel emotionally obligated to save them all, this type of cleaner is your new best friend.
Manual washers are especially useful for collections that are growing fast but do not yet justify a major equipment investment.
Vacuum and Ultrasonic Cleaning: Worth It?
If you have a large collection, rare pressings, or high standards that can hear a breadcrumb from three rooms away, a record cleaning machine may be worth it.
Vacuum record cleaning machines
These apply cleaning fluid, scrub the grooves, and then vacuum away the dirty liquid. The big advantage is that the grime is lifted off the record instead of drying back onto it. They are efficient, effective, and a favorite among serious collectors.
Ultrasonic record cleaners
Ultrasonic systems use tiny cavitation bubbles in a cleaning bath to dislodge debris from deep inside the grooves. They are especially appealing for people who clean lots of records or want a very thorough clean with minimal manual contact. They also tend to cost enough to make you suddenly very interested in taking care of your records from the beginning.
For most casual listeners, these machines are optional. For collectors with valuable libraries, they can be excellent long-term tools.
How to Clean the Stylus, Because the Record Is Only Half the Story
A spotless LP played with a dirty stylus is like washing your car and then driving through wet cement. Stylus care matters.
Use the right direction
Always clean the stylus from back to front, which follows the direction the record travels during playback. Never brush side to side, and never jab upward. The stylus is tiny, delicate, and not interested in your improvisation.
Use dedicated stylus tools
A stylus brush or stylus cleaning gel is usually the safest option. Some people use liquids, but only products designed specifically for stylus cleaning should be considered. Overdoing liquids or using the wrong product can create new problems instead of solving old ones.
Cleaning the stylus regularly helps reduce distortion, protects the grooves, and keeps sound crisp instead of dull and fuzzy.
The Biggest Vinyl Cleaning Mistakes to Avoid
Even well-meaning record lovers can cause damage by using the wrong method. Here are the most common mistakes:
Using tap water
Tap water may leave mineral residue behind. Distilled water is the safer choice for rinsing.
Using paper towels or rough fabrics
They can shed lint or create micro-abrasions. Microfiber and dedicated record cloths are much safer.
Soaking the label
Water and labels are not best friends. Protect the label or clean carefully around it.
Using household cleaners
Window sprays, furniture polish, and all-purpose cleaners do not belong on records. Dedicated vinyl cleaning solution is the better path.
Playing dirty records repeatedly
Each play can grind debris deeper into the grooves and also dirty the stylus. Clean first, then play.
Assuming noise equals dirt every time
Some noise comes from permanent wear, bad pressings, or groove damage. Cleaning helps a lot, but it is not time travel.
How to Store Records So They Stay Clean Longer
Cleaning matters, but storage is what keeps you from having to clean the same record every other Tuesday.
Store records vertically
Stacking records flat can encourage warping over time. Vertical storage is the safer choice.
Use anti-static inner sleeves
Paper sleeves can shed dust and create friction. Anti-static sleeves help keep surfaces cleaner and reduce static buildup.
Keep records away from heat and direct sunlight
Vinyl and heat are a tragic combination. Store records in a cool, dry area away from windows, radiators, and other warm spots.
Handle records by the edges and label
Your fingertips are full of oils. The grooves would prefer not to meet them.
Good storage is quiet maintenance. It protects the work you just did and helps preserve sound quality over time.
A Simple Cleaning Routine That Actually Works
If you want a practical routine instead of an obsessive one, here is a good balance:
- Before each play: quick brush to remove dust and static
- After each play: return the record to an anti-static sleeve
- Every few plays or when needed: inspect for fingerprints or visible debris
- For used purchases: do a full deep clean before the first play
- Regularly: clean the stylus and keep the turntable area dust-free
This routine is realistic, effective, and far less painful than trying to rescue an entire neglected collection in one marathon weekend.
Real-World Experiences: What Cleaning Vinyl Records Actually Feels Like
The first time many people properly clean a record, the reaction is usually some version of, “Wait, that was in there the whole time?” A used LP that looked merely dusty can hide an astonishing amount of grit in the grooves. One collector might pick up a classic jazz record at a thrift store for five bucks, assume it is permanently noisy, and then discover after a careful clean that most of the crackle was just old dust, smoke residue, and fingerprints from listeners past. Suddenly the horns sound clearer, the piano has more sparkle, and the singer no longer seems to be performing through a snowstorm.
Another common experience comes from people who only dry brush their records and wonder why the noise never fully goes away. Dry brushing is great maintenance, but it often reveals its limits on older records. The record looks cleaner, sure, but once the needle drops, the pops and fuzz are still there. Then comes the first true wet clean with a proper vinyl cleaning solution, and the difference is obvious. The background gets quieter. Bass sounds tighter. Details that seemed buried start showing up. It is one of those rare hobby moments where a little care produces a very satisfying payoff.
There is also the stylus revelation. Many record owners focus only on the LP and forget the needle. Then one day they clean the stylus correctly and realize the sound had been getting dull so gradually they barely noticed. A clean stylus often restores clarity fast. Vocals sound less congested, cymbals gain shimmer, and tracking improves. It is a small maintenance task that punches above its weight.
Collectors with bigger libraries often describe a second phase: the moment when cleaning stops feeling like repair work and starts feeling like part of the ritual. You pull out a record, give it a quick brush, lower the tonearm, and everything feels a bit more intentional. It is not fussy. It is just smart. Like sharpening a good kitchen knife or wiping down a camera lens, the habit keeps the tool performing the way it should.
Then there are the cautionary tales, and vinyl collectors have plenty. Someone uses a random household cleaner and ends up with smeary residue. Someone else wipes a record with a paper towel and wonders why lint appears to have entered a long-term relationship with the grooves. Another person puts a freshly cleaned but still damp record back into an old paper sleeve and creates a sequel to the original grime problem. These stories are annoying in the moment, but they all point to the same lesson: the right method matters.
Perhaps the most satisfying experience is cleaning a record you thought was a lost cause and discovering it is simply a survivor with bad manners. Not every noisy LP can be saved, of course. Some are scratched beyond redemption. Some were played to death decades ago on cheap equipment. But a surprising number just need patience, the right tools, and a little respect for the grooves. When that transformation happens, it feels less like cleaning and more like archaeology with a soundtrack.
Final Thoughts
If you want your vinyl records to sound just like new, the secret is not brute force or fancy myths. It is consistent, careful maintenance. Brush off loose dust before playback. Deep-clean dirty records with the right solution and technique. Keep the stylus clean. Store records vertically in anti-static sleeves and away from heat. That combination does more for sound quality than any dramatic internet hack ever will.
Vinyl is a physical format, and that is part of the fun. It asks a little more from you than tapping a screen, but it also gives a little more back. Treat your records well, and they will reward you with cleaner playback, longer life, and fewer moments where you wonder whether the drummer is supposed to sound like bacon frying in another room.


