
Table of Contents >> Show >> Hide
- What Defragmenting Actually Does
- Before You Start
- Step 1: Open Command Prompt as Administrator
- Step 2: Analyze the Drive First
- Step 3: Run the Defrag Command
- Step 4: Review the Results and Let Windows Keep Doing Its Job
- Common Problems and How to Avoid Them
- Best Practices for Safer, Smarter Defragmentation
- Practical Examples
- Experiences and Lessons From Real-World Defragging
- Conclusion
If your Windows PC has started feeling like it needs a motivational speaker just to open File Explorer, your hard drive may be fragmented. On a traditional hard disk drive, files can get scattered into little pieces across the disk over time. That forces the drive head to do extra work, which can make loading files and apps feel slower than they should. The good news is that Windows still includes a built-in command-line tool that can help clean up the mess.
This guide breaks the process into four simple steps, shows you the exact commands to use, and explains when you should not defragment a drive. That last part matters. If you have an SSD, you should not treat it like an old-school spinning HDD. In modern Windows, optimization for SSDs is different, and Command Prompt can handle that too when you use the right command.
So, no, this is not movie-hacker magic. You do not need green code raining down the screen. You just need Command Prompt, a little patience, and the ability to resist clicking random things while your drive is doing digital housekeeping.
What Defragmenting Actually Does
Defragmenting reorganizes file fragments so the pieces of the same file sit closer together on a traditional hard drive. On an HDD, that can reduce the time it takes the disk head to find and read data. Think of it like rearranging a messy garage so the box labeled “holiday lights” is not somehow split between the attic, the shed, and your neighbor’s lawn chair.
On the other hand, SSDs do not work the same way. They do not rely on a moving read/write head, so traditional defragmentation is not the performance hero there. For SSDs, Windows uses optimization methods such as retrimming. That is why the safest modern approach is to use commands that let Windows choose the correct optimization for the drive type instead of forcing every drive through the same old routine.
Before You Start
Before opening Command Prompt and charging into battle, do a few basic checks:
- Make sure you know whether the target drive is an HDD or SSD.
- Close large apps that are actively reading or writing files.
- Make sure your laptop is plugged in.
- Leave enough free space on the drive for the process to work effectively.
- If the drive has errors, run disk checking first instead of forcing defrag on a problem drive.
Defragmentation is maintenance, not a miracle cure. It can help a traditional hard drive that has become scattered and inefficient, but it will not fix malware, failing hardware, or a drive that is packed so full it is basically holding its breath.
Step 1: Open Command Prompt as Administrator
The first step is gloriously simple: open Command Prompt with administrator privileges. In Windows, search for Command Prompt, right-click it, and choose Run as administrator. If you skip the administrator part, Windows may greet you with the digital equivalent of a folded-arms stare.
Why does this matter? The defrag command needs elevated permissions to analyze and optimize local volumes properly. If you are using a work computer with strict permissions, you may need approval from your IT administrator.
Quick tip
If you want to see the built-in help menu first, type this command and press Enter:
That displays the available switches and is a handy way to double-check syntax before you run anything more ambitious.
Step 2: Analyze the Drive First
Before you defragment anything, analyze the drive. This is the part where you avoid doing unnecessary work just because Command Prompt makes you feel powerful.
Use this command to analyze your main drive:
Here is what those switches mean:
/Aanalyzes the drive instead of immediately optimizing it./Ushows progress on the screen./Vgives you a more detailed report with fragmentation statistics.
If your target is a different volume, replace C: with the correct letter, such as D: or E:. When the analysis is done, Windows will tell you whether optimization is recommended. This is useful because not every drive needs manual attention. In many systems, Windows already performs scheduled maintenance automatically.
For example, if you have a secondary 2 TB HDD where you store videos, game installs, and giant folders you swear you will organize someday, analyzing it first helps you confirm that fragmentation is actually contributing to the slowdown.
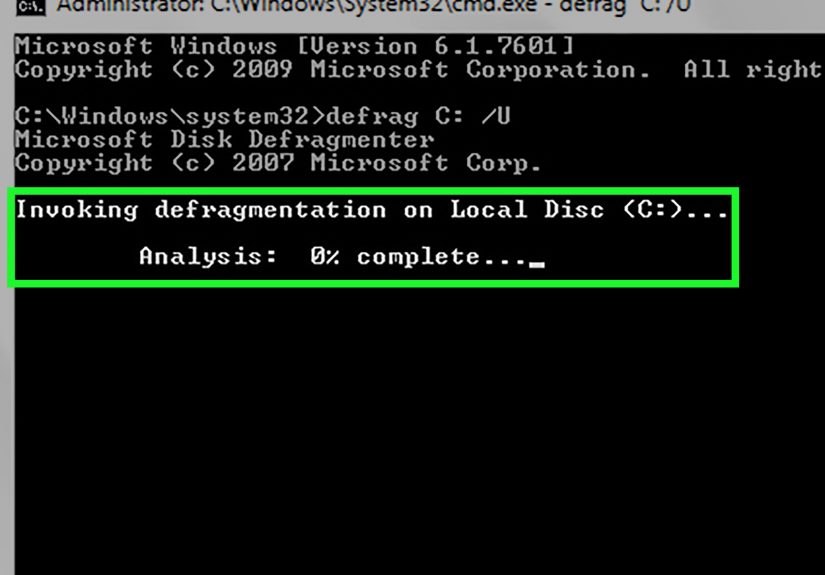
Step 3: Run the Defrag Command
Once analysis shows that optimization makes sense, you can run the command. For a traditional hard drive, a common command looks like this:
This tells Windows to defragment drive C, show progress, and display detailed results at the end. If the drive is large or heavily fragmented, this may take a while. Translation: this is a fine time to refill your water bottle, but not a fine time to force-shutdown your PC because you got impatient.
If you want Windows to decide the proper optimization automatically based on the media type, use this instead:
This is often the smarter modern choice because /O tells Windows to apply the correct optimization for that drive. If the volume is an HDD, that usually means traditional defragmentation. If it is an SSD, Windows can apply the appropriate optimization instead of doing something outdated and unhelpful.
Other useful command examples
What these do:
defrag D: /A /Uanalyzes drive D and shows progress.defrag D: /O /U /Voptimizes drive D using the proper method and shows a detailed report.defrag /C /H /Voptimizes all volumes, runs at normal priority, and shows detailed output.defrag C: D: /Mcan process multiple volumes in parallel in the background.
If you are keeping things simple, though, stick with one drive at a time. It is easier to monitor, easier to troubleshoot, and much less likely to leave you wondering which volume is doing what.
Step 4: Review the Results and Let Windows Keep Doing Its Job
After the command finishes, read the report instead of just admiring the fact that you used Command Prompt without breaking anything. The output can tell you whether the process completed successfully, how fragmented the drive was, and whether more action is needed.
If the report suggests limited improvement, look at the bigger picture. Is the drive nearly full? Is it old and slow by design? Are startup programs eating system resources? Defragmentation can help with file layout, but it cannot turn a ten-year-old laptop hard drive into a race car.
Also remember that Windows usually schedules optimization automatically. That means manual defragging is often best used as a targeted maintenance step when you notice unusual slowness on a traditional HDD, after moving lots of files, or after installing and removing giant applications over time.
Common Problems and How to Avoid Them
1. Defrag fails or does not run
If the volume is marked dirty or has file system issues, run Check Disk first:
You may be asked to schedule the scan for the next restart, especially for the system drive. That is normal.
2. The drive is an SSD
Do not force traditional defragging habits onto an SSD just because an old forum post from the Windows 7 era told you to. Use the optimization-aware option or the built-in Windows schedule. Modern storage maintenance is not one-size-fits-all.
3. There is not enough free space
Defragmentation works best when the drive has breathing room. If the disk is crammed to the edges with giant files, the results may be partial or disappointing. Delete junk, move large archives to another drive, or back up old media before trying again.
4. You expect dramatic speed gains everywhere
Defragmentation mainly helps HDD read performance. It does not fix low RAM, a bloated startup list, overheating, or background apps chewing through system resources like tiny digital raccoons.
Best Practices for Safer, Smarter Defragmentation
- Analyze first instead of defragging blindly.
- Use
/Owhen you want Windows to apply the correct optimization for the drive type. - Run Command Prompt as administrator.
- Plug in laptops before starting.
- Do not interrupt the process unless necessary.
- Use
chkdskfirst if the drive has file system errors. - Do not obsessively defragment drives that Windows is already maintaining well.
Practical Examples
Example 1: Your old family PC has an HDD and takes forever to open photos.
Run defrag C: /A /U /V first. If the report recommends optimization, follow with defrag C: /U /V. If the drive is nearly full, free up space first.
Example 2: You are not sure whether the drive is HDD or SSD.
Use defrag C: /O /U /V. That lets Windows decide the right method for the media type.
Example 3: You have multiple traditional drives used for storage.
You can optimize them all with defrag /C /H /V, but many users still prefer one drive at a time for easier tracking and fewer surprises.
Experiences and Lessons From Real-World Defragging
One of the most common experiences people have with defragmenting in Command Prompt is surprise. Not because the command is complicated, but because the process is much less dramatic than expected. Many users assume defragging is some advanced technician-only trick, when in reality it is just a built-in Windows maintenance tool wearing a slightly more serious outfit. The moment they run defrag C: /A /U /V and see an actual report, the mystery usually disappears.
A classic case is the older home computer with a mechanical hard drive that has been used for years without much maintenance. It stores photos, school projects, random downloads, installers from three laptops ago, and maybe a folder labeled “NEW NEW FINAL” that absolutely does not contain the final version. On systems like that, users often report that boot times feel sluggish, large folders open slowly, and file searches seem to drag. After analyzing the drive, they discover fragmentation is not the only problem, but it is part of the story. Once the drive is optimized and some free space is cleared, the machine often feels more organized and more responsive, even if it is still obviously an older PC.
Another common experience comes from gamers who still use large HDDs for older game libraries. These users might install and uninstall enormous titles regularly, which creates a lot of file movement. In that setting, running a manual analysis can be genuinely useful. Some people notice faster loading on older titles stored on an HDD after optimization, especially when the drive has been heavily used for months. The lesson here is that defragmentation is most helpful when the drive is doing the kind of work that naturally creates scattered data.
There is also the opposite experience: someone runs defrag expecting a miracle and gets only a modest improvement. That is not failure. It usually means fragmentation was not the main issue. Maybe the system has too many startup apps, not enough memory, outdated drivers, or a drive so full it can barely function. This is why Command Prompt defragging is best seen as one useful maintenance step, not a magical cure-all. It is a wrench, not an entire repair shop.
Many users also learn a valuable modern lesson the first time they try this on a newer machine: storage type matters. People who grew up hearing “always defrag your computer” often discover that the advice does not apply the same way to SSDs. Using a command such as defrag C: /O /U /V helps avoid that confusion because Windows chooses the proper optimization for the drive. That gives users confidence without forcing them to memorize every storage detail.
In the end, the experience most people walk away with is simple: Command Prompt is not scary, maintenance works better when it is intentional, and small system habits add up. Analyze first. Optimize the right way. Leave enough free space. Do not wait until the computer sounds emotionally exhausted. Those habits matter more than running flashy commands once in a blue moon.
Conclusion
If you want a clean, reliable way to defragment a traditional hard drive in Windows, Command Prompt is still a solid option. The four-step version is easy to remember: open Command Prompt as administrator, analyze the drive, run the appropriate defrag command, and review the results. For modern systems, the smartest move is often to let Windows choose the proper optimization with /O, especially if you are not completely sure whether the drive is an HDD or SSD.
Used correctly, this tool is simple, effective, and refreshingly free. No sketchy downloads. No mysterious “ultra turbo cleaner” software. Just Windows doing what Windows already knows how to do. That is a nice change of pace on the internet.


