
Table of Contents >> Show >> Hide
- Why Laundry Goes Wrong (Even When You “Did Everything Right”)
- Before You Start: What You Need
- How to Do Laundry Step-by-Step
- Step 1: Read the care label (yes, really)
- Step 2: Sort clothes the smart way
- Step 3: Prep the clothes before they go in
- Step 4: Choose the right water temperature and cycle
- Step 5: Measure detergent (don’t eyeball it)
- Step 6: Load the washer correctly
- Step 7: Start the wash and let the machine do its job
- Step 8: Dry clothes the right way
- Step 9: Fold, hang, and store promptly
- How to Hand-Wash Clothes (When the Label Says So)
- Common Laundry Mistakes to Stop Making
- Quick Examples: What to Do With Common Loads
- Conclusion
- Extra: Real-Life Laundry Experiences and Lessons (About )
Laundry looks simple until your white T-shirt turns blush pink, your favorite sweater shrinks into a toddler crop top, and your jeans come out smelling like “wet regret.” The good news? Doing laundry well is not a mysterious life skill reserved for grandmas and people with perfectly labeled baskets. It’s a repeatable process.
This guide breaks down exactly how to wash clothes step-by-step, from sorting and stain prep to choosing the right cycle, detergent, and drying method. If you’re brand new to laundry, this will help you avoid common mistakes. If you already do laundry every week, this will help you do it better, faster, and with fewer casualties.
Think of laundry as a system, not a chore: read the label, sort smart, use the right amount of detergent, don’t overload the machine, and dry with intention. That alone will save your clothes, your time, and your electricity bill.
Why Laundry Goes Wrong (Even When You “Did Everything Right”)
Most laundry disasters come from a handful of issues: skipping care labels, mixing incompatible fabrics, overloading the washer, using too much detergent, and drying everything on high heat. In other words, laundry problems are usually process problems.
The fix is not buying ten specialty products. The fix is learning a clean, consistent workflow. Once you have that, laundry gets dramatically less chaotic.
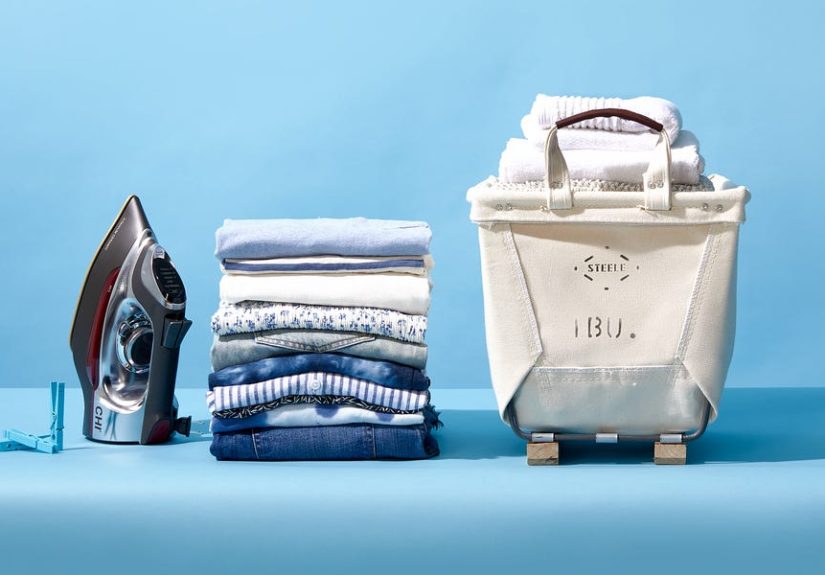
Before You Start: What You Need
Basic laundry supplies
- Laundry detergent (HE detergent if you have an HE washer)
- Stain remover or pre-treat product
- Laundry baskets or hampers (bonus points if you sort as you go)
- Drying rack or hangers for air-dry items
- Mesh laundry bags for delicates (optional but very helpful)
- Bleach or oxygen brightener (optional, only when label-safe)
A quick reality check
You do not need a different detergent for every sock in your house. Start with one good detergent, a stain remover, and basic sorting habits. Fancy products can come later if you want them.
How to Do Laundry Step-by-Step
Step 1: Read the care label (yes, really)
The care label is your laundry cheat sheet. It tells you whether the item can be machine washed, hand washed, bleached, tumble dried, dried flat, or needs professional cleaning. It also gives temperature and cycle guidance.
If you ignore the label, you’re basically freestyling with fabric science. Sometimes that works. Sometimes your wool sweater becomes a potholder.
Common care-label clues:
- Hand in a tub: hand wash only
- Dots in the wash tub: water temperature (cold, warm, hot)
- Lines under the tub: gentler wash cycle (permanent press/delicate)
- X over a symbol: do not do that thing (wash, bleach, tumble dry, etc.)
Step 2: Sort clothes the smart way
Sorting is not just “lights and darks.” A better laundry sorting system separates by color, fabric type, and soil level. This helps prevent dye transfer, lint messes, and poor cleaning.
Sort by color
- Whites
- Lights/pastels
- Brights
- Darks/blacks/navy
- Reds (new red items especially)
Sort by fabric type
- Towels and heavy cottons
- Delicates (lace, lingerie, thin knits)
- Athletic wear / synthetics
- Lint producers (terry, fleece, chenille)
- Lint attractors (corduroy, some permanent-press fabrics, darker garments)
Sort by soil level
Muddy yard-work clothes, sweaty gym gear, and kitchen towels should not be washed with lightly worn office shirts. Heavily soiled items need more cleaning power and sometimes a separate cycle.
Step 3: Prep the clothes before they go in
This step takes 2–3 minutes and prevents half of all laundry nonsense.
- Empty pockets (tissues, coins, receipts, mystery gum)
- Close zippers and fasten hooks
- Turn darks and graphic tees inside out (helps reduce fading and pilling)
- Place delicates in a mesh bag
- Untangle straps and drawstrings
- Pre-treat visible stains before washing
How to pre-treat stains (basic method)
For many everyday stains, apply a small amount of liquid detergent or stain remover directly to the spot, let it sit for a few minutes, then wash as usual. Always check the care label first, and avoid harsh rubbing that can damage fibers or spread the stain.
Important rule: if the stain is still there after washing, do not dry it yet. Dryer heat can set stains and make them much harder to remove.
Step 4: Choose the right water temperature and cycle
Use the care label as your first guide. If you’re unsure, cold water is often the safest starting point for most everyday loads, especially for colors and mixed fabrics.
Water temperature basics
- Cold: best for dark colors, bright colors, many synthetics, and everyday loads
- Warm: useful for moderately soiled clothing and many durable fabrics
- Hot: use only when label-safe and appropriate (some whites, heavily soiled cottons, etc.)
Laundry bonus: washing in cold water can also reduce energy use. A lot of washer energy goes toward heating water, so using cold cycles more often is easier on both clothes and utility costs.
Cycle selection basics
- Normal: everyday cottons, tees, socks, underwear
- Permanent Press: blends and wrinkle-prone clothes
- Delicate/Gentle: lightweight or fragile items
- Heavy Duty: towels, work clothes, durable heavily soiled items
Step 5: Measure detergent (don’t eyeball it)
One of the most common laundry mistakes is using too much detergent. More soap does not always mean cleaner clothes. It can leave residue, trap odors, and cause rinse problems.
Follow the detergent label instructions and adjust for:
- Load size
- Soil level
- Washer type (HE vs. standard)
- Water hardness (if your detergent label provides guidance)
Detergent tips that matter
- Use HE detergent in HE washers
- Measure with the cap or scoop (no random “that looks right” pours)
- Single-dose pods usually go in the drum before clothes (follow your washer and detergent instructions)
- Liquid detergent can often be used for pre-treating stains
Step 6: Load the washer correctly
Your washer is not a clown car. Overloading reduces cleaning performance, prevents proper rinsing, and can increase lint and wear from too much friction.
Instead:
- Load clothes loosely
- Distribute items evenly
- Leave enough room for water and movement
- Wash bulky items (blankets, comforters) only if your machine is rated for them
If your clothes come out dingy, linty, or still dirty, overloading is a top suspect.
Step 7: Start the wash and let the machine do its job
Once the cycle starts, resist the urge to “improve” it every five minutes. Laundry gets better when the setup is correct, not when you keep opening the lid like a suspense movie.
If your washer has settings for soil level or extra rinse, use them when they make sense:
- Higher soil level: sportswear, yard-work clothes, kids’ play clothes
- Extra rinse: helpful when residue is an issue or for very full (but not overloaded) loads
Step 8: Dry clothes the right way
Drying is where many good laundry intentions go to die. High heat is fast, but it can also shrink, fade, and wear out fabrics.
Before drying
- Check for stains before the clothes go in the dryer
- Separate items that need air-drying or low heat
- Shake out clothes to reduce wrinkles and help them dry evenly
Drying choices
- Tumble dry low: many everyday garments, especially if you want to reduce shrink risk
- Air dry / line dry: delicates, activewear, elastic-heavy items, some knits
- Dry flat: sweaters and items that can stretch on a hanger
Dryer safety and performance tip
Clean the dryer lint filter after each use. It improves airflow, helps drying efficiency, and supports safer dryer operation. If drying times get longer, the lint trap, slot, or vent may need deeper cleaning.
Step 9: Fold, hang, and store promptly
The longer clean clothes sit in a basket, the more they wrinkle and the more likely they become the world’s least fun treasure hunt. Fold or hang clothes soon after drying.
Quick rule of thumb:
- Hang: dresses, blouses, button-downs, linen pieces, wrinkle-prone items
- Fold: sweaters, tees, jeans, activewear, knits that may stretch
How to Hand-Wash Clothes (When the Label Says So)
Some items really do need hand washingespecially delicate fabrics, lingerie, and garments that can lose shape in a machine.
Simple hand-wash method
- Check the care label.
- Fill a sink or basin with cool or lukewarm water (based on the label).
- Add a small amount of mild detergent.
- Submerge and gently swish the garment (don’t scrub aggressively or twist).
- Rinse with clean water until soap is gone.
- Press out water gently (do not wring).
- Roll in a clean towel to absorb moisture.
- Lay flat or air dry according to the care label.
If the label says dry-clean only, don’t test your luck unless you fully understand the fabric and risks.
Common Laundry Mistakes to Stop Making
- Mixing towels with delicates: rough fabrics can damage lighter items
- Washing everything in hot water: increases shrink/fade risk and energy use
- Using too much detergent: residue, odor, and dingy fabrics
- Leaving wet laundry in the washer: hello, musty smell
- Drying stains: heat can set them
- Ignoring the care label: the fastest route to laundry regret
- Overloading the washer: poor cleaning and more lint
Quick Examples: What to Do With Common Loads
Everyday mixed clothes load
Sort by color, wash cold on normal or permanent press, use the measured detergent amount, then dry on low to medium (or hang what tends to shrink).
Towels and washcloths
Wash separately from delicates and lint-attracting clothes. Use a cycle suited for heavier fabrics. Avoid overloading so they rinse and dry properly.
Gym clothes / activewear
Wash with similar synthetic fabrics, usually in cold water. Skip high heat in the dryer when possible to help preserve elasticity and performance fabrics.
Sweaters and knits
Check labels carefully. Many should be washed gently and dried flat to keep their shape. Hanging a heavy wet sweater is basically a stretching experiment.
Conclusion
Learning how to do laundry step-by-step is less about perfection and more about pattern recognition. Read the care label, sort with intention, pre-treat stains, use the right detergent amount, avoid overloading, and dry with care. That’s the formula.
Once you build the habit, laundry stops feeling like a weekly ambush and starts feeling like a simple maintenance routineone that keeps your clothes looking better, lasting longer, and smelling like a functioning adult lives in your home.
And if you accidentally turn a white sock pink once in a while? Congratulations. You’re doing laundry, not performing surgery.
Extra: Real-Life Laundry Experiences and Lessons (About )
The biggest change in my laundry results didn’t come from a premium detergent or a fancy machine setting. It came from slowing down for five minutes before I started. I used to treat laundry like a race: grab everything, stuff it in, dump detergent, press start, hope for the best. The result was predictabletwisted sleeves, faded shirts, random lint on black clothes, and at least one item that came out looking personally offended.
What finally fixed it was creating a simple rhythm. First, I started sorting clothes as they went into the hamper instead of sorting on laundry day. One basket for whites and lights, one for darks, and one for towels and “dirty enough to be suspicious” items. That small habit cut my laundry time because I wasn’t standing in front of the washer playing fabric roulette.
The second lesson was detergent. I used to think a little extra detergent meant extra-clean clothes. In reality, it often meant the opposite: stiff towels, residue on dark shirts, and that strange “clean-ish but not fresh” smell. Once I started measuring properly, loads rinsed better and fabrics felt more normal. It was one of those mildly annoying life lessons where the instructions on the bottle were right all along.
I also learned the hard way that dryers are not neutral. They are powerful, convenient, and slightly dramatic. I shrank a cotton shirt I loved because I tossed it in on high heat with towels. Since then, I separate dryer loads more carefully and pull out delicate or shrink-prone items to air-dry. It takes a little more effort, but clothes last longer, which is cheaper than replacing them.
Stains taught me another important rule: don’t panic, but don’t wait. If I deal with a stain quicklyeven just blotting it and applying a bit of detergent before wash daythe chances of saving the item are much better. If I ignore it and throw it in the dryer, that stain tends to become a permanent memory.
One unexpectedly helpful habit was checking the dryer lint filter every single time, not “whenever I remember.” Drying became faster and more consistent, and I stopped wondering why one load took forever. It’s one of those tiny maintenance tasks that feels boring but pays off immediately.
The most practical laundry lesson, though, is this: good laundry is not about doing everything perfectly. It’s about avoiding the few mistakes that cause the biggest problems. If you read labels, sort smart, don’t overload the washer, and use the right amount of detergent, you’re already doing better than most people on a rushed Tuesday night.
Laundry still isn’t my favorite chore. But now it’s predictable. And honestly, that’s a win. Clean clothes, fewer ruined garments, less lint on black T-shirts, and no surprise sweater shrinkage? That’s the kind of domestic peace I can get behind.


