
Table of Contents >> Show >> Hide
- What Does It Mean to “Extend” a Candle Wick?
- Why Candle Wicks Become Too Short
- How to Extend a Candle Wick Safely
- What Not to Do
- How to Prevent a Short Candle Wick
- When You Should Not Try to Save the Candle
- Frequently Asked Questions About Extending a Candle Wick
- Real-World Experiences With Short Candle Wicks
- Final Thoughts
Note: This article is for general candle-care information. Always follow the candle maker’s instructions, never trim or adjust a burning candle, and stop using any candle that feels unsafe or unstable.
Every candle lover eventually meets the same tiny villain: a wick so short it looks like it has given up on life. You light the candle, the flame sputters, melts a sad little puddle, and then quits like it just remembered it has other plans. Frustrating? Absolutely. Unfixable? Not always.
The good news is that in many cases, you do not actually need to “replace” or magically lengthen the wick. What most people really mean when they search how to extend a candle wick is this: How do I expose more of the wick, help the candle burn properly again, and stop wasting all that leftover wax? That is a very differentand much saferquestion.
In this guide, we will walk through what causes a candle wick to seem too short, how to fix the problem safely, when a candle can be rescued, and when it is better to retire it with dignity. We will also cover how to prevent short wicks in the first place, because the best candle rescue is the one you never need.
What Does It Mean to “Extend” a Candle Wick?
Let’s clear up the waxy confusion. In a finished candle, “extending” the wick usually does not mean attaching extra wick material to the top like you are giving the candle hair extensions. That is not a smart fix for a burned candle, and it can create an uneven or unsafe flame.
Instead, extending a wick usually means one of three things:
- Exposing more of the existing wick because it has become buried in melted and re-hardened wax
- Correcting tunneling so the wick has enough access to fuel
- Resetting the candle so the wick can burn at the proper height and in the proper position
That distinction matters. A candle wick is part of a system: wick, wax, vessel, fragrance load, and airflow all work together. If one part gets out of balance, the flame misbehaves. So the fix is usually not “add more wick.” The fix is “help the original wick work the way it was supposed to.”
Why Candle Wicks Become Too Short
A wick can seem too short for several reasons, and each one points to a different solution.
1. The wick was trimmed too aggressively
Most candle-care advice recommends trimming a wick before each burn, but only to a modest length. If you trim too close to the wax, the wick may not have enough exposed material to catch and hold a steady flame. In other words, your candle did not become dramatic for no reasonyou gave it a buzz cut.
2. The candle tunneled
Tunneling happens when wax melts down the center but leaves a ring of unmelted wax around the sides. Over time, that “wall” makes the wick look shorter and shorter because the candle surface is no longer level.
3. Melted wax drowned the wick
If too much liquid wax surrounds a weak or buried wick, the flame can struggle, shrink, or go out. This often happens after an uneven burn, an overly deep melt pool, or a wick that was already cut too short.
4. The wick shifted or bent
A wick that leans to one side may burn poorly, curl into the wax, or create an uneven melt pattern. Then the candle starts acting like it has personal issues when the real problem is simple geometry.
5. The candle was not burned long enough the first time
The first burn matters. If the wax does not melt close to the edges early on, the candle may “remember” that narrow melt path and keep tunneling on future burns.
6. The wick is clogged or the candle is poorly matched
Sometimes the wick itself is the problem. Heavy fragrance oils, additives, or an undersized wick can cause a weak flame. If the candle repeatedly drowns or tunnels no matter what you do, you may be dealing with a design issue rather than a maintenance issue.
How to Extend a Candle Wick Safely
If the wick is still there and the candle vessel is in good condition, you may be able to rescue it. The key word is safely. Never work on a candle while it is lit, and never try to improvise with random household materials to “build” a new wick on top of an old one.
Method 1: Expose more of the buried wick
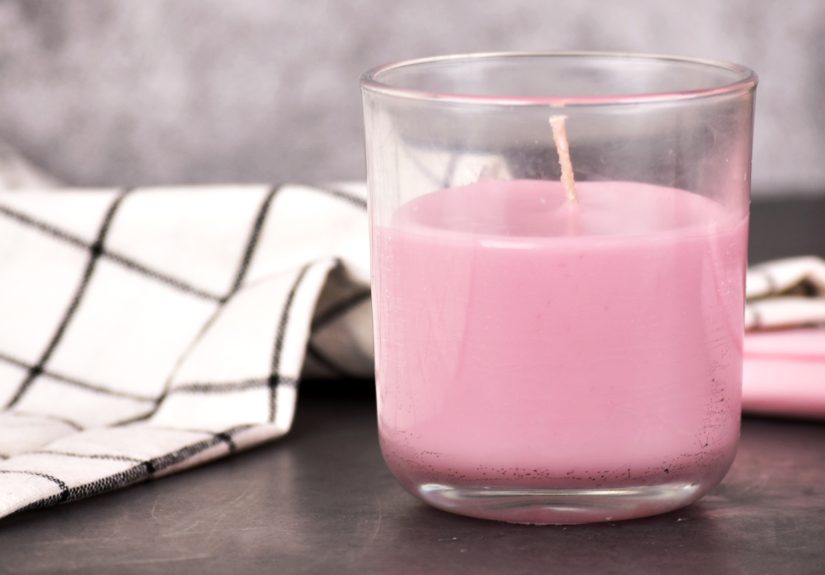
This is the most common fix for a wick that looks too short in a jar candle. Start only when the candle is completely cool. If wax has hardened around the wick and buried it, remove a small amount of wax from around the wick area so more of the wick is exposed above the surface. The goal is not to carve out a canyon. The goal is simply to reveal enough wick to let the flame catch and stay stable.
Once the surface is more level, test the candle again on the next burn. If the flame becomes steady and begins melting the top more evenly, you have probably solved the problem.
Method 2: Correct candle tunneling
If tunneling is making the wick appear too short, the candle needs a more even top surface. In many cases, once excess side wax is reduced and the candle is allowed to melt more evenly, the wick no longer seems “short” at all. It was just trapped in a wax crater.
For lightly tunneled candles, a longer, proper burn session may help the melt pool widen. For more severe tunneling, some candle experts recommend controlled heat techniques to level the top. Whatever method is used, the aim is the same: create a flatter surface so the wick can breathe, draw wax properly, and burn without drowning.
Method 3: Recenter the wick
If the wick leans to one side, wait until the candle is cool, then gently guide it back toward the middle. A centered wick helps the candle melt more evenly and reduces the risk of one-sided tunneling. This is a small adjustment, but it can make a surprisingly big difference.
Method 4: Clean away debris
Charred wick bits, soot flakes, or loose trimmings can interfere with the next burn. Before relighting, make sure the top of the candle is free of debris. A clean wax surface gives the wick a better chance to burn cleanly and consistently.
What Not to Do
Now for the part where we keep your candle-care routine from turning into a bad idea with fragrance notes.
- Do not try to glue, tape, or tie new wick material onto a partially burned wick.
- Do not trim or adjust the wick while the candle is burning.
- Do not keep relighting a wick that instantly drowns or disappears into liquid wax.
- Do not burn a candle for marathon sessions hoping it will “fix itself.”
- Do not use a damaged vessel, cracked jar, or unstable candle.
If a wick is nearly gone, keeps collapsing, or cannot stay lit even after you level the wax and expose more of the wick, the candle may be at the end of its useful life. At that point, trying to force it to burn normally is not thriftinessit is wishful thinking in a glass jar.
How to Prevent a Short Candle Wick
If you want to avoid future candle drama, prevention is the real hero here.
Trim smart, not aggressively
Yes, trim the wick before each burn. No, do not take it down to stubble. A modest trim helps control flame size, soot, and mushrooming without making it too short to function.
Let the first burn form a full melt pool
That first session helps train the candle. Letting wax melt broadly across the surface reduces the odds of tunneling later. This is one of the simplest ways to protect wick performance over the life of the candle.
Keep candles away from drafts
Fans, vents, and open windows can push a flame around, causing uneven burns and wasted wax. Candles prefer calm air, not a wind tunnel worthy of a science fair.
Do not burn too long at once
Long burn sessions can overheat the wax, create oversized melt pools, and stress the wick. Shorter, controlled burns are better for performance and safety.
Re-trim only after cooling
Once the candle has cooled and the wax has hardened, trim it for the next session. This keeps the wick ready without working around hot wax or an active flame.
Stop when little wax remains
When a candle gets near the end, the wick system may no longer behave the way it did when the candle was full. That does not mean it needs heroic intervention. It may just mean it is done.
When You Should Not Try to Save the Candle
Sometimes the safest answer is also the least exciting one. Do not try to keep using a candle if:
- the wick has completely disappeared
- the jar is cracked, chipped, or overheated
- the flame repeatedly flares too high or produces heavy smoke
- the wick will not stay centered
- only a very small amount of wax remains at the bottom
In those cases, it is usually better to stop burning the candle and consider reusing the leftover wax in a safer way, according to the manufacturer’s guidance.
Frequently Asked Questions About Extending a Candle Wick
Can you actually make a candle wick longer?
Not in the practical, everyday sense for a burned candle. Usually, the safer fix is exposing more of the original wick or correcting the wax level so the wick can function normally again.
Why does my candle wick keep disappearing?
The most common reasons are over-trimming, tunneling, drowning in liquid wax, or a wick that is too small for the candle.
Is a short wick dangerous?
A short wick is more often frustrating than dramatic, but a poorly burning candle can still create problems. Weak flames, repeated relighting, and uneven burning are all signs the candle needs attentionor retirement.
Can I fix a candle that tunnels badly?
Often, yes. Severe tunneling can sometimes be corrected by leveling the wax surface and improving future burn habits. But if the candle keeps failing, the wick or candle design may be the deeper issue.
Real-World Experiences With Short Candle Wicks
One of the most common experiences people report is that the candle worked beautifully for the first few burns, then suddenly started acting stubborn. The flame got smaller, the scent throw weakened, and the wick seemed to vanish into a moat of wax. In many of those cases, the problem was not a defective candle at all. It was a combination of short burn sessions, a little over-trimming, and a tunnel that got worse each time. Once the top was leveled and the wick was given enough exposed height, the candle behaved normally again.
Another familiar scenario happens with expensive jar candles. Someone buys a lovely candle, burns it for an hour on the first night, blows it out, and comes back the next day expecting perfection. Instead, the candle has built a memory ring. A few burns later, the wick looks too short and the owner feels personally betrayed by luxury. The lesson here is simple: premium candles still obey basic burn physics. A fancy label does not exempt wax from chemistry.
There are also plenty of experiences where people think the wick is the problem, but the real issue is airflow. A candle placed near an air vent, fan, or frequently opened window may burn unevenly and curl the wick off-center. Then the flame starts leaning, one side of the wax melts faster, and the wick looks shorter because the candle top is no longer level. Move the candle to a calmer spot, and suddenly it stops behaving like a diva.
Some candle fans learn the hard way that “trim before every burn” is excellent advice right up until it becomes overachieving advice. It is surprisingly easy to snip too much, especially with small jar candles or wooden-wick styles. People often assume that if a little trimming is good, more trimming must be better. Candle logic disagrees. A wick cut too low may struggle to catch, and then the owner ends up poking, tilting, and relighting when the better approach would have been a gentler trim in the first place.
Then there is the emotional stage of candle ownership: the refusal to let go. Many people try to rescue the last bit of wax from a beloved scent long after the candle has clearly retired from active duty. That last inch can be tempting. But a candle near the end of its life often will not burn as predictably as it did when full. Experienced candle users eventually figure out that there is a difference between extending a wick and forcing a candle past its safe, useful life.
The best candle experiences usually come from small, consistent habits: trim carefully, let the wax melt evenly, avoid drafts, do not burn too long, and keep the vessel clean. These habits are not flashy, but they work. And that is really the secret behind most “wick extension” success stories. The wick often does not need a miracle. It just needs a fair shot.
Final Thoughts
If you are wondering how to extend a candle wick, the answer is usually not to build a new wick or improvise a crafty little fire experiment. The smarter approach is to expose the wick you already have, correct the wax surface, prevent tunneling, and follow good candle-care habits going forward.
In other words, the wick is rarely asking for surgery. It is asking for better conditions.
When handled properly, many candles with seemingly short wicks can be saved and enjoyed for much longer. But if the candle remains unstable, heavily tunneled, or near the end of its life, let it go. The goal is a clean, even, pleasant burnnot a dramatic showdown between scent loyalty and common sense.


