
Table of Contents >> Show >> Hide
- What Does It Mean to Flock a Christmas Tree?
- What You’ll Need to Flock Your Tree
- Step-by-Step: How to Flock a Christmas Tree
- Safety First: Flocked Tree Do’s and Don’ts
- Eco-Friendly and Pet-Friendly Flocking Ideas
- Styling Ideas for Your Flocked Tree
- Common Flocking Mistakes (and How to Fix Them)
- Real-Life Experiences: What It’s Really Like to Have a Flocked Tree
- Final Thoughts
If you’ve ever looked at your perfectly fine Christmas tree and thought, “You’re cute, but you’d look better if you’d just been through a charming snowstorm,” flocking is for you. A flocked Christmas tree lets you bring that fresh, snowy, winter-wonderland vibe into your living room, even if it’s 70°F outside and you’re in fuzzy socks instead of snow boots.
In this guide, you’ll learn exactly how to flock a Christmas tree in a few simple, realistic steps. We’ll cover what flocking actually is, which products to use, how to avoid a blizzard of fake snow all over your floor, and how to keep your tree safe for kids, pets, and your electrical system. By the end, you’ll know how to get that dreamy, “Hometalk-worthy” flocked tree without turning your home into a permanent snow globe.
What Does It Mean to Flock a Christmas Tree?
“Flocking” a Christmas tree means coating the branches with a white, snow-like material so the tree looks as if it’s just been dusted (or dumped) on by fresh snow. You’ll see flocked trees in catalogs, décor magazines, and DIY posts that make it look surprisingly easyand the good news is, it actually can be.
There are a few main ways people flock trees:
- Commercial flocking powder: A specially formulated powder that sticks when activated with water. It clings well and dries hard, giving you that realistic, fluffy snow look.
- Spray-on “snow” products: Convenient aerosol cans that work well for light flocking or touch-ups but may not create as thick a layer as powder.
- DIY flocking mixes: Creative crafters sometimes use soap flakes, cornstarch, or even shredded coconut mixed with a binder for a more natural or budget-friendly option.
You can flock both real and artificial trees, but most people prefer artificial trees: they don’t dry out as quickly, and they’re easier to store and reuse with the flocking still intact.
What You’ll Need to Flock Your Tree
Before you turn your living room into a winter workshop, gather your supplies. Having everything within reach will make the process smoother (and less messy… relatively speaking).
- An artificial or real Christmas tree (unlit or carefully pre-lit)
- Flocking powder or spray snow (enough for the size of your tree)
- Large drop cloths, painter’s plastic, or old sheets to protect floors and furniture
- Spray bottle filled with water (you can add a small amount of white glue if desired)
- Gloves and a simple mask or respirator to avoid breathing in fine particles
- Step ladder for taller trees
- Soft brush or handheld broom for gentle cleanup
- Optional: DIY flock mix (like soap flakes or coconut) if you prefer a more natural look
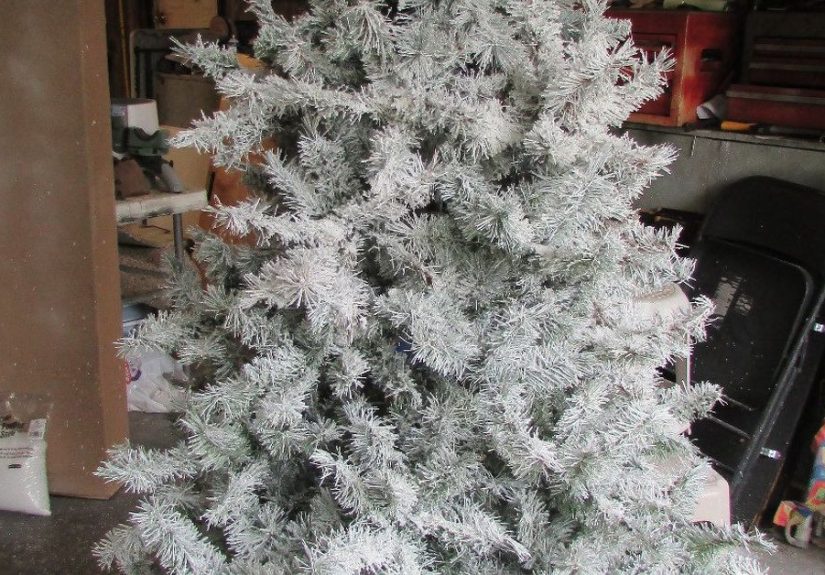
Tip: If you’re flocking indoors, consider doing it in a low-traffic room or garage. Once flocking powder gets on the floor, it tends to migrate everywhere like glitter’s bossy cousin.
Step-by-Step: How to Flock a Christmas Tree
Step 1: Assemble and Fluff Your Tree
Start by setting up your tree exactly where you want it. Once it’s flocked and dry, you won’t want to drag it across the house. Assemble all sections and take your time fluffing each branch. Separate the tips, bend branches slightly up and out, and fill in any obvious gaps. A well-fluffed tree gives the flocking more surface area to cling to, which makes your final “snow” effect fuller and more realistic.
Plug in pre-lit trees at this stage to ensure all lights work before you cover everything in faux snow. It’s a lot easier to swap out a bad light strand now than when your tree looks like it lives in Narnia.
Step 2: Protect Your Space
Next, protect everything around your tree. Lay out drop cloths or plastic sheeting on the floor and, if you’re indoors, tape plastic to nearby walls or large furniture. Even careful flocking creates some overspray and drift, so a little prep now saves a lot of cleanup later.
If you can, slightly pull the tree away from the wall so you can move around it easily. Make sure pets and small children are out of the roomthis is not the time for a puppy to investigate “the weird white dust.”
Step 3: Lightly Mist the Branches
Using your spray bottle, mist the branches with water. You want the needles to be damp, not dripping. For some commercial flocking powders, the moisture helps activate the adhesive in the powder and makes it stick firmly to the branches. Work in sections from top to bottom so the branches you’ve already sprayed don’t dry out while you’re still applying flocking.
If you’re using a water-and-glue mix, go lightly. Too much glue can make the flock clump and take much longer to dry.
Step 4: Apply the Flocking (a Little at a Time)
This is the fun part. Load flocking powder into a kitchen sifter, large sieve, or even your gloved hand. Starting at the top of the tree, gently shake or sprinkle the powder onto the damp branches. Think of how snow naturally fallson top of the branches and tipsrather than coating every inch in a solid layer.
As you sprinkle the powder, lightly mist the area again with water. The powder will start to puff, cling, and set. Work your way around the tree in sections: sprinkle, mist, rotate. For a lightly frosted look, focus on the outer tips and upper surfaces of branches. For a heavy, “blizzard” effect, build the flock up in layers, allowing each light layer to get damp before adding more.
Step 5: Fill in Empty Spots and Let It Dry
Step back occasionally to check for bare spots or uneven coverage. It’s easy to get hyper-focused on one area and forget the back or lower branches. Add a little more flock to any thin sections, then give everything a final, gentle mist to lock it in.
Now, let the tree dry completely. Most commercial flocking needs several hours to cure; many DIYers prefer to leave it overnight. Avoid touching or decorating the tree while it driesthis is when the flock is most vulnerable to being knocked off or smudged.
Step 6: Clean Up and Add Decorations
Once your tree is fully dry, carefully remove the drop cloths, folding them inward to trap the loose flocking. Sweep or gently vacuum the area around the tree. Expect some “shedding,” especially the first day or two as you decorate. That’s normal, as long as big chunks aren’t falling off.
Now you can decorate! Flocked trees look gorgeous with simple, neutral color palettes (think warm white lights, metallic ornaments, and natural textures) but also pair beautifully with bold reds, deep greens, or jewel tones. Because the snow effect is already dramatic, you can usually use fewer ornaments and still get a full, styled look.
Safety First: Flocked Tree Do’s and Don’ts
Flocked trees are festive, but you still want them to be safe. Keep these safety basics in mind:
- Keep all trees away from heat sources. Flocking products can be fire-retardant, but they’re not magic. Position your tree at least several feet away from fireplaces, radiators, and space heaters.
- Use indoor-rated lights in good condition. Check for frayed wires, broken bulbs, or loose connections before hanging them on your flocked tree.
- Don’t overload outlets or extension cords. Spread lights across multiple outlets or use a power strip with surge protection.
- Supervise kids and pets. Some flocking, especially older or cheaper products, may not be safe if ingested. Discourage licking, chewing, or gnawing on branchesadorable but risky.
- Ventilate during application. Whether you’re using spray snow or loose powder, open a window or run a fan to keep the air clear.
If you’re flocking a real tree, remember that once it’s coated, it may not be accepted for regular tree recycling or chipping services in your area. Check local rules and be prepared to dispose of it as trash if necessary.
Eco-Friendly and Pet-Friendly Flocking Ideas
If you’re worried about chemicals or curious pets, you can lean toward more natural or low-tox approaches. Some DIY flock recipes use grated or flaked soap, liquid starch, and water whipped to a thick, snowy texture. Others use shredded coconut with a safe binder to mimic fluffy snow.
These options may not be as durable as commercial flocking powder, but they can be more comforting if you have cats or dogs who treat your tree like a snack bar. Always test a small area first and watch how well the flocking sticks once it dries. If it sheds too much, you might reserve these recipes for wreaths, garlands, or tabletop trees instead of your main, kid-and-pet zone showpiece.
Styling Ideas for Your Flocked Tree
Once you’ve created your snowy masterpiece, it’s time to style it. A flocked tree has a built-in “wow” factor, so you can keep the décor simple and still get magazine-level impact.
- Winter white minimalism: Stick to white and clear glass ornaments, warm white lights, and a simple tree skirt. Let the snow texture take center stage.
- Rustic lodge: Layer in burlap ribbon, wooden ornaments, pinecones, and warm metallics like copper or bronze. Add a plaid tree collar or blanket for extra coziness.
- Classic red and green: Bright red ornaments and velvet ribbon pop beautifully against the white “snow” and green branches.
- Glam metallics: Mix gold, champagne, and silver ornaments for a luxe, shimmering look that feels high-end even with simple ornaments.
Because the flocking visually fills in gaps, you can often decorate with fewer ornaments and still get that full, finished look. Great news if you’re decorating on a budget or just don’t feel like hanging 300 tiny baubles this year.
Common Flocking Mistakes (and How to Fix Them)
Even with a simple process, a few missteps are common. Luckily, they’re easy to fix:
- Using too much flock at once: Heavy dumping can create clumps or cause the flock to slide off. Fix it by brushing off excess once dry and reapplying in thinner layers.
- Forgetting the back of the tree: Guests can see more than just the front, especially in open floor plans. Rotate the tree as you work, and do a full 360-degree check before you stop.
- Not letting it dry fully: Decorating too soon can smear or knock off half your snow. If you’re not sure, give it extra time; overnight is ideal.
- Using harsh cleaners to tidy up: Skip mopping with a soaking-wet mop directly under the tree base. A soft broom or gentle vacuum (away from the actual branches) works better.
Real-Life Experiences: What It’s Really Like to Have a Flocked Tree
So, what happens after the Instagram photos are taken and the cocoa mugs are put away? Living with a flocked tree is a little different from a standard green one, and knowing what to expect can save your sanity.
1. The first year is the “shedding” year. Think of a flocked tree like a new sweater: it sheds a bit at first. You’ll likely notice a light dusting of white near the base of the tree and around high-traffic areas. Most people find that after the first few daysand a gentle round of tidyingthe shedding calms down. The key is not to panic. A little fallout is normal and doesn’t mean you did anything wrong.
2. How you decorate can reduce mess. The way you handle the branches matters. If you aggressively shove large ornaments deep into the tree or constantly rearrange your décor, you’ll knock more flocking loose. Try hanging heavier pieces closer to the trunk (where they’re less likely to rub snow off) and place delicate ornaments on the outer tips.
3. Storage makes a huge difference. One of the biggest lessons people learn after their first flocked season is how important storage is. If possible, store your tree fully or partially assembled, covered in a roomy tree bag instead of cramming branches into a tiny box. Compressing the branches too much scrapes off flocking and breaks it loose. A gentle wrap with plastic or a fabric cover keeps dust off and the snow effect fresher for the next year.
4. Be realistic about pets and toddlers. If you have a cat who views your tree as an indoor climbing gym or a toddler who loves to taste-test everything, expect some interaction with the branches. Some families solve this by leaving the bottom 12–18 inches of the tree lightly flocked (or even unfrocked) and concentrating heavier snow higher up. Others use baby gates or low decorative barriers to keep tiny handsand pawsat a reasonable distance.
5. Plan your cleaning routine ahead of time. A small handheld vacuum or a dustpan and brush parked in the same room as the tree is a game changer. That way, when you see a little drift of faux snow appear near the tree stand, you can sweep it up in seconds rather than letting it spread through the house. Quick, frequent cleanups are much easier than one giant post-holiday deep clean.
6. Expect compliments (and questions). Flocked trees are conversation starters. Guests will ask if you bought it that way, how you did it, and whether it was messy. Having a few honest talking points“Yes, it shed a bit, but I just used a drop cloth and a vacuum and it was fine”makes you sound both festive and impressively capable.
7. Decide if flocking is a “once in a while” or “every year” thing. After one season, some people decide they love the snowy look so much they never go back to plain green. Others treat flocking like a style phase they revisit every few years. The good news: if you’ve flocked an artificial tree well and stored it carefully, you can use the same flocked tree for several holiday seasons before needing any touch-ups.
Overall, most DIYers agree that the time, effort, and mild mess of flocking are absolutely worth it when you switch on the lights for the first time. The glow of warm lights against the snowy branches feels extra cozy and instantly elevates even simple ornaments. If you’re craving that “holiday home tour” look without spending a fortune on a pre-flocked designer tree, doing it yourself is a budget-friendly way to get the same magic.
Final Thoughts
Flocking a Christmas tree isn’t hardit just takes a little planning, a few basic supplies, and a willingness to embrace a temporary mess in exchange for weeks of wintery beauty. Choose a good location, protect your floors, apply your flocking in light layers, and give everything time to dry. Add in some safety awareness for pets, kids, and fire risks, and you’ll have a tree that looks like it came straight out of a holiday photoshoot.
Whether you go for a lightly frosted, subtle look or a full-on snowstorm, a flocked tree instantly changes the mood of your space. So grab your spray bottle, your powder, and your favorite playlistit’s time to turn your everyday tree into a cozy, snowy showstopper.


