
Table of Contents >> Show >> Hide
- Why Ivy Is So Easy to Propagate
- What You Need Before You Start
- Step 1: Choose the Right Ivy Stem
- Step 2: Take a Proper Cutting
- Step 3: Remove Lower Leaves and Prep the Stem
- Step 4: Pick Your Rooting Method
- Step 5: Give Cuttings the Right Conditions
- Step 6: Know When Your Ivy Has Rooted
- How to Care for Newly Rooted Ivy
- Common Mistakes to Avoid
- Can You Grow Ivy Outdoors?
- Frequently Asked Questions
- Real-Life Growing Experiences and Practical Lessons
- Conclusion
If you have one healthy ivy plant, you are approximately three good snips away from having several more. Ivy is one of those generous plants that seems to look at a pair of clean scissors and say, “Go ahead, I can take it.” That is exactly why gardeners and houseplant fans love it. Learning how to grow ivy from cuttings is affordable, beginner-friendly, and weirdly satisfying in the way only plant propagation can be.
Even better, ivy propagation does not require a greenhouse, a horticulture degree, or the patience of a saint. With the right cutting, a clean container, bright indirect light, and a little consistency, you can root ivy in water or in a loose growing medium and turn one vine into a fuller pot, a new hanging basket, or a gift for another plant-loving human.
This step-by-step guide walks you through the whole process, from choosing the best stems to transplanting rooted cuttings into soil. Along the way, we will cover common mistakes, troubleshooting tips, and the little details that separate “Why is this stick sad?” from “Look at my glorious new ivy.”
Why Ivy Is So Easy to Propagate
Ivy is a natural choice for propagation because it roots readily from stem cuttings. The plant grows as a vining climber or trailer, and its stems produce nodes, which are the points where leaves attach and where roots can form. In many cases, ivy even tries to root on its own when stems touch soil. In other words, this plant is not exactly shy about reproducing itself.
That growth habit makes ivy ideal for beginners who want fast results. It also means you can prune a leggy plant and use those trimmings instead of tossing them out. One quick haircut can become a whole tray of baby plants. That is the kind of recycling project even lazy gardeners can get behind.
What You Need Before You Start
Before taking cuttings, gather your supplies so you can work quickly and keep the stems fresh. Here is the basic setup:
- Healthy ivy plant
- Clean, sharp scissors, pruners, or a knife
- Small jar or glass for water propagation, or small pots for soil rooting
- Rooting medium such as perlite, coarse sand, or a light potting mix
- Optional rooting hormone
- Clear plastic bag or humidity dome
- Fresh potting mix with good drainage for transplanting later
Clean tools matter more than people think. A dirty blade can spread disease faster than gossip at a family reunion. Give your cutting tools a quick disinfecting wipe before you start.
Step 1: Choose the Right Ivy Stem
The best cuttings come from a healthy, vigorous parent plant. Look for vines with fresh growth, firm stems, and clean leaves. Avoid stems that are yellowing, wilted, damaged, or showing spots, since those can carry disease or simply lack the energy needed to root well.
If you are propagating English ivy, take cuttings from juvenile growth rather than mature flowering stems. Juvenile ivy is the climbing or trailing form with the classic lobed leaves, and it generally roots more easily. Mature growth can behave differently and may not give you the spreading, trailing plant shape most people want.
It is also smart to skip stems with flowers or buds. When a cutting tries to bloom, it spends energy on flowers instead of roots. Right now, your future ivy baby needs to focus on survival, not performance art.
Step 2: Take a Proper Cutting
For most ivy varieties, cut a stem that is about 4 to 6 inches long. Make the cut just below a node, because that is where roots are most likely to develop. A cutting with several leaves and at least two or three nodes is ideal.
If possible, take cuttings in the morning, when the plant is fully hydrated. Fresh, well-hydrated stems are less likely to wilt during the rooting process. Once cut, keep them out of hot sun and do not let them sit around drying out on the counter while you go make a snack and forget what you were doing. We have all been there.
Quick cutting checklist
- Length: 4 to 6 inches
- Cut just below a node
- Use healthy, non-flowering stems
- Include at least 2 to 3 nodes
- Keep cuttings cool and moist until planted
Step 3: Remove Lower Leaves and Prep the Stem
Once you have your cuttings, remove the leaves from the lower half of each stem. You want at least one bare node at the bottom, because that section will go into water or rooting medium. If leaves sit below the waterline or beneath wet soil, they tend to rot, and that invites trouble.
If the remaining leaves are especially large, you can trim them back slightly to reduce moisture loss, though that is usually not necessary for ivy. At this point, you can also dip the cut end in rooting hormone. Ivy often roots without it, but rooting hormone can speed the process and improve success, especially when rooting in soil or sand.
Step 4: Pick Your Rooting Method
There are two easy ways to propagate ivy from cuttings: in water or in a rooting medium such as perlite, coarse sand, or a loose potting mix. Both methods work. Your best choice depends on whether you prefer to watch roots develop or would rather avoid transplant shock later.
Method 1: Root Ivy in Water
Water propagation is simple and satisfying because you can literally watch the roots show up. Place the prepared cutting in a clean jar filled with room-temperature water. Make sure the bare nodes are submerged, but keep the leaves above the waterline.
Set the jar in a bright spot with indirect light. A sunny windowsill that blasts the cutting all afternoon is not the move. Too much direct sun can stress the cutting before it roots. Refresh the water whenever it turns cloudy, and top it off as needed.
Depending on the variety and conditions, you may see roots begin in a few weeks. Once the roots are a couple of inches long and look healthy, the cutting is ready for potting mix. Do not leave it in water forever unless you plan to grow it as a water-rooted plant long-term. Most ivy does better once it transitions to soil.
Method 2: Root Ivy in Soil, Sand, or Perlite
If you want sturdier roots from the beginning, root the cutting in a loose medium. Fill a small pot with moistened perlite, coarse sand, or a light mix designed for drainage and airflow. Use a pencil or dibber to make a planting hole, then insert the cutting about 1 to 1 1/2 inches deep, burying at least one node.
Firm the medium gently around the stem so the cutting stays upright. Water lightly to settle everything in. Then cover the pot with a clear plastic bag or dome to create a humid mini-greenhouse. Just make sure the plastic does not rest directly on the leaves.
Keep the medium evenly moist but not soggy. This is important. A completely dry cutting is a lost cause, but a constantly waterlogged cutting can rot before it ever gets started. Think “wrung-out sponge,” not “tiny swamp.”
Step 5: Give Cuttings the Right Conditions
Unrooted cuttings do not yet have a root system, so their environment matters a lot. The goal is to keep them hydrated without drowning them.
Best conditions for ivy propagation
- Light: Bright, indirect light
- Moisture: Evenly moist, never bone dry, never saturated
- Humidity: Moderate to high humidity helps prevent wilting
- Temperature: Mild indoor temperatures work best; avoid extremes
- Airflow: Good airflow matters, but do not put cuttings in a drying draft
If your home is very dry, the plastic cover will help a lot. If condensation builds up heavily, open the cover briefly for some air exchange. Cuttings love humidity, but fungus loves stale, wet air, so the balance matters.
Step 6: Know When Your Ivy Has Rooted
Patience is part of the process, but ivy usually does not test your character for too long. In many cases, cuttings rooted in soil or sand develop roots in about 6 to 8 weeks. Water-rooted cuttings may show roots sooner, though the exact timing depends on light, temperature, and the condition of the stem.
For cuttings in soil, give the stem a gentle tug after a few weeks. If you feel resistance, roots are forming. Another good sign is fresh top growth. New leaves usually mean the cutting has moved beyond “surviving” and into “actually thriving.”
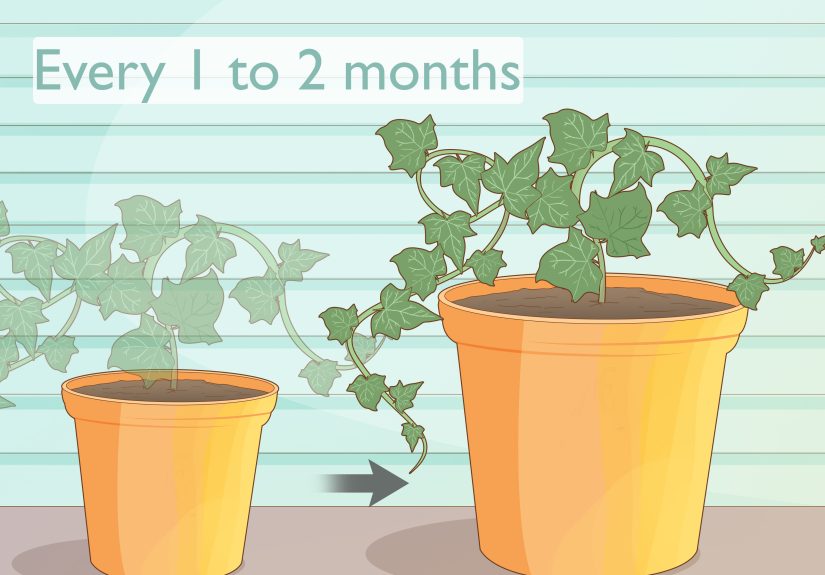
Once roots are established, transplant each cutting into a pot with rich, well-draining potting mix. Choose a pot with drainage holes and avoid jumping into an oversized container. A pot that is only slightly larger than the root system is usually best, since overly large pots can stay wet too long and increase the risk of root rot.
How to Care for Newly Rooted Ivy
After transplanting, keep the soil lightly and evenly moist for the first few weeks while the roots settle in. Place the plant in bright indirect light and avoid harsh afternoon sun. Once the ivy is established, let the top portion of the soil dry slightly before watering again.
Ivy generally prefers good drainage, moderate moisture, and cooler room temperatures over hot, stuffy conditions. Too much water is one of the fastest ways to turn a promising new plant into a cautionary tale. Brown leaves, yellowing foliage, or mushy stems often point to moisture problems, poor drainage, or both.
To encourage a fuller plant, pinch the growing tips after the cutting is actively growing. That helps the ivy branch instead of stretching into one dramatic vine that thinks it is starring in a Victorian novel.
Common Mistakes to Avoid
Using weak or diseased cuttings
Always start with healthy growth. A cutting that is already struggling is not likely to bounce back just because you are cheering for it.
Burying leaves
Leaves below water or below the soil line rot quickly. Keep all foliage above the surface.
Too much direct sun
Bright indirect light is ideal. Direct sun can scorch or dehydrate an unrooted cutting fast.
Overwatering
Moist is good. Soggy is not. Heavy, wet conditions invite rot and fungal issues.
Using dense garden soil
Field soil compacts too easily and can harbor disease. Use a clean, airy medium instead.
Potting up too early or too late
Move cuttings once roots are established, but do not rush them. At the same time, do not leave water-rooted cuttings sitting in a jar forever if your goal is a potted plant.
Can You Grow Ivy Outdoors?
Technically yes, but this is where the story gets complicated. English ivy is considered invasive in parts of the United States and can spread aggressively outdoors. It can climb trees, cover the ground, damage structures, and crowd out other plants. If you want the look of ivy without the drama, growing it indoors or in containers is often the safer choice.
If you do use ivy outside, keep it tightly managed and check local recommendations first. A charming vine can become a neighborhood menace faster than expected.
Frequently Asked Questions
Can you grow ivy from a single cutting?
Yes. A single healthy cutting with at least one node can root and become a new plant. That said, taking several cuttings at once gives you better odds and helps create a fuller pot later.
Is water or soil better for ivy propagation?
Both methods work. Water propagation is easier to monitor, while soil or perlite often produces roots that transition to potting mix more smoothly.
Do you need rooting hormone for ivy?
Not always. Ivy is usually easy to root, but rooting hormone can improve results, especially with soil propagation.
How long does it take for ivy cuttings to root?
Many ivy cuttings root within a few weeks in water, while cuttings in rooting media often take around 6 to 8 weeks to develop a solid root system.
Real-Life Growing Experiences and Practical Lessons
One of the most useful things about learning how to grow ivy from cuttings is that the process teaches you to notice small details. Gardeners often say ivy is easy, and that is true, but “easy” does not mean “mindless.” In real homes, real apartments, and real kitchens with questionable lighting, success usually comes down to a few habits that get better with practice.
For example, many people take their first ivy cuttings from a plant that is already too leggy. That is not a disaster, but it does mean the stems may be tired, stretched, and less eager to root. A better experience usually starts with a healthy plant that has been growing well for a while. The strongest cuttings often come from vines with compact growth, fresh leaves, and no obvious stress.
Another common lesson comes from water propagation. It looks beautifully simple online, and to be fair, it really can be simple. But growers quickly learn that clear jars in direct sun can heat up fast, cloudy water needs to be changed, and roots that look impressive in water are not always thrilled when moved into soil. That does not mean water propagation is bad. It just means timing matters. Potting up at the right moment can make the difference between steady growth and a cutting that sulks for two weeks like it has been personally offended.
Soil propagation teaches a different kind of patience. At first, nothing appears to be happening. There is no exciting glass jar full of visible roots, just a stem sitting there as if it is reconsidering its life choices. Then one day the cutting resists a gentle tug, and suddenly you have proof that the quiet method was working all along. Many experienced growers end up liking this route because the roots form in the medium where the plant will continue growing.
People also learn quickly that humidity is helpful, but too much fussing can backfire. Constantly lifting the bag, poking the medium, rotating the pot every twelve minutes, and checking for roots with the intensity of a detective does not speed things up. Consistent moisture, indirect light, and restraint usually win. Ivy is cooperative, but it still wants space to do the job.
There is also a design lesson hidden in propagation. Instead of rooting one cutting and calling it a day, many plant owners eventually start three, five, or even more cuttings together. When those rooted stems are potted into one container, the result looks fuller, greener, and far more intentional. That is how a single slightly scruffy plant becomes a lush indoor accent that looks like you definitely have your life together.
Maybe the biggest takeaway is that ivy propagation rewards observation more than perfection. You do not need fancy equipment. You need to notice whether the leaves are staying firm, whether the medium is drying too quickly, whether the light is too strong, and whether the cutting still looks healthy week to week. Once you start paying attention to those cues, growing ivy from cuttings becomes less like following a rigid formula and more like building a repeatable skill. And that is when it gets fun.
Conclusion
If you want an easy, low-cost way to make more plants, ivy cuttings are one of the best places to start. Use healthy stems, cut near a node, remove the lower leaves, and root the cuttings in water or a loose, well-draining medium. Keep them in bright indirect light, maintain steady moisture, and transplant once the roots are well developed. That is the whole game plan.
The beauty of ivy propagation is that it is practical, forgiving, and genuinely useful. You get to refresh the parent plant, make new ones, and sharpen your plant-care skills all at once. Not bad for a project that starts with scissors and a vine.


