
Table of Contents >> Show >> Hide
- What Counts as a “Heavy” Picture?
- Before You Hang Anything, Do These 4 Checks
- The Best Ways to Hang a Heavy Picture
- Step-by-Step: How to Hang a Heavy Picture Safely
- Easy Solutions for Common Hanging Problems
- Best Hardware Choices by Wall Type
- Common Mistakes to Avoid
- Pro Tips for a Cleaner, Easier Install
- Final Thoughts
- Experience Section: Real-World Lessons From Hanging Heavy Pictures
Hanging a heavy picture sounds simple right up until you’re standing on a ladder, holding a frame the size of a compact car, wondering whether your wall is about to become a crime scene. The good news: you do not need superpowers, a contractor’s belt, or blind faith in one lonely nail. You just need the right hardware, the right wall strategy, and a little patience.
If you’ve ever asked, “How do I hang a heavy picture on drywall without it crashing down at 2 a.m.?” you’re in the right place. This guide walks you through the safest, easiest ways to hang heavy wall art, oversized frames, and mirror-like pieces without guessing, over-drilling, or turning your wall into Swiss cheese. We’ll cover studs, anchors, plaster, masonry, common mistakes, and the install tips that make the whole job go much smoother.
What Counts as a “Heavy” Picture?
“Heavy” is less about drama and more about hardware. A medium frame you can lift with one hand may still be too much for a basic nail in drywall. In practical terms, a picture becomes “heavy” when it needs more than a simple small-picture hook or when the frame is large enough to put extra stress on a single hanging point.
That usually includes:
- Oversized art prints with thick frames
- Large canvas pieces in floating frames
- Mirrors disguised as “decor”
- Shadow boxes, gallery pieces, and framed textiles
- Anything valuable, awkward, or heavy enough to make you nervous
Rule number one: don’t guess. Weigh the frame or check the manufacturer’s label. Your hardware choice should be based on the actual weight of the picture and the type of wall behind it.
Before You Hang Anything, Do These 4 Checks
1. Confirm the exact weight
Use a bathroom scale if needed. Hold the picture, step on the scale, then subtract your weight. Glamorous? No. Effective? Absolutely.
2. Inspect the back of the frame
Heavy art is more secure with strong hanging hardware on the frame itself. D-rings, metal brackets, or a cleat system usually offer better stability than flimsy wire alone. If the wire looks like it came from a twist tie’s emotionally exhausted cousin, upgrade it.
3. Identify your wall type
The best way to hang a heavy picture depends on the wall:
- Drywall: common, easy to work with, but weak without the right anchor
- Stud location: the gold standard for strong support
- Plaster and lath: more brittle, needs extra care
- Brick or concrete: strong, but requires masonry hardware
4. Pick the final location first
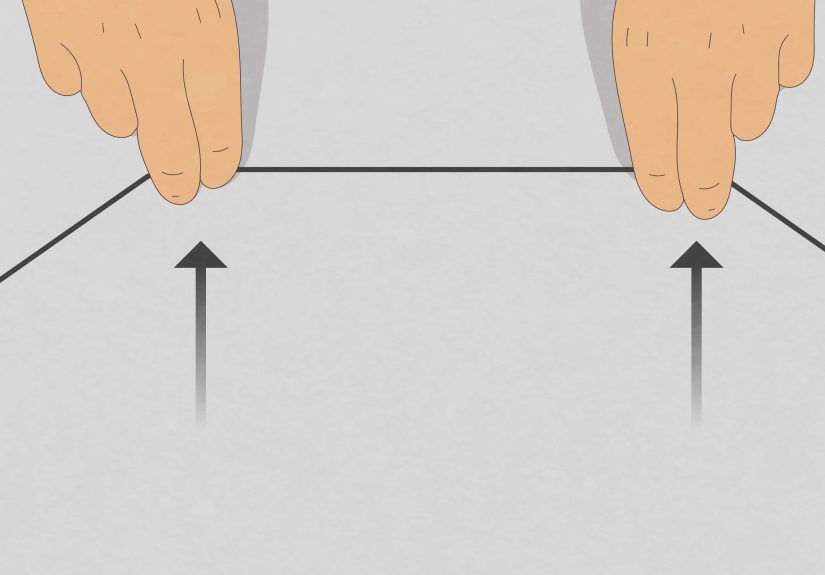
Do not install first and “see how it looks.” That is how walls end up with a constellation of regret. Mark placement with painter’s tape, paper templates, or a pencil before you touch a drill.
The Best Ways to Hang a Heavy Picture
Option 1: Mount into a wall stud
If you can hit a stud, do it. Hanging a heavy picture on a stud is usually the strongest and most reliable solution. A stud gives the screw real structural support, which is exactly what you want when the frame is expensive, oversized, or heavy enough to make guests nervous.
Use a stud finder, mark the center of the stud, and install a screw or heavy-duty picture hanger rated above the picture’s weight. If your frame allows for two mounting points, even better. Two points reduce shifting and help the picture stay level instead of slowly turning crooked like it has an opinion.
Option 2: Use heavy-duty drywall anchors
No stud where you want the art? Drywall anchors are the next best thing. For heavy pictures, choose anchors specifically rated for the load. Toggle bolts, strap toggles, and some metal hollow-wall anchors are strong choices because they spread the force behind the drywall instead of relying on surface grip alone.
When hanging heavy art on drywall, match the anchor to both the weight and the wall material. Don’t grab random leftover anchors from an old junk drawer. Hardware should be selected like it matters, because it does.
Option 3: Use toggle bolts for plaster walls
Plaster walls can crack if handled roughly, so a standard drywall hanger may be a bad fit. Toggle bolts are often a smarter solution for heavier pieces because they hold from behind the wall and reduce stress at one tiny surface point. Drill carefully, go slowly, and don’t over-tighten.
If you live in an older home, this step matters. Plaster looks tough, but it can be surprisingly dramatic when drilled the wrong way.
Option 4: Use masonry anchors for brick or concrete
Brick, concrete, and stone walls need masonry anchors or concrete screws. This is not the time for ordinary picture hooks. You’ll need the correct drill bit, a pilot hole, and hardware designed for masonry surfaces. The upside is that once installed correctly, these walls provide very solid support for heavy art.
Option 5: Use a French cleat for very large or valuable pieces
If you’re hanging a massive frame, a heavy mirror-style piece, or artwork you really don’t want to see face-down on the floor, a French cleat system is one of the best solutions. It distributes weight across a wider area and makes large pieces easier to level. It also feels satisfyingly professional, which is always nice.
Option 6: Adhesive strips for lighter “heavy-looking” frames
Some large frames are more bulky than truly heavy. In those cases, removable picture hanging strips can work if the frame falls within the product’s weight limit, the wall surface is appropriate, and the piece is not valuable or irreplaceable. Always follow the strip manufacturer’s instructions exactly.
This is a great option for renters, but it is not magic. If the piece is genuinely heavy, skip the wishful thinking and use proper mechanical hardware.
Step-by-Step: How to Hang a Heavy Picture Safely
Step 1: Measure the picture and mark the wall
Measure the frame height and the distance from the top of the frame to the hanging hardware. Then mark where the hardware needs to land on the wall. Use painter’s tape if you want to protect the finish and keep your pencil marks organized.
For most rooms, wall art looks best when the center sits around eye level. Above furniture, the bottom of the frame should feel visually connected to the piece below it instead of floating awkwardly near the ceiling.
Step 2: Find the stud or choose the anchor points
Use a stud finder if possible. If a stud lines up with your ideal placement, great. If not, choose two anchor points when the frame design allows it. Two mounting points create better balance and reduce tilting.
Step 3: Install the hardware
For screws into studs, drill a pilot hole if needed and drive in the screw or hanger. For drywall anchors, follow the package directions carefully. Some anchors require pilot holes, while self-drilling models do not. For toggle bolts, make sure the hole size matches the toggle mechanism.
Step 4: Hang the picture and level it
Lift the frame into place, set it on the hardware, then check it with a level. If the picture is large, ask for help. There is no prize for balancing a 35-pound frame alone while perched on a step stool like a very committed raccoon.
Step 5: Add bumpers
Rubber or felt bumpers on the bottom corners help keep the frame from scuffing the wall and make it less likely to shift or tilt every time a door closes.
Easy Solutions for Common Hanging Problems
The picture keeps tilting
Use two hooks instead of one, or switch from wire hanging to D-rings. Add bumpers to the back corners. Crooked art is surprisingly good at ruining your mood from across the room.
The frame is too wide for one stud
Use two wall anchors, a French cleat, or mount a backer board across studs and attach the picture hardware to that. This works especially well for oversized art above a sofa, console, or bed.
You’re hanging art over furniture
Keep the piece visually connected to the furniture below. If the picture is too high, it looks like it’s trying to leave the room. A little breathing room is good; a giant gap is not.
You’re renting
For moderate-weight frames, removable strips may be the cleanest option. For truly heavy pieces, check your lease and use proper anchors if allowed. A patch kit is cheaper than a security-deposit argument.
Best Hardware Choices by Wall Type
- Drywall with stud: screw, heavy-duty picture hanger, or French cleat
- Drywall without stud: toggle bolt, strap toggle, or metal hollow-wall anchor
- Plaster: toggle bolt or carefully installed anchor designed for hollow walls
- Brick or concrete: masonry anchor or concrete screw
- Smooth painted wall, lighter frame: picture hanging strips within rated limits
Common Mistakes to Avoid
Using under-rated hardware
Always choose hardware that comfortably exceeds the actual weight of the picture. “Probably fine” is not an installation method.
Trusting the free hardware that came in the box
Included hardware is sometimes perfectly fine and sometimes deeply optimistic. Check the rating before you use it.
Ignoring the frame’s back hardware
A strong wall anchor won’t help much if the D-rings, screws, or hanging wire on the frame are weak. Think of the whole setup as a chain. The weakest part decides the outcome.
Skipping the level
Eyeballing it works right up until you sit down and realize the frame is slanting like a ship in a storm.
Over-tightening anchors
Too much force can damage drywall or crack plaster. Snug is good. Hulk mode is not.
Pro Tips for a Cleaner, Easier Install
- Use paper templates to map out hole placement before drilling.
- Mark drill points with painter’s tape for easier visibility.
- Keep a small vacuum nearby to catch drywall dust.
- Use two hang points for wide or expensive pieces.
- Upgrade frame hardware before hanging if it looks weak.
- Check the wall for outlets, switches, or plumbing nearby before drilling.
Final Thoughts
Learning how to hang a heavy picture is really about making smart decisions before the frame ever touches the wall. Know the weight. Know the wall. Choose hardware that matches both. Whenever possible, use a stud. When that isn’t possible, use a heavy-duty anchor designed for the job. And if the piece is large, valuable, or unusually awkward, a French cleat or two-point mounting system is worth every extra minute.
Done right, your picture will stay level, secure, and exactly where you want it. Done wrong, it becomes a surprise flooring accessory. Let’s aim for the first one.
Experience Section: Real-World Lessons From Hanging Heavy Pictures
One of the biggest lessons people learn when hanging heavy pictures is that the “hard part” usually isn’t the drilling. It’s the planning. A lot of failed installs start the same way: someone holds the frame up, says, “That looks about right,” hammers in a nail, hangs the art, steps back, and immediately realizes it’s too high, off-center, or hanging from hardware that was never meant to support that much weight. Then comes the patching, the sighing, and the promise to “do it properly this time.”
Another common experience is discovering that a large frame isn’t necessarily heavy in the way you expected. Some oversized canvas pieces are bulky but surprisingly light, which makes heavy-duty adhesive strips or specialty hooks a realistic option. On the other hand, a medium-size framed mirror can weigh far more than it looks. That’s why weight matters more than appearance. A frame can look dainty and still behave like a gym dumbbell.
Many homeowners also find that the wall itself changes everything. Drywall tends to be forgiving, so people often assume all walls behave the same way. Then they meet plaster. Suddenly the drill bites differently, the wall chips more easily, and the project becomes less “easy afternoon task” and more “respect the house and move slowly.” In older homes, patience is not optional. Pilot holes, the right anchor, and a gentle hand can save a lot of frustration.
There’s also the very relatable experience of trying to hang a wide frame on one center hook, only to watch it drift crooked every time someone shuts a door. This is where two mounting points can feel like a life upgrade. The frame stays put, the bottom corners stop smacking the wall, and your eye no longer twitches every time you walk past it. Sometimes the best install tip is simply giving the artwork better balance.
People who hang a lot of art also tend to become big fans of templates. A piece of kraft paper, painter’s tape, and a pencil can prevent multiple mistaken holes and make placement far less stressful. It sounds almost too simple, but it works. The same goes for using a level instead of relying on instinct. Human instinct is wonderful for many things. It is less impressive when hanging a 30-pound frame over a sofa.
Finally, experience teaches that “secure” feels better than “fast.” The extra ten minutes spent finding a stud, checking a weight rating, or swapping weak frame hardware for stronger D-rings is almost always worth it. Once the picture is up, level, and solid, you stop thinking about it. And that’s the goal. Good hanging hardware should disappear into the background while the artwork gets all the attention.


