
Table of Contents >> Show >> Hide
- Why Dry Herbs in the Oven?
- Best Herbs for Oven Drying
- When to Harvest Herbs for Drying
- How to Dry Herbs in the Oven: Step-by-Step
- Best Storage Tips for Dried Herbs
- Common Mistakes When Drying Herbs in the Oven
- Oven-Drying vs. Other Herb Drying Methods
- How to Use Oven-Dried Herbs in Cooking
- Troubleshooting: If Your Herbs Aren’t Drying Well
- Real-World Kitchen Experiences with Oven-Drying Herbs (Extended Section)
- Conclusion
Fresh herbs are one of life’s tiny luxuries. You buy a bunch of parsley for one recipe, use three sprigs, and then spend the next week pretending you’re “definitely” going to make tabbouleh. Good news: oven-drying herbs is a fast, practical way to save flavor, reduce waste, and keep your kitchen stocked without paying spice-aisle prices for tiny jars.
This guide walks you through exactly how to dry herbs in the oven, including the best temperature range, timing, what herbs work best, what mistakes cause sad brown flakes, and how to store your dried herbs so they actually taste like something later. We’ll also cover when oven-drying is a smart shortcutand when another method (like air-drying or a dehydrator) may preserve better color and aroma.
Why Dry Herbs in the Oven?
Oven-drying herbs is popular because it’s quick, accessible, and doesn’t require special equipment. If you have a sheet pan, an oven, and a little patience, you can preserve a garden harvest or grocery-store bundle in a single afternoon.
That said, let’s be honest: the oven is not always the gold medal method for herb quality. Many extension and preservation sources note that higher heat can reduce color, flavor, and aromatic oils. The trick is to use the lowest possible heat, encourage airflow, and check frequently so you dry the herbs instead of cooking them.
Best Herbs for Oven Drying
Most culinary herbs can be dried in the oven, but some perform better than others.
Great candidates (usually easier to dry)
- Rosemary
- Thyme
- Oregano
- Sage
- Marjoram
- Savory
Can be dried, but watch carefully
- Parsley
- Mint
- Dill
- Chives
- Tarragon
- Basil (often loses more flavor/color than woody herbs)
In general, woody or sturdier herbs hold up better during drying. Tender, high-moisture herbs can still be dried, but they need gentler handling and closer monitoring to avoid browning or dull flavor.
When to Harvest Herbs for Drying
If you’re drying herbs from your garden, timing matters. For many herbs, the ideal harvest window is early in the day after the dew has evaporated, before the sun and heat cause wilting. Many home preservation sources also recommend harvesting just before flowering (or as buds are forming) for strong flavor.
Translation: don’t wait until your basil looks like it’s trying to start a flower shop. Younger, healthy leaves usually dry better and taste brighter.
How to Dry Herbs in the Oven: Step-by-Step
1) Sort and prep the herbs
Remove damaged, yellowed, bruised, or dirty leaves. If the herbs are from your garden or still gritty from the store, rinse briefly in cool water. Then shake off excess moisture and pat dry thoroughly. Surface moisture is the enemy hereit slows drying and can affect texture and flavor.
You want the herbs clean and dry before they go into the oven, not soaking like they just finished a pool workout.
2) Decide whether to dry whole sprigs or leaves
You can dry either whole sprigs or stripped leaves. For small, woody herbs like thyme and oregano, many people dry sprigs and strip the leaves later. For broad-leaf herbs like basil or sage, stripping leaves first can make drying more even and reduce the risk of stems holding moisture longer.
3) Arrange in a single layer
Line a baking sheet (or two) with parchment paper for easier cleanup. Spread herbs in a single layer with as little overlap as possible. Air circulation matters. If the herbs are piled up, they steam instead of dry.
If you have a large batch, do multiple trays or multiple rounds. Overcrowding is the fastest path to patchy results.
4) Set the oven low (very low)
The ideal drying temperature for herbs is generally lowoften around 90–110°F when possible. Many home ovens can’t hold that temperature, so use the lowest setting available. A common upper limit cited for oven-drying herbs is 180°F. If your oven runs hot, use an oven thermometer to check the real temperature.
If your oven cannot go low enough, you still have options:
- Use the oven light only (some sources recommend this for overnight drying with the heat off).
- Preheat briefly, then turn the oven off and let residual heat do the work (monitor closely).
- Use the lowest setting and shorten drying time with frequent checks.
5) Keep the door slightly ajar for airflow
Propping the oven door slightly open helps moisture escape and improves air circulation. This is a common recommendation in extension-style guidance for low-temperature oven drying. It also reduces the risk of the herbs “cooking” instead of drying.
Important: use caution and follow your appliance’s safety guidance. Some ovens are not designed to be left open in the same way, and you should never leave an active oven unattended.
6) Dry slowly and check often
Drying time varies based on the herb type, leaf size, moisture level, your oven temperature, and airflow. A typical oven-drying range is around 2 to 4 hours, though some sources suggest checking at 1 hour and then monitoring regularly until fully dry. Other methods (like oven-light drying) may take overnight.
A practical checking rhythm:
- Check at 45–60 minutes.
- Rotate trays if needed.
- Gently move or stir leaves occasionally for even drying.
- Continue checking every 15–30 minutes until done.
7) Test for doneness the right way
The herbs are done when the leaves feel dry and crumble easily between your fingers. Stems should snap rather than bend (especially on woody herbs). If leaves feel cool, soft, or leathery, they likely need more time.
Don’t rush this step. Partially dried herbs can mold in storage, and nobody wants to discover that the hard way while seasoning soup.
8) Cool completely before storing
Let the herbs cool to room temperature before storing them. Trapping residual warmth can create condensation inside the container, which is exactly what you were trying to remove in the first place.
Once cool, strip leaves from stems (if needed) and store them whole or lightly crumbled. Whole leaves tend to keep aroma longer; crush them when you cook for stronger release of flavor.
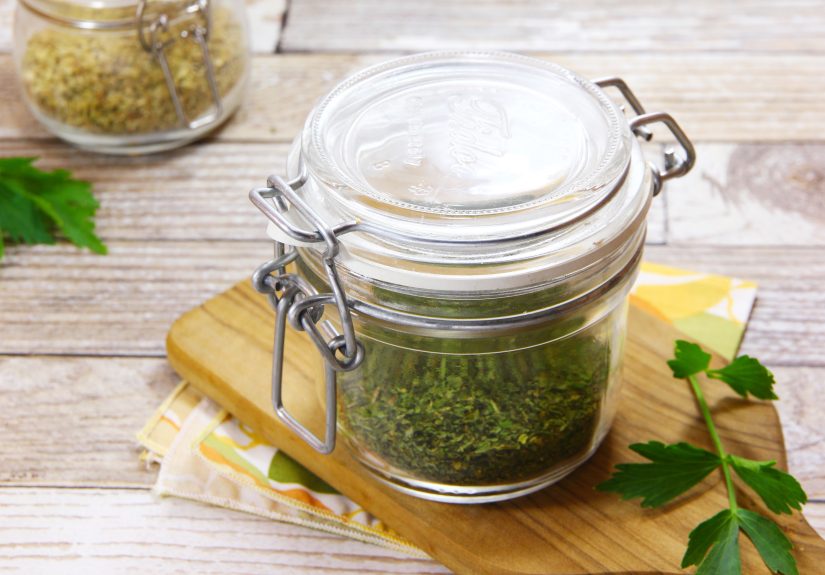
Best Storage Tips for Dried Herbs
- Use airtight glass jars or tightly sealed containers.
- Store in a cool, dry, dark place away from heat and sunlight.
- Label each jar with the herb name and drying date.
- Keep moisture outalways use a dry spoon.
Shelf life guidance varies by source and storage conditions. Some sources emphasize peak quality within months, while others note that well-stored dried herbs may remain usable for much longer. The safest rule for home cooks: if the aroma is weak and the color is faded, it’s time for a refresh.
Common Mistakes When Drying Herbs in the Oven
Using too much heat
High heat can scorch delicate leaves and drive off aromatic oils. If your dried herbs smell like warm hay instead of actual herbs, the oven likely ran too hot.
Skipping airflow
Moisture needs somewhere to go. A slightly open oven door (when safe for your appliance) helps a lot.
Overcrowding the pan
Herbs need space. Overlapping leaves trap moisture and cause uneven drying.
Not drying thoroughly before storage
“Almost dry” is not dry. If leaves bend instead of crumble, keep going.
Forgetting to check often
Herbs can go from “not ready” to “oops, charcoal confetti” surprisingly fast, especially small leaves like thyme.
Oven-Drying vs. Other Herb Drying Methods
Oven drying
Fast and convenient, especially for small batches. Good when you need results today.
Air drying
Great for sturdy herbs and larger bunches, especially in a dry climate. Slower, but often gentle on flavor. Tender herbs may mold if humidity is high.
Dehydrator drying
Often considered the best balance of quality and control because temperature and airflow are designed for drying. If you preserve herbs often, a dehydrator can be worth it.
Microwave drying
Very fast for tiny batches, but it requires careful timing and can be inconsistent. Some herbs dry well; others brown quickly.
How to Use Oven-Dried Herbs in Cooking
Dried herbs are concentrated and behave differently than fresh herbs. They shine in recipes with moisture and timesoups, stews, sauces, marinades, braises, roasted vegetables, and seasoning blends.
A few practical tips:
- Crush dried herbs between your fingers before adding them to release aroma.
- Add them earlier in cooking so they can rehydrate and bloom.
- Use your nose: if the jar smells faint, add a little more (or replace it).
- Keep separate jars of common blends (Italian mix, poultry seasoning, herb salt) for easy weeknight cooking.
Troubleshooting: If Your Herbs Aren’t Drying Well
Problem: They turned brown quickly
Your oven is likely too hot. Use the lowest setting, verify with an oven thermometer, and check more often.
Problem: They feel limp after hours
You may have too much moisture (wet herbs, overcrowded tray, poor airflow). Dry the herbs more thoroughly before starting, spread them out more, and improve ventilation.
Problem: They dried unevenly
Leaf size and oven hot spots are usually to blame. Rotate trays, stir gently, and separate larger leaves from smaller ones.
Problem: They lost most of their flavor
This can happen with high heat, over-drying, or naturally delicate herbs. Try a lower temperature, shorter drying time, or switch those herbs to freezing instead.
Real-World Kitchen Experiences with Oven-Drying Herbs (Extended Section)
One of the most common experiences people have with oven-drying herbs is discovering that the process is less about “following a fixed recipe” and more about learning your oven’s personality. Two people can dry the same tray of oregano for the same amount of time and get different results because one oven runs hot, one has strong convection, and one apparently thinks 170°F is merely a suggestion. The first time many home cooks try this, they expect a precise number of minutes. What they really need is a process: low heat, airflow, and frequent checks.
Another frequent experience is surprise at how much herbs shrink. A heaping tray of parsley can dry down to a very modest jar. This is normaland a good reminder to dry more than you think you need if you’re preserving a harvest. People often feel disappointed the first time (“That’s it?”), then delighted later when a pinch adds real flavor to soup, eggs, or roasted potatoes. The volume drops, but the convenience goes way up.
Many gardeners also notice a difference between herbs from the backyard and herbs from the store. Homegrown herbs can be more aromatic, but they may also be dustier, so washing and thorough drying become more important. Store-bought herbs may look cleaner but can hold extra moisture from packaging, which can slow oven drying. In both cases, the best results usually come from patience at the prep stage: rinse only if needed, drain well, and let surface moisture disappear before the tray goes into the oven.
A very relatable experience: the “I forgot to check them” moment. Herbs are small, light, and quick to over-dryespecially thyme, dill, or thin oregano leaves. It’s easy to get distracted by one email, one phone call, or one episode of a show and come back to herbs that smell more toasted than fresh. The fix is simple: set a timer every 15 to 30 minutes once the herbs start drying. It sounds basic, but it is the difference between a fragrant jar and a lesson in smoke alarm sensitivity.
People who dry herbs regularly also tend to develop a rhythm. They save stems for stock, label jars immediately, and keep the leaves whole until cooking day. They stop trying to force every herb into the same method and accept that basil might be better frozen, while rosemary and thyme dry beautifully. That flexibility is what turns oven-drying from a one-time experiment into a practical kitchen habit.
Perhaps the most rewarding experience is using your own dried herbs months later. In the middle of winter, adding home-dried sage to a pan of butter or crushed oregano to tomato sauce feels a little like finding money in an old coat pocketsmall, satisfying, and oddly triumphant. Oven-drying herbs isn’t fancy. It’s just smart, useful, and a great way to make your cooking taste more intentional without spending more at the store.
Conclusion
Learning how to dry herbs in the oven is one of the easiest kitchen preservation skills you can pick up. The key is simple: low heat, good airflow, and frequent checking. If you respect those three rules, you can turn extra herbs into a flavorful pantry staple in just a few hours.
Start with a small batch, test your oven, and keep notes on what works best for each herb. Once you get the hang of it, you’ll waste less, save money, and always have a jar of something delicious waiting to rescue dinner.


