
Table of Contents >> Show >> Hide
- What Is VirtualBox?
- Before You Install VirtualBox
- How to Install VirtualBox on Windows
- How to Install VirtualBox on Mac
- How to Install VirtualBox on Linux
- Should You Install the VirtualBox Extension Pack?
- Create Your First Virtual Machine
- Install Guest Additions After the Guest OS
- Common VirtualBox Installation Problems
- Best Practices After Installing VirtualBox
- Real-World Experience: Lessons From Installing VirtualBox on Windows, Mac, and Linux
- Conclusion
Installing VirtualBox sounds like one of those tasks that should take five minutes, right up until your computer asks about kernel modules, Hyper-V, system extensions, or whether you trust an installer with a name long enough to need its own parking space. The good news: Oracle VirtualBox is still one of the most approachable ways to run a virtual machine on your existing computer, whether you use Windows, macOS, or Linux.
This guide walks you through how to install VirtualBox on Windows, Mac, or Linux, how to choose the correct installer, what to do before your first virtual machine, and how to avoid the tiny setup mistakes that turn a simple install into a heroic IT side quest. We will also cover Guest Additions, the Extension Pack, common troubleshooting tips, and real-world experience that makes the process smoother.
What Is VirtualBox?
VirtualBox is a free, hosted virtualization application from Oracle. In plain English, it lets you run one operating system inside another. Your real computer is called the host. The system running inside VirtualBox is called the guest. For example, you can run Ubuntu inside Windows 11, Windows inside Linux, or a test Linux server inside macOS without replacing your main operating system.
Developers use VirtualBox to test apps in different environments. Students use it to learn Linux without risking their main laptop. Tech hobbyists use it to explore old operating systems, test software safely, or build a small home lab. It is like having a spare computer, except it lives in a window and does not steal snacks from your desk.
Before You Install VirtualBox
Check Your Host Operating System
Before downloading anything, confirm your host operating system and processor type. Windows users should know whether they are on Windows 10 or Windows 11 and whether the system is x86_64 or Arm. Mac users should check whether the Mac uses Intel or Apple Silicon. Linux users should check the distribution, version, and whether they are running a 64-bit system.
This matters because VirtualBox provides different installers for different host platforms. Installing the wrong package is a little like trying to put diesel in a toaster. It may be technically adjacent to machinery, but nobody is leaving happy.
Enable Hardware Virtualization
Most modern computers support hardware virtualization, but it may be disabled in BIOS or UEFI settings. Look for options such as Intel VT-x, Intel Virtualization Technology, AMD-V, or SVM Mode. If VirtualBox complains that virtualization is unavailable, restart your computer, enter BIOS or UEFI setup, enable the feature, save changes, and boot normally.
Download Only From the Official VirtualBox Site
Always download VirtualBox from Oracle’s official VirtualBox download page. Avoid random “download helper” sites. They often come with extra installers, outdated builds, or other digital confetti you never asked for. Choose the base package for your operating system and, if needed, the matching Extension Pack for the same VirtualBox version.
How to Install VirtualBox on Windows
Step 1: Download the Windows Installer
Go to the official VirtualBox downloads page and choose the Windows installer. Save the file somewhere easy to find, such as your Downloads folder. The installer usually has a name similar to VirtualBox-version-Win.exe.
Step 2: Run the Installer
Double-click the installer. Windows may show a User Account Control prompt. Choose Yes if you downloaded the installer from Oracle and are ready to proceed. The setup wizard will open and show installation options.
For most users, the default components are the right choice. These include the VirtualBox application, USB support, networking features, and other required drivers. During installation, your network may briefly disconnect while VirtualBox installs networking drivers. Do not panic. Your Wi-Fi is not filing for divorce; it is just taking a quick coffee break.
Step 3: Accept Driver Prompts
Windows may ask whether you want to install Oracle device software. Choose Install. These drivers allow VirtualBox to create virtual network adapters, USB support, and other features needed by virtual machines.
Step 4: Launch VirtualBox
When installation finishes, open VirtualBox from the Start menu. If the program opens without errors, congratulations. You now have a virtualization platform ready to host your first guest operating system.
Windows Troubleshooting: Hyper-V Conflicts
One common Windows issue is a conflict with Hyper-V or Hyper-V-related security features. If VirtualBox starts but virtual machines run slowly, refuse to start, or show virtualization errors, check whether Hyper-V, Windows Hypervisor Platform, Virtual Machine Platform, Memory Integrity, or Credential Guard is enabled.
On Windows, open Turn Windows features on or off and review these features. Advanced users can also use PowerShell or DISM commands, but beginners should start with the Windows Features panel. After changing virtualization-related settings, restart the computer. Yes, restart. Not “close the lid and hope.” A proper restart.
How to Install VirtualBox on Mac
Step 1: Choose Intel or Apple Silicon
On macOS, choosing the correct installer is especially important. Intel Macs need the macOS Intel package. Apple Silicon Macs, such as M1, M2, M3, and newer models, need the Apple Silicon package. Mixing them up is one of the fastest ways to make your Mac stare back at you like you asked it to run a toaster driver.
Step 2: Open the DMG File
Download the correct macOS DMG file from Oracle. Double-click the DMG to mount it. A window will open showing the VirtualBox package installer. Double-click VirtualBox.pkg and follow the setup wizard.
Step 3: Approve macOS Security Prompts
macOS may display security prompts when installing software downloaded outside the App Store. If you trust the source and downloaded VirtualBox from Oracle, open System Settings, go to Privacy & Security, and approve the installer if macOS asks for confirmation.
Some versions of macOS may also show alerts related to system extensions. Virtualization tools sometimes need low-level system components to function properly. Follow the prompts carefully and restart your Mac if requested.
Step 4: Open VirtualBox From Applications
After installation, open the Applications folder and launch VirtualBox. If macOS asks for permission again, review the message and approve only if it clearly refers to Oracle VirtualBox and you downloaded it from the official source.
Apple Silicon Note
Apple Silicon support is more limited than traditional Intel virtualization. On Arm-based hosts, you should generally plan to run Arm-compatible guest operating systems. If your goal is to run old x86 operating systems at full speed on an Apple Silicon Mac, temper expectations. Virtualization and emulation are cousins, not twins, and one of them definitely takes longer to get ready in the morning.
How to Install VirtualBox on Linux
Step 1: Update Your System
Before installing VirtualBox on Linux, update your system. On Ubuntu or Debian-based systems, you can use:
On Fedora or other RPM-based systems, use the appropriate package manager, such as:
Updating first helps ensure your kernel, headers, and build tools are aligned. This is important because VirtualBox uses kernel modules. If the running kernel and header packages do not match, VirtualBox may install successfully but fail when starting a virtual machine.
Step 2: Install Required Build Tools
Linux installations often need compiler tools, make, DKMS or equivalent build support, and kernel headers. On Ubuntu or Debian-based systems, a common preparation command is:
On Fedora or RHEL-based systems, you may need packages such as:
The exact package names vary by distribution, but the idea is the same: give VirtualBox the tools it needs to build and load its kernel modules.
Step 3: Download the Correct Linux Package
Oracle provides packages for popular Linux distributions, including Ubuntu, Debian, Fedora, openSUSE, Oracle Linux, and Red Hat Enterprise Linux. Download the package that matches your distribution and version. Ubuntu and Debian users usually download a .deb package. Fedora, RHEL, Oracle Linux, and openSUSE users usually download an .rpm package.
Step 4: Install the Package
On Ubuntu or Debian, install the downloaded package with:
The second command helps resolve missing dependencies if the first command reports them. On Fedora or other RPM-based distributions, install the package with:
Once installed, launch VirtualBox from your application menu or by running:
Step 5: Add Your User to the vboxusers Group
If you plan to use USB devices inside virtual machines, add your Linux user to the vboxusers group:
Log out and log back in, or restart your computer, so the new group membership takes effect. Linux is powerful, but it is also very committed to making you prove you meant what you typed.
Linux Troubleshooting: Kernel Modules and Secure Boot
If a virtual machine refuses to start and mentions vboxdrv, the VirtualBox kernel module probably did not load correctly. First, confirm that your kernel headers match your running kernel. Then reinstall or rebuild the VirtualBox modules. On some systems, Secure Boot may block unsigned kernel modules. You may need to sign the modules according to your distribution’s Secure Boot process or disable Secure Boot if that fits your security policy.
Should You Install the VirtualBox Extension Pack?
The Extension Pack adds features that many users want, including support for certain USB features, remote display capabilities, and other extras. The most important rule is simple: the Extension Pack version must match your installed VirtualBox version. If VirtualBox is version 7.2.8, install the 7.2.8 Extension Pack. Do not mix versions unless your hobby is collecting mysterious error messages.
How to Install the Extension Pack
- Download the Extension Pack from the official VirtualBox download page.
- Open VirtualBox.
- Go to Tools or Preferences, depending on your version.
- Open the Extensions section.
- Click the add button and select the .vbox-extpack file.
- Review and accept the license terms if you agree.
After installation, restart VirtualBox. If the Extension Pack fails, double-check that the version matches exactly and that the downloaded file was not renamed or partially downloaded by your browser.
Create Your First Virtual Machine
Step 1: Download an ISO File
To create a virtual machine, you need an operating system installer. For Linux, download an ISO file from the official Ubuntu, Fedora, Debian, or Linux Mint website. For Windows, use Microsoft’s official installation media or evaluation virtual machine options when appropriate.
Step 2: Click New in VirtualBox
Open VirtualBox and click New. Enter a name, choose the operating system type, and select the version. VirtualBox may detect the OS automatically if your ISO filename is clear. Apparently, even software appreciates good labeling.
Step 3: Assign Memory and CPU
Do not give the virtual machine all your RAM or CPU cores. Your host operating system still needs resources. For a lightweight Linux VM, 2 GB to 4 GB of RAM may be enough. For Windows guests, 4 GB to 8 GB is more comfortable. A good beginner rule is to start modestly, test performance, and adjust later.
Step 4: Create a Virtual Disk
Create a new virtual hard disk. A dynamically allocated disk is usually best for beginners because it grows as needed instead of taking the full size immediately. For many Linux test machines, 25 GB to 40 GB is comfortable. For Windows guests or development environments, consider 60 GB or more.
Step 5: Install the Guest OS
Start the virtual machine and follow the operating system installer. The process is similar to installing an OS on a real computer, except the “computer” is a file-backed virtual environment. Once installation finishes, remove the ISO from the virtual optical drive if VirtualBox does not do it automatically.
Install Guest Additions After the Guest OS
Guest Additions are drivers and utilities installed inside the guest operating system. They improve screen resizing, mouse integration, shared folders, clipboard sharing, and general usability. Without Guest Additions, your VM may feel like it is wearing shoes two sizes too small.
To install them, start the virtual machine, open the Devices menu, and choose Insert Guest Additions CD Image. In a Windows guest, run the installer from the mounted virtual CD. In a Linux guest, you may need build tools and kernel headers before running the installer script. After installation, reboot the guest.
Common VirtualBox Installation Problems
VirtualBox Opens, but the VM Will Not Start
This usually points to disabled hardware virtualization, a Hyper-V conflict on Windows, blocked kernel modules on Linux, or macOS security approval issues. Start by reading the exact error message. VirtualBox errors often look scary, but many of them are surprisingly specific.
USB Devices Do Not Show Up
Install the matching Extension Pack, enable the proper USB controller in VM settings, and add your user to the vboxusers group on Linux. Also remember that a USB device cannot usually be controlled by both host and guest at the same time.
Shared Clipboard Does Not Work
Install Guest Additions, reboot the guest, then enable clipboard sharing from the VM menu. You can choose disabled, host-to-guest, guest-to-host, or bidirectional. For security, do not enable bidirectional clipboard sharing on virtual machines you do not trust.
The Screen Is Tiny
Install Guest Additions and reboot. After that, resizing the VM window should adjust the guest display more naturally. If it still looks wrong, check the VM display settings and video memory.
Best Practices After Installing VirtualBox
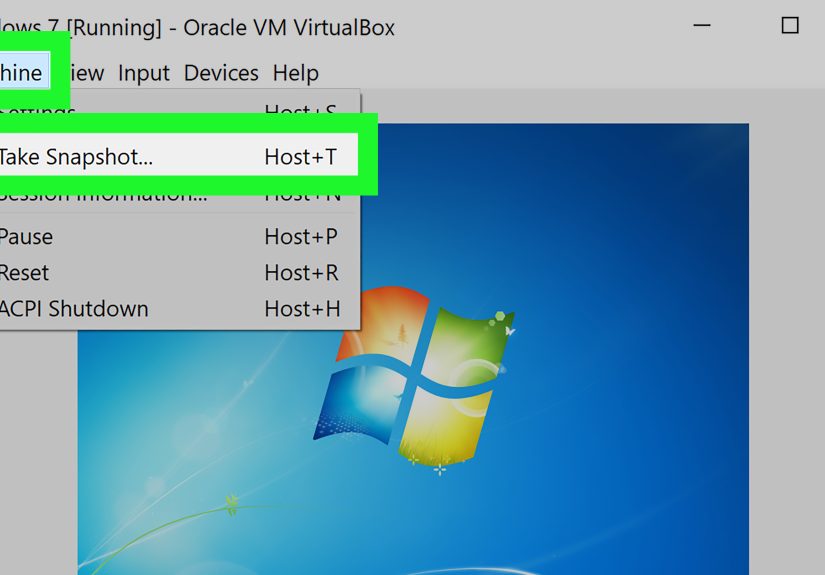
Keep VirtualBox updated, but avoid updating in the middle of important work. Shut down running VMs before upgrading. Keep Guest Additions close to the same version as VirtualBox. Store virtual machines on a drive with enough space. Use snapshots before risky experiments, but do not treat snapshots as a full backup strategy. Snapshots are convenient, not magical.
Also, name your VMs clearly. “Ubuntu Test” is better than “New VM 3 Final Final Really Final.” Future you deserves kindness.
Real-World Experience: Lessons From Installing VirtualBox on Windows, Mac, and Linux
After installing VirtualBox on many different machines, one lesson stands above the rest: the installation itself is rarely the hard part. The hard part is the surrounding environment. Windows may have Hyper-V-related features enabled. macOS may block a system extension until you approve it. Linux may need matching kernel headers. VirtualBox is usually not being dramatic; it is just asking the host operating system for permission to do very low-level work.
On Windows, the smoothest installs happen when the computer is fully updated, virtualization is enabled in BIOS or UEFI, and Hyper-V conflicts are handled before creating the first VM. Many beginners install VirtualBox correctly, then assume it is broken because the first virtual machine will not start. In reality, Windows security or virtualization features may already be using the hypervisor layer. Checking System Information, Windows Features, and Memory Integrity settings early can save a lot of time.
On macOS, patience is the secret ingredient. The installer may finish, but the Mac may still require approval in Privacy & Security. If you click through too quickly, miss the prompt, and immediately try to launch a VM, the result can look like a failed installation. The better approach is slower and cleaner: download from Oracle, open the DMG, run the package, read every macOS security prompt, approve what is required, restart if asked, then launch VirtualBox. It feels less exciting, but so does not troubleshooting for an hour.
On Linux, the experience depends heavily on the distribution and kernel state. Ubuntu and Debian-based systems are usually straightforward when build tools and headers are installed first. Fedora and other RPM-based systems may need slightly different packages, but the concept remains the same. If the kernel updates, VirtualBox modules may need rebuilding. That is normal. Linux gives you power, flexibility, and the occasional reminder that kernels are not decorative.
Another practical lesson: install Guest Additions as soon as the guest operating system is stable. New users often struggle with tiny screens, trapped mouse pointers, awkward file transfers, or clipboard issues, then discover that Guest Additions solves most of the pain. Shared folders are especially useful for development work, but they should be used thoughtfully. A read-only shared folder is safer when the guest system is experimental or untrusted.
Finally, snapshots are wonderful, but they should be used with discipline. Take a snapshot before major changes, software experiments, registry edits, system upgrades, or package installations that might break the guest. But do not let snapshots pile up forever. Too many snapshots can consume disk space and complicate performance. Think of them as save points in a video game, not as a substitute for real backups.
The best VirtualBox setup is boring in the best possible way: correct installer, clean host system, matching Extension Pack, installed Guest Additions, sensible RAM allocation, enough disk space, and a VM name you can understand six months later. Do that, and VirtualBox becomes a reliable lab instead of a mysterious box of digital raccoons.
Conclusion
Learning how to install VirtualBox on Windows, Mac, or Linux is not just about clicking through an installer. The real success comes from choosing the correct package, preparing your host system, understanding platform-specific issues, and installing Guest Additions after your guest operating system is ready. Windows users should watch for Hyper-V conflicts. Mac users should pay attention to security approvals and processor type. Linux users should prepare kernel headers, build tools, and user permissions.
Once VirtualBox is installed properly, it becomes a powerful tool for testing software, learning operating systems, creating labs, and experimenting without putting your main machine at risk. Treat it with a little planning, and it will reward you with a flexible virtual playground. Treat it casually, and it may reward you with an error message that looks like it was written by a robot having a rough Monday.


