
Table of Contents >> Show >> Hide
- Before You Start: Borax Slime Safety Tips
- Recipe 1: Classic Stretchy Borax Slime
- Recipe 2: Clear Glass Borax Slime
- Recipe 3: Fluffy Borax Slime
- Why Borax Makes Slime Work
- How to Fix Common Borax Slime Problems
- Best Add-Ins for Borax Slime
- How to Store Homemade Borax Slime
- of Real-Life Slime-Making Experience
- Conclusion
There are two kinds of people in this world: people who think slime is a fun, squishy science project, and people who have accidentally found it stuck to a couch cushion. If you are here, welcome to the first groupat least for now. Learning how to make slime with borax is one of the easiest ways to turn ordinary school glue into stretchy, glossy, poke-worthy slime that feels like it came from a craft store but costs far less.
Borax slime is popular because the recipe is simple, the texture is reliable, and the science is genuinely cool. When a diluted borax solution mixes with glue, it helps link the glue’s long polymer chains together. That process is what transforms runny glue into a stretchy, bouncy, moldable slime. Translation: it is chemistry wearing a glitter hat.
This guide gives you three easy DIY borax slime recipes: classic stretchy slime, clear glass slime, and fluffy borax slime. You will also learn how to mix borax activator safely, fix common slime problems, store your slime, and avoid turning your kitchen table into a sticky archaeological site.
Before You Start: Borax Slime Safety Tips
Borax, also called sodium borate, is a household laundry booster and cleaning ingredient. It can be used in slime, but it should be handled carefully. The safest approach is simple: an adult should measure and mix the borax solution, children should not touch the dry powder, and everyone should wash hands after making and playing with slime.
Do not eat slime. Do not taste slime. Do not let pets taste slime, even if your dog looks deeply offended by being excluded from craft time. Keep borax powder and finished slime away from toddlers, pets, and anyone likely to confuse craft supplies with snacks. Avoid slime play if you have cuts, irritated skin, eczema, or very sensitive skin. If skin redness, itching, burning, or discomfort appears, stop playing and wash the area with soap and water.
Basic Borax Activator Recipe
Most borax slime recipes start with a diluted activator. This keeps the borax from being too concentrated and makes it easier to control the slime texture.
- 1 cup warm water
- 1 teaspoon borax powder
Stir the borax into the warm water until it dissolves. Label the container clearly as “Borax Slime Activator” and keep it out of reach when not in use. You will not use the whole cup for one batch. Add it slowly, one tablespoon at a time, because slime goes from “perfectly stretchy” to “rubbery pancake” faster than anyone expects.
Recipe 1: Classic Stretchy Borax Slime
This is the dependable, beginner-friendly slime recipe. It is stretchy, soft, slightly glossy, and perfect for learning the basics. If you are making slime for the first time, start here before attempting the fancy stuff.
Ingredients
- 1/2 cup white washable school glue
- 1/2 cup warm water
- 2 to 4 tablespoons borax activator
- Food coloring, optional
- Glitter, foam beads, or confetti, optional
Instructions
- Pour 1/2 cup white school glue into a mixing bowl.
- Add 1/2 cup warm water and stir until the glue becomes smooth and thinner.
- Add a few drops of food coloring if you want colored slime. Stir well.
- Add 1 tablespoon of borax activator and mix slowly.
- Continue adding activator 1 tablespoon at a time until the slime starts pulling away from the bowl.
- Pick up the slime and knead it for 2 to 5 minutes.
- If it is still sticky, dip your fingers in the activator and keep kneading instead of pouring in a lot more liquid.
Texture Tips
The secret to classic borax slime is patience. At first, it may look like a lumpy glue monster with commitment issues. Keep stirring and kneading. The texture usually improves after a few minutes because the activator continues working through the glue mixture. If you add too much borax solution too quickly, the slime can become stiff, stringy, or rubbery.
For stretchier slime, use a little less activator and knead longer. For firmer slime, add another teaspoon or two of activator, but go slowly. Slime rewards patience and punishes panic pouring.
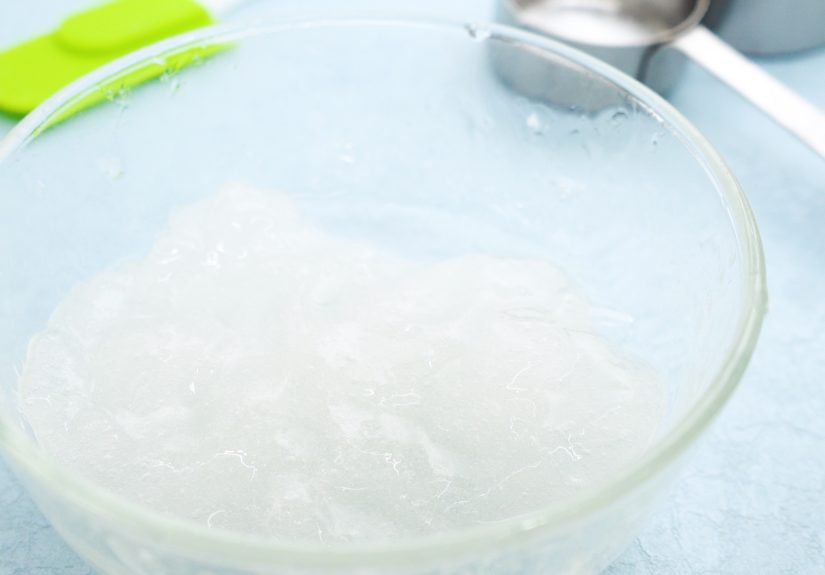
Recipe 2: Clear Glass Borax Slime
Clear slime is the drama queen of the slime world. It looks beautiful, catches light, and makes glitter look like it has a publicist. It also shows bubbles right after mixing, so do not expect instant crystal-clear perfection. Letting it rest is the magic trick.
Ingredients
- 1/2 cup clear washable school glue
- 1/4 cup warm water
- 2 to 3 tablespoons borax activator
- Fine glitter, sequins, or small charms, optional
Instructions
- Add 1/2 cup clear glue to a clean bowl.
- Mix in 1/4 cup warm water until smooth.
- Add glitter or small decorations if desired. Use a light hand so the slime stays transparent.
- Add 1 tablespoon borax activator and stir slowly.
- Add more activator, one teaspoon at a time, until the slime pulls together.
- Knead gently with clean hands until the slime is smooth.
- Place it in an airtight container and let it rest for 1 to 3 days if you want a clearer look.
How to Keep Clear Slime Clear
Stir clear slime slowly to reduce air bubbles. Wild whisking may feel exciting, but it traps tiny bubbles that make the slime cloudy. The good news is that bubbles rise and disappear while the slime rests. Put it in a clean airtight container, leave it alone, and resist the urge to poke it every 12 minutes. This is harder than it sounds.
If your clear slime becomes too firm after resting, knead in a few drops of warm water. If it is sticky, add a tiny amount of borax activator to your hands and knead. Tiny is the keyword. With clear slime, too much activator can turn a gorgeous glassy batch into something closer to a bouncy eraser.
Recipe 3: Fluffy Borax Slime
Fluffy slime is soft, puffy, and extremely satisfying to squish. The fluffy texture comes from shaving cream, which adds air and volume. This recipe is perfect when you want big, marshmallow-like slime that feels light instead of dense.
Ingredients
- 1/2 cup white washable school glue
- 2 cups foaming shaving cream
- 1 tablespoon water
- 2 to 4 tablespoons borax activator
- Food coloring, optional
- 1 teaspoon lotion, optional for softer slime
Instructions
- Add 1/2 cup white glue to a large mixing bowl.
- Mix in 1 tablespoon water and 1 teaspoon lotion if using.
- Add 2 cups foaming shaving cream and fold gently until combined.
- Add food coloring and stir until the color looks even.
- Add 1 tablespoon borax activator and mix slowly.
- Continue adding activator little by little until the slime forms and pulls away from the bowl.
- Knead for several minutes until it becomes fluffy, stretchy, and less sticky.
Fluffy Slime Notes
Fluffy slime is biggest and puffiest on the first day. Over time, the air bubbles from the shaving cream settle, and the slime becomes more like regular stretchy slime. That is normal. It is not a slime failure; it is just physics quietly clocking in for work.
Use plain foaming shaving cream, not gel. Shaving gel can work only if it foams up first, but standard foam is easier and more predictable. Avoid strongly scented shaving cream if you are making slime with kids or anyone sensitive to fragrance.
Why Borax Makes Slime Work
Glue contains long chain-like molecules called polymers. In plain glue, those chains can slide around easily, which is why glue flows out of a bottle. When you add borax activator, borate ions help connect some of those chains. This linking process makes the mixture thicker, stretchier, and more elastic.
That is why slime behaves in such a funny way. Pull it slowly, and it stretches. Yank it quickly, and it may snap. Press it gently, and it oozes. Roll it fast, and it feels firmer. Slime is often described as a non-Newtonian material because it does not behave like a simple liquid or solid all the time. Basically, slime refuses to pick a lane, and we respect the confidence.
How to Fix Common Borax Slime Problems
My Slime Is Too Sticky
Sticky slime usually needs more kneading or a tiny bit more activator. First, knead it for a few minutes. If it still sticks heavily to your fingers, dip your fingertips into borax activator and knead again. Do not dump in a large splash. Too much activator can make slime tough.
My Slime Is Too Hard or Rubbery
Hard slime usually means too much borax activator was added. Try kneading in a small amount of warm water or lotion. Add only a few drops at a time. You may not fully rescue an overactivated batch, but you can often make it softer and more playable.
My Slime Is Stringy
Stringy slime often needs more kneading. Let it rest for five minutes, then knead again. If it still breaks into strings, it may have too much activator. Add a little glue or a few drops of warm water and work it in slowly.
My Slime Did Not Form
Check your ingredients. Washable PVA school glue works best. Some specialty glues, old glues, or off-brand formulas may not react as expected. Also make sure the borax dissolved fully in warm water. If the activator is too weak or unevenly mixed, the slime may stay soupy.
Best Add-Ins for Borax Slime
Once you know how to make slime with borax, add-ins make each batch feel new. Glitter creates sparkle, foam beads make crunchy slime, plastic snow gives a frosty texture, and small sequins can turn clear slime into galaxy slime. You can also add a drop of washable paint for bold color, but avoid adding too much liquid coloring because it may stain hands or surfaces.
Use only clean, dry add-ins. Food crumbs, real candy, leaves, or random pocket discoveries are not slime decorations. They are invitations for mold, smells, and regret.
How to Store Homemade Borax Slime
Store slime in an airtight container or zip-top bag. Keep it away from heat, carpet, upholstery, bedding, pets, and small children. Most homemade slime lasts about one week when handled with clean hands and stored properly. If it smells strange, changes color unexpectedly, grows spots, or becomes watery in a suspicious way, throw it away.
Do not wash slime down the drain. It can clog plumbing. Wrap old slime in a paper towel or place it in a sealed bag and throw it in the trash. Your sink has enough problems.
of Real-Life Slime-Making Experience
The first thing experience teaches you about borax slime is that recipes are guides, not laws carved into a glittery mountain. The exact amount of activator depends on the glue brand, room temperature, humidity, water amount, and how enthusiastically someone measured “just a little.” Two batches made with the same ingredients can feel slightly different, which is why slow mixing matters so much.
In practice, the best slime makers do not pour activator like soup broth. They add a spoonful, stir, watch, and wait. When the glue begins clumping and pulling away from the sides of the bowl, that is the moment to slow down. Many beginners think the slime is not ready because it still sticks to the bowl. Then they add more activator and end up with a rubber brick. The better move is to pick it up and knead. Kneading finishes the job.
Another lesson: slime is cleaner when the workspace is ready before the glue opens. Cover the table with parchment paper, a plastic tray, or an old washable placemat. Set out measuring spoons, bowls, paper towels, and a storage container first. Slime has a talent for finding the one uncovered library book, homework page, or fabric chair in the room. Preparation saves furniture and friendships.
Color also behaves differently than people expect. One drop of food coloring may look too pale in the bowl, but color often deepens as the slime comes together. Add color slowly unless you want hands that look like you lost a fight with a blueberry. Gel food coloring is stronger than liquid coloring, so use a toothpick amount at first. For pastel slime, start with white glue. For jewel-tone slime, use clear glue and concentrated color.
Clear slime requires emotional maturity. It looks cloudy right after mixing because of trapped air bubbles. The first instinct is to keep poking it, stretching it, and checking whether it has cleared. This, unfortunately, adds more bubbles. The best strategy is to put it in a container and ignore it for a day or two. When you come back, the slime often looks dramatically clearer, as if it spent the weekend at a spa.
Fluffy slime is the most impressive fresh batch, especially for kids, because it grows big and pillowy. However, it does not stay that way forever. The shaving cream slowly loses air, and the slime shrinks. This is normal, not a recipe failure. If you want the fluffiest experience, make fluffy slime right before playtime instead of the night before.
The final experience-based tip is to set rules before play begins. Slime stays at the table. Slime does not visit hair. Slime does not nap on blankets. Slime does not become earrings, mustaches, or “just a tiny carpet experiment.” These rules may sound dramatic, but anyone who has removed slime from fabric knows they are written with wisdom.
Conclusion
Making slime with borax is simple, fun, and surprisingly educational. With glue, water, and a carefully diluted borax activator, you can create classic stretchy slime, clear glass slime, or fluffy slime in just a few minutes. The key is to add activator slowly, knead patiently, and follow basic safety rules. Borax slime is a science project, a sensory activity, and a tiny lesson in polymer chemistry all rolled into one squishy masterpiece.
Start with the classic recipe if you are new, try clear slime when you want something shiny and dramatic, and make fluffy slime when you want maximum squish. Keep your batches small, your workspace covered, and your slime far away from carpet. Your future self will applaud.


