
Table of Contents >> Show >> Hide
- Quick Prep: What You’ll Need (and What You Don’t)
- Design #1: Cute Stamped Confetti (Fast, Classic, and Weirdly Addictive)
- Design #2: Shaving Cream Marbled Swirls (Dreamy, Artsy, and Surprisingly Easy)
- Design #3: Doodle Wrap (Cute Icons + Personal Messages, No Art Skills Required)
- Finishing Touches That Make DIY Wrap Look Store-Bought (In a Good Way)
- Eco-Friendly Notes (Because Cute Can Also Be Smart)
- Conclusion: Your Gifts Deserve Better Than Last-Minute Panic Wrap
- Experience-Based Notes: What You’ll Learn After Making DIY Wrapping Paper a Few Times
Store-bought wrapping paper is greatuntil it rips, wrinkles, or turns into a glitter bomb that lives in your carpet forever. Making your own wrapping
paper is the fun, budget-friendly, “look what I made!” upgrade that turns even a simple gift into a moment. And no, you don’t need an art degree or a
craft room the size of a small airport. You need paper, a few basic supplies, and the willingness to embrace a little chaos (the cute kind).
In this guide, you’ll learn how to make your own wrapping paper using three adorable designs that look polished but stay beginner-friendly:
a stamp pattern that’s practically foolproof, dreamy marbled swirls, and a doodle-style design that doubles as personalization. By the end, you’ll have
DIY wrapping paper you can customize for birthdays, holidays, baby showers, and those “I forgot the gift bag” emergencies.
Quick Prep: What You’ll Need (and What You Don’t)
Best paper options for homemade gift wrap
- Kraft paper roll (brown or white): sturdy, forgiving, and looks instantly “intentional.”
- Butcher paper: smooth and easy to decorate, especially for marker-based designs.
- Plain matte wrapping paper (solid color): great if you want clean prints and crisp folds.
- Recycled paper (paper grocery bags cut flat, packing paper): budget-friendly and charmingly imperfect.
Basic supplies (mix and match)
- Washable craft paint or acrylic paint
- Ink pads (including self-inking stamps if you want “easy mode”)
- Foam brush or sponge (for smooth paint application)
- Paper towels + baby wipes (your future self says thank you)
- Scissors, painter’s tape, and a protective table covering
- Optional: metallic paint pen, twine, ribbon, gift tags, stickers
Setup tips that save your sanity
- Flatten your paper. If it’s rolled, unroll and gently “reverse roll” it for a minute so it relaxes.
- Protect your surface. Tape down parchment paper, a trash bag, or an old tablecloth.
- Do a test print first. One quick test on scrap paper prevents 47 dramatic sighs later.
- Plan your palette. Two colors + a neutral often looks more modern than six colors fighting for attention.
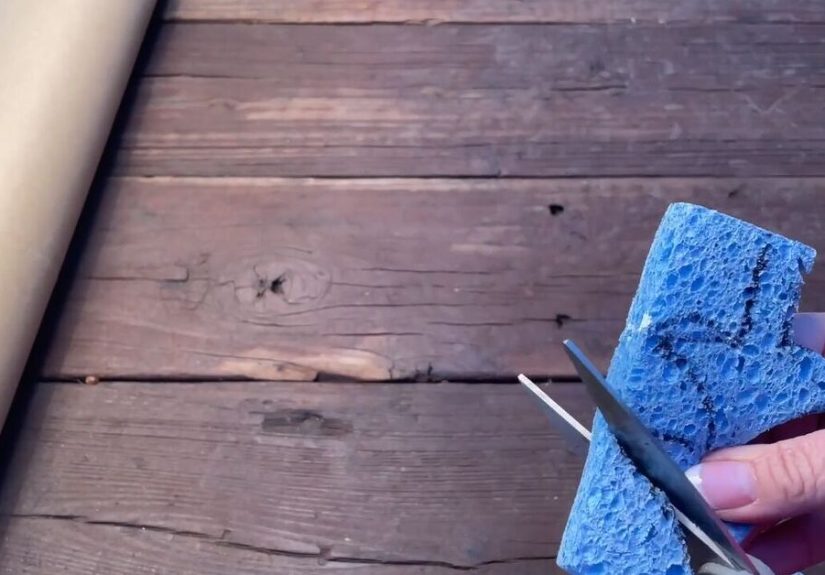
Design #1: Cute Stamped Confetti (Fast, Classic, and Weirdly Addictive)
If DIY wrapping paper had a “starter pack,” stamping would be in it. Why? Because it’s consistent, quick, and surprisingly hard to mess upespecially
if you choose a simple repeating shape. This design is perfect for kraft paper gift wrap and looks great with twine or a bold ribbon.
Pick your stamp style
- Rubber stamps (store-bought): crisp, detailed, and easy to use.
- Found-object stamps: buttons, corks, the end of a paper tube, or even bubble wrap for texture.
- DIY foam stamp: cut a simple shape from craft foam and stick it to a wine cork or a small block.
Step-by-step: how to make stamped wrapping paper
- Lay your paper flat and tape the corners so it doesn’t slide around while you stamp.
- Ink or paint your stamp. For paint: dab a thin layer onto a sponge “palette,” then tap the stamp onto the sponge for even coverage.
- Start in one corner and work outward. It’s easier to keep spacing consistent when you move in a pattern.
- Repeat with intention. Try a loose diagonal “confetti” scatter or a neat grid if you’re feeling organized.
- Let it dry completely. Paint needs more time than ink. If you roll it up too early, it will “print” itself onto itself (a betrayal).
Make it extra cute: pattern ideas
- Button dots in alternating sizes (big dot, small dot, repeat)
- Mini hearts scattered like confetti for Valentine’s Day or anniversaries
- Simple botanical stamp (leaf/branch) repeated in a loose stripe
- Holiday icons (stars, snowflakes, trees) in two coordinating colors
Troubleshooting (aka “why does my stamp look sad?”)
- Blobby edges: too much paint. Use a thinner layer and tap onto a sponge first.
- Patchy prints: press evenly and lift straight up (no twisting).
- Smudges: let it dry longer than you think, especially on glossy paper.
Design #2: Shaving Cream Marbled Swirls (Dreamy, Artsy, and Surprisingly Easy)
Marbling looks like fancy stationery shop magic, but the “secret” is shaving cream. This technique creates one-of-a-kind swirls that feel special for
birthdays, bridal showers, and holiday gifts. It’s also great when you want a big “wow” without needing perfect drawing skills.
What you’ll need
- Shaving cream (the classic foam kind works best)
- Food coloring or liquid watercolor
- A shallow tray or baking pan
- A toothpick, skewer, or fork for swirling
- Paper + a straight edge (old gift card, ruler, or cardboard strip) to scrape
Step-by-step: how to marble your own wrapping paper
- Spread a layer of shaving cream in the tray (about 1/2 inch is plenty). Smooth it gently.
- Add color. Dot food coloring or watercolor across the surfacethink “polka dots,” not “entire bottle.”
- Swirl lightly. Drag a toothpick or fork through the dots in slow, wavy lines. The goal is ribbons, not mud.
- Lay paper on top of the shaving cream. Press gently so the whole surface makes contact.
- Lift straight up and place the paper shaving-cream-side up on a protected surface.
- Scrape off the foam with a straight edge in one smooth pass to reveal the marbled pattern.
- Dry flat for at least 20–30 minutes. If it curls, weigh corners with clean books once it’s mostly dry.
Color combos that look “designer,” not “science fair”
- Navy + gold (use a metallic paint pen afterward for tiny stars)
- Sage + blush for soft, modern vibes
- Teal + purple for bold birthday wrap
- Red + pink for cheerful holiday candy-cane energy (without being literal)
Pro tips for cleaner marbling
- Less swirling is more. Over-mixing turns gorgeous swirls into one sad color.
- Use thicker paper if your paper tears easily. Kraft and butcher paper handle this well.
- Make a “feature strip.” Marble a wide strip and tape it onto plain paper like a bold accent.
Design #3: Doodle Wrap (Cute Icons + Personal Messages, No Art Skills Required)
This is the design for people who want their DIY wrapping paper to feel personallike you actually know the person you’re giving the gift to (which is a
nice touch, honestly). Doodle wrap is also a lifesaver when you have limited supplies: paper + a marker can carry the whole project.
What you’ll need
- Kraft paper, butcher paper, or plain white paper
- Permanent marker, felt-tip marker, or paint pen
- Optional: one accent color (marker or paint pen) for highlights
- Optional: stickers or washi tape for extra “cute factor”
Step-by-step: how to create doodle-style wrapping paper
- Choose a doodle theme based on the person or occasion (ideas below).
- Pick 3–5 simple icons you can repeat easily (stars, hearts, bows, mugs, books, tiny flowers).
- Create a repeating pattern by spacing icons evenly across the paper. Don’t stress about perfectionslightly imperfect looks handmade in a good way.
- Add “micro-details” like dots, tiny lines, or sparkles between icons to fill empty space without clutter.
- Personalize one area with a message banner: “To: ___ / From: ___” or a playful line like “Open me for serotonin.”
Theme ideas (steal these with pride)
- For a coffee lover: mugs, beans, tiny steam squiggles, “but first, coffee.”
- For a bookworm: mini books, stars, glasses, bookmarks, “one more chapter.”
- For kids: dinosaurs, rockets, smiling fruit, or simple animals (cats always win).
- For winter holidays: snowflakes, mittens, evergreen sprigs, candy shapes.
- For birthdays: confetti dots, candles, balloons, little “yay!” bubbles.
Make it look polished (even if your doodles are chaotic neutral)
- Use consistent line weight. Stick to one marker size for the main pattern.
- Limit your colors. Black + one accent color instantly looks cohesive.
- Repeat your icons. Repetition makes the design feel intentional, not random.
Finishing Touches That Make DIY Wrap Look Store-Bought (In a Good Way)
Choose the right ribbon or tie
- Twine looks amazing on kraft paper and stamped designs.
- Satin ribbon elevates marbling and doodles instantly.
- Paper “belly bands” (a strip of contrasting paper wrapped around the gift) add structure and hide seams.
Add a topper without doing the most
- A sprig of greenery (real or faux)
- A handwritten tag (matching your doodle theme)
- A small ornament or charm that becomes part of the gift
Wrapping tips so your paper doesn’t betray you at the last second
- Measure once, cut once. Most wrapping struggles are really “paper size” struggles.
- Crease with confidence. Firm folds make DIY paper look crisp and professional.
- Use double-sided tape for cleaner seams, especially on marbled paper.
Eco-Friendly Notes (Because Cute Can Also Be Smart)
If sustainability matters to you, choose plain paper without foil, glitter, or heavy plastic coatings when possible. Kraft paper and many matte papers are
easier to reuse or recycle. You can also reuse tissue paper, packing paper, or paper bags and make them look intentional with stamps or doodles. Bonus:
DIY wrapping paper helps you use exactly what you needno giant leftovers that live in a closet until the end of time.
Conclusion: Your Gifts Deserve Better Than Last-Minute Panic Wrap
Making your own wrapping paper is one of those rare projects that’s actually fun, genuinely customizable, and doesn’t require a shopping spree.
Start with stamped confetti for quick wins, try shaving-cream marbling when you want big visual impact, and keep doodle wrap in your back pocket for
personal, meaningful gifts. With a roll of paper and a little creativity, you can turn “just wrapping” into part of the gift.
Experience-Based Notes: What You’ll Learn After Making DIY Wrapping Paper a Few Times
The first time you try homemade gift wrap, the biggest surprise is how much the paper choice affects the whole experience. Thin paper can
wrinkle or buckle the second it meets paint, while thicker kraft paper forgives almost everything. If you’ve ever painted on a flimsy sheet and watched it
curl like it’s trying to become a cinnamon roll, you already understand why many crafters end up loving kraft paper rolls. They hold up to stamping, they
dry nicely, and they fold cleanly around corners. That one switch can take a project from “craft experiment” to “I could sell this at a holiday market.”
Another thing people discover quickly: less paint is usually better. It feels logical to load up your stamp so the print looks bold, but
too much paint creates blurry edges and sticky smears that never seem to fully dry. The “grown-up” move is dabbing paint onto a sponge first, then tapping
the stamp lightly. This gives you clean prints and makes your pattern more consistent. The bonus lesson is emotional: your best prints often happen after
the first two “practice” stamps. It’s like your tools need a warm-up lap before they behave.
Marbling teaches its own set of truths. The first is that over-swirling is real. Everyone wants to keep swirling because it’s satisfying,
but the prettiest marbled patterns come from just a few gentle passes. Too much mixing turns into one flat color, and suddenly your “dreamy swirls” look
like a melted crayon had a tough day. If you stop swirling earlier than you think you should, you usually get those gorgeous ribbon-like streaks people
associate with fancy stationery. Also: scraping the shaving cream off is oddly satisfying, like revealing a surprise layer in a dessert you didn’t have to bake.
Doodle wrap is where you learn that cohesion beats complexity. A handful of simple icons repeated well looks more “designed” than a dozen
different doodles competing for attention. Many people find it helpful to pick 3–5 icons and one accent color, then repeat them across the page. The end
result feels intentional and gift-worthy, even if the drawings are simple. It’s also the technique most likely to spark personalization: you start adding
the recipient’s favorite things, inside jokes, or little messagesand suddenly your wrapping paper becomes part of the gift’s emotional value.
Practical experience also teaches you about drying timespecifically, that it expands to fill the available space if you let it. If you’re
making multiple sheets, it helps to plan where they’ll dry before you start. Some people tape finished paper to a wall (protected underneath), drape it
over chairs, or clip it to a line with clothespins. And if you’re working in a hurry, you learn to love ink pads and paint pens because they dry faster
than thick paint. The biggest “I did not expect this” moment? Rolling up paper that’s even slightly damp can transfer the pattern onto the back and create
ghost prints. Sometimes that looks cool. Sometimes it looks like your wrapping paper got haunted by its own design.
Finally, there’s the confidence factor. DIY wrapping paper starts as a “cute idea,” but after you’ve made a few rolls, it becomes a go-to solution. You
stop worrying about perfection and start focusing on how the finished gift looks: crisp folds, a good ribbon choice, and a simple tag. That’s when you
realize homemade wrapping paper isn’t about making museum-level artit’s about making the whole gifting experience feel warmer, funnier, and more you.
And honestly, that’s a pretty great upgrade from last-minute panic wrap and a piece of tape that sticks to itself more than it sticks to the paper.


