
Table of Contents >> Show >> Hide
- What Is Irish Jig Dance, Exactly?
- Before You Start: Build a Smart Beginner Setup
- How to Learn Irish Jig Dance: A 9-Step Progression That Works
- Step 1: Learn the count before the choreography
- Step 2: Lock in posture and frame
- Step 3: Build ankle-foot strength and spring
- Step 4: Master beginner soft-shoe vocabulary
- Step 5: Drill “small clean” before “big flashy”
- Step 6: Use phrase-based practice
- Step 7: Add musicality cues
- Step 8: Introduce hard-shoe basics when ready
- Step 9: Simulate performance conditions
- Iconic Jig Technique Checklist
- Common Irish Jig Mistakes (and How to Fix Them)
- Your 4-Week Beginner Irish Jig Training Plan
- Performance Day Playbook: How to Look Ready Even If You’re Nervous
- Injury-Smart Irish Dance: Train for Longevity
- Experience Section: Real-World Studio Stories (Extended)
- Final Takeaway
If you’ve ever watched Irish dancers and thought, “How are their feet moving that fast while their upper body looks like it’s balancing a cup of tea?”welcome to the club.
Irish jig dance is equal parts rhythm, athletic control, and joyful chaos (the good kind). The best part: you do not need to be born into a dancing family, own an emerald-green costume,
or memorize 400 years of dance history before your first class. You just need a plan.
This guide breaks down exactly how to learn Irish jig dance from beginner to performance-ready:
how to count the music, what steps to train first, how to avoid common mistakes, how to build stamina without frying your calves, and how to walk on stage looking confident even if your stomach is doing cartwheels.
We’ll keep it practical, detailed, and friendly enough that you can actually use it.
What Is Irish Jig Dance, Exactly?
The short version
Irish jig dance is a branch of Irish step dance performed to jig music, most commonly in a 6/8 rhythm. In modern training, dancers usually begin in soft shoes and later progress to hard-shoe work
(where your feet become percussion instruments). The style is known for fast, precise footwork, quick elevation, and strong posture.
The dance-family context
In competitive and school settings, Irish dance includes reels, jigs, slip jigs, and hornpipeseach matching specific musical timing. A standard jig uses 6/8 timing; slip jig uses 9/8; reel uses 4/4.
That timing matters because your steps must “fit” the tune. Think of it as choreography meeting musical math.
Why people love it
- It’s athletic: foot speed, power, balance, coordination, and stamina all get trained.
- It’s artistic: musicality and expression matter just as much as mechanics.
- It’s social: classes, céilí teams, feiseanna (competitions), and performance circuits create real community.
- It’s inclusive: beginners can start young, older, and everything in between.
Before You Start: Build a Smart Beginner Setup
1) Find a qualified Irish dance school
Start with a certified school and teacher network rather than random clips stitched together online.
Video is great for review, but technique quality comes from in-person correction: posture, turnout control, landing mechanics, rhythm, and spacing.
One coach’s cue can save you months of “Why does my hop still feel awkward?”
2) Wear simple, functional practice gear
You don’t need a stage costume for class one. Fitted athletic wear that lets your teacher see knee tracking and foot lines is ideal.
Many beginners start in ballet slippers, jazz shoes, or socks before getting dedicated Irish soft shoes.
Comfort + visibility + movement freedom beats “looking official” on day one.
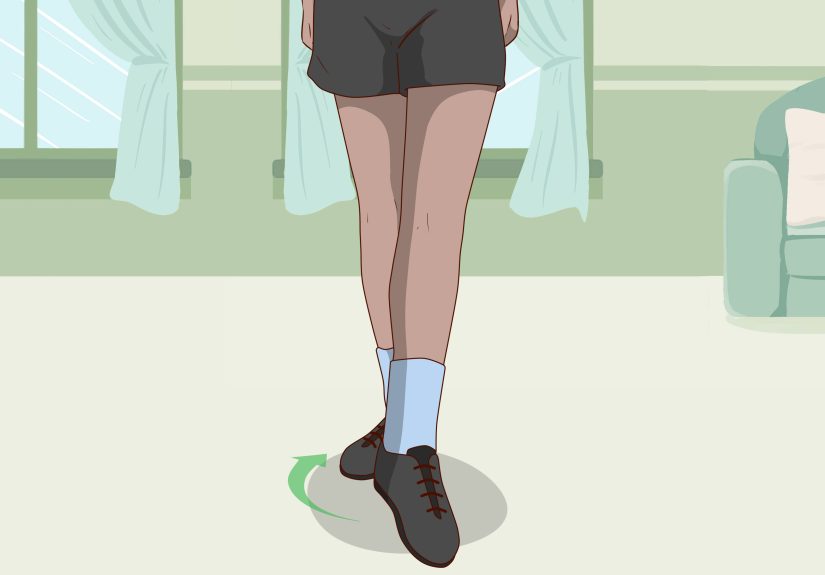
3) Understand the shoe path
- Soft shoes: used early for light jig, reel basics, rhythm training, and line quality.
- Hard shoes: introduced later for treble-oriented sounds, percussive timing, and power control.
4) Create a tiny home practice zone
You don’t need a ballroom. A safe, non-slippery surface, enough room for short travel, and a mirror (or camera) is enough.
If your floor is unforgiving, limit impact volume and prioritize technical drills over repeated jumps.
How to Learn Irish Jig Dance: A 9-Step Progression That Works
Step 1: Learn the count before the choreography
New dancers often try to memorize steps before they internalize rhythm. Reverse that. Clap and count jig timing first.
Feel the pulse in phrases (not just numbers), then layer footwork.
If your timing is clean, your body has a map. If timing is fuzzy, everything feels like a pop quiz.
Step 2: Lock in posture and frame
Classic Irish step style emphasizes a steady torso with active lower-body precision. Think “tall spine, open chest, long neck, ribs stacked over hips.”
Keep shoulders relaxed, not stiff. “Still” does not mean “tense.” Efficient posture lets your legs move faster with less wasted energy.
Step 3: Build ankle-foot strength and spring
Irish jig dance depends on reactive lower legs. Add short daily work:
- calf raises (straight and bent knee),
- single-leg balance with controlled ankle motion,
- gentle pogo hops for elastic rebound,
- foot intrinsic activation (toe control, arch support drills).
Keep volume low at first. Your Achilles tendon appreciates ambition, but it loves progression even more.
Step 4: Master beginner soft-shoe vocabulary
Your teacher may sequence differently, but beginners commonly start with basic traveling and place-based patterns in reel/light jig frameworks.
Focus on:
- clean foot placement,
- clear lift from the standing leg,
- quiet landings,
- consistent spacing and rhythm.
Step 5: Drill “small clean” before “big flashy”
Fast feet come from consistency, not wild acceleration. Spend more time on controlled slow tempo than ego tempo.
A neat 70% speed rep beats a messy 110% rep every single day.
Step 6: Use phrase-based practice
Instead of running a full dance repeatedly, train in chunks:
- 8 bars slow (precision)
- 8 bars medium (timing)
- 8 bars full tempo (performance intention)
- Rest, then repeat
This improves retention and reduces “autopilot errors.”
Step 7: Add musicality cues
Musicality in jig dance is not only speed. It’s accents, lift quality, and how clearly your movement “speaks” the tune.
Try this: on each phrase, choose one accent to highlight with cleaner attack and one phrase ending to soften with controlled landing.
That small contrast makes your dancing look intentional, not robotic.
Step 8: Introduce hard-shoe basics when ready
Hard-shoe work is excitingand loudin the best way. But it also increases load on feet, ankles, and knees.
Move into hard shoe only when your soft-shoe timing and landing mechanics are stable.
Rhythm first, volume second.
Step 9: Simulate performance conditions
Performance confidence is trainable. Practice:
- one full run with no stopping,
- a short reset breathing routine,
- a second full run “as if judged,”
- quick review notes (one fix only).
That pattern teaches focus under pressure and prevents overthinking.
Iconic Jig Technique Checklist
Posture
- Tall spine, chin neutral, chest lifted but not flared.
- Shoulders down, neck free, no upper-back collapse.
Feet and ankles
- Strong pointed lines where appropriate.
- Controlled landing through foot and ankle (not noisy heel slam unless stylistically intended in hard-shoe work).
- No collapsing arches under fatigue.
Timing
- Stay inside the tune, not ahead of it.
- Phrase endings should land clearly with intent.
Travel and spacing
- Use the floor efficiently; don’t drift unpredictably.
- Keep orientation consistent relative to audience/judges.
Common Irish Jig Mistakes (and How to Fix Them)
| Mistake | What It Looks Like | Fast Fix |
|---|---|---|
| Rushing the beat | Feet arrive early, phrasing feels panicked | Practice at 80% tempo with metronome, then increase by small increments |
| Over-tension in upper body | Shoulders creep up, breathing gets shallow | Exhale on phrase starts; relax jaw/shoulders between reps |
| Noisy, heavy landings | Impact sounds uncontrolled in soft-shoe drills | Rehearse silent landing drills and ankle-controlled descents |
| Sloppy foot lines under fatigue | Pointed shapes disappear in later bars | Shorter sets with strict quality; add calf/foot endurance drills |
| Memorized but not musical | Steps are correct but “flat” | Mark accents and phrase endings intentionally in each run |
Your 4-Week Beginner Irish Jig Training Plan
Use this as a base template (adjust by coach guidance and recovery needs):
| Week | Focus | Sessions | Goal |
|---|---|---|---|
| Week 1 | Rhythm + posture + basic foot placement | 3 technical sessions + 2 short mobility sessions | Keep timing stable for 8-bar drills |
| Week 2 | Beginner combinations + clean transitions | 3 technical sessions + 2 strength/balance sessions | Perform short combo with consistent landing quality |
| Week 3 | Speed layering + musical accents | 3 technical sessions + 1 simulation run day | Dance combo at near-performance tempo with control |
| Week 4 | Performance readiness + stamina pacing | 2 quality sessions + 2 full-run simulation sessions | Complete full run confidently without timing drift |
Performance Day Playbook: How to Look Ready Even If You’re Nervous
Warm-up strategy (20–30 minutes total)
- Light pulse-raising movement (walk/jog/skips)
- Dynamic mobility (ankles, hips, calves)
- Short technical phrases at submax speed
- One clean near-performance pass
- Stop before fatigue steals sharpness
Mental cue stack
- Cue 1: “Hear the phrase.”
- Cue 2: “Tall and calm.”
- Cue 3: “Clean endings.”
Don’t carry ten cues on stage. Three strong cues beat a thousand anxious thoughts.
Recovery between rounds
- Walk, don’t collapse immediately.
- Hydrate in small sips.
- Note one improvement onlythen move on.
Injury-Smart Irish Dance: Train for Longevity
Irish dance is physically demanding, especially on the lower limbs. A smart dancer doesn’t only train hard; they train sustainably.
Prioritize progressive load, warm-up quality, sleep, hydration, and technique fidelity.
If pain changes your mechanics, that is datanot a challenge to “push through and hope.”
Practical durability rules
- Increase volume gradually (especially jump and hard-shoe volume).
- Do foot/ankle + hip + core support work 2–3 times weekly.
- Keep one low-impact recovery day after heavier sessions.
- Seek dance-informed medical support early when needed.
Experience Section: Real-World Studio Stories (Extended)
The fastest way to understand Irish jig dance is to hear what actually happens in a studio after the mirrors fog up and everyone realizes this is both
art class and cardio test. Below are composite, real-world-style experiences built from common beginner-to-intermediate patterns in Irish dance training.
If you see yourself in one of these stories, good. That means you’re on track.
Experience 1: “I thought speed was the goal.”
A new adult dancer came in convinced that Irish dance was a race. On week one, every drill was full throttle. The result? She was ahead of the music, exhausted
after two phrases, and frustrated that she “couldn’t do it naturally.” Her teacher paused class and had everyone clap the jig rhythm while walking the pattern.
No jumps, no fancy footwork, just timing and placement. Suddenly everything changed. Her steps looked less dramatic but ten times cleaner.
By week four she wasn’t “faster”she was on time, and the speed came naturally because she stopped fighting the tune.
Her biggest breakthrough was learning that Irish dance rewards precision before power. Once she respected rhythm, confidence showed up on its own.
Experience 2: “My upper body was frozen.”
A teen dancer interpreted “strong posture” as “be a statue.” Shoulders lifted, jaw clenched, breathing shallowclassic tension loop.
Her feet were capable, but the performance looked tight and stressed. The fix was surprisingly simple: breathing cues at phrase starts and soft shoulder resets between repetitions.
She practiced one internal sentence before each run: “Tall spine, easy shoulders, sharp feet.” Within two weeks her movement looked cleaner with no extra effort.
Judges and teachers often describe this as “easy power”the dancer looks calm, then suddenly nails quick, precise footwork.
She learned that control is not stiffness; it’s efficient alignment plus relaxed focus. On performance day, she used the same cue stack backstage and delivered her best run of the season.
Experience 3: “I kept getting little aches.”
Another dancer loved hard-shoe drills and doubled practice volume too quickly. Within a month: recurring ankle soreness and inconsistent landings.
Instead of quitting, he switched to a structured load plan: two high-quality technical days, one lower-impact review day, one strength-and-balance day,
and one full rest day. He also reduced unnecessary repetitions and tracked how his legs felt after each session. The pain gradually settled, and his quality improved.
Ironically, he danced better with fewer total reps because every rep had intention. He also added a standard pre-class sequencedynamic warm-up, ankle activation,
and short rhythm drillswhich made his first full run of the day far cleaner than before.
Experience 4: “My first feis felt terrifying.”
One beginner said she was fine in class and completely overwhelmed in competition. New venue, noise, costumes, numbers, and the internal soundtrack of “don’t mess up.”
Her teacher introduced a simulation routine two weeks out: enter, bow, perform, exit, reset, repeat. They practiced exactly how she would warm up,
where she would place her attention, and how to recover between rounds. On event day, she still felt nervousbut now it was familiar nervous, not chaos nervous.
She finished with one small timing slip, recovered immediately, and smiled through the ending phrase. Her reflection afterward was perfect:
“I didn’t need a perfect dance. I needed a reliable routine.” That mindset is gold for long-term progress.
Experience 5: “I finally enjoyed the process.”
The most meaningful shift came from a dancer who stopped measuring success only by medals or speed.
She began tracking three things per week: consistency of timing, quality of landings, and confidence level during full runs.
She celebrated small winsone cleaner phrase, one calmer performance pass, one day with less fatigue. Over time those tiny gains stacked into major improvement.
Six months later, her videos looked like a different dancer: better control, sharper rhythm, stronger presence. Her takeaway says it all:
“Irish jig dance became fun when I stopped chasing perfect and started building durable skill.”
Final Takeaway
Irish jig dance is iconic for a reason: it blends tradition, athleticism, music, and performance in a way that feels electric when done well.
Learn it step by steptiming first, posture second, clean drills third, performance polish fourthand you’ll progress faster than any “shortcut” approach.
Whether your goal is fitness, culture, stage work, or competition, the formula is the same: train smart, listen to the music, and make every rep intentional.
Do that, and your feet will do the talking.


