
Table of Contents >> Show >> Hide
- What Is Kitchen Backsplash Tiling?
- Why a Tile Backsplash Is Worth It
- Popular Kitchen Backsplash Tile Materials
- How to Choose the Right Kitchen Backsplash Tile
- Best Kitchen Backsplash Tile Layouts
- Tools and Materials Needed for Kitchen Backsplash Tiling
- How to Install a Kitchen Tile Backsplash
- Grout Choices: Small Detail, Big Difference
- Common Kitchen Backsplash Tiling Mistakes
- Kitchen Backsplash Maintenance Tips
- Design Ideas for Kitchen Backsplash Tiling
- DIY or Hire a Professional?
- Real Experiences and Practical Lessons From Kitchen Backsplash Tiling
- Conclusion
A kitchen backsplash has one job that sounds simple: protect the wall from splashes, steam, sauce explosions, coffee drips, and the occasional “I thought the blender lid was on” incident. But good kitchen backsplash tiling does much more than guard drywall from culinary chaos. It can brighten the room, frame the countertop, make cabinets look more expensive, and give your kitchen a finished, intentional look without requiring a full renovation.
Whether you love classic white subway tile, handmade zellige, sleek porcelain, glossy glass, or bold patterned mosaics, the right backsplash can become the visual handshake of your kitchen. It says, “Yes, people cook here, but we also have taste.” The challenge is choosing the right tile, planning the layout, preparing the wall, installing it cleanly, and finishing it so the result looks polished rather than like a weekend project that fought back.
This guide walks through kitchen backsplash tiling from design decisions to installation tips, maintenance, common mistakes, and real-world experience. It is written for homeowners, DIY beginners, remodelers, and anyone currently staring at a blank wall behind the stove wondering whether grout is a friend or a lifelong commitment.
What Is Kitchen Backsplash Tiling?
Kitchen backsplash tiling is the process of installing tile on the wall area between the countertop and upper cabinets, around the sink, behind the range, or across an entire kitchen wall. Its main purpose is practical: tile creates a durable, washable surface that protects the wall from water, grease, food stains, and heat exposure. But in modern kitchens, the backsplash is also one of the most important design features.
A backsplash can be small and subtle, such as a simple row of ceramic tile behind the sink, or dramatic and expansive, such as a full-height marble-look porcelain slab running from countertop to ceiling. Most residential backsplash projects use ceramic, porcelain, glass, stone, mosaic, or specialty decorative tile. Each material has its own style, price range, maintenance needs, and installation quirks.
Why a Tile Backsplash Is Worth It
A tile backsplash is one of the most efficient kitchen upgrades because it offers a strong mix of function, beauty, and value. Compared with replacing cabinets or countertops, tiling a backsplash is usually more affordable and faster, yet the visual impact can be huge.
It Protects Your Walls
Painted drywall is not exactly thrilled about repeated exposure to tomato sauce, dishwater, cooking oil, and steam. Tile provides a hard, moisture-resistant surface that is much easier to wipe down. This is especially important behind sinks, cooktops, coffee stations, and food prep areas.
It Adds Style Without Taking Over
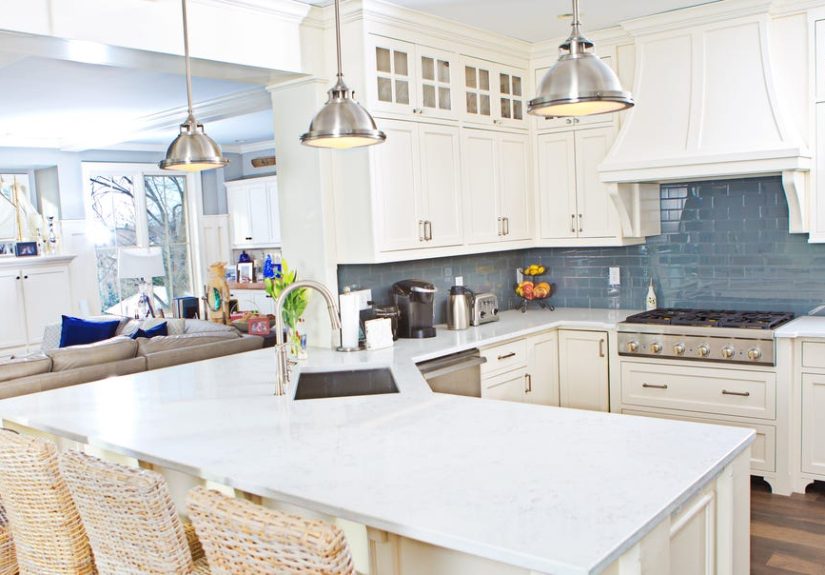
Backsplash tile can introduce color, texture, pattern, shine, or contrast. In a white kitchen, blue ceramic tile can add coastal charm. In a modern kitchen, large-format porcelain can create a sleek architectural look. In a farmhouse kitchen, handmade-look tile can add warmth and imperfection in the best possible way.
It Can Improve Resale Appeal
Buyers notice kitchens. A clean, well-installed backsplash gives the impression that the kitchen has been cared for and updated. Even a simple subway tile backsplash can make a space look more finished and move-in ready.
Popular Kitchen Backsplash Tile Materials
The best backsplash tile depends on your kitchen style, cleaning habits, budget, and tolerance for maintenance. Some materials are practically bulletproof; others are gorgeous but require a little more pampering.
Ceramic Tile
Ceramic tile is one of the most popular choices for kitchen backsplash tiling. It is affordable, widely available, easy to clean, and offered in countless colors, shapes, and finishes. Classic subway tile is usually ceramic, although porcelain versions are also common.
Ceramic is a smart choice for DIY projects because it is generally easier to cut than porcelain. It works beautifully in traditional, modern, cottage, and transitional kitchens. If you want a reliable backsplash without needing a second mortgage or a tile-cutting engineering degree, ceramic is a safe bet.
Porcelain Tile
Porcelain is denser and more water-resistant than standard ceramic. It is excellent for high-use kitchens and can mimic marble, concrete, limestone, wood, and other materials. Porcelain tiles may be harder to cut, especially in large formats, so a wet saw or professional installation may be worth considering.
Glass Tile
Glass tile reflects light and can make small kitchens feel brighter. It works well in contemporary and coastal designs and is available in mosaics, subway shapes, and glossy sheets. However, glass can show adhesive marks if installed incorrectly, so using the proper mortar and technique is important.
Natural Stone Tile
Marble, travertine, slate, limestone, and other natural stones bring organic texture and luxury to a backsplash. The trade-off is maintenance. Many stones are porous and may need sealing to resist stains. Behind a stove, marble can look stunning, but it may also collect oil splatter like it is auditioning for a cooking documentary.
Mosaic Tile
Mosaic tile usually comes mounted on mesh sheets, making it easier to install small pieces in a consistent pattern. Mosaics can include ceramic, porcelain, glass, stone, or metal. They are great for decorative accents, but they also create more grout lines, which means more cleaning over time.
Handmade and Zellige-Style Tile
Handmade and zellige-style tiles are loved for their uneven edges, color variation, and reflective glaze. They create movement and depth, especially in kitchens with simple cabinetry. The charm comes from imperfection, but installation takes patience because the tiles may not be perfectly uniform.
How to Choose the Right Kitchen Backsplash Tile
Choosing backsplash tile is partly design, partly practicality, and partly preventing future regret. Before falling in love with a dramatic patterned tile, think about how it will work with the rest of the kitchen.
Start With the Countertop
The backsplash sits directly above the countertop, so these two surfaces must get along. If your countertop has strong veining, speckles, or bold movement, choose a simpler backsplash. If the countertop is plain, the backsplash can carry more personality.
Coordinate With Cabinets
Cabinet color affects how the tile reads. White cabinets can handle almost anything, from soft gray subway tile to emerald green ceramic. Dark cabinets often pair well with lighter backsplash tile for contrast. Wood cabinets look beautiful with cream, handmade white, soft green, warm gray, or earthy terracotta tones.
Think About Lighting
Glossy tile reflects light and can make the kitchen feel brighter. Matte tile feels softer and more modern but may show grease differently depending on the finish. Under-cabinet lighting can dramatically change the appearance of tile color, so always test samples in your actual kitchen.
Consider Cleaning
Smooth glazed tile is usually easiest to clean. Highly textured stone, rough brick, or heavily uneven tile can trap grease and dust. If you cook often, especially with oil, choose a backsplash that can handle frequent wiping.
Best Kitchen Backsplash Tile Layouts
Tile layout can completely change the look of the same material. A simple white subway tile may look classic in a running bond pattern, modern in a vertical stack, or energetic in a herringbone pattern.
Running Bond
Running bond, also called brick pattern, offsets each tile row by half a tile. It is classic, forgiving, and timeless. This pattern works especially well with subway tile and is a strong choice for beginners.
Stacked Layout
Stacked tile lines up vertically and horizontally for a clean grid. It feels modern and crisp, especially with rectangular or square tiles. Since the lines are very visible, accuracy matters.
Vertical Tile
Vertical subway tile can make the wall feel taller and more contemporary. It is a great trick for small kitchens or spaces with low upper cabinets.
Herringbone
Herringbone creates movement and visual interest. It is beautiful behind a range or across a full backsplash, but it requires more cuts and planning. Beginners can do it, but they should bring patience, spacers, and perhaps a motivational snack.
Chevron
Chevron tile forms a clean V-shaped pattern. It looks sophisticated but usually requires pre-cut angled tiles or careful cutting. It is best for homeowners who want a statement backsplash with a tailored finish.
Tools and Materials Needed for Kitchen Backsplash Tiling
Before starting, gather the right tools. Stopping mid-project to hunt for a grout float is how weekend projects become weeklong dramas.
- Tile
- Tile spacers
- Tile adhesive, mastic, or thinset mortar
- Notched trowel
- Level or laser level
- Tape measure
- Pencil or marker
- Tile cutter, wet saw, or nippers
- Grout
- Grout float
- Bucket and sponge
- Caulk for countertop and corner joints
- Painter’s tape
- Drop cloth or cardboard countertop protection
- Outlet extenders, if needed
- Safety glasses and gloves
How to Install a Kitchen Tile Backsplash
Backsplash installation is manageable for many DIYers, but success depends on preparation and patience. Tile rewards careful planning and punishes “close enough” with crooked grout lines that stare at you during breakfast.
Step 1: Prepare the Wall
Remove outlet covers, switch plates, loose paint, dust, grease, and old adhesive. The wall should be clean, dry, flat, and stable. Glossy painted surfaces may need light sanding so the adhesive bonds properly. Patch holes or dents before tiling.
Step 2: Protect the Countertop
Cover countertops with cardboard, plastic, or a drop cloth. Tile adhesive and grout are not decorative toppings, no matter how confidently they land on your quartz.
Step 3: Plan the Layout
Measure the backsplash area and mark the center point. Dry-lay tiles on the countertop with spacers to see how the pattern will end at corners, cabinets, outlets, and edges. Avoid tiny sliver cuts at the ends if possible. Adjust the starting point so cut tiles are balanced.
Step 4: Establish a Level Line
Countertops are not always perfectly level. Use a level to find the low point and plan from there. If needed, leave a small gap at the bottom and later fill it with caulk. This flexible joint helps handle minor movement between countertop and wall.
Step 5: Apply Adhesive
Spread tile adhesive or thinset with a notched trowel in a small section. Hold the trowel at an angle to create consistent ridges. Do not cover too large an area at once, especially if you are new to tiling. Adhesive can skin over before the tile is placed.
Step 6: Set the Tile
Press tiles into the adhesive using a slight twist. Add spacers to keep grout joints even. Check the layout often with a level. For mesh-backed mosaics, make sure the sheets align and do not create visible seams.
Step 7: Cut Around Outlets and Edges
Measure carefully before cutting. Around outlets, the tile should fit close enough that the cover plate hides the edges, but not so tight that the outlet cannot sit properly. Outlet extenders may be needed after tile adds thickness to the wall.
Step 8: Let the Adhesive Cure
Follow the manufacturer’s recommended drying time before grouting. Rushing this step can shift tiles and weaken the installation. Tile projects are not fond of impatience.
Step 9: Apply Grout
Use a grout float to press grout into the joints at an angle. Work in small sections, then wipe excess grout with a damp sponge. Rinse the sponge often and avoid pulling grout out of the joints. After a haze forms, buff the tile with a clean cloth.
Step 10: Caulk Edges and Transitions
Use caulk, not grout, where the backsplash meets the countertop, cabinets, inside corners, and other surfaces that may move. Caulk creates a flexible seal and helps prevent cracking.
Grout Choices: Small Detail, Big Difference
Grout color can quietly blend in or boldly define the pattern. White grout with white subway tile creates a soft, seamless look. Dark grout emphasizes each tile and can make the pattern more graphic. Warm gray grout is popular because it hides minor stains better than bright white while still looking clean.
For narrow grout joints, unsanded grout is commonly used. For wider joints, sanded grout may be recommended. Some newer grouts are stain-resistant and easier to maintain. Natural stone may require special grout and sealing, so always check the tile manufacturer’s recommendations.
Common Kitchen Backsplash Tiling Mistakes
Backsplash tiling is not impossible, but it has a few traps. Knowing them ahead of time can save money, frustration, and the urge to cover everything with a giant cutting board.
Skipping the Dry Layout
Dry-laying tile helps prevent awkward cuts and poor alignment. Without it, you may end up with tiny pieces at the most visible edge.
Using the Wrong Adhesive
Different tile materials require different setting products. Glass tile, large-format porcelain, and natural stone may need specific mortar. Using the wrong adhesive can cause poor bonding or visible discoloration.
Ignoring Wall Flatness
Tile does not hide major wall problems. It often highlights them. A wavy wall can make tiles appear uneven, especially with glossy finishes or stacked layouts.
Forgetting Outlet Depth
Once tile is installed, outlets may sit recessed behind the new surface. Outlet extenders help bring them forward safely and neatly.
Grouting Too Soon
If adhesive has not cured, grout pressure can move the tile. Waiting the proper amount of time is boring but important.
Kitchen Backsplash Maintenance Tips
Once installed, a tile backsplash is usually easy to care for. Wipe it regularly with a soft cloth, warm water, and mild dish soap. Avoid abrasive pads on glossy or glass tile. Clean grease splatters sooner rather than later, especially behind the cooktop.
If your backsplash uses natural stone or cement-based grout, sealing may be recommended. Sealer helps reduce staining but does not make the surface invincible. Think of it like a raincoat, not a superhero cape.
Design Ideas for Kitchen Backsplash Tiling
Classic White Subway Tile
White subway tile remains popular because it is affordable, flexible, and timeless. It works with nearly every cabinet color and countertop style. To make it more interesting, try vertical stacking, handmade edges, or a soft gray grout.
Bold Patterned Tile
Patterned tile can turn the backsplash into a focal point. It works best when the rest of the kitchen is relatively simple. For example, a black-and-white patterned backsplash can add drama to white cabinets and butcher block countertops.
Full-Height Backsplash
A full-height backsplash runs from the countertop to the ceiling or upper cabinets. This approach makes the kitchen feel custom and high-end, especially behind open shelving or a range hood.
Warm Neutral Tile
Cream, beige, taupe, and clay-toned tiles are excellent for kitchens that need warmth. They pair beautifully with wood cabinets, brass hardware, and stone countertops.
Glossy Handmade-Look Tile
Glossy uneven tile reflects light in different directions, adding depth without a loud pattern. It is ideal for homeowners who want interest but not visual clutter.
DIY or Hire a Professional?
A simple ceramic subway tile backsplash can be a good DIY project for careful beginners. Mesh mosaic sheets and adhesive mats can also simplify installation. However, professional help is wise for expensive tile, natural stone, glass tile, complex patterns, uneven walls, large-format slabs, or kitchens with many outlets and corners.
DIY can save labor costs, but mistakes can become expensive. If you are using premium marble tile, imported zellige, or a detailed herringbone layout, hiring a skilled installer may protect your investment. A beautiful tile installed poorly is still a problem; a modest tile installed well can look surprisingly upscale.
Real Experiences and Practical Lessons From Kitchen Backsplash Tiling
The first thing many homeowners learn during kitchen backsplash tiling is that the wall is rarely as straight as it looked yesterday. Under normal life conditions, a kitchen wall seems innocent. Under a level, tape measure, and bright work light, it suddenly reveals every bump, dip, and questionable decision made by previous renovations. That is why surface preparation matters so much. Cleaning grease, sanding glossy paint, and patching dents may feel like slow work, but it creates the foundation for a backsplash that actually stays put.
Another real-world lesson is that tile color changes throughout the day. A sample that looks creamy white under store lighting can appear gray in a north-facing kitchen or yellow under warm bulbs. Before buying boxes of tile, bring samples home and lean them against the wall for at least a day. Look at them in morning light, afternoon shade, and nighttime lighting. This simple test can prevent the classic “Why does my white tile look like oatmeal?” situation.
Dry layout is also one of those steps people are tempted to skip until they learn why professionals insist on it. Laying tile out on the countertop helps you see where cuts will land. The goal is to avoid tiny tile slivers at corners, next to cabinets, or around the range. In one common scenario, starting at the exact center of the wall creates a beautiful middle section but leaves a skinny half-inch cut at the edge. Shifting the layout slightly may create fuller, more balanced cuts on both sides.
Outlet cuts are another area where patience pays off. Kitchens have a surprising number of outlets, switches, and awkward interruptions. Measure twice, mark clearly, and cut slowly. A tile that breaks during cutting is not a personal failure; it is simply tile being dramatic. Always buy extra material, usually at least 10 percent more than the measured square footage, and more if the pattern requires many cuts. Extra tile also helps with future repairs because dye lots and finishes can change over time.
Grouting teaches its own lessons. First, do not mix too much grout at once unless you enjoy racing against a bucket of cement-like pudding. Second, wipe the tile carefully but not aggressively. Too much water can weaken grout or wash it out of the joints. Third, grout haze is normal, but it should be cleaned after the grout firms up according to product instructions. Waiting too long can turn haze removal into an upper-body workout nobody requested.
Homeowners also discover that caulk is not optional at movement joints. The line where the backsplash meets the countertop should be caulked because counters and walls can move slightly. Grout in that joint often cracks. A neat bead of color-matched caulk looks cleaner and lasts better.
Finally, the biggest experience-based tip is to slow down. Tile installation is not a race; it is a sequence. Prepare, plan, set, wait, grout, clean, caulk, and admire. When done carefully, kitchen backsplash tiling delivers a rare kind of satisfaction. You get a cleaner wall, a better-looking kitchen, and the quiet pride of knowing those little rectangles did not defeat you.
Conclusion
Kitchen backsplash tiling is one of the most rewarding upgrades you can make in a kitchen. It protects the walls, adds personality, improves the room’s visual balance, and can make even older cabinets and countertops feel refreshed. The key is choosing a tile that fits your lifestyle as well as your style. Smooth ceramic or porcelain tile is practical and timeless. Glass adds brightness. Natural stone brings luxury. Handmade tile adds charm and movement. Patterned tile delivers personality, but it should be used thoughtfully.
Successful backsplash installation depends on careful planning, clean wall preparation, balanced layout, proper adhesive, patient grouting, and flexible caulk at transitions. Whether you install it yourself or hire a professional, a well-designed backsplash can turn the kitchen wall from “blank space” into the feature that ties the whole room together. And as a bonus, it will be ready for the next spaghetti sauce incident.
Note: This article was developed from current, practical kitchen tiling guidance commonly recommended by reputable U.S. home improvement, tile, and interior design resources, rewritten in original standard American English for web publishing.


