
Table of Contents >> Show >> Hide
- What You’ll Learn
- Why Chalk Paint Is a Cheat Code for a Desk Makeover
- Materials and Tools for a Large Desk Makeover Using Chalk Paint
- Prep: The Part Everyone Skips, Then Regrets
- Step 1: Safety check (especially for older desks)
- Step 2: Remove hardware and label everything
- Step 3: Clean like you mean it
- Step 4: The “Is there wax here?” quick test
- Step 5: Scuff-sand glossy surfaces (yes, even with chalk paint)
- Step 6: Repair, fill, and smooth
- Step 7: Decide if you need a stain blocker
- How to Chalk Paint a Large Desk Without Streaks, Patchiness, or Panic
- Sealing and Protecting Your Chalk Painted Desk
- Troubleshooting: Common Chalk Paint Desk Problems (and Fixes)
- Maintenance: Keeping Your Chalk Painted Desk Looking Fresh
- of Real-World Desk Makeover Experiences (So You Don’t Learn the Hard Way)
- Wrap-Up
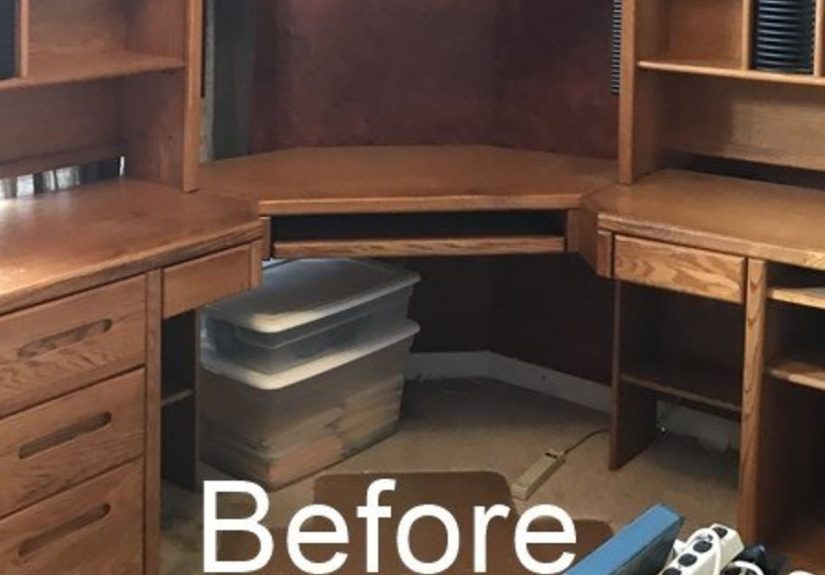
A big desk is basically a small country: it has borders (those sharp corners), natural resources (mysterious drawer crumbs),
and at least one region you avoid making eye contact with (hello, water-ring archipelago). The good news: chalk paint is one of
the fastest ways to turn a tired, scuffed, or “corporate beige” desktop into something that looks intentionallike you planned
it, not like you panic-bought paint at 8:47 p.m.
This guide is built for a large desk makeover using chalk paintthink 60–80 inches long, heavy-use surface,
and plenty of flat real estate where brush marks and uneven sheen can show up if you’re not careful. We’ll cover prep that’s
actually worth your time, painting techniques that look smooth on wide surfaces, and the big decision: wax vs. a durable
clear topcoat for a desk that needs to survive coffee, laptops, and the occasional existential sigh.
Why Chalk Paint Is a Cheat Code for a Desk Makeover
Chalk-style paints are known for a matte, velvety finish and for sticking to many surfaces with less prep than
traditional paint systems. That’s why they’re popular for furniture makeovers: you can often skip heavy sanding and still get
great coverage and that soft, “designer vintage” look.
But a desk is different from a cute little side table
A desk top is a high-traffic surface. It gets dragged by keyboards, scraped by notebooks, and occasionally baptized by iced coffee.
Chalk paint can absolutely handle thisif you plan your finish the way you’d plan a road trip: with snacks, a map, and
at least one backup route when something goes weird.
The two big wins with chalk paint on a large desk:
- Great coverage and forgiving application (especially if you like a subtly textured, hand-painted look).
- Versatile finishing options: keep it ultra-matte, lightly buffed, distressed, or sleek and protected.
Materials and Tools for a Large Desk Makeover Using Chalk Paint
The secret to a desk-sized project is scaling your tools. A tiny craft brush on a 72-inch top is like mowing a football field with nail clippers.
Must-haves
- Chalk paint (enough for 2 coats; buy extra if going from dark-to-light).
- Cleaner/degreaser (dish soap + water works for many pieces; a dedicated degreaser helps if the desk is grimy).
- Microfiber cloths and/or lint-free rags.
- Painter’s tape (for protecting walls, undersides, drawer interiors, and hardware areas).
- Sandpaper or sanding sponge (typically 180–220 grit for scuff-sanding).
- Vacuum + tack cloth (or a slightly damp lint-free cloth) for dust removal.
- Brush + foam roller (brush for details; roller for the large top for a smoother finish).
- Drop cloth and something to elevate the desk (wood blocks or painter’s pyramids, if disassembled parts).
Optional but often worth it
- Wood filler for dents, chips, and gouges (because desks collect battle scars).
- Stain-blocking primer (shellac-based) for tannin bleed-through (common on some woods and older pieces).
- Clear protective finish:
- Wax (soft, buttery feel; lower durability for a desktop unless you’re gentle)
- Water-based polycrylic/topcoat (more durable and wipeable for daily use)
- Lacquer/topcoat system (durable but less forgiving to repair)
- Mineral spirits (for removing wax residue before painting, if needed).
Prep: The Part Everyone Skips, Then Regrets
Chalk paint is famous for “minimal prep,” not “zero prep.” A large desk has a lot of surface area, which means a lot of opportunity
for invisible stuffoils, cleaners, old waxto cause visible problems (peeling, fish-eyes, patchy sheen).
Step 1: Safety check (especially for older desks)
If your desk is vintage or older (especially pre-1978 in the U.S.), consider lead safety before sanding or scraping painted finishes.
Lead dust is a serious hazard. When in doubt: test first, avoid dry sanding, and follow lead-safe work practices.
Step 2: Remove hardware and label everything
Take off knobs, pulls, and any removable trim. Put screws in labeled bags. If your desk has a keyboard tray or file rails,
take photos so reassembly isn’t a puzzle designed by a mischievous wizard.
Step 3: Clean like you mean it
Clean the entire desktop, edges, drawer fronts, and especially the area where your arms rest (a.k.a. “the lotion zone”).
Use soap and water for general dirt, or a degreaser if the piece is oily or has years of polish build-up.
Step 4: The “Is there wax here?” quick test
If water beads up on the surface or it feels slick and oily even after cleaning, you may have wax or polish build-up.
Wax is the enemy of paint adhesion. Wipe a small area with mineral spirits on a rag; if the rag picks up a waxy residue,
keep going until the surface feels clean and slightly “grabby.”
Step 5: Scuff-sand glossy surfaces (yes, even with chalk paint)
For glossy laminate, varnished wood, or shiny factory finishes, do a light scuff-sand to create “tooth.” You’re not trying
to sand the desk into a new erajust dull the shine so paint can grip evenly.
Step 6: Repair, fill, and smooth
Fill dents and chips, let filler dry, then sand smooth. Wipe off dust thoroughly. On a large top, dust control matters:
dust = bumps, and bumps = you touching the surface forever because you can’t stop noticing them.
Step 7: Decide if you need a stain blocker
Some woods (and some old stains) can bleed tannins through water-based paints, especially light colors. If your desk is
oak, pine with knots, mahogany, or a mystery species with a dramatic past, you have two smart options:
- Wait-and-see approach: paint one coat, let dry, and watch for yellow/brown stains.
- Preventive approach: spot-prime knots/stainy areas (or the whole top) with a shellac-based stain blocker.
How to Chalk Paint a Large Desk Without Streaks, Patchiness, or Panic
Plan your workflow like you’re painting a runway
A big desktop is where lap marks happen if you stop mid-zone. The trick is to work in sections and keep a “wet edge.”
That means you don’t let one section dry completely before blending into the next.
Step-by-step: painting the base
-
Stir the paint well. Chalk paint can be thick and needs a thorough stir to keep pigment consistent.
If it feels too thick for a smooth top coat, lightly mist your brush/roller or add a small amount of water per the manufacturer’s guidance. - Start with the underside and less-visible areas. Get a feel for coverage and drying time before tackling the main event (the top).
-
Use a foam roller on the desktop. Roll in long, even passes. Then “tip off” lightly with a brush if needed
(a gentle pass to smooth roller texture). For a modern look, aim for thin coats rather than thick coverage in one go. - Let coat #1 dry fully. Chalk paint often dries quickly to the touch, but give it enough time so you don’t drag semi-wet paint into texture.
- Lightly de-nib if needed. If you feel grit or raised grain, do a quick, gentle sand with 220 grit and remove dust.
- Apply coat #2. Most desks need two coats for consistent color and sheen. High contrast color changes may need a third.
A realistic example: the “Too Big for Cute” desk
Imagine a 72-inch office desk with a laminate top and chunky drawer bases. You clean, scuff-sand the shine, and paint the base
with a brush. For the top, you roll a thin coat, tip it off, and repeat. The result: a smooth, modern finish that doesn’t scream
“craft day,” even if you absolutely did blast a motivational playlist while painting.
Distressing: optional, not mandatory
If you like a distressed look, do it intentionally: focus on natural wear points (edges, corners, drawer pulls).
Light sanding after the paint dries can reveal the underlying surface for that “this desk has stories” vibewithout looking like a raccoon attacked it.
Sealing and Protecting Your Chalk Painted Desk
Chalk paint is porous and needs protection on a desk, especially the desktop. Think of sealing as the desk’s raincoat.
Without it, water, oils, and friction can mark the finish fast.
Option A: Wax (beautiful feel, more maintenance)
Wax gives that signature soft, velvety finish and a mellow sheen. It’s lovely on the base and drawer fronts.
On a desktop, it can work if you’re gentleuse coasters, desk pads, and avoid standing water.
- How to apply: thin coat, work in sections, buff off excess.
- Dry vs. cure: it can feel dry quickly, but curing takes longer; treat the surface gently during that window.
- Repairability: easy to re-wax and refresh over time.
Important: once you wax, you generally don’t topcoat with water-based finishes over it. Wax is a final step, not a “layer in the middle.”
Option B: Water-based polycrylic/topcoat (durable desk armor)
If your desk is a daily driverwork, homework, crafts, coffeewater-based polycrylic/topcoats are popular because they cure to a harder,
wipeable finish. Many are designed to stay clear and resist yellowing on lighter colors.
- Best for: desktops, dining tables, and anything that gets wiped down often.
- Look: choose matte/satin to keep the chalky vibe; gloss will look more “sealed” and reflective.
- Application tip: thin coats, light sanding between coats if needed, and don’t over-brush as it starts to set.
Option C: Lacquer or manufacturer-specific protective topcoat
Some chalk paint lines offer matching protective topcoats. These can be very durable, especially when you follow the brand’s dry time,
temperature, and humidity guidance. The trade-off: once a hard topcoat chips, repairs can be more obvious than with wax.
My practical recommendation for a large desk
For most people: wax the base (for that gorgeous feel) and topcoat the desktop with a durable water-based finish.
It’s the best of both worlds: soft and pretty where hands touch lightly, and tough where life happens.
If you want one uniform finish everywhere, choose durability first. A large desk is a work surface, not a museum exhibit (even if your color palette is impeccable).
Troubleshooting: Common Chalk Paint Desk Problems (and Fixes)
Problem: Paint scratches off easily
Usually caused by poor cleaning, wax/polish residue, or skipping scuff-sanding on glossy finishes.
Fix: clean thoroughly, remove wax with mineral spirits, scuff-sand, repaint, and seal properly.
Problem: Yellow/brown stains appear through paint
That’s bleed-through (tannins, knots, old stains). Fix: let paint dry, then spot-prime with a shellac-based stain blocker,
then repaint and seal. Don’t wax firstshellac and wax don’t play nicely together.
Problem: Brush marks on the top
Use a foam roller for the desktop, thin your paint slightly if appropriate, and avoid going back over sections as they start drying.
If marks remain, lightly sand smooth and apply one more thin coat.
Problem: Sticky drawers after painting
Paint adds thickness. Lightly sand drawer edges/runners and consider waxing the runners (not the painted face) for smoother glide.
Keep paint off the inner contact points if possible.
Problem: Cloudy or streaky clear coat
Often from humidity, heavy coats, or over-brushing. Fix: let it cure, then lightly sand and apply a thin, even recoat under better conditions.
Maintenance: Keeping Your Chalk Painted Desk Looking Fresh
- Use coasters and a desk mat during the first few weeks while finishes cure fully.
- Clean gently: damp cloth for daily wipe-down; avoid harsh cleaners that can dull or soften finishes.
- Refresh waxed areas as neededespecially edges and drawer fronts that get handled constantly.
- Touch-ups are normal. A desk lives a hard life. The goal is “beautiful and functional,” not “never touched by human hands.”
of Real-World Desk Makeover Experiences (So You Don’t Learn the Hard Way)
DIY desk makeovers have a pattern, and it goes like this: confidence → chaos → triumph → obsession. If you’ve never painted a large desk
with chalk paint before, here are the most common “experiences” people reportwhat surprises them, what slows them down, and what they wish they’d known
before they were halfway through the second coat with paint in their hair and a dog tail suspiciously close to the wet edge.
First: the size hits you. A large desktop feels manageable until you start painting and realize you’re basically resurfacing a small ice rink.
The lesson most DIYers learn fast is to set up your pathwork from one side to the other and don’t paint yourself into a corner.
On a wide top, stopping to answer a text can create a dry line you’ll see later, so people get into a rhythm: roll, tip off, move along.
It’s oddly meditative… until you notice a tiny speck of dust that suddenly becomes your entire personality.
Second: prep is the difference between “wow” and “why is this peeling?” Many people go in believing chalk paint means no sanding ever.
Then they discover their desk is coated in years of polish, cleaner residue, or that slick factory finish that laughs at paint.
The common takeaway is: cleaning is non-negotiable, and a quick scuff-sand on glossy surfaces is less work than repainting the whole top.
Third: the finish choice becomes deeply personal. Wax is often described as “buttery” and satisfying to bufflike giving your desk a spa day.
But on a desktop, people notice wax can mark if you’re rough on it (hot mugs, sharp corners of devices, spilled coffee that sits too long).
That’s why many DIYers end up doing a hybrid approach: wax for the base and drawers, and a tougher water-based topcoat on the top.
The emotional arc here is hilarious: “Wax is romantic” becomes “Poly is practical,” and then they buy both and call it “balance.”
Fourth: cure time is real. A desk may feel dry quickly, but finishes keep hardening underneath the surface.
The most common regret story is using the desk too soondragging a monitor stand across it, sticking a mouse pad down, or setting a cold drink directly on it.
The best real-world habit: treat the desk gently at first, use a desk mat, and let the finish fully toughen up before expecting it to behave like factory laminate.
Finally: everyone ends up proud. The moment you put the hardware back on and slide the desk into place, it stops being “a project”
and becomes “the desk.” It looks custom. It looks intentional. And you’ll catch yourself staring at it like you’re waiting for it to compliment you back.
Wrap-Up
A large desk makeover using chalk paint is one of the most satisfying upgrades you can do with a weekend, basic tools,
and a decent playlist. The keys are simple: clean thoroughly, scuff-sand glossy finishes, paint in thin coats with a plan for the large top,
and choose a protective finish that matches how you actually use your desk (not how you imagine your desk being used in a perfectly curated life).
If you want the desk to look beautiful and stay beautiful: seal it, let it cure, and give it a little grace. Desks are for living.


