
Table of Contents >> Show >> Hide
- What You’ll Need (So You Don’t End Up Sewing With Kitchen Scissors)
- Step 1: Choose a Design That Reads Well on a Wall
- Step 2: Plan Your Finish Before You Stitch (Yes, Before)
- Step 3: Prep Your Fabric and Start Clean
- Step 4: Stitch Neatly (Your Wall Art Deserves Consistency)
- Step 5: Manage Thread Ends Like You’re Not a Chaos Goblin
- Step 6: Wash (Optional) and Press the Right Way
- Step 7: Finish as Wall Art (Hoop Finish or Frame Finish)
- Step 8: Hang It Like Art (Because It Is)
- Common Mistakes (And How to Fix Them Without Crying)
- Conclusion
- Experience Corner: Things You Only Learn After You’ve Made (and Finished) a Few Pieces
Cross stitch wall art is the rare DIY that’s equal parts “cozy grandma core” and “minimalist gallery wall,”
depending on what you stitch. It’s also delightfully portable: you can take your project from couch to coffee shop
like a tiny, thread-powered side quest. And when you’re done? You get actual, hang-on-the-wall home decorno
“I made this but it lives in a drawer” situation.
This guide walks you through how to make cross stitch decor wall art in 8 easy steps, from picking a
design that looks great at a distance to finishing it like you meant to do that all along. We’ll keep it practical,
friendly for beginners, and just nerdy enough to help you avoid the classic pitfalls (like discovering your hoop
leaves a ring after you’ve already told everyone you’re “basically an artist now”).
What You’ll Need (So You Don’t End Up Sewing With Kitchen Scissors)
Core supplies
- Fabric: Aida cloth is the classic beginner-friendly option (common counts: 14-count or 16-count).
- Thread: Cotton embroidery floss (six-strand floss is typical; you’ll separate strands as needed).
- Needle: A tapestry needle (blunt tip) sized for your fabric count.
- Pattern: Printed or digital, ideally with clear symbols and a color key.
- Hoop or frame: An embroidery hoop keeps fabric taut while you stitch; a picture frame is for finishing.
- Small scissors: The kind that makes you feel like a sewing wizard.
- Marking tool (optional): Water-soluble or erasable fabric pen/pencil for light guides.
Finishing extras (pick your adventure)
- For hoop-finish wall art: Felt backing, strong thread, and a needle for whipstitching.
- For framed wall art: Acid-free mounting board or foam core, pins or lacing thread, and a frame + mat.
- For clean presentation: Mild soap (optional wash), clean towel, iron, and a pressing cloth.
Step 1: Choose a Design That Reads Well on a Wall
Not every cross stitch pattern wants to be wall art. Some are adorable up close… and become a fuzzy blob from
across the room, like a sitcom dad without his glasses.
- Go bolder than you think: Strong shapes, clean typography, simple florals, geometric motifs, or icons.
- Check “distance clarity”: Zoom out on a digital mockup or hold the pattern at arm’s length.
- Mind the size: A 4″ hoop can look charming in a gallery cluster, but it may look lonely above a sofa.
- Pick a palette with purpose: Two to five colors often look modern and intentional on a wall.
Example: If you want a minimalist look, stitch a simple phrase like “MAKE THINGS” in one color with a neat border.
If you want cozy cottage vibes, choose a small wreath motif in muted greens with a single pop color.
Step 2: Plan Your Finish Before You Stitch (Yes, Before)
The best finishing secret is boring: decide how you’ll display it early. Your finishing method affects
fabric margins, overall sizing, and whether a hoop crease will haunt you.
Quick finishing options
- Hoop finish: Fast, affordable, and cuteperfect for small projects and gallery walls.
- Traditional frame + mat: The “real art” look. Great for gifts and larger designs.
- Float frame: Lets the fabric edge showsuper modern when done neatly.
- Hanging banner (advanced): A stitched panel with a dowel and tassels for boho decor.
Pro tip: Whatever finish you choose, leave extra fabric around the design. You’ll be grateful when it’s time to
mount or tension the piece without doing fabric gymnastics.
Step 3: Prep Your Fabric and Start Clean
Cross stitch is a counted craft. That means the smallest “eh, close enough” can snowball into
“why does my flower look like a haunted pineapple?” later.
Prep like a calm, capable person
- Find your center: Fold fabric in half twice; lightly mark the center point if helpful.
- Prevent fraying: Use painter’s tape, masking tape, or a quick zigzag stitch along the edges.
- Keep it clean: Wash hands first; consider a project bag if you stitch on the go.
- Thread strands: Many stitchers use 2 strands on 14-count Aida for a balanced look (adjust to taste).
Starting thread without a knot helps the back stay flatter. If you’re new, aim for secure starts that don’t create
big lumpsyour future framing self will send you a thank-you note.
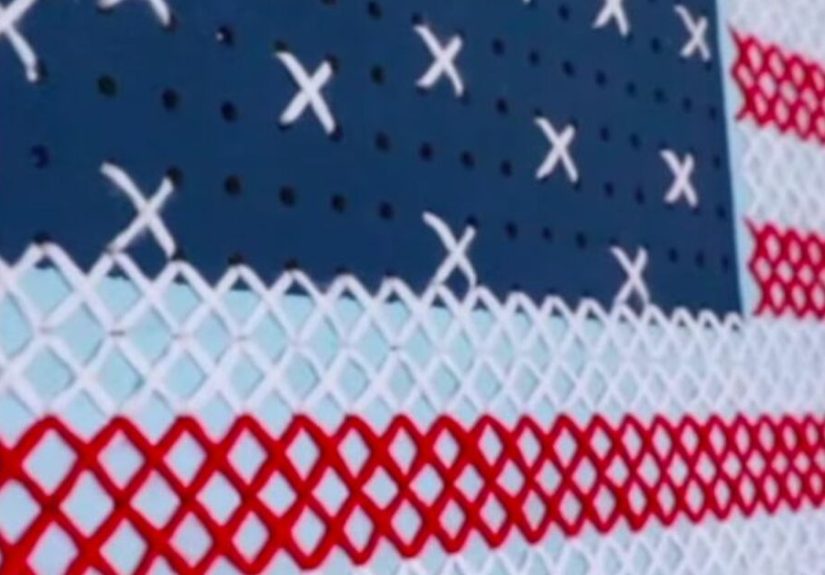
Step 4: Stitch Neatly (Your Wall Art Deserves Consistency)
The magic of cross stitch wall decor is that it looks crisp and “designed.” You get that look by being consistent,
not by being perfect.
How to make stitches look polished
- Keep your X’s consistent: Always cross the top leg the same direction (pick a direction and commit).
- Work in rows: Many stitchers do a row of half-stitches, then return to complete the X’s for speed and uniformity.
- Don’t pull too tight: Tugging hard can distort fabric and make coverage uneven.
- Use backstitch for definition: Outlines and small details make designs “pop” on a wall.
If your pattern includes fractional stitches or specialty details, take them slowly. The difference between
“handmade art” and “mysterious pixel salad” is often one careful backstitch line.
Step 5: Manage Thread Ends Like You’re Not a Chaos Goblin
Wall art finishing is easier when the back isn’t a dramatic tangle of thread tails and regret.
You don’t need a museum-quality backsidebut you do want it reasonably flat.
Thread management that helps later
- End threads by weaving under stitches: Secure without knots, especially if framing.
- Limit “traveling” long distances: Jumping across open fabric can show through when mounted.
- Change colors smartly: Finish a color in a section before moving on when possible.
Think of it like making a bed: nobody needs hospital corners, but if it looks like you wrestled a raccoon,
you’ll notice.
Step 6: Wash (Optional) and Press the Right Way
When you finish stitching, your fabric may have hoop marks, hand oils, light grime, or visible grid lines.
A gentle wash can help, but it’s optionaland depends on your materials.
If you choose to wash
- Use cool or lukewarm water and a small amount of mild soap.
- Soak gently; don’t wring or twist the fabric.
- Rinse well and roll in a clean towel to remove excess water.
- Let it air dry flat, then press when slightly damp (or fully dry with care).
Pressing that won’t crush your stitches
- Press from the back side on a soft surface (like a towel) to protect the stitch texture.
- Use a pressing cloth and gentle pressureno aggressive ironing “laps.”
- Keep the iron moving minimally; think “press,” not “scrub.”
The goal is smooth fabric, not flattened stitches. Your cross stitch should still look like thread, not a printed
T-shirt graphic.
Step 7: Finish as Wall Art (Hoop Finish or Frame Finish)
Here’s where your cross stitch becomes decor. Choose the finish that fits your vibe, your budget, and how much
you enjoy precision tasks (be honest with yourself).
Option A: Hoop-finish wall art (fast and charming)
- Center your design in the hoop and tighten the screw firmly.
- Gently tug the fabric edges around the hoop until the front is taut and smooth.
- Trim excess fabric, leaving a margin (about 1–2 inches) beyond the hoop edge.
- Run a gathering stitch around the back edge and pull to cinch the fabric neatly.
- Cover the back with felt (whipstitch or glue carefully if you prefer a no-sew finish).
- Add a ribbon or hanging loop at the top for easy wall display.
Style idea: Create a triosame hoop size, same color palette, different small motifs. Instant “I have my life
together” wall moment.
Option B: Traditional frame + mat (clean, classic, gift-ready)
- Choose a frame and mat opening that complements the stitched area (not just the fabric size).
- Use an acid-free mounting board or foam core cut to fit your frame.
- Center the stitched piece on the board; lightly secure temporarily.
- Tension the fabric evenly by pinning the edges into the board sides or lacing with thread across the back.
- Check the front often for straight grain and smooth tension.
- Assemble with the mat and frame, keeping the fabric flat and aligned.
If you want a truly professional look, a custom framer familiar with needlework can be worth itespecially for
heirloom-style pieces or large projects.
Option C: Float frame (modern, fabric-forward)
Float frames show the fabric edge and can look stunning with raw linen or dyed Aida. The trick is keeping your
fabric square and your mounting clean. If you love a modern aesthetic, this finish can make cross stitch feel like
contemporary fiber art.
Step 8: Hang It Like Art (Because It Is)
A finished piece deserves a thoughtful landing spot. Consider scale, lighting, and what’s happening around it.
Your wall art should look intentional, not like it’s hiding from your smoke detector.
Display tips that make it look “designed”
- Mind the light: Avoid direct sun to reduce fading over time.
- Create a mini gallery: Group 3–6 small hoop pieces for impact.
- Repeat a color: Echo a thread color elsewhere in the room (pillows, vase, book spine) for cohesion.
- Use consistent spacing: Even 2–3 inches between pieces looks polished.
Common Mistakes (And How to Fix Them Without Crying)
“My fabric is wavy.”
Try gentle washing (if appropriate) and pressing from the back on a padded surface. Waviness often comes from
uneven tension or pulling stitches too tight.
“My design is slightly crooked in the frame.”
If you mounted it yourself, loosen and re-tension slowly, checking the front frequently. Use the fabric’s grid
lines (Aida holes) as your built-in ruler.
“The hoop left a ring.”
Light hoop marks often press out. If you know you’ll frame later, consider stitching “in hand” (no hoop) or use
a Q-snap style frame to reduce hoop rings.
“My stitches look messy up close.”
First: welcome to being human. Second: backstitching and careful pressing improve the overall look dramatically.
And third: no one stands two inches from your wall art unless they’re inspecting it like a museum guard.
Conclusion
Making cross stitch decor wall art is basically the craft version of meal prep: a little planning up front makes
everything smoother later, and the payoff is something you can enjoy every day. Choose a design that reads well,
stitch with consistency, finish cleanly, and display it like it belongs in your homebecause it does.
Start small if you’re new: a simple motif in a 6-inch hoop can look shockingly good with the right colors and a
tidy finish. Then level up to framed pieces once you’re comfortable with tensioning and mounting. Either way, you’re
turning thread into decor, and that’s pretty magical for something that fits in a project bag.
Experience Corner: Things You Only Learn After You’ve Made (and Finished) a Few Pieces
The first time I tried to make cross stitch wall art, I assumed the “art” part happened automatically the moment I
completed the last stitch. Spoiler: the wall does not magically frame your work for you. My finished piece sat on a
table for a week while I stared at it like, “Now what?” That’s when I learned the real hobby is sometimes
finishing.
One of the biggest lessons: tension is everything. I used to tighten my thread like I was lashing cargo to a truck.
The result was a slightly puckered fabric that looked fine in my hand but turned into gentle waves once I removed
the hoop. Now I aim for “snug, not stressed.” When the stitches lay neatly and the fabric stays square, finishing
becomes 10x easierespecially if you want a crisp framed look.
I also learned that color choices feel different on a wall than on a pattern chart. Bright colors that look cute on
screen can shout in real life. Muted palettes tend to look more “decor” and less “I found neon floss and got excited.”
My favorite trick is to pick one hero color, one dark anchor (like navy or charcoal), and one soft neutral. Suddenly
the piece looks intentional, like it’s part of the room’s plan rather than a rogue craft project.
Hoop finishing taught me humility. The first time I gathered the fabric on the back, I pulled the thread too hard
and the front went slightly off-centerlike the design was trying to escape stage left. Now I gather gradually,
checking the front every few pulls. And I always cut my felt backing slightly smaller than the hoop so it looks
clean and doesn’t puff out. The difference between “handmade” and “handmade but polished” is often that tiny detail.
Framing taught me patience. Pinning or lacing a piece evenly is strangely meditative until you realize you’ve
tensioned the top perfectly and the sides are doing their own interpretive dance. The fix is slow, even adjustments:
a little on the left, then a little on the right, and frequent front checks. I now treat it like aligning a picture
on the wallstep back, look, adjust, repeatuntil it’s straight.
Finally, I learned to build a “finishing day” routine. When a piece is done, I set aside an hour to clean up thread
tails, gently press, and choose the display method. It turns finishing from a vague future chore into the satisfying
final act. And the best part? Once it’s on the wall, you don’t just remember the hours of stitchingyou get that
little daily spark of “I made that,” which is honestly the whole point.


