
Table of Contents >> Show >> Hide
- What Does “Nano-Ammeter” Really Mean?
- The Clever Trick: Measure Voltage, Then Infer Current
- Why This Works Better Than You Might Expect
- Where the Trick Starts to Misbehave
- What the Pros Use Instead
- The DIY Upgrade Path: Add an Op-Amp, Get Serious
- The Real Villains: Leakage, Dirt, and Wiggly Cables
- How to Use Your Existing Meter Without Fooling Yourself
- When This Hack Is Brilliant, and When It Is a Bad Idea
- Conclusion
- Hands-On Experiences: What It Feels Like to Chase Nanoamps
- SEO Tags
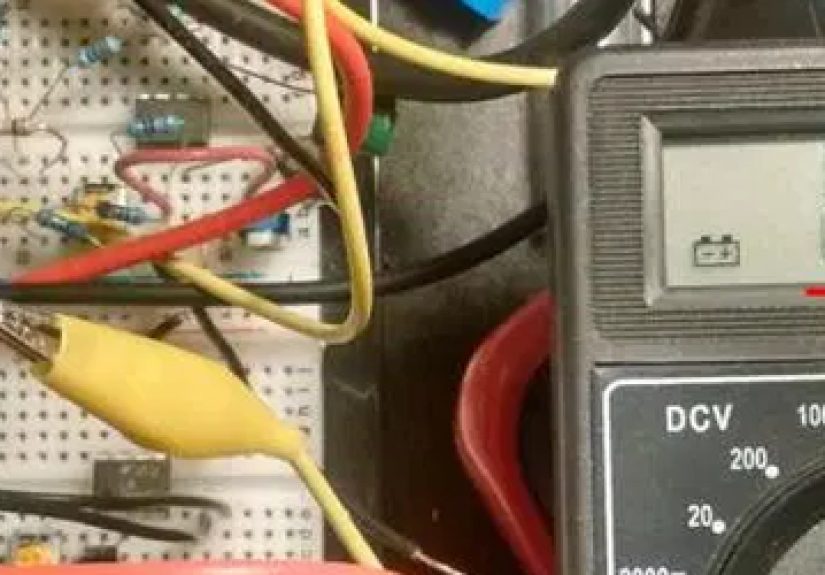
If you have ever stared at a circuit and wondered where your battery life went, welcome to the tiny-current detective agency. Somewhere in that board, a sleepy sensor, a leaky capacitor, or a supposedly “off” transistor may be sipping current in the nanoamp range. That is the kind of current so small it makes a standard multimeter shrug, yawn, and ask whether you meant milliamps instead.
But here is the delightful twist: in some cases, the nano-ammeter you need is already sitting in your toolbox. Not because your handheld digital multimeter suddenly became a lab-grade electrometer overnight, but because the voltage measurement mode on many meters can be repurposed to infer ultra-small current. It is a clever hack, a useful field trick, and a reminder that electronics is often just applied mischief with a calculator.
This article breaks down how that trick works, why it sometimes works surprisingly well, when it absolutely does not, and what separates a “good enough for the bench” setup from the sort of low-current measurements that make professional electrometers cost real money. Along the way, we will talk about input impedance, burden voltage, leakage current, guarding, transimpedance amplifiers, and the cruel reality that your fingerprints can be part of the circuit.
What Does “Nano-Ammeter” Really Mean?
A nanoammeter measures current in nanoamps, or one-billionth of an ampere. That is 10-9 A. For perspective, this is the territory of capacitor leakage, photodiode dark current, sensor bias current, insulation leakage, and ultra-low-power standby circuits. In other words, it is the neighborhood where signals are tiny, errors are nosy, and the room humidity suddenly develops a personality.
Conventional digital multimeters are excellent general-purpose tools, but they are not optimized for the deepest end of low-current measurement. Standard DMMs are usually comfortable above the microamp level, while specialized instruments such as picoammeters and electrometers are designed for much smaller signals. That is why professional low-level measurement gear focuses obsessively on things normal circuits barely notice: insulation resistance, cable motion, board contamination, shielding, and noise.
The Clever Trick: Measure Voltage, Then Infer Current
The basic idea is simple enough to fit on a sticky note. In voltage mode, a digital multimeter has a known input impedance. If a tiny current flows into that input, it creates a tiny voltage across that impedance. Measure the voltage, divide by the impedance, and you have current. It is Ohm’s law wearing a fake mustache.
That is the core of the “you already have one” argument. Instead of forcing your meter to directly measure nanoamps on its current range, you let the meter stay in voltage mode and use its input resistance as the effective current-to-voltage converter. In many handheld meters, DC voltage input impedance is greater than 10 MΩ, while special low-impedance modes intentionally lower that value to avoid ghost voltage readings. For ultra-small current work, you care deeply about which mode you are in, because the wrong one turns your clever hack into a very expensive guess.
In the maker world, one memorable example showed that a common handheld meter could be used to estimate very small leakage currents by relying on its voltage input behavior. It was not magic. It was calibration, patience, and a willingness to treat a humble meter like a known resistor with a screen attached.
Why This Works Better Than You Might Expect
Low current measurement often comes down to converting current into voltage cleanly enough that something practical can read it. A resistor can do that, and so can a transimpedance amplifier. In voltage mode, your meter’s input network may behave like a high-value resistor that creates a measurable voltage from a tiny current source. If your current source is small, steady, and high impedance, this can work surprisingly well.
It is especially useful for leakage investigations. For example:
- Checking whether a capacitor is leaking more than expected
- Estimating standby drain from a high-impedance sensor node
- Measuring bias currents in test setups
- Getting a sanity check before dragging out specialized lab gear
That last point matters. A lot of practical engineering is not about having the perfect instrument first. It is about asking, “Can I learn something useful with the gear already on the bench?” In that sense, using a multimeter as a nanoammeter is less a stunt and more a highly respectable form of technical thrift.
Where the Trick Starts to Misbehave
Input Impedance Is Not a Fairy Tale Constant
The whole method depends on knowing the meter’s input impedance. If that impedance is not stable, not specified, range-dependent, or affected by internal switching, your current calculation starts drifting from science into fan fiction. Some meters present a nominal 10 MΩ on DC voltage ranges, but not all ranges and not all modes behave the same way. Auto-ranging, protection networks, and low-impedance features can all change the real behavior enough to matter.
The practical fix is calibration. If you want useful results, treat the meter like an unknown until proven otherwise. Check the effective input behavior against a known source or a second instrument. Otherwise, you are not measuring nanoamps; you are measuring optimism.
Burden Voltage Can Wreck the Circuit You Are Measuring
This is the big catch. When current flows into a measuring instrument, the instrument creates a voltage drop. That drop is called burden voltage. In a shunt-style ammeter, burden voltage can be large enough to change the circuit under test and produce a misleading reading. Professional picoammeters and electrometers reduce this burden dramatically by using feedback amplifier techniques, often driving it down to the microvolt range.
Your meter-in-voltage-mode trick can still load the circuit because current flowing into the meter creates a voltage across the meter input. If the source under test cannot tolerate that voltage shift, the circuit changes, the current changes, and your result becomes self-sabotaging. This method is best for sources where that loading is acceptable or where the current source is already high impedance.
Noise Is Not Subtle at Tiny Currents
At nanoamp and picoamp levels, noise strolls into the room like it owns the lease. Thermal noise, amplifier noise, environmental electric fields, and even cable movement can show up in the reading. One of the reasons professional low-current instruments use filtering, averaging, shielding, low-noise cabling, and sometimes battery power is because line noise and handling noise become serious troublemakers.
If your reading changes when you breathe near the test fixture, congratulations: you are officially doing low-current measurement.
What the Pros Use Instead
Professional low-current instruments fall into a few families: picoammeters, electrometers, and source-measure units. These are built to measure currents well below what a DMM normally handles. High-end instruments can resolve femtoamp-level current, offer guarded inputs, use triax connectors, include noise monitoring, and support analysis modes such as trend charts and histograms. They are not being fancy for sport. They are being fancy because at this scale the measurement setup is half the instrument.
The difference is not just sensitivity. It is also measurement architecture. Traditional DMMs often rely on shunt methods. Picoammeters and modern electrometers use feedback ammeter techniques that keep input burden low and improve measurement integrity. That is why an electrometer is the correct answer for truly demanding jobs such as photodiode dark current, gate leakage testing, ion current, or ultra-high-resistance measurements.
The DIY Upgrade Path: Add an Op-Amp, Get Serious
If the multimeter trick is the appetizer, the transimpedance amplifier is the main course. A transimpedance amplifier, or TIA, converts input current into output voltage using an op-amp and a feedback resistor. The input node is held near virtual ground, which means the burden voltage can be much lower than with a simple resistor-based method. That is a major win when the source is sensitive to loading.
Designers use TIAs all over the place: photodiodes, electrochemical sensors, radiation detectors, and precision current monitors. The challenge is that a TIA is not just “slap in a big resistor and profit.” Stability, bias current, capacitance, feedback compensation, and noise all matter. A huge feedback resistor can give you lots of gain, but it also invites bandwidth and noise problems to the party.
This is why ultra-low-bias op-amps exist. Parts built for femtoamp or picoamp input bias current are designed to avoid corrupting the very signal they are supposed to measure. Some are engineered with special pinouts, internal guard buffers, and layout guidance specifically to minimize leakage and preserve high-impedance measurements.
The Real Villains: Leakage, Dirt, and Wiggly Cables
PCB Leakage Is Real
In ordinary circuits, a slightly grimy board is ugly. In low-current circuits, it is electrically opinionated. Flux residue, dust, skin oils, moisture, and contamination can create leakage paths large enough to swamp the current you are trying to measure. That is why application notes for femtoamp measurement spend a shocking amount of time discussing cleaning, drying, and handling. Yes, your circuit board may need a spa day.
Guarding Is Not Optional at the Deep End
Guarding means surrounding a high-impedance node with conductors driven to nearly the same potential, reducing leakage currents and shortening settling time. It is one of the most important techniques in low-current measurement. Guard rings on PCBs, guarded connectors, and shielded enclosures are not exotic luxuries. They are how you stop the outside world from casually editing your readings.
Triboelectric Effects Are Weirdly Rude
Move a cable and you can generate current. That is not poetry; it is triboelectric effect. Friction between insulating and conductive materials in cables can create tiny currents that show up right where you least want them. Secure cables, reduce motion, and use low-noise cable types when the measurement is sensitive enough. At nanoamp levels, a dangling cable is not just messy. It is a co-author.
How to Use Your Existing Meter Without Fooling Yourself
If you want to try the “you already have one” method, use these rules:
- Know the meter’s voltage input impedance. Do not assume. Verify it from documentation or measurement.
- Use DC voltage mode, not low-impedance modes. LoZ features are designed for a completely different problem.
- Start with stable, high-impedance current sources. Leakage tests are better candidates than live power rails.
- Calibrate against a known source. If the method matters, calibration matters more.
- Keep everything clean and still. Dust, moisture, cable motion, and fingerprints are not harmless.
- Average readings when practical. Tiny currents are noisy and patience is a measurement tool.
- Know when to stop improvising. If burden voltage or uncertainty changes the result, move to a TIA or an electrometer.
When This Hack Is Brilliant, and When It Is a Bad Idea
Brilliant: checking leakage currents, comparing devices, troubleshooting suspicious standby behavior, or doing educational experiments where relative measurements matter more than absolute laboratory accuracy.
Bad idea: measuring currents in low-voltage live circuits that will be disturbed by loading, certifying device performance, characterizing semiconductor leakage with strict limits, or publishing data that needs traceable precision. There is a difference between “good bench insight” and “metrology-grade truth,” and low-current work punishes anyone who forgets it.
Conclusion
The phrase “Need a nano-ammeter? You already have one!” is half hack, half challenge, and entirely useful when taken with the right amount of skepticism. Yes, your digital multimeter can sometimes stand in for a nanoammeter by using its voltage input impedance as part of the measurement. That makes it a fantastic tool for troubleshooting, experimenting, and learning how low-current measurement actually works.
But the trick also teaches the deeper lesson: measuring tiny currents is less about staring harder at the display and more about understanding the entire measurement system. Input impedance, burden voltage, leakage, guarding, shielding, cleanliness, cable motion, temperature, and calibration all matter. The smaller the current, the bigger the setup becomes.
So yes, you may already have a nanoammeter. It might be your multimeter, your op-amp, or your favorite bench experiment waiting to happen. Just remember that at nanoamp scale, electronics stops being only about circuits and starts being about manners. Keep it clean, keep it quiet, and do not let the fingerprints near the evidence.
Hands-On Experiences: What It Feels Like to Chase Nanoamps
The first time you try to measure nanoamps with ordinary bench gear, it feels a little like birdwatching with oven mitts. You know something is there. You can see hints of movement. But every time you get close, your own presence changes the result. That is the weird charm of low-current work. It teaches humility faster than almost any other electronics project.
A common early experience goes like this: you set up a test for leakage current, connect your meter, and get a number that seems plausible. Then you move the leads and the number changes. Then you touch the board and the number changes more. Then you lean over the setup with the kind of concentrated stare normally reserved for bomb defusal, and the reading drifts again because the environment is warmer, noisier, or more humid than it was thirty seconds ago. At that moment, you realize the current under test is not the only tiny thing in the room. Your confidence just got smaller too.
That sounds frustrating, but it is actually one of the best learning experiences in analog electronics. Nanoamp measurement forces you to notice details that ordinary lab work lets you ignore. You begin to care about where the cable is resting, whether the board has residue near the input node, whether the meter is auto-ranging, and whether your “ground” is really as quiet as you thought. You stop treating the test setup like a transparent window and start seeing it for what it is: another circuit with its own leakage, capacitance, and attitude.
There is also a very satisfying moment when things finally begin to behave. You clean the board. You secure the cables. You add shielding. You let the reading settle instead of poking the setup every five seconds like an impatient raccoon. Suddenly the drift drops, the noise narrows, and the measurement becomes repeatable. It is the kind of victory that does not look dramatic from across the room, but on the bench it feels glorious.
Many hobbyists and engineers discover that low-current work changes how they think about “cheap” and “expensive” tools. A standard meter can be clever and useful. A well-designed TIA can be amazingly capable. But after enough battles with leakage and burden voltage, you also start to understand why electrometers and picoammeters are built the way they are. Their cost is not just for sensitivity. It is for the engineering discipline embedded in the entire measurement chain.
In practical terms, the experience is often less about hitting a perfect number and more about developing intuition. You learn what a stable reading looks like. You learn when a circuit is being loaded too much. You learn that repeatability is often more valuable than absolute resolution during debugging. And perhaps most importantly, you learn when to trust the hack and when to promote the problem to “real instrument required.” That judgment is worth as much as the reading itself.
So if you try the “Need A Nano-Ammeter? You Already Have One!” approach, expect a little chaos at first. Expect false starts, weird drift, and one or two moments where you suspect the meter is mocking you. Then expect the setup to teach you more about analog measurement than a dozen tidy textbook examples ever could. Because once you have wrestled with nanoamps in the real world, you never look at a clean schematic the same way again.


