
Table of Contents >> Show >> Hide
- What Are No-Bake Cookie Butter Sandwich Cookies?
- Why This Recipe Works (A Little Cookie Science, But Make It Fun)
- No-Bake Cookie Butter Sandwich Cookies Recipe
- Step-by-Step Instructions
- Flavor Variations (Because Cookie Butter Loves Attention)
- Troubleshooting (Save Your Batch, Save Your Mood)
- Storage and Make-Ahead Tips
- Serving Ideas (A.K.A. Excuses to Make Them Again)
- FAQ
- Extra : Real-World “Experience” Notes When Making These Cookies
If your sweet tooth wants “bakery-level cookie vibes” but your oven wants a day off, you’re in the right place. These No-Bake Cookie Butter Sandwich Cookies are chewy, spiced, and downright snackable: two tender no-bake oat cookies hugging a fluffy cookie butter filling. Think: the cozy cinnamon-caramel taste of speculoos (a.k.a. cookie butter’s best friend) turned into a hand-held dessert that disappears faster than your phone battery on a road trip.
This guide goes beyond “mix stuff, hope for the best.” You’ll get a reliable method, texture science (without a lab coat), and lots of ways to customizefrom chocolate drizzle drama to a tangy cheesecake-style filling. Bonus: an experiences section at the end so you know what it actually feels like to make these (and how to avoid the classic no-bake chaos).
What Are No-Bake Cookie Butter Sandwich Cookies?
They’re exactly what they sound like: no-bake cookies (set by cooling, not baking) made with oats and cookie butter flavor, then sandwiched with a creamy cookie butter frosting in the middle. The result is soft-chewy on the outside, smooth in the center, and gently spiced all the way through.
Quick refresher: what is cookie butter?
Cookie butter is a sweet spread made from crushed spiced cookies (often speculoos) blended into a smooth, spoonable paste. It behaves a lot like peanut butter in recipesrich, spreadable, and excellent at making people “taste test” with a spoon five times in a row.
Why This Recipe Works (A Little Cookie Science, But Make It Fun)
Classic no-bake cookies set because the hot sugar-and-fat mixture thickens to the right stage, then firms as it cools. Too little cooking time and your cookies stay gooey. Too much and they turn dry and crumbly. The goal is that sweet spot where the mixture is thick enough to hold its shape but still soft and chewy after cooling.
Cookie butter adds flavor and body, but oats are doing the heavy lifting here. Use quick oats for a cohesive, sandwich-friendly cookie. Old-fashioned oats can work, but they tend to make thicker, rougher cookies that are more “rustic snack” than “neat sandwich cookie.”
No-Bake Cookie Butter Sandwich Cookies Recipe
Yield, timing, and texture
- Makes: About 14–16 sandwich cookies (28–32 individual cookies)
- Active time: ~25 minutes
- Chill/set time: 30–45 minutes
- Texture: Soft-chewy cookies + creamy, fluffy cookie butter filling
Ingredients
For the no-bake cookies:
- 1/2 cup (1 stick) unsalted butter
- 1/2 cup milk (dairy or unsweetened oat milk both work)
- 1 cup granulated sugar
- 1/4 cup packed light brown sugar (for that caramel warmth)
- 1/2 cup cookie butter (creamy speculoos spread)
- 1 1/2 teaspoons vanilla extract
- 1/2 teaspoon ground cinnamon
- 1/4 teaspoon fine salt
- 2 3/4 cups quick oats
- Optional: 1/3 cup finely crushed speculoos cookies (for extra “cookie” punch)
For the cookie butter filling:
- 1/2 cup unsalted butter, softened
- 1/2 cup cookie butter
- 2 to 2 1/2 cups powdered sugar, sifted (to taste and thickness)
- 1 teaspoon vanilla extract
- Pinch of salt
- 1 to 2 tablespoons milk or heavy cream (as needed)
Optional toppings:
- Melted chocolate for drizzling or dipping
- Crushed speculoos cookies for rolling the edges
- Flaky salt (tiny pinch = big personality)
Equipment
- Medium saucepan
- Spatula or wooden spoon
- Sheet pan + parchment paper
- Cookie scoop (helpful for evenly sized cookies)
- Hand mixer or stand mixer (for filling)
Step-by-Step Instructions
1) Prep your landing zone
Line a sheet pan with parchment. If you want super-uniform sandwich cookies, set out a cookie scoop. The more even the cookies, the more “bakery case” they look when stacked.
2) Cook the base mixture to the right stage
- In a medium saucepan over medium heat, melt the butter with the milk, granulated sugar, and brown sugar. Stir until everything looks smooth and the sugar is fully moistened.
- Bring it to a full rolling boilthe kind that keeps bubbling even when you stir. Once it hits that boil, start a timer and boil for 60 seconds.
- Remove from heat immediately. Stir in cookie butter, vanilla, cinnamon, and salt until glossy and fully combined.
Tip: If you like precision (or your stove runs wild), you can use a candy thermometer. You’re aiming for roughly 230–235°F so the cookies set but stay chewy.
3) Add oats and shape the cookies
- Stir in the quick oats (and crushed speculoos, if using) until everything is evenly coated.
- Let the mixture rest for 1–2 minutes so it thickens slightlythis helps prevent “cookie puddles.”
- Scoop tablespoon-sized mounds onto the parchment, then lightly press the tops flat with the back of a spoon. You want them thick enough to hold filling, but flat enough to sandwich neatly.
4) Let them set
Leave cookies at room temp for about 20 minutes, then chill for another 10–25 minutes until firm enough to lift cleanly. (If your kitchen is warm or humid, chilling is your best friend.)
5) Make the cookie butter filling
- Beat softened butter and cookie butter until smooth and fluffy, about 1–2 minutes.
- Add powdered sugar, vanilla, and salt. Beat again until thick and creamy.
- Add milk or cream 1 teaspoon at a time until the filling is spreadable but not runny. You want it to hold a little “swirl” when stirred.
6) Assemble the sandwich cookies
- Flip half the cookies upside down (flat side up).
- Spread or pipe about 1 to 1 1/2 teaspoons filling on each. (Piping looks fancy; spreading is faster. Both taste like victory.)
- Top with remaining cookies and gently press until the filling reaches the edges.
- Chill 10–15 minutes to set the filling for cleaner bites.
Flavor Variations (Because Cookie Butter Loves Attention)
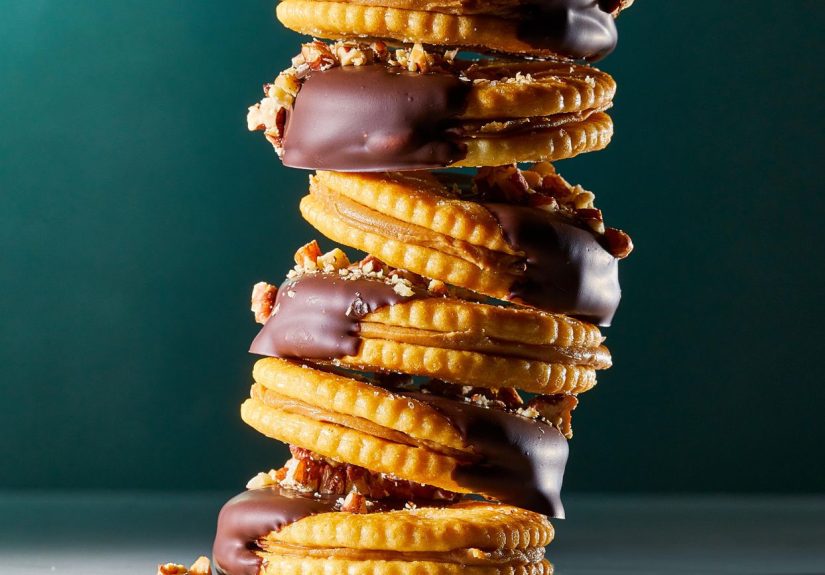
Chocolate-dipped edges
Dip half of each assembled sandwich cookie into melted chocolate. Let set on parchment, then pretend you made them for guests instead of “for research.”
Cheesecake-style filling
Swap in 4 oz softened cream cheese for half the butter in the filling. You’ll get a tangy, rich center. Note: Cream cheese filling means these should be stored in the fridge.
Salted caramel cookie butter
Add 2 tablespoons caramel sauce to the filling and a generous pinch of salt. The flavor becomes “spiced latte meets dessert bar.”
Crunchy “cookie crumb” rims
Roll the edges of the filled cookies in crushed speculoos crumbs. It’s a small step that makes them look like they came from a boutique bakery with a chalkboard menu.
Gluten-free option
Use certified gluten-free quick oats and a gluten-free cookie butter (check labelsbrands vary). If adding cookie crumbs, use gluten-free spiced cookies.
Troubleshooting (Save Your Batch, Save Your Mood)
“My cookies didn’t set.”
- You likely under-boiled the mixture. Next time, wait for a true rolling boil, then time the boil.
- Humidity can slow settingchill longer and consider using the thermometer target (230–235°F).
- Too much liquid or too few oats can also keep cookies soft. Measure carefully.
“My cookies are dry and crumbly.”
- Over-boiling can push the mixture too far, so the final cookie dries out.
- Try reducing boil time slightly (even 10–15 seconds can matter).
- For this batch: sandwich with a slightly looser filling and chillfilling moisture helps.
“My filling is oozing out the sides.”
- Too warm: chill the filling for 10 minutes, then re-whip briefly.
- Too thin: beat in a bit more powdered sugar.
- Cookies too warm: let cookies fully cool/set before filling.
Storage and Make-Ahead Tips
Best texture timeline
These taste amazing the same day, but they also hold up well for a few days if stored properly. Because they’re filled, keep them in a single layer or with parchment between layers to prevent sticking.
How to store
- Room temperature (no dairy filling): In an airtight container for 2–3 days for best texture.
- Refrigerator: 5–7 days is a good quality window, especially if using cream cheese.
- Freezer: Freeze in a single layer until firm, then transfer to a freezer bag/container for up to 2 months for best quality.
Food safety note: If your filling contains cream cheese, milk, or other perishable ingredients, don’t leave the cookies sitting out for long periodsserve, enjoy, and return leftovers to the fridge.
Serving Ideas (A.K.A. Excuses to Make Them Again)
- Coffee pairing: Cookie butter + coffee tastes like a cinnamon-cookie latte without the line.
- Ice cream sandwich upgrade: Freeze assembled cookies and serve with vanilla or coffee ice cream on the side.
- Party platter: Mix versionschocolate-dipped, crumb-rimmed, and classicso everyone thinks you’re extremely organized.
- Gift boxes: Stack with parchment, add a ribbon, and accept compliments graciously.
FAQ
Can I use old-fashioned oats?
Yes, but the cookies will be chunkier and less uniform. For sandwich cookies, quick oats usually give a smoother bite and cleaner edges. If you only have old-fashioned oats, pulse them briefly in a food processor to mimic quick oats.
Do I need to chill them?
You can let them set at room temperature, but chilling helps them firm fasterespecially in warm kitchens or humid weather. If your cookies are soft, chilling is the easiest fix.
Can I make them nut-free?
Cookie butter is typically made from cookies (not nuts), but always check labels for allergen statements and cross-contact warnings. For a nut-free household, use products labeled accordingly.
Can I reduce the sugar?
With no-bake cookies, sugar isn’t just sweetnessit’s structure. Reducing it can make the cookies fail to set. If you want a less-sweet result, keep the cookie base the same and cut sweetness in the filling by using less powdered sugar and adding a pinch more salt.
Extra : Real-World “Experience” Notes When Making These Cookies
Here’s what you’ll likely notice when you actually make No-Bake Cookie Butter Sandwich Cookiesthe little moments that don’t show up in a tidy ingredient list. First, the smell hits fast. Once the butter, sugars, and cookie butter warm together, your kitchen starts smelling like cinnamon toast met a caramel cookie and decided to move in. It’s the kind of aroma that makes people “accidentally” walk through the kitchen multiple times. If you’re making these for a family event, expect at least one person to ask, “Are those done yet?” while clearly hoping you’ll say, “You can taste test one.”
The second thing you’ll experience is how dramatic the mixture looks in the pot versus on the pan. In the saucepan, it’s glossy and loosealmost like a thick syrup. The moment the oats go in, it transforms into something that looks like cookie dough’s rugged cousin. Give it a minute to rest before scooping and you’ll see it tighten up, which is basically the cookie version of “pull yourself together.” That short pause often makes the difference between tidy rounds and cookies that spread into freestyle shapes. (Freestyle shapes still taste great, but sandwich cookies do prefer a little structure.)
You may also notice that your first few scoops aren’t as pretty as the last ones. That’s normal. The mixture continues to thicken as it cools, so your final cookies often look more uniform. If you want to feel like a cookie professional right away, use a cookie scoop and press the tops flat with the back of a spoon. If you want to feel like a cookie artist, embrace the imperfect ones and call them “rustic.”
Filling them is its own mini-adventure. The filling can go from perfect to slightly too soft if your kitchen is warm, or if you got excited and microwaved the cookie butter “just for a second” and then forgot that a second is a concept, not a law. The best experience trick is to keep your filling thick and cool: if it feels loose, chill it for 10 minutes and re-whip. You’ll feel the texture change into something more stable, like frosting that’s ready to hold its ground. When you press the top cookie on, do it gently. This isn’t a burger. You’re not trying to compress it; you’re trying to persuade it.
Another real-life note: these cookies taste different depending on temperature. Straight from the fridge, they’re firmer and more “snappy-chewy.” After 10 minutes at room temp, the cookie butter aroma blooms and the filling gets creamier. If you’re serving them at a party, chilling them first makes them easier to transport and stack, but letting them sit a few minutes before serving makes them taste more flavorful. Also: they are surprisingly filling. Cookie butter plus oats is a sneaky combo that feels light until you realize one sandwich cookie has the confidence of a full dessert.
Finally, the most common experience: you’ll end up making “just one more batch” because people remember these. Not because they’re complicatedbecause they’re comforting, quick, and a little bit funny in how they dodge the oven entirely. Once you’ve nailed the boil time and found your favorite filling thickness, these become a repeat recipethe kind you can make while chatting, cleaning up as you go, and still looking like you planned dessert on purpose.


