
Table of Contents >> Show >> Hide
- Before You Start: The 3 Rules of Looking Expensive on a Budget
- Entryway & Hallways: First Impressions, No Pressure
- Living Room: The “This Feels Designed” Zone
- Kitchen: High Impact, Low Regret
- 11) Paint cabinets (or just the lowers) + new pulls
- 12) Peel-and-stick backsplash (the weekend glow-up)
- 13) Under-cabinet lighting without a full rewire
- 14) Open shelving in one smart spot
- 15) Faux “new counters” with a surface wrap or kit
- 16) Add a toe-kick “trim” moment
- 17) A pull-out trash or hidden recycle station
- Dining Room: Where “Builder Grade” Goes to Retire
- Bedroom: Cozy, Polished, and Not a “Mattress-on-a-Frame” Documentary
- Bathroom: Spa Vibes Without a Spa Invoice
- Closets, Laundry & Utility Areas: The Secret Custom Rooms
- Conclusion: Custom Is a Collection of Small Wins
- The Real-Life Part: What DIY “Custom” Actually Feels Like (and Why It’s Worth It)
“Custom” is a vibe. It’s trim that lines up, lighting that flatters your life choices, and storage that doesn’t look like it was purchased in a panic.
The good news: you don’t need a renovation budget (or a reality TV camera crew) to get there. These budget-friendly DIY projects focus on the details
designers lean onmolding, paint, lighting, and smart built-insso every room feels intentional, polished, and yes… a little bit fancy.
Before You Start: The 3 Rules of Looking Expensive on a Budget
1) Repeat a “signature” detail
Pick one or two finishes (like matte black hardware or warm brass accents) and repeat them around the house. Consistency reads “custom,” even if your
tool collection reads “borrowed from a neighbor.”
2) Add architecture before you add decor
Wall trim, built-ins, and upgraded millwork change the bones of a room. Throw pillows are great, but they can’t distract from builder-grade flatness
forever.
3) Do the unsexy prep
Cleaning, sanding, caulking, and patching are the behind-the-scenes crew of affordable home upgrades. Skip them and your “custom” becomes “why is it
peeling?” real fast.
Entryway & Hallways: First Impressions, No Pressure
1) Skinny “board-and-batten” wainscot
Cost: $40–$150 | Time: 3–6 hours
Add vertical battens and a simple top rail to the lower third of the wall. Paint it the same color as the wall for subtle sophistication, or go
high-contrast for drama (the classy kind).
2) Picture-frame molding (the “instant character” trick)
Cost: $50–$200 | Time: 1 weekend
Create decorative rectangles with trim to fake paneling. Keep spacing consistent and use caulk like you mean it. This is how plain walls start
acting like they pay rent.
3) A real drop zone (hooks + shelf + tray = sanity)
Cost: $25–$120 | Time: 1–2 hours
Install a shelf with a row of hooks underneath and add a small tray or basket for keys and mail. Label one bin “mystery items” and watch clutter
magically obey.
4) Upgrade switch plates and add a dimmer
Cost: $10–$60 | Time: 30–60 minutes
Fresh plates remove the “rental energy.” A dimmer makes overhead lighting less interrogation-room, more “I live in a magazine.”
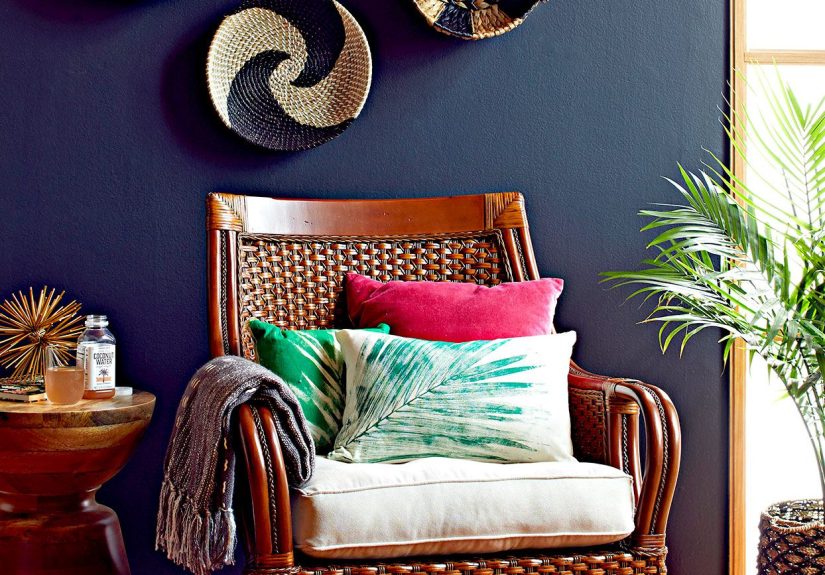
Living Room: The “This Feels Designed” Zone
5) Paint the trim (or paint everything for a luxe wrap)
Cost: $30–$100 | Time: 1 day
Crisp trim in a fresh semi-gloss is classic. For a modern custom look, paint walls and trim the same coloryour room will feel taller, calmer,
and mysteriously more expensive.
6) Faux built-ins using bookcases + trim
Cost: $150–$900 | Time: 1 weekend
Anchor matching bookcases, add trim to cover gaps, and paint everything one color. Style it like a grown-up (some books, some baskets, one object
that says “I travel” even if it was a work trip).
7) Floating shelves that actually look intentional
Cost: $30–$200 | Time: 2–4 hours
Thicker shelves read higher-end. Keep them aligned with somethingwindow trim, a sofa back, or your best guessand you’ll get that built-in vibe
without building a whole-in.
8) A bigger mirror with a DIY “statement” frame
Cost: $25–$150 | Time: 2–3 hours (+ dry time)
Frame a plain mirror with wood strips or a sculpted DIY edge and paint it. Oversized mirrors bounce light and instantly make a room feel curated
(and also help you spot lintbonus?).
9) Upgrade curtain hardware (longer, higher, better)
Cost: $20–$120 | Time: 1 hour
Hang rods wider and higher than the window. It visually enlarges the window and makes the whole room feel custom. Yes, a few inches can change
your life.
10) Dress up the “fifth wall” (aka the ceiling)
Cost: $20–$80 | Time: 1–3 hours
Paint the ceiling a soft tint, add a subtle stencil, or install a lightweight medallion around your light fixture. People won’t know why it looks
elevatedthey’ll just feel it.
Kitchen: High Impact, Low Regret
11) Paint cabinets (or just the lowers) + new pulls
Cost: $60–$250 | Time: 1–3 days
A clean, properly prepped paint job changes everything. Pair it with upgraded hardware and suddenly your kitchen stops giving “builder special.”
12) Peel-and-stick backsplash (the weekend glow-up)
Cost: $50–$200 | Time: 2–5 hours
Great for renters and commitment-phobes. Start from a level line, go slow, and use a smoothing tool to avoid bubbles. Your counters will look like
they got promoted.
13) Under-cabinet lighting without a full rewire
Cost: $20–$120 | Time: 30–90 minutes
Light strips make countertops look cleaner, brighter, and more “custom kitchen showroom.” Also, you can finally see what you’re chopping. Small win.
14) Open shelving in one smart spot
Cost: $25–$150 | Time: 2–4 hours
Replace a short run of uppers (or add shelves over a coffee station). Use matching brackets and keep shelf styling simple: a few dishes, a plant,
and nothing you hate dusting.
15) Faux “new counters” with a surface wrap or kit
Cost: $40–$250 | Time: 1 day
If your counters are dated, a high-quality wrap or refinishing kit can buy you timeand styleuntil a real replacement is in the budget.
16) Add a toe-kick “trim” moment
Cost: $15–$60 | Time: 1–2 hours
Clean, crisp toe-kick lines (and a fresh coat of paint) make cabinets look more finished. This is the kind of detail people notice subconsciously,
like good eyebrows.
17) A pull-out trash or hidden recycle station
Cost: $30–$150 | Time: 1–2 hours
A simple sliding kit or DIY shelf turns chaos into order. Custom kitchens hide the boring stuff. You deserve that energy.
Dining Room: Where “Builder Grade” Goes to Retire
18) Chair rail + paint (or wallpaper) below
Cost: $40–$180 | Time: 1 weekend
Install a chair rail at a consistent height and treat the lower portion differentlypaint, wallpaper, or even a subtle texture. It’s instant
architecture without heavy construction.
19) Swap the light fixture and add a ceiling medallion
Cost: $30–$250 | Time: 1–2 hours
A statement fixture creates a focal point; a lightweight medallion adds “custom home” charm. Together, they make the room feel finished, not
forgotten.
20) DIY banquette bench with hidden storage
Cost: $120–$500 | Time: 1–2 days
Build a simple bench along a wall, hinge the seat for storage, and add cushions. Banquettes scream “designed,” and they also rescue you from chair
clutter.
Bedroom: Cozy, Polished, and Not a “Mattress-on-a-Frame” Documentary
21) DIY upholstered headboard (oversized = custom)
Cost: $60–$220 | Time: 3–5 hours
Plywood + foam + batting + fabric = instant boutique hotel vibes. Mount it higher than you think for that designer proportion.
22) Upgrade window treatments (even just the details)
Cost: $25–$200 | Time: 1–2 hours
New curtain panels help, but even new rings, finials, or tiebacks can make existing curtains look elevated. Small changes, big “I have my life
together” energy.
23) Accent wall behind the bed (paint, peel-and-stick, or stencil)
Cost: $25–$150 | Time: 2–6 hours
One wall of pattern or color creates a focal point without overwhelming the room. Bonus: it distracts from the laundry chair. You know the one.
Bathroom: Spa Vibes Without a Spa Invoice
24) Replace the mirror (or “frame” the existing one)
Cost: $20–$180 | Time: 1–2 hours
A modern mirror changes the whole vanity wall. If replacing isn’t possible, add a simple wood frame and paint it to match your hardware.
25) Re-caulk and refresh grout lines
Cost: $10–$60 | Time: 2–4 hours
It’s not glamorous, but it’s transformative. Clean edges and bright grout make tile look newer, cleaner, and more custom than “I tried my best.”
26) Add over-toilet storage that looks built-in
Cost: $40–$220 | Time: 2–4 hours
A shelf tower or floating shelves, trimmed and painted, turns dead space into intentional storage. Keep it minimal: baskets, towels, one plant that
enjoys humidity.
Closets, Laundry & Utility Areas: The Secret Custom Rooms
27) A closet “system” made from shelves + matching bins
Cost: $50–$250 | Time: 2–6 hours
Add one shelf up high, one at eye level, and consistent bins below. Label everything. A closet that functions well feels custom because it’s
tailored to your actual life, not an imaginary influencer’s.
Conclusion: Custom Is a Collection of Small Wins
The most convincing DIY room makeover ideas aren’t always the biggest projectsthey’re the ones that look intentional: trim that lines up, lighting
that flatters, storage that disappears, and finishes that repeat like they were planned. Pick two or three projects that solve a real annoyance
(ugly walls, bad light, zero storage), do them well, and let the “custom” feeling compound from room to room.
The Real-Life Part: What DIY “Custom” Actually Feels Like (and Why It’s Worth It)
Here’s the honest truth about affordable home upgrades: the “custom” look usually happens in the last 10% of the projectthe part where you’re tired,
slightly dusty, and wondering if ordering takeout counts as a building permit. DIYers often start strong (music on, tools out, confidence high) and then
hit the classic mid-project dip: the paint looks weird when it’s half-dry, the trim doesn’t meet perfectly in one corner, and you suddenly notice every
wall in your house is approximately one degree out of square. Congratulations: you’re doing it right.
The best experience hack is planning for momentum, not perfection. For example, if you’re installing molding, pre-paint it before it goes on the wall.
If you’re painting cabinets, set up a simple “door drying zone” so you’re not playing a stressful game of “don’t touch that” for 48 hours. If you’re
doing peel-and-stick anything, measure twice, then measure once more because the pattern repeat will humble you. The projects in this list are meant to
be approachable, but they still reward patienceespecially when you’re aligning battens, spacing picture frames, or trying to keep shelves level while
gravity offers unhelpful opinions.
Another real-life lesson: custom-looking work is mostly about the finishing steps people skip. Caulk is basically Photoshop for trim. Wood filler is a
tiny miracle in a tube. Sanding turns “crafty” into “clean.” And lightingoh, lightingcan make a perfectly good upgrade look questionable if it’s harsh.
Many DIYers report that once they add warmer bulbs, a dimmer, or under-cabinet lighting, suddenly the same room feels calmer and more upscale. It’s not
your imagination; good lighting is the difference between “cute” and “whoa, did you hire someone?”
Expect a little mess, but also expect weird joy in the smallest moments: the first time you step back from a newly trimmed wall and it looks like it
belongs in an older, character-filled home; the first time your entryway hooks actually catch backpacks instead of eating them; the first time your
“faux built-ins” look so convincing that a friend asks what contractor you used. (Your contractor’s name is You. Payment accepted in compliments.)
One more thing: DIY projects change how you use your home. When you build a banquette, you eat at the table more. When you fix the closet, mornings are
less chaotic. When you add a drop zone, your counters stay clearer. These are functional upgrades disguised as decor, and they’re the reason budget-friendly
DIY projects can make a house feel truly custombecause the space starts working the way you actually live.
If you’re deciding what to do first, choose the project that removes the biggest daily annoyance. A small, well-executed upgrade gives you confidence
and makes the next one easier. That’s the secret: you’re not “doing 27 projects.” You’re stacking small wins until your whole home feels designed on
purposeby a person with taste, humor, and possibly a caulk gun.


