
Table of Contents >> Show >> Hide
- Why a Metal Paper Organizer Is the Perfect Upcycle Candidate
- Pick Your Base: What to Upcycle (and What to Avoid)
- Before You Paint: Design Your Paper System (So the Organizer Actually Helps)
- Tools and Materials: What You’ll Actually Use
- Step-by-Step: How to Upcycle a Metal Paper Organizer
- Make It Look Custom: Easy Upgrades That Feel Fancy
- Mounting Options: Desk, Wall, or Cabinet Side
- How to Keep Paper from Taking Over Again
- Budget Breakdown: What This Upcycle Typically Costs
- Conclusion: Your Paper Deserves a Home (Not a Pile)
- Experience Notes: What You’ll Probably Run Into (and How to Win Anyway)
- 1) The organizer looks clean… until you start sanding
- 2) Rust keeps “reappearing” like a bad sequel
- 3) Spray paint runs happen when you get confident
- 4) The finish feels dry… but fingerprints still show up
- 5) You realize the problem wasn’t the organizerit was the system
- 6) The most satisfying part is the “drop zone” effect
Somewhere in the wild, there’s a perfectly good metal paper sorter sitting in a garage sale box, priced at “please take this away,”
quietly waiting to become the hero of your home office. If you’ve ever watched mail multiply on your counter like it’s auditioning for a
nature documentarycongrats. You’re the target audience for a Hometalk-style upcycle: practical, budget-friendly, and just creative enough
to make you feel like a wizard with a spray can.
In this guide, you’ll turn a tired metal organizer (or any metal rack that can hold paper) into a good-looking, hard-working station for
bills, school forms, receipts, and the mysterious “important-looking” envelopes you’re afraid to open. We’ll cover choosing the right piece,
removing rust, prepping for paint, adding personality, and setting up a paper system that doesn’t collapse the second life gets busy.
Why a Metal Paper Organizer Is the Perfect Upcycle Candidate
Metal organizers are basically built for the job: they’re sturdy, thin-profile, and usually shaped in a way that makes paper behave.
The downside? Many older ones look… aggressively beige. Or rusty. Or both. The upside is that paint, primer, and a few smart tweaks can
give you something that looks boutique without charging you boutique prices.
- Durability: Metal holds its shape and survives daily use better than many flimsy plastic trays.
- Better footprint: Wall-mount it or tuck it against the side of a cabinet for “I have my life together” vibes.
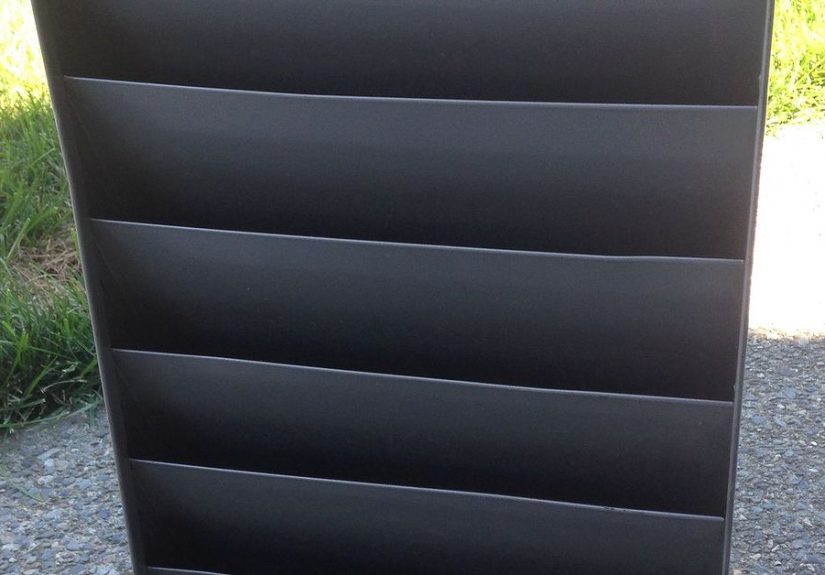
- Style flexibility: Matte black? Warm white? A “hammered metal” finish that hides imperfections? Yes.
- Sustainability: Upcycling keeps usable materials out of the waste stream and reduces the need to buy new.
Pick Your Base: What to Upcycle (and What to Avoid)
You don’t need the exact same organizer to get the same results. The best base is the one you can find cheaply and safely use.
Look for pieces with slots or shelves that fit letter-size paper (8.5 x 11 inches), folders, or notebooks.
Great candidates
- Vintage metal letter sorters and desktop paper racks
- Metal magazine racks (especially sturdy ones)
- Wire file holders or vertical file sorters
- Metal wall baskets or tiered mail organizers
- Old office “in/out” trays with a metal frame
Proceed with caution
- Sharp edges: If it feels like it wants to fight you, it might need edge sanding or rubber trim.
- Flaking mystery coatings: Some older finishes may be unstable. Prep thoroughly, and if you’re unsure, paint outdoors and wear proper protection.
- Severe structural rust: Surface rust is fixable. Rust that has eaten holes or weakened joints is a “nope.”
Before You Paint: Design Your Paper System (So the Organizer Actually Helps)
An organizer isn’t magic; it’s a parking lot. If everything is allowed to park forever, you’ve just built a nicer-looking traffic jam.
The goal is a simple flow: paper arrives, paper gets sorted, paper exits (filed, paid, scanned, shredded, recycled).
A simple “3-lane highway” sorting plan
- Action: bills to pay, forms to sign, invitations you need to RSVP to
- To File: anything you must keep (tax docs, warranties, medical statements, contracts)
- Out: shred/recycle (junk mail, duplicate inserts, expired flyers)
If you’ve got kids, add a fourth lane: School. If you run a side hustle, add Business. Keep it honest:
more lanes = more decisions = more procrastination.
Tools and Materials: What You’ll Actually Use
You can do this with basic supplies. Fancy tools are optional; patience is not.
- Dish soap + warm water (or a degreaser) and a rag
- Wire brush or abrasive pad
- Sandpaper: medium grit (around 120) and fine grit (around 220)
- Rust removal option: white vinegar soak/wipe, baking soda paste, or a rust remover (as needed)
- Metal primer (spray primer formulated for metal)
- Spray paint (or a paint + primer combo designed for metal)
- Optional clear coat (for extra protection)
- Painter’s tape + drop cloth/cardboard
- Gloves, eye protection, and a mask/respirator rated for paint fumes
- Mounting hardware if wall-mounting (screws + anchors appropriate for your wall type)
Step-by-Step: How to Upcycle a Metal Paper Organizer
Step 1: Clean it like you mean it
Even “clean-looking” metal can be coated with oils, dust, and garage-sale mystery film. Wash with warm soapy water, rinse,
and dry thoroughly. If it’s greasy (kitchen-adjacent finds often are), use a degreaser and wipe again.
Step 2: Tackle rust and peeling paint
Surface rust is common and fixable. Start by scraping loose rust and flaking paint with a wire brush or abrasive pad.
For stubborn rust, use a household method like vinegar or a baking-soda paste, then scrub and wipe clean.
Dry completelyrust loves moisture like a cat loves ignoring you.
Step 3: Sand for grip (the secret sauce)
Paint sticks better to a slightly rough surface. Sand the whole piece with medium grit first, then smooth with fine grit
if needed. Focus on corners, edges, and any repaired areas. Wipe away dust with a clean cloth.
Step 4: Prime the metal
Primer is your “paint insurance.” Apply light, even coats of a primer formulated for metal. Don’t try to cover everything
in one heavy passspray runs are not a cute design choice (unless you’re going for “sad candle” aesthetic).
Let primer dry per the label instructions.
Step 5: Spray paint in thin coats
Use multiple light coats rather than one thick coat. Keep the can moving in smooth passes, and spray from a consistent distance.
Let each coat flash off (dry a bit) before the next. Two to three coats is common, depending on color and coverage.
Step 6: Optional: seal it for longevity
If your organizer will be handled frequently or placed where humidity is an issue, a clear protective topcoat can help.
Choose one compatible with your paint (and test on the underside first).
Make It Look Custom: Easy Upgrades That Feel Fancy
Labels that don’t scream “temporary”
- Clip-on label holders: Great for a vintage office vibe.
- Paint-pen lettering: Clean, modern, and surprisingly forgiving.
- Small tags + twine: Cute, but keep them short so they don’t tangle.
Add function with smart attachments
- Magnet strip: For paper clips, binder clips, or a tiny pair of scissors.
- Hook underneath: For keys or a lanyard (hello, drop zone).
- Mini shelf: A small wood strip can create a spot for stamps and envelopes.
Use finishes that hide imperfections
If your organizer has dents, pitting, or “character,” choose a finish that works with it:
satin, matte, or textured/hammered spray paints are excellent for disguising flaws while looking intentional.
Mounting Options: Desk, Wall, or Cabinet Side
Desktop
Best if you process papers daily and want everything within arm’s reach. Add felt pads underneath so it doesn’t scratch
your desk or wobble.
Wall-mounted
Perfect for small spaces. Mount it near your entryway for mail, or above your desk for “inbox” control. If the organizer
wasn’t designed for wall mounting, you can often add picture-hanging hardware, keyhole hangers, or a backing boardjust
be sure it’s secure and rated for the load.
Cabinet side “command corner”
A sneaky-great option: mount it to the side of a bookshelf or cabinet. Papers stay visible, but not scattered.
This is the organizational equivalent of hiding vegetables in mac and cheese.
How to Keep Paper from Taking Over Again
The organizer is step one. The habit is step two. Here’s a realistic plan that doesn’t require you to become a different person.
The 5-minute daily reset
- Empty junk mail immediately into recycle
- Move “Action” papers to a single visible slot
- Once you complete an action, file it or scan it and recycle the physical copy (when appropriate)
A weekly “paper appointment”
Pick a consistent time (Sunday evening, Friday afternoonwhatever works). File what needs filing, shred what needs shredding,
and clear out anything that has become “emotional support paperwork.”
Budget Breakdown: What This Upcycle Typically Costs
- Base organizer: often free to $10 from thrift stores, yard sales, or your own stash
- Primer + paint: depends on brand/finish; one can of each is usually enough
- Extras: labels, hooks, magnets, and hardware are optional and easy to keep cheap
The real payoff isn’t just saving moneyit’s getting a piece that fits your workflow, your space, and your style.
Store-bought organizers can be great, but they rarely solve your exact paper problem.
Conclusion: Your Paper Deserves a Home (Not a Pile)
An upcycled metal paper organizer is a small project with big ripple effects: your desk clears, your entryway calms down,
and you stop playing “where did I put that form?” at the worst possible time. The trick is pairing the makeover with a simple
paper routineAction, File, Outand giving yourself permission to keep it easy.
Paint it a color that makes you happy. Label it in a way that makes sense to your real life. And if you mess up a coat of paint?
Congratulations: you’ve just created “version one.” DIY always gets better on version two.
Experience Notes: What You’ll Probably Run Into (and How to Win Anyway)
Let’s talk about the part nobody posts in the glamorous “after” photo: the little surprises that show up when you’re transforming
metal into something magazine-worthy. If you’ve never upcycled metal before, expect a tiny learning curveand a huge payoff.
Here are the most common “yep, that happened” moments and how to handle them without rage-quitting into a bag of chips.
1) The organizer looks clean… until you start sanding
This is normal. Sanding reveals scratches, old drips, and random texture you couldn’t see before. The good news is you don’t need
perfection; you need a surface the primer can grip. If you uncover flaky paint, don’t ignore itremove what’s loose, feather the edges
with sandpaper, and keep going. A textured finish can hide a lot of “history,” which is a polite way of saying “this thing used to live
behind a filing cabinet since 1998.”
2) Rust keeps “reappearing” like a bad sequel
If rust is stubborn, it usually means moisture was trapped or you didn’t fully remove loose corrosion. Hit it again with a wire brush,
wipe it dry, and prime properly. If you’re painting in humid weather, drying takes longer and rust can be more persistent. Consider painting
on a drier day, and always store the piece indoors while it cures. Metal is dramatic: it wants ideal conditions and compliments.
3) Spray paint runs happen when you get confident
Runs are the classic “I can totally do this in one coat” mistake. When you see a run, don’t try to wipe it while wet unless you enjoy
turning a small problem into modern art. Let it dry, sand the run smooth, and re-spray lightly. Thin coats feel slower, but they save time
because you won’t be doing the DIY version of customer support for your own project.
4) The finish feels dry… but fingerprints still show up
Paint can be “dry to the touch” long before it’s fully cured. If you start loading paper immediately, you might leave marks or scuffs.
Give it time. If you’re impatient (same), set up a temporary paper tray while the organizer cures. Your future self will thank you for not
embedding a thumbprint into the finish like a DIY fossil.
5) You realize the problem wasn’t the organizerit was the system
This is the big one. Once the organizer looks great, you’ll notice paper still piles up if you don’t have clear categories and a routine.
Keep labels simple and honest: “Pay,” “File,” “Kids,” “Business,” “To Scan.” Then commit to a short weekly reset. The best organizer is the one
you’ll actually use when you’re tired, busy, and operating on pure vibes.
6) The most satisfying part is the “drop zone” effect
When your mail has a home, your counters stop being a sorting station. That tiny shift changes the feel of your space. You’ll be amazed how quickly
a wall-mounted organizer near the door can reduce clutter. It’s not just organizationit’s stress prevention disguised as a cute upcycle.
Bottom line: expect a few hiccups, plan for a couple extra drying hours, and keep your system simple. The glow-up is real, and the daily convenience
is even better. You’re not just painting metalyou’re building a small routine that makes your home office (or kitchen corner “office”) feel calmer.


