
Table of Contents >> Show >> Hide
- How Yoga Can Help When You Have Diabetes
- Safety Tips Before You Start
- 11 Yoga Poses for Diabetes: Step-by-Step
- Pose 1: Mountain Pose (Tadasana)
- Pose 2: Cat–Cow (Marjaryasana–Bitilasana)
- Pose 3: Child’s Pose (Balasana)
- Pose 4: Seated Forward Bend (Paschimottanasana)
- Pose 5: Bridge Pose (Setu Bandhasana)
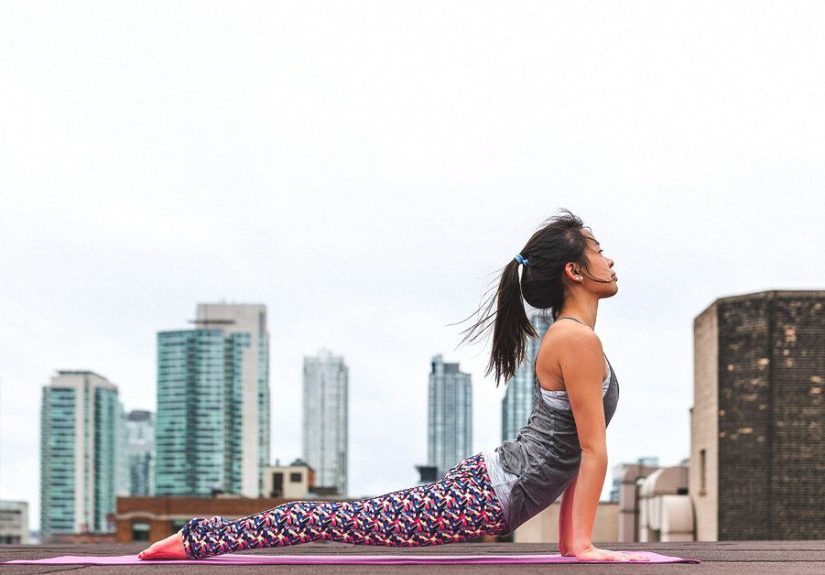
- Pose 6: Cobra Pose (Bhujangasana)
- Pose 7: Chair Pose (Utkatasana)
- Pose 8: Supine Spinal Twist (Jathara Parivartanasana)
- Pose 9: Legs-Up-the-Wall (Viparita Karani)
- Pose 10: Reclining Bound Angle Pose (Supta Baddha Konasana)
- Pose 11: Easy Pose with Breath Awareness (Sukhasana + Pranayama)
- How Often Should You Practice Yoga for Diabetes?
- Real-Life Experiences with Yoga for Diabetes (500-Word Insight)
- Bottom Line: Let Yoga Support Your Diabetes Journey
If you live with diabetes, you already know the usual advice by heart: eat well, move more, take your meds, manage stress. Helpful? Yes. Exciting? Not exactly. That’s where yoga strolls in, rolls out a mat, and says, “Let’s make this whole blood sugar thing a little more enjoyable.”
Yoga combines movement, breathing, and mindfulness in a way that can support blood sugar management, reduce stress, and improve overall health. Research suggests that yoga may help lower fasting and post-meal glucose, improve A1C, support weight management, and reduce stress hormones that nudge blood sugar up. Mind–body practices like yoga are now being recognized by diabetes and endocrine experts as a useful complement to standard care, not a replacement.
Below, you’ll find 11 beginner-friendly yoga poses for diabetes that focus on gentle movement, stress relief, and building strength. You don’t need to be flexible. You don’t need fancy gear. You only need a mat, a bit of space, and your healthcare provider’s green light before you start any new exercise routine.
How Yoga Can Help When You Have Diabetes
Before we dive into the poses, it helps to understand why yoga keeps showing up in diabetes research and guidelines.
1. Improved Blood Sugar and Insulin Sensitivity
Regular physical activity helps muscles use more glucose, which can lower blood sugar and improve insulin sensitivity. Several studies suggest that yoga can reduce fasting blood glucose, post-meal glucose, and A1C levels in people with type 2 diabetes, especially when practiced consistently alongside other healthy habits.
2. Less Stress, More Stable Numbers
Stress can make blood sugar spike by releasing hormones such as cortisol and adrenaline. Yoga’s slow breathing, meditation, and mindful movement help calm the nervous system and reduce stress, which may translate into more stable readings over time.
3. Better Sleep, Mood, and Self-Care
Living with diabetes isn’t just a physical job; it’s an emotional and mental one. Yoga is linked with better sleep, less anxiety, improved mood, and more self-awarenessall of which can make it easier to stick to meds, food plans, blood sugar checks, and other self-care routines.
Important note: Yoga is a support tool, not a cure for diabetes. Always work with your healthcare provider to adjust medications and overall treatment, especially if your activity level changes.
Safety Tips Before You Start
- Talk to your healthcare team first. Ask whether there are any limitations based on your blood sugar, blood pressure, eye health (like retinopathy), neuropathy, or heart disease.
- Check your blood sugar. Especially if you use insulin or certain oral meds, monitor before and after a new yoga routine to understand how your body responds.
- Keep fast-acting carbs nearby. Glucose tablets, juice, or regular soda can help in case of low blood sugar.
- Skip intense or risky poses at first. The poses below are gentle on purpose. Save advanced inversions or deep backbends for a later date (or neveryour choice!).
- Move with curiosity, not punishment. If something hurts (sharp pain, not mild stretch), back out of the pose.
11 Yoga Poses for Diabetes: Step-by-Step
Try these poses in order as a short sequence, or sprinkle a few into your day. Aim for slow breathing in and out through the noseabout 4–6 breaths per minute if it feels comfortable.
Pose 1: Mountain Pose (Tadasana)
Why it helps: This “simple” standing pose improves posture, balance, and body awareness. It’s a great way to start a practice and check in with your energy level and breath.
How to do it:
- Stand with your feet hip-width apart, toes pointing forward.
- Spread your toes and press evenly through your feet.
- Gently engage your thighs, lengthen through the spine, and relax your shoulders down.
- Let your arms rest by your sides, palms facing forward or in toward your thighs.
- Soften your jaw, breathe slowly for 5–10 breaths, and simply notice how you feel.
Make it easier: Stand with your back lightly touching a wall for extra support.
Pose 2: Cat–Cow (Marjaryasana–Bitilasana)
Why it helps: Gentle movement of the spine helps release back tension and encourages deeper breathing, supporting relaxation and circulation.
How to do it:
- Come to hands and knees with wrists under shoulders and knees under hips.
- Cow: Inhale, arch your back, lift your chest and tailbone, and let your belly relax toward the mat.
- Cat: Exhale, round your spine, tuck your chin toward your chest, and draw your belly gently in.
- Move slowly between Cat and Cow for 8–10 rounds of breath.
Make it easier: If your wrists are sensitive, place your forearms on blocks or come higher onto your fists.
Pose 3: Child’s Pose (Balasana)
Why it helps: This rest pose calms the nervous system and gives you a physical “reset button” anytime stress or frustration with diabetes management kicks in.
How to do it:
- From hands and knees, bring your big toes together and widen your knees as much as comfortable.
- Sink your hips back toward your heels and stretch your arms forward, resting your forehead on the mat or a pillow.
- Relax your shoulders and jaw. Breathe slowly for 1–3 minutes.
Make it easier: Place a folded blanket between calves and thighs or bring your knees closer together.
Pose 4: Seated Forward Bend (Paschimottanasana)
Why it helps: This pose stretches the back of the legs and may gently stimulate the abdominal region. Forward folds are also naturally calming for many people.
How to do it:
- Sit with your legs extended in front of you. Sit on a folded blanket if your hamstrings are tight.
- Flex your feet and sit tall as you inhale.
- Exhale and hinge from your hips, reaching toward your shins, ankles, or feet.
- Keep your spine long (it’s fine if your knees are bent). Hold for 5–10 breaths.
Make it easier: Loop a strap or towel around the soles of your feet and hold the ends instead of reaching for your toes.
Pose 5: Bridge Pose (Setu Bandhasana)
Why it helps: Bridge strengthens the legs and glutes, opens the chest, and can enhance circulation. Strength training, even with body weight, is known to support better insulin sensitivity.
How to do it:
- Lie on your back with knees bent and feet hip-width apart, heels close to your sitting bones.
- Press your feet into the mat and slowly lift your hips on an inhale.
- Keep your knees over your ankles and avoid rolling to the outer edges of the feet.
- Optionally, interlace your hands under your back and gently roll your shoulders closer together.
- Hold for 5–8 breaths, then slowly lower down.
Make it easier: Place a yoga block or firm pillow under your sacrum and rest your hips on it for supported Bridge.
Pose 6: Cobra Pose (Bhujangasana)
Why it helps: A gentle backbend that opens the chest and may help counteract the slouched posture of long desk hours or screen time. Backbends can feel energizing when fatigue is part of your diabetes story.
How to do it:
- Lie on your stomach with legs extended and the tops of your feet on the mat.
- Place your hands under your shoulders, elbows hugging in.
- Inhale and gently lift your chest, using mostly back strength and only light pressure from your hands.
- Keep your neck long and gaze slightly forward, not straight up.
- Hold for 3–5 breaths, lower down, and repeat 2–3 times.
Make it easier: Lift only a few inches off the matthis is still Cobra, not “not trying hard enough.”
Pose 7: Chair Pose (Utkatasana)
Why it helps: Chair Pose builds strength in your legs and core, and engaging more muscle mass helps your body use glucose more effectively.
How to do it:
- From Mountain Pose, inhale and raise your arms overhead, palms facing each other.
- Exhale and bend your knees as if you’re sitting back into an invisible chair.
- Keep your weight in your heels and your chest gently lifted.
- Hold for 3–8 breaths, then straighten your legs to come up.
Make it easier: Stand in front of a real chair and hover a few inches above the seat, or lightly touch the chair back for balance.
Pose 8: Supine Spinal Twist (Jathara Parivartanasana)
Why it helps: This gentle twist can feel great after meals (wait at least 1–2 hours), helping release tension in the back and promoting a sense of relaxation in the belly area.
How to do it:
- Lie on your back and draw your knees toward your chest.
- Extend your arms out like a T, palms facing up.
- Let your knees slowly fall to one side while turning your head in the opposite direction.
- Take 5–10 slow breaths, then switch sides.
Make it easier: Place a pillow or folded blanket under your knees to reduce the intensity.
Pose 9: Legs-Up-the-Wall (Viparita Karani)
Why it helps: This restorative pose encourages relaxation, may ease swelling in the feet and ankles, and is perfect at the end of a long day of blood sugar charts and carb counting.
How to do it:
- Sit sideways next to a wall with one hip touching it.
- Gently swing your legs up the wall as you lower your back onto the floor.
- Adjust so your sitting bones are a few inches from the wall (comfort over perfection).
- Rest your arms by your sides, palms up, and close your eyes.
- Stay for 5–15 minutes if it feels good.
Make it easier: Place a folded blanket under your hips or bend your knees slightly if your hamstrings feel tight.
Pose 10: Reclining Bound Angle Pose (Supta Baddha Konasana)
Why it helps: Deep relaxation can lower stress hormones that interfere with blood sugar management. This pose opens the hips and invites a long, quiet rest.
How to do it:
- Lie on your back and bring the soles of your feet together.
- Let your knees fall out to the sides.
- Place pillows or blocks under your thighs if the stretch is intense.
- Rest your hands on your belly or by your sides, breathing calmly for 3–10 minutes.
Make it easier: Cover yourself with a blanket and add a small pillow under your head for full “cozy mode.”
Pose 11: Easy Pose with Breath Awareness (Sukhasana + Pranayama)
Why it helps: Mindfulness and controlled breathing (pranayama) are core components of yoga and linked to better stress management and potentially better glycemic control.
How to do it:
- Sit cross-legged on a cushion or in a chair with your feet flat on the floor.
- Lengthen your spine and rest your hands on your thighs or in your lap.
- Close your eyes or soften your gaze.
- Inhale through your nose for a count of 4, pause for 1, exhale for a count of 6.
- Continue for 5–10 minutes, or as long as is comfortable.
Make it easier: Shorten the counts (for example, inhale 3, exhale 4) and use a chair if sitting on the floor is uncomfortable.
How Often Should You Practice Yoga for Diabetes?
Most research on yoga and diabetes involves people practicing several times per week for at least 8–12 weeks. You don’t have to start with daily hour-long sessions to see benefits, though.
- Beginner goal: 10–20 minutes, 3 times per week.
- Next step: 30 minutes, 4–5 times per week, mixing movement and restorative poses.
- Gold standard: Combine yoga with other activities, like walking after meals and gentle strength training, to fully support blood sugar and heart health.
Remember: consistency beats intensity. A few calm poses most days will do more for your diabetes than one heroic, once-a-month yoga marathon.
Real-Life Experiences with Yoga for Diabetes (500-Word Insight)
Statistics and studies are important, but they don’t always capture what it feels like to live with diabetes and experiment with something new like yoga. Here’s what a yoga-for-diabetes journey can look like in real life, based on common experiences many people share.
The “I’m Not a Yoga Person” Start
Many people with diabetes arrive at yoga class with crossed arms and a skeptical eyebrow. Maybe you’ve thought, “I’m not flexible,” “I’m too old,” or “My blood sugar is too unpredictable for this.” It’s completely normal to worry about lows, highs, or just feeling awkward. The first few sessions often focus less on impressive poses and more on practical details: Where do I put my glucose meter? Should I check my blood sugar beforehand? Can I drink water on the mat? (Yes.)
Over time, that initial awkwardness usually softens. Students discover that everyone is busy wobbling in Chair Pose and adjusting bolsters in Child’s Pose. There’s often a sense of relief when an instructor says, “Listen to your body first, my voice second.” For people used to strict diabetes rules and numbers, this kinder, more intuitive approach to movement can feel refreshingly new.
Small Wins That Add Up
At first, the “results” from yoga may not show up as dramatic A1C changes. Instead, they tend to appear in smaller, everyday ways:
- Noticing your shoulders are less tense when you check your blood sugar.
- Falling asleep a bit faster on nights you do Legs-Up-the-Wall.
- Feeling more confident walking into your next doctor’s appointment because you’ve added something positive to your routine.
These are subtle, but they matter. Over weeks and months, less stress, better sleep, and more regular movement start to layer together in your favor.
Working Around Real-Life Challenges
Of course, it’s not always smooth sailing. Sometimes blood sugar runs high and you feel sluggish on the mat. Other times it dips low and you need to pause, treat, and rest. Certain complicationslike neuropathy, joint issues, or retinopathymay mean you modify or skip specific poses.
This is where a collaborative mindset helps. Many people find success by letting their yoga teacher know they have diabetes (you can share as much or as little detail as you’re comfortable with), bringing snacks or glucose with them, and planning practice times around meals and medications. Your healthcare provider can also offer guidance on how yoga fits into your broader activity plan.
From “Exercise Task” to “Self-Care Ritual”
Over time, yoga often shifts from “one more thing I should do for my diabetes” to “something I do for myself.” The mat becomes a place where you’re not being judged by numbers, lab tests, or food logs. You’re simply breathing, moving, and learning how your body feels todaynot how it “should” feel.
Some people find a favorite mini-routine that fits their lifestyle: three poses in the morning (Mountain, Cat–Cow, Chair), a short relaxation in the afternoon (Child’s Pose, Reclining Bound Angle), and a calming breath practice before bed. Others go to a weekly class or follow an online video designed for beginners or for people with chronic conditions.
Regardless of the exact routine, the most powerful “experience” many people report is this: yoga helps them feel like they’re working with their body, not constantly battling against it. When you live with diabetes, that shiftfrom struggle to partnershipcan be just as valuable as any lab result.
Bottom Line: Let Yoga Support Your Diabetes Journey
Yoga won’t replace your medications, your meal plan, or your glucose meterbut it can absolutely join the team. Gentle poses, mindful breathing, and regular practice can help lower stress, support more stable blood sugar, and improve how you feel in your body overall.
You don’t need to be perfect. Start where you are: two or three poses, a few minutes of slow breathing, and a willingness to keep showing up. Over time, those small, steady steps can make a meaningful difference in how you experience life with diabeteson and off the mat.


