
Table of Contents >> Show >> Hide
- Way #1: Color with Fills & Strokes (The “I Want Control” Method)
- Way #2: Color with Live Paint (The “Coloring Book Mode” Method)
- Way #3: Color with Gradients (The “Depth & Glow” Method)
- Way #4: Color with Recolor Artwork (The “Palette Exploration Turbo” Method)
- Quick Color Workflow Checklist (So Your Files Stay Sane)
- Common Coloring Mistakes (and How to Fix Them)
- Real-World Coloring Experiences (So You Don’t Learn the Hard Way)
- Experience #1: The “One Tiny Change” That Turns Into 40 Changes
- Experience #2: Coloring Line Art Like It’s 2009 (and Regretting It)
- Experience #3: The Gradient Phase (a.k.a. “Everything Must Glow”)
- Experience #4: Clients Love OptionsYou Don’t Have to Suffer for Them
- Experience #5: The “Print Surprise” You Learn Once
- Conclusion
Coloring in Adobe Illustrator can feel like ordering coffee at a place where “small” is a personality type and the menu has 47 kinds of foam.
But once you know which coloring workflow fits which kind of artwork, Illustrator goes from “Why is everything white?” to “Okay, yes, I am a wizard.”
This guide breaks down four reliable, real-world ways to add color in Adobe Illustratoreach with practical steps, best-use cases, and
“please don’t do this to yourself” tips. We’ll cover:
- Fills & Strokes (the classic, clean, controllable approach)
- Live Paint (the “coloring book mode” for line art and messy overlaps)
- Gradients (from simple depth to juicy, modern blends)
- Recolor Artwork (the fastest way to explore palettes and make clients think you did 12 versions)
Along the way, you’ll pick up color-management habits (global swatches, consistency, palette-building) that save hours on revisionsand help your
work look intentional instead of “I panicked and clicked teal.”
Way #1: Color with Fills & Strokes (The “I Want Control” Method)
If Illustrator had a hometown, it would be called Fill & Stroke. Nearly everything you color in Illustrator boils down to these two:
a fill colors the inside of a shape; a stroke colors the outline.
When to use it
- Logos, icons, UI assets, infographics
- Flat illustrations with clean, closed shapes
- Brand systems where color consistency matters (hello, global swatches)
How to do it (step-by-step)
- Select an object with the Selection tool (V) or Direct Selection tool (A).
- In the toolbar, click the Fill square (solid box) or Stroke square (hollow box) to target what you’re coloring.
-
Choose a color from:
- Swatches (great for consistent palettes)
- Color panel (great for mixing and fine-tuning)
- Eyedropper (I) to sample an existing color in your document
- Optional but powerful: open the Appearance panel to stack multiple fills/strokes or apply them at different levels (object vs. group).
Pro tips that prevent “why did everything change?” moments
-
Use Global Swatches for brand colors: change the swatch once, and everything using it updates automatically.
It’s like a “master switch” for your palette. - Name your swatches (e.g., “Brand Blue 100” instead of “Blue-ish #14”) so future-you doesn’t send past-you a strongly worded email.
- If color selection feels inconsistent, check whether you’re targeting the fill or the stroke. (Yes, this has fooled everyone. Yes, even the confident ones.)
Mini example: A two-color icon with scalable consistency
Say you’re building a set of app icons. You make two global swatchesPrimary Navy and Accent Coral.
Every icon uses only those swatches. When marketing later decides “navy should be slightly less serious,” you edit the Primary Navy swatch once,
and the entire icon set updates without you hunting down stray shapes like a color detective.
Way #2: Color with Live Paint (The “Coloring Book Mode” Method)
Live Paint is Illustrator’s secret weapon for coloring line art, overlapping shapes, or drawings where things look enclosed
even when they technically aren’t perfect closed paths.
When to use it
- Illustrations made of strokes (line art) that need fills
- Overlapping shapes creating “cells” you want to color quickly
- Art traced from sketches where you don’t want to manually close every gap
How to do it (step-by-step)
- Select the line art (all the paths you want to color).
- Go to Object > Live Paint > Make. Your artwork becomes a Live Paint Group.
- Select the Live Paint Bucket tool (it’s often nested under Shape Builder).
-
Pick a color (from Swatches or Color panel), then click inside regions to fill them.
You can also paint strokes, depending on your Live Paint settings. - When you’re done (and you want normal editable shapes), go to Object > Live Paint > Expand.
Why Live Paint feels like cheating (in a good way)
-
It can fill “faces” even if paths aren’t perfectly closed, as long as the enclosed area is recognized.
That’s a lifesaver for complex sketches and quick vector drawings. - It supports filling with solid colors, gradients, and even patterns inside Live Paint faces.
Pro tips for fewer surprises
-
Use the arrow keys to cycle through neighboring swatches while the Live Paint Bucket is active.
This makes coloring fastlike flipping through a marker set. - If areas won’t fill, investigate gaps. Live Paint has gap-detection behavior, but extremely open shapes can still break the “enclosed” logic.
- If you need clean production artwork: Expand when finished so the result behaves like normal Illustrator shapes.
Mini example: Coloring a traced sketch without closing every line
Imagine you’ve vector-traced a hand-drawn character. Some lines don’t quite meet because the sketch was loose.
Instead of zooming in and patching tiny gaps for an hour, you convert the drawing to a Live Paint Group and start filling regions immediately.
Once it’s colored, you expand it into standard shapes for final polish.
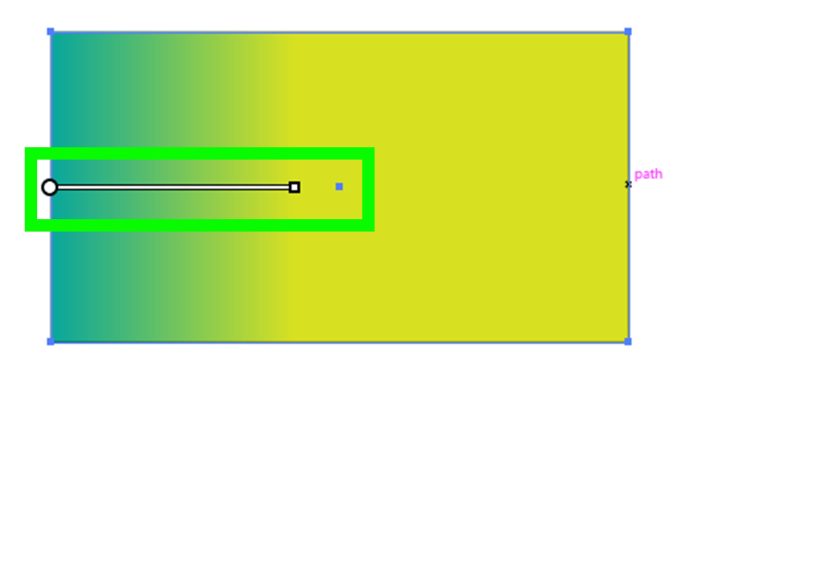
Way #3: Color with Gradients (The “Depth & Glow” Method)
Gradients are how you take an illustration from “nice” to “wait… how did you do that?”
Illustrator supports linear, radial, and freeform gradientseach useful for different looks.
When to use it
- Adding depth, lighting, and form to flat shapes
- Modern backgrounds, blobs, and soft transitions
- Product illustrations where subtle shading matters
How to do it (step-by-step)
- Select your shape.
- Open the Gradient panel or use the Gradient tool.
-
Apply a gradient type:
- Linear for straight transitions
- Radial for circular lighting effects
- Freeform for multi-point blends inside a shape
- Edit gradient stops (colors), adjust the angle, reposition the gradient line/handles, and fine-tune transitions until it looks intentional.
Freeform gradients: the “painted” look without painting
Freeform gradients let you place multiple color points (or lines) inside a single shape and blend them organically.
They’re excellent for glossy highlights, colorful shadows, and trendy “liquid” gradient styleswithout building ten separate shapes.
Pro tips for gradients that don’t look accidental
- Use fewer stops than you think. Two to four intentional colors usually beats twelve “maybe this will fix it” colors.
- Save gradients as swatches once you nail one. Reusing gradients makes a full illustration feel unified.
- If your gradient looks muddy, choose colors with clearer separation in lightness (one lighter highlight, one midtone, one shadow).
Mini example: Turning a flat circle into a “3D” button
Start with a circle. Apply a radial gradient where the highlight is slightly off-center (top-left), the midtone sits in the middle,
and a darker edge wraps around the bottom-right. Instantly: depth. Add a subtle stroke or a second fill via the Appearance panel if you want extra polish.
Way #4: Color with Recolor Artwork (The “Palette Exploration Turbo” Method)
Coloring isn’t just applying colorit’s choosing the right colors. That’s where Recolor Artwork shines.
It lets you swap palettes, assign new harmonies, reduce or remap colors, and iterate quickly without repainting every object manually.
When to use it
- You want multiple colorways fast (social posts, product variants, seasonal campaigns)
- You inherited artwork with chaotic colors and need to unify it
- You need to reduce colors for screen printing or simpler brand systems
How to do it (step-by-step)
- Select the artwork you want to recolor (grouped illustrations work great).
- Open Recolor Artwork (often found under Edit Colors / Recolor options, or via Properties quick actions).
-
Use the interface to:
- Assign new colors to existing ones
- Edit</strong colors as a set (shift a whole palette warmer/cooler)
- Reduce</strong the number of colors for simpler output
- Save</strong the result as a new set of swatches
Color Guide + Recolor = the palette pairing you actually need
The Color Guide panel helps generate harmonious color suggestions (tints, shades, complementary and analogous options)
based on a base color. Combine that with Recolor Artwork and you can explore “safe” color relationships quicklyespecially helpful when you’re
building a palette that needs to feel cohesive.
Pro tips for Recolor like a pro
- Start with swatches. If your art uses named swatches (especially global ones), recoloring becomes cleaner and more predictable.
- Make variants on purpose. Try a “Muted,” “High Contrast,” and “Pastel” version. Clients love options. Designers love not redoing work.
- Reduce colors when preparing art for limited ink processes. Fewer colors can look more premium when chosen intentionally.
Mini example: One illustration, four seasonal versions
You’ve drawn a vector coffee cup illustration for a brand. You need a spring, summer, fall, and winter palette.
Instead of manually repainting each shape, you use Recolor Artwork to create four color themes, save each palette as swatches,
and export all versions in a fraction of the time. Bonus: everything stays structurally identical, so the campaign looks consistent.
Quick Color Workflow Checklist (So Your Files Stay Sane)
- Pick your color mode early: RGB for screens, CMYK for print workflows.
- Use Swatches (and preferably Global Swatches) for consistency.
- Use Live Paint for line art and complex overlaps; Expand if you need standard shapes afterward.
- Use Gradients intentionallyfewer stops, clearer light-to-dark structure.
- Use Recolor Artwork for fast palette exploration and client-ready variants.
Common Coloring Mistakes (and How to Fix Them)
1) “Why won’t this shape fill?”
Check whether the path is closed, whether you’re targeting Fill vs Stroke, and whether the object has “None” applied.
If it’s line art, consider Live Paint instead of trying to manually close every gap.
2) “My colors look inconsistent across the illustration.”
This usually happens when you pick colors ad hoc. Use a controlled palette via Swatches,
and consider Recolor Artwork to unify and rebalance the whole piece.
3) “My gradient looks like a sad bruise.”
Reduce the number of colors and adjust contrast. Good gradients typically follow a clear lighting idea: highlight, midtone, shadow.
If you’re blending two saturated colors, add a midpoint color that bridges them instead of letting Illustrator “guess.”
Real-World Coloring Experiences (So You Don’t Learn the Hard Way)
The funniest thing about coloring in Illustrator is that it’s rarely the coloring that breaks youit’s the recoloring.
Most designers (and anyone who has ever received the message “Can we see it in… like… a slightly happier blue?”) eventually develop
a survival kit of habits. Here are a few common experiences people run into, plus what actually helps.
Experience #1: The “One Tiny Change” That Turns Into 40 Changes
A classic scenario: you build a clean illustration using direct colorsno swatches, no system, just vibes.
It looks great… until you need to update the palette. Suddenly you’re clicking on shapes one-by-one, discovering that you used five almost-identical blues,
three “accidentally different” grays, and one rogue teal that appears in the file like a ghost.
The fix is boring but magical: use swatches, and when it matters, use global swatches.
It’s the difference between “palette update” being a two-minute tweak vs. a weekend hobby you didn’t ask for.
Experience #2: Coloring Line Art Like It’s 2009 (and Regretting It)
Many people start by trying to close every little gap in line art with the Pen tooltiny repairs, micro-strokes, zooming until your monitor becomes a telescope.
It works… eventually. But it’s not the fastest path.
Live Paint often provides the “good enough, fast” solution when you’re coloring sketchy drawings, traced art, or overlapping lines.
Then, once the colors are right, you can always expand and refine edges where needed.
Think of Live Paint as your first pass: block color quickly, then polish where it counts.
Experience #3: The Gradient Phase (a.k.a. “Everything Must Glow”)
Gradients are addictive. One day you’re adding a tasteful shadow; the next day your icon set looks like it’s auditioning for a sci-fi movie.
The healthiest approach is to define a purpose for gradients:
depth (light direction), material (metal, glass), or focus (subtle emphasis).
If your gradient doesn’t serve one of those, it might be decorative noise.
Also, a practical trick: reuse the same gradient logic across objects (same highlight direction, similar contrast).
That consistency makes gradients feel like a lighting systemnot random color soup.
Experience #4: Clients Love OptionsYou Don’t Have to Suffer for Them
“Can we see three versions?” is not a threat; it’s an opportunity to look prepared.
Recolor Artwork is the shortcut to delivering variations without rebuilding the piece.
A smart workflow many designers adopt is:
(1) build with swatches,
(2) create a base palette that works,
(3) use Recolor Artwork to explore multiple colorways,
(4) save the winners as swatches, and
(5) export variants quickly.
The best part is that you maintain consistent structure across versions, so the brand feel stays cohesive.
Experience #5: The “Print Surprise” You Learn Once
Another common lesson: colors that look perfect on screen can shift in print if you ignore color mode early.
If you’re creating for print, it’s worth setting expectations:
work in CMYK-aware palettes, test prints when possible, and avoid ultra-neon colors that can’t translate.
For screen work, RGB gives you the broader range. The main point isn’t to fear color modesit’s to choose the right one before you commit
to a palette that only exists in one universe.
In other words: Illustrator coloring becomes dramatically easier when you treat color like a system, not a last-minute decoration.
Pick the method that matches the job, and you’ll spend more time designingand less time yelling at a tiny gap in a path at 400% zoom.
Conclusion
If you remember only one thing, make it this: Illustrator doesn’t have “one” way to colorit has workflows.
Use Fills & Strokes for precision and clean vector control, Live Paint for fast line-art coloring,
Gradients for depth and modern polish, and Recolor Artwork when you need palette exploration and rapid variations.
Combine these methods with smart habitsswatches (global when needed), a consistent palette, and intentional gradient structure
and your coloring process becomes faster, cleaner, and way more revision-proof.


