
Table of Contents >> Show >> Hide
- Why This 3-Ingredient DIY Cleaner Works
- The $0.19 Batch: The Exact Recipe
- How to Use It (Without Turning Cleaning Into Cardio)
- What This Cleaner Is (and Isn’t)
- Countertop Compatibility Guide (Because Not All Counters Are Built the Same)
- Upgrade Options (Still Simple, Still 3 Ingredients)
- Common Mistakes (So Your Countertops Don’t Suffer)
- Troubleshooting: If Something Looks Off
- Storage & Safety Notes
- FAQ
- Conclusion: A Tiny Batch With Big “Why Didn’t I Do This Sooner?” Energy
- Extra: Real-World Experiences & Lessons From Everyday Kitchens (About )
Your countertops work harder than most of us do on a Monday. They catch coffee splashes, onion confetti, mystery sticky spots (how?), and the occasional “I swear that was sealed” olive oil incident. The good news: you don’t need a cabinet full of pricey sprays to keep counters looking fresh. You can make a simple homemade countertop cleaner with three ingredients you probably already own and it can cost about $0.19 per batch if you buy smart.
This DIY spray is designed for everyday cleaning: lifting fingerprints, crumbs, light grease, and general kitchen grime. It’s not trying to audition as a hospital disinfectant (more on that later). Think of it as a reliable “reset button” for your kitchen, minus the chemical smell and the “Why is this $7?” feeling.
Why This 3-Ingredient DIY Cleaner Works
A good countertop spray needs to do three things: loosen grime, cut grease, and wipe away clean without leaving a weird film that makes your counters look like they just lost a fight with a fog machine. This recipe hits those goals using:
- Water to dilute, spread, and help lift water-based messes.
- Dish soap (a surfactant) to break up grease and food residue so it doesn’t just smear around.
- Rubbing alcohol to help dissolve oily smudges, speed drying, and reduce streaking.
The trick is balance. Too much soap can leave streaks. Too much alcohol can evaporate so fast you feel like you’re polishing a countertop mirage. The ratios below are tuned for daily, real-life kitchens.
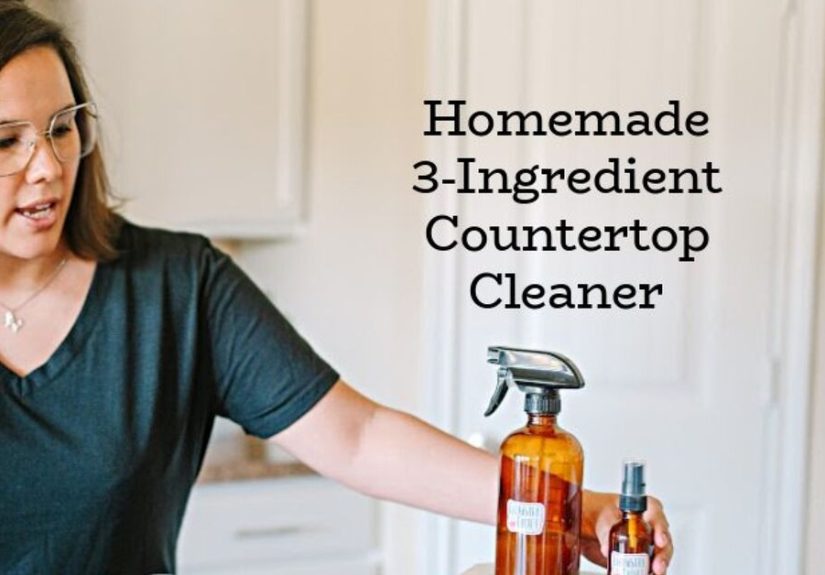
The $0.19 Batch: The Exact Recipe
This makes about 16 ounces (2 cups) of cleanerenough to keep in a standard spray bottle and use for a couple weeks, depending on how chaotic dinner gets.
Ingredients (3 total)
- 1 3/4 cups water (tap is fine)
- 1/4 cup rubbing alcohol (70% isopropyl is common)
- 1 teaspoon liquid dish soap (a basic, non-lotion type works best)
Directions
- Add the water to a clean 16–20 oz spray bottle.
- Pour in the rubbing alcohol.
- Add 1 teaspoon dish soap (go easymore soap is not more better).
- Swirl gently to mix. Don’t shake like a smoothie unless you enjoy spraying countertop foam forever.
- Label the bottle: “Counter Cleaner (Alcohol + Soap)” so nobody mistakes it for a science fair project.
How does it get to $0.19?
The cost depends on what you pay for alcohol and dish soap, but here’s a realistic example using typical U.S. store-brand pricing:
- Rubbing alcohol: If a 32 oz bottle costs about $3.00, then 1/4 cup (2 oz) costs $0.19 (2/32 × $3.00 = $0.1875).
- Water: basically pennies per gallon (and you’re using less than a pint).
- Dish soap: 1 teaspoon is a tiny fraction of the bottleusually just a cent or two.
So yes, about $0.19 is achievable when alcohol is the main cost driver and you’re not over-pouring soap. If your alcohol is pricier, you may land closer to $0.25–$0.40. Still a bargain compared to many ready-to-spray cleaners.
How to Use It (Without Turning Cleaning Into Cardio)
- Clear the counter (or at least move the toaster like you mean it).
- Spray lightly across the surfaceno need to drench.
- Wait 20–30 seconds so the soap can loosen grime.
- Wipe with a microfiber cloth (best for streak-free shine), or a clean dish towel. For raw chicken zones, use a disposable paper towel and then wash hands.
- Buff dry if you want that “I totally have my life together” finish.
What This Cleaner Is (and Isn’t)
Let’s keep it honest, because kitchens deserve the truth:
- It is an excellent everyday countertop cleaner for crumbs, smudges, and light grease.
- It is not a guaranteed “kills 99.9%” disinfectant. The alcohol percentage in this budget recipe is intentionally low to keep cost down and reduce streaking.
- If you need true disinfection after risky messes (raw meat juice, someone sneezed directly onto the island like it owed them money), use an EPA-registered disinfectant and follow its label instructions for contact time.
Countertop Compatibility Guide (Because Not All Counters Are Built the Same)
Quartz (Engineered Stone)
Quartz is generally easy to maintain and often does best with mild soap and water-style cleaning. This recipe is typically gentle enough for day-to-day use, especially since it avoids harsh acids and abrasives. Avoid aggressive scrubbing pads and skip harsh chemical cleaners that can dull the finish over time.
Granite, Marble, and Other Natural Stone
Natural stone likes it calm: pH-neutral, non-abrasive, and not acidic. That’s why vinegar and lemon-based DIY sprays are risky on stone (etching is foreverlike that haircut in your high school yearbook). This recipe avoids strong acids, but you should still:
- Test in a small, hidden spot first.
- Use a soft cloth, not a scrub pad.
- Don’t let liquid sit for longspray, wipe, dry.
If your stone is newly sealed and you’re cautious, you can also make a stone-leaning version: use the same recipe but reduce soap slightly (to avoid residue) and always buff dry.
Laminate
Laminate is the practical friend who doesn’t need fancy maintenance. Gentle soap-based cleaning works well. The main caution is standing water near seams. Don’t soak the edgeswipe, then dry.
Butcher Block / Wood Counters
Wood is beautiful…and thirsty. Use this cleaner sparingly on butcher block, and always wipe with a damp cloth followed by a dry cloth. Avoid leaving moisture sitting on the surface. For routine care, many homeowners stick to mild soap and water, then re-oil as needed.
Upgrade Options (Still Simple, Still 3 Ingredients)
Same three ingredients, different ratioslike changing your coffee order depending on how hard your day is about to be.
“Grease Mode” Ratio
- 3 cups water
- 1 cup rubbing alcohol
- 5–10 drops dish soap (drops, not tablespoons)
This version dries fast and helps with oily fingerprints and stovetop-adjacent grime. It’s still an everyday cleanernot a promised disinfectant.
Common Mistakes (So Your Countertops Don’t Suffer)
1) Using vinegar “because the internet said so”
Vinegar has its place, but natural stone is not that place. Acid + stone can lead to etching and dullness. If you’re not sure what your countertop is made of, play it safe and avoid acidic DIY sprays.
2) Overdoing the soap
Soap residue is the #1 reason DIY cleaners leave streaks. Start with 1 teaspoon. If you see haze, reduce soap and buff dry.
3) Thinking “clean” automatically means “disinfected”
Cleaning removes grime. Disinfecting is a different job and often requires a product designed for it, used correctly. When in doubt after high-risk messes, follow product labels for disinfection.
Troubleshooting: If Something Looks Off
My counters look streaky
- Use less soap next time.
- Switch to microfiber (it grabs residue better than paper towel).
- Finish with a dry buffing cloth.
It’s not cutting the grease
- Let the spray sit 30–60 seconds before wiping.
- Use “Grease Mode” ratio for a week and see if it improves.
- For heavy buildup, pre-wipe with warm water, then spray and wipe again.
My stone feels dull
Stop and reassess. Dullness can be residue, wear, or etching. Try wiping with plain water and a microfiber cloth, then drying thoroughly. If dullness persists, consult your countertop manufacturer or a stone-care pro for stone-safe products.
Storage & Safety Notes
- Label the bottle and store away from kids and pets.
- Keep away from open flames; alcohol is flammable.
- Don’t mix with bleach or other strong cleaners in the same bottle.
- Use in a ventilated area if you’re sensitive to smells.
FAQ
Can I add essential oils?
You can, but then it’s no longer a strict 3-ingredient recipe. If you do add fragrance, keep it minimal and remember some oils can be irritating or may interact with certain finishes.
Will this damage stainless steel appliances?
For stainless, spray onto the cloth (not directly onto the appliance), wipe with the grain, then buff dry. Always test first and avoid saturating seams or edges.
Can I use this on glass?
It can work for quick glass touch-ups, but soap can leave haze on mirrors/windows. For glass, reduce soap dramatically (a couple drops) or use a dedicated glass formula.
Conclusion: A Tiny Batch With Big “Why Didn’t I Do This Sooner?” Energy
A homemade 3-ingredient countertop cleaner is one of those small household upgrades that punches above its weight. It’s cheap, fast to make, and surprisingly good at handling the daily messes that life throws at your kitchen. Stick to gentle techniques, respect your countertop material, and you’ll get clean counters without the dramaor the price tag.
Extra: Real-World Experiences & Lessons From Everyday Kitchens (About )
Let’s talk about what actually happens once a DIY cleaner leaves the “cute recipe” stage and enters the wild ecosystem known as your kitchen. People don’t just clean countertopsthey clean around homework, phone calls, air-fryer experiments, and the kind of snack decisions that generate crumbs like they’re being sponsored by a bakery.
One of the most common “aha” moments comes from switching how you wipe, not just what you spray. Many households report that the same homemade cleaner suddenly seems twice as effective once they ditch the old sponge and use a microfiber cloth. Microfiber grabs grease and residue instead of spreading it like butter on toast. That’s when counters stop looking “kind of clean” and start looking “clean-clean.”
Another frequent experience: the first time someone makes a DIY cleaner, they get ambitious with dish soap. It’s understandabledish soap feels like the hero of the sink, so surely more means cleaner, right? In reality, extra soap often means streaks. The fix is simple and oddly satisfying: cut the soap amount in half, wipe once with the cleaner, then do a quick second pass with a barely damp cloth and a final dry buff. People are always surprised that the “secret” is using less.
Then there’s the “countertop material reality check.” A lot of households move into a home with stone counters and assume every DIY solution is fair game. That’s when someone tries vinegar because it’s “natural” and ends up wondering why the counter looks cloudy in certain spots. The lesson learned (and repeated) is that natural doesn’t always mean compatible. Gentle and pH-neutral is the safer long-term strategy for stoneespecially if you want your counters to keep their shine.
Families with kids often love this recipe for a different reason: it helps with the sticky handprint economy. You know the one. The same tiny humans who can’t find their shoes can somehow locate the only surface in the room that shows fingerprints. A light spray, a short dwell time, and one wipe usually takes care of itno harsh fumes, no sticky residue that attracts more grime.
Finally, there’s the “smell factor.” Many store-bought sprays smell like “ocean breeze,” which is impressive considering the ocean does not smell like that. With this DIY formula, the scent is mild and disappears quickly. That becomes a quality-of-life upgrade for people who clean while cooking or who simply don’t want their kitchen to smell like a chemistry lab. The biggest takeaway from real kitchens: the best cleaner is the one you’ll actually use consistently. A cheap, simple spray you can remake in two minutes tends to get used which means counters stay cleaner, longer, with less effort.


