
Table of Contents >> Show >> Hide
- Why a DIY Concrete Tabletop Still Works So Well
- Before You Start: Plan the Design Like a Realist
- Tools and Materials You’ll Likely Need
- How to Make a DIY Concrete Tabletop
- Common DIY Concrete Tabletop Mistakes to Avoid
- Indoor vs. Outdoor Concrete Tabletops
- Is a DIY Concrete Tabletop Worth It?
- What the Experience of Building One Is Really Like
- Final Thoughts
- SEO Tags
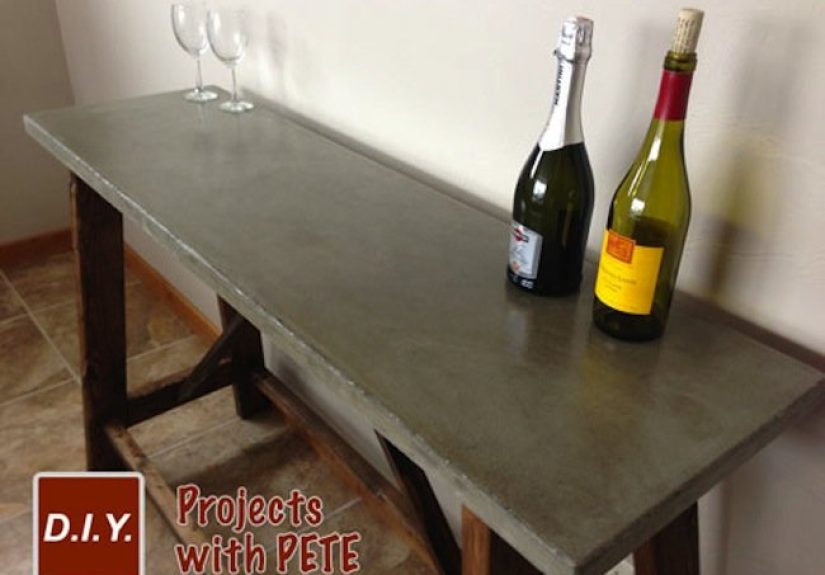
If you love furniture that looks expensive, sturdy, and just a little bit dramatic, a DIY concrete tabletop is hard to beat. It has that clean, architectural style that makes wood legs look sharper, black steel bases look cooler, and ordinary patio furniture look like it suddenly started charging rent. Better yet, a concrete top can be made at home with planning, patience, and a healthy respect for gravity. Because yes, this thing will be heavy. “Cute but heavy” is basically concrete’s brand identity.
A Bob Vila-style project is all about practical results: use the right form material, mix carefully, reinforce where it matters, cure the slab properly, and seal the finished surface so it holds up in the real world. That is the difference between a tabletop that looks custom and one that looks like a sidewalk auditioning for a dinner party. The good news is that the process is very doable for an experienced DIYer. The less-good news is that concrete is not fond of rushed decisions, sloppy forms, or the sentence, “I’ll just eyeball it.”
This guide breaks down how to make a DIY concrete tabletop that looks polished, performs well, and avoids the usual rookie mistakes. Whether you are building a dining table, a coffee table, a workbench top, or an outdoor table, the principles are the same: build a clean mold, reinforce the slab, keep the mix under control, work out air bubbles, allow enough curing time, then sand and seal for durability.
Why a DIY Concrete Tabletop Still Works So Well
A concrete tabletop remains popular because it delivers three things homeowners love: customization, durability, and style. You can control the size, thickness, edge profile, color tone, and finish. Want a sleek industrial slab? Easy. Want a warmer look paired with wood or rattan? Also easy. Want something that survives sun, spilled drinks, and the occasional guest who thinks coasters are “just a suggestion”? Concrete is happy to volunteer.
It is also one of the few tabletop materials that can feel equally at home indoors and outdoors. For an outdoor setup, a sealed concrete top stands up beautifully to weather, heat, and hard use. Indoors, it adds that high-end custom look people usually associate with boutique kitchens, designer coffee shops, or a renovation budget that definitely made somebody sweat.
The catch is that concrete is not forgiving during the build. If your mold is crooked, your slab will be crooked. If your seams are messy, the edges will faithfully preserve that mess like a tiny gray fossil record of your bad choices. So the real secret is not magic. It is prep.
Before You Start: Plan the Design Like a Realist
Before mixing anything, decide how the tabletop will be used. A dining table needs comfortable proportions and a stable base. A coffee table can be thicker-looking and more sculptural. An outdoor side table can be smaller and simpler. In every case, think about weight first. A concrete slab is not a lightweight craft project. Even a relatively small top can be heavy enough that moving it alone is a bad idea and a great way to invent new vocabulary.
Choose a size that matches your base and your workspace. Also think through thickness. A thicker slab looks impressive, but it adds weight fast. Many DIY builders aim for a practical thickness that looks substantial without turning the finished piece into a deadlift competition. If the table base is flimsy, fix that problem now. Concrete will not become lighter out of sympathy.
Tools and Materials You’ll Likely Need
Most DIY concrete tabletop projects use a combination of standard carpentry tools and concrete supplies. The usual list includes melamine-coated particleboard for the mold, screws, silicone or polyurethane caulk, reinforcement mesh or rebar depending on the size, concrete countertop mix, mixing tools, a straight board for screeding, sandpaper or a sander, and a quality concrete sealer. Add safety gear too: gloves, eye protection, and a dust mask or respirator when mixing dry material. Concrete may look calm in the bag, but it turns into a diva once opened.
If you want added color, you can use pigments designed for concrete. If you want a smoother finish, have sanding pads ready. If you want a sink cutout or other opening, rigid foam inserts can help shape the void inside the mold. For a simple tabletop, however, a clean rectangle is often the smartest place to start.
How to Make a DIY Concrete Tabletop
1. Build a Precise Mold
The mold determines the final shape of the tabletop, so this is where accuracy pays off. Melamine-coated particleboard is a favorite for good reason: it is smooth, affordable, and releases concrete more easily than many other sheet materials. Build the mold upside down, because the surface touching the bottom of the mold usually becomes the top of the finished slab.
Measure carefully and fasten the sidewalls from the outside so they can be removed later without drama. If you are making a table with rounded corners or a special profile, shape that detail now. Do not wait until the pour and suddenly become “creatively flexible.” Concrete loves consistency, not improvisation.
2. Seal Every Inside Seam
Once the mold is assembled, run a smooth bead of caulk along every interior seam. This step does two important jobs: it prevents leakage and it softens the edge slightly so you do not end up with brittle, razor-sharp corners. Smooth the caulk line neatly because the concrete will capture every bump and wobble. Let it cure fully before moving on.
This is one of the least glamorous steps in the project, which is exactly why people rush it. Don’t. A few extra minutes here can save you from spending hours later wondering why your finished piece looks like it was assembled during mild turbulence.
3. Add Reinforcement
Concrete handles compression well, but tabletops also deal with tension and movement, especially when they are lifted, carried, or supported only at the ends. That is why reinforcement matters. For many tabletops, steel mesh is a practical choice. Keep it away from the edges so it does not show through or weaken the perimeter. The goal is to place the reinforcement within the body of the slab, not jammed against the bottom like a forgotten afterthought.
On larger builds, some DIYers also use rebar or specialty reinforcement systems, but for a straightforward tabletop, mesh sized correctly for the slab often gets the job done. Just make sure the reinforcement sits where it is supposed to, not wherever gravity decides it should nap.
4. Mix the Concrete Carefully
Use a countertop mix when possible rather than a basic bag of general-purpose concrete. Countertop blends are made to flow better, finish better, and reduce some of the guesswork. Follow the manufacturer’s water instructions closely. Adding too much water may seem like the easy route, but it weakens the mix and increases the chance of shrinkage and cracking. In other words, wet and sloppy is great for cake batter, not concrete.
Mix thoroughly until the material reaches a workable consistency. Some blends are designed to be flowable without becoming soupy. If you are mixing by hand, take your time and scrape the sides well. Dry pockets and rushed blending can create weak spots or inconsistent color.
5. Pour, Screed, and Vibrate
Pour the mix into the mold and work it into the corners. If you are embedding mesh mid-pour, fill partway, place the reinforcement, then continue filling. Once the mold is full, screed the surface with a straight board using a back-and-forth sawing motion to level the slab. Fill any low spots and screed again until the thickness is even.
Then comes one of the most important steps: vibrating the mold to release trapped air. You can tap the sides with a rubber mallet, use an orbital sander against the form, or gently lift and settle the work surface if the setup allows. The goal is to reduce air pockets and voids, especially along the edges and face. Skip this step and you may end up with a finish that looks more “moon crater” than “modern minimalism.”
6. Cure with Patience
After the pour, cover the slab lightly if needed to slow moisture loss and prevent overly rapid drying. Then let the concrete cure. Not “kind of cure.” Actually cure. This is where many first-time builders get impatient because the slab looks solid before it is truly ready. Concrete gains strength over time, and that curing window matters for both durability and finish quality.
For many DIY countertop-style projects, several days of curing is standard, and longer is often better than shorter. Resist the urge to demold too soon just because the project is starting to look handsome. Plenty of beautiful concrete pieces have been ruined by enthusiastic early handling.
7. Demold, Sand, and Seal
Once the slab has cured sufficiently, remove the mold carefully. Lift the tabletop with help, support it evenly, and do not flex it more than necessary. Then inspect the surface. Some pinholes are normal and can add character, but larger voids may need a slurry fill if you want a more refined finish.
Wet sanding or honing can help smooth the surface and improve sealer adhesion. A matte or satin finish often looks more natural than an overly glossy one, though this depends on your style. Before sealing, make sure any residue from form release, wax, or construction dust is gone. Then apply the appropriate concrete sealer according to its instructions. For a tabletop that will face food, drinks, rain, or daily abuse, the sealer is not optional. It is your insurance policy.
Common DIY Concrete Tabletop Mistakes to Avoid
The biggest mistake is overwatering the mix. The second biggest is treating curing like a suggestion. Other common errors include building a flimsy mold, forgetting reinforcement, neglecting edge cleanup, and using a weak table base that cannot support the slab. Another classic problem is rushing the sealer stage. If the surface is not properly prepped, the sealer may not bond well, and that can lead to blotchy results, weak protection, or premature wear.
Also remember that concrete is wonderfully honest. It will preserve fingerprints in wet mix, rough caulk lines, uneven forms, and every speck of debris you forgot to vacuum out of the mold. In a strange way, that is part of the material’s charm. It rewards care and punishes shortcuts with immediate, visible sarcasm.
Indoor vs. Outdoor Concrete Tabletops
For indoor use, the main concerns are stains, abrasion, and compatibility with the table base and surrounding decor. For outdoor use, moisture management becomes even more important. A sealed outdoor concrete tabletop can perform very well, but it should be maintained over time. Depending on exposure, resealing may be part of the long-term routine. If the table lives in direct weather year-round, expect maintenance to matter more than it would for an indoor piece.
Outdoor tabletops also benefit from thoughtful design choices. Slightly eased edges, a stable base, and careful placement can help prevent chipping and wobble. Concrete is durable, but it is not indestructible. It is more “tough artist” than “superhero.”
Is a DIY Concrete Tabletop Worth It?
Yes, if you enjoy detailed project work and want a custom result that looks far more expensive than the raw materials suggest. A DIY concrete tabletop can be a smart build for a patio table, coffee table, work surface, or statement dining table. It offers a premium look, solid performance, and nearly endless design flexibility.
No, if you hate waiting, dislike precise measuring, or think “structural support” sounds like something other people should worry about. Concrete projects are not difficult in the abstract, but they do require discipline. The builder who plans carefully usually gets a gorgeous slab. The builder who wings it often gets a heavy reminder that physics also has opinions.
What the Experience of Building One Is Really Like
The experience of making a DIY concrete tabletop is equal parts satisfying, humbling, and strangely addictive. It usually begins with confidence. You sketch dimensions, buy the materials, and tell yourself this is just a tabletop, not a suspension bridge. Then you start building the mold and immediately discover that concrete projects are really detail projects wearing work boots. Suddenly you care deeply about whether every seam is straight, whether every screw is flush, and whether your workbench is level enough to satisfy the engineering gods.
The pouring day is the part most people imagine as the “real” build, but by then the outcome is already heavily influenced by everything you did before. If the mold is square and the reinforcement is positioned correctly, the pour feels exciting. If the mold is sketchy, the pour feels like trying to frost a cake while the plate slides off the table. Once the mix goes in, the project becomes wonderfully physical. You scoop, spread, screed, tap, and vibrate the form while telling yourself that all these bubbles will definitely leave on their own. They will not. You have to persuade them.
Then comes the emotional roller coaster of curing. The slab looks done long before it is actually ready, and that is where patience gets tested. Every DIYer knows the temptation to peek, poke, or demold early. This is the stage where concrete teaches character development. Wait too little and you risk chips, cracks, or surface damage. Wait properly and the slab rewards you with strength and a cleaner finish. It is one of those rare home projects where doing nothing for a while is genuinely part of doing it well.
Demolding is the big reveal, and it is usually the moment people fall in love with the material. Even a simple slab has presence. The edges look crisp, the surface has subtle variation, and the whole thing feels custom in a way that manufactured tops often do not. Small pinholes and tonal shifts make it feel real rather than fake-perfect. Sanding and sealing take it from “garage project” to “piece of furniture.” Once the sealer goes on, the color deepens, the surface settles into itself, and the tabletop starts to look intentional instead of merely successful.
What surprises many people is how much they learn from one build. By the end, you understand why caulk lines matter, why low-water mixes are worth respecting, why vibration helps so much, and why everyone keeps talking about curing. You also gain a healthy respect for weight. The first lift of a finished slab tends to answer the question, “Could I have made this thicker?” with an immediate and unified “Absolutely not.”
There is also a weird pride that comes with living with the finished piece. Guests notice it. You notice it. Every time you set down a coffee mug or wipe off rain after a storm, you remember that you built the thing from powder, water, and stubbornness. That is a pretty good feeling. A DIY concrete tabletop is not the fastest project, but it is one of the most rewarding because it combines craftsmanship, design, and practicality in one very solid package.
Final Thoughts
A DIY concrete tabletop is one of those projects that feels ambitious at first and completely logical by the end. The process is not about fancy secrets. It is about following sound technique: build a clean melamine mold, seal the seams, reinforce the slab, mix carefully, vibrate out air pockets, cure with patience, and seal the finished surface properly. Do that, and you can create a table that looks custom-made, performs beautifully, and earns compliments without revealing how many times you stared at drying caulk like it was a life event.
If you want a project with real presence, modern style, and long-term usefulness, this one deserves a spot near the top of the list. Just bring a helper when it is time to move it. Confidence is helpful, but concrete is heavier.


