
Table of Contents >> Show >> Hide
- Why Royal Icing Sometimes Takes Forever to Dry
- Easy Ways to Dry Royal Icing Fast: 7 Steps
- Step 1: Start with Completely Cool Cookies
- Step 2: Use the Right Icing Consistency
- Step 3: Lower the Humidity in the Room
- Step 4: Add Gentle Airflow with a Clean Fan
- Step 5: Use a Dehydrator or Dehumidifier Wisely
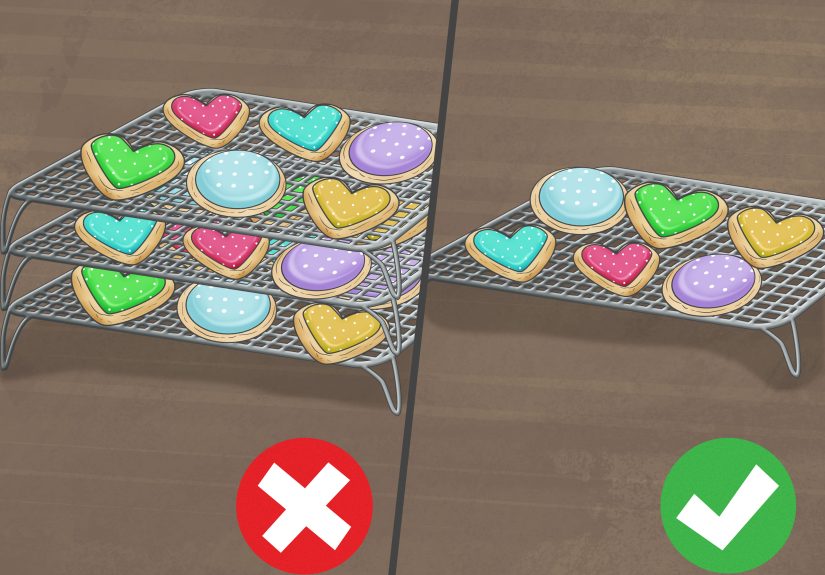
- Step 6: Decorate in Thin Layers and Let Sections Set
- Step 7: Dry Cookies Uncovered at Room Temperature
- Mistakes That Make Royal Icing Dry Slower
- How Long Does Royal Icing Usually Take to Dry?
- A Smart Setup for Faster Royal Icing Drying
- Real-World Experiences: What Bakers Learn the Hard Way
- Conclusion
Royal icing is the overachiever of the cookie world. It looks polished, pipes like a dream, and dries hard enough to survive stacking, gifting, and that one relative who always shakes the cookie tin like it owes them money. But there is one tiny problem: sometimes royal icing dries at the speed of a dramatic movie scene. You know the kind. You stare at it. It stares back. Nothing happens.
If you have ever decorated cookies at night and whispered, “Please dry before morning,” this guide is for you. The good news is that you usually do not need a magic wand. You need a smarter setup. Royal icing dries faster when you manage a few key variables well: cookie temperature, icing consistency, humidity, airflow, and how thickly you apply each layer. Get those right, and the drying process becomes much more predictable.
Below, you will find seven practical steps to help royal icing dry faster without wrecking the finish. You will also learn what slows it down, how long drying usually takes, and what experienced bakers tend to figure out after a few messy batches. Spoiler alert: the icing is not always the villain. Sometimes the weather is the real drama queen.
Why Royal Icing Sometimes Takes Forever to Dry
Before jumping into the quick fixes, it helps to understand what is happening. Royal icing dries because moisture gradually evaporates from the surface and the icing firms into a hard shell. That means anything that adds extra moisture or slows evaporation will delay drying. High humidity, overly thin flood icing, thick decorative layers, and warm cookies are common culprits.
Drying also happens in stages. The surface can crust over fairly quickly, but the icing underneath may still be soft. That is why a cookie can look ready and then smudge the second you stack it. Fast drying is not just about making the top look dry. It is about helping the icing set evenly so the surface stays smooth and the design survives real life.
Easy Ways to Dry Royal Icing Fast: 7 Steps
Step 1: Start with Completely Cool Cookies
This sounds painfully obvious, but it is one of the most skipped steps in home baking. If your cookies are even slightly warm, the heat can create extra moisture under the icing and make the surface harder to control. The result is often a slower set, a softer finish, or icing that spreads more than planned.
Let cookies cool fully on a wire rack before decorating. Not “mostly cool.” Not “cool enough if I squint.” Fully cool. A cookie that still feels faintly warm in the center is not ready. If you want your royal icing to dry fast and smooth, start with a dry, room-temperature base.
Example: if you bake sugar cookies in the afternoon, do not rush straight into flooding them five minutes later. Give them time to cool completely, then decorate. Your icing will behave better and dry more evenly.
Step 2: Use the Right Icing Consistency
If your royal icing is too thin, it may spread beautifully for a minute and then take forever to dry. That is the trade-off. Flood icing needs enough looseness to self-level, but not so much that it turns into edible paint. The more water you add, the longer it usually takes to dry.
For outlines, use a thicker consistency that holds shape well. For flooding, aim for an icing that settles smoothly without becoming watery. A common mistake is thinning all the icing at once until it pours fast. That may feel convenient, but it usually slows drying and increases the chance of craters, uneven surfaces, and color bleed.
Keep small bowls of icing and adjust gradually. Add water drop by drop, not with the reckless optimism of someone pouring cereal milk. If the icing runs off the spoon like soup, you have gone too far. A balanced consistency helps the icing set faster, look shinier, and stay where you pipe it.
Step 3: Lower the Humidity in the Room
Humidity is the secret boss battle of cookie decorating. You can mix perfect icing, pipe beautiful details, and still lose the fight because the room feels like a tropical spa. Moist air slows evaporation, which means royal icing stays wet longer. It can also contribute to bleeding between colors and a dull finish.
If the weather is humid, try decorating in the driest room in the house. Turn on the air conditioner, especially a dry setting if you have one. Close windows if outdoor air is damp. Even simple changes can help create a more icing-friendly environment.
If you decorate often, a small dehumidifier can make a noticeable difference. It is not glamorous, but neither is watching your white icing absorb enough moisture to become emotionally unstable. A drier room helps the icing crust sooner and reduces the chances of sticky surfaces later.
Step 4: Add Gentle Airflow with a Clean Fan
One of the easiest ways to dry royal icing faster is to use a small fan. Gentle airflow helps moisture leave the icing surface more quickly, which encourages a faster crust and can reduce sinking or cratered centers. This is especially useful right after flooding cookies.
The key word here is gentle. You want air moving across the cookies, not a windstorm that sends parchment paper into the next county. Set a clean tabletop fan on low and aim it so the air passes over the tray evenly. Do not aim dusty garage fan air straight at fresh cookies unless your decorating style is “rustic with mysterious particles.”
This trick works especially well for flood icing, base coats, and larger areas that need to crust before you add details. It is simple, affordable, and beginner-friendly, which is why so many cookie decorators swear by it.
Step 5: Use a Dehydrator or Dehumidifier Wisely
If you decorate cookies regularly, a food dehydrator can be a real time-saver. It helps the surface of royal icing dry quickly, which can improve shine, reduce color bleed, and help prevent craters. But there is an important catch: a dehydrator usually helps the top crust form faster, not the entire cookie become fully dry in five magical minutes.
Use it strategically. Short sessions after flooding can help stabilize the surface before you move on to the next layer. That is especially helpful for multi-color cookies or designs with sections that like to misbehave. A dehydrator is not a shortcut to stacking immediately, but it can make the whole decorating process smoother.
If a dehydrator feels like too much equipment, a dehumidifier is another useful option in humid climates. It does not blow directly on the cookies, but it improves the room conditions overall. Think of it as quiet support staff for your icing.
Step 6: Decorate in Thin Layers and Let Sections Set
Thick icing takes longer to dry. That is just the science of it. If you flood too heavily or pile details on top of still-wet sections, you create extra moisture and weight. The result can be sagging, craters, bleeding colors, or designs that smudge when touched.
The fastest way to get a truly dry finish is often to use thinner, controlled layers. Flood the cookie evenly, then let it crust before adding details. If you are piping adjacent colors, give each section a little time before adding the next one. If you are building dimension, patience matters even more.
For example, if you are making flower petals, holiday sweater patterns, or layered lettering, do not try to do everything at once just because you are feeling brave. Let the base set first. You may spend a little longer decorating, but the total drying outcome is usually better and more reliable.
Step 7: Dry Cookies Uncovered at Room Temperature
Once the cookies are decorated, let them dry uncovered at room temperature. Covering them too soon traps moisture and slows the process. Stacking them early is even worse. That is how you end up with fingerprints, smudges, and the deep personal sorrow of ruined detail work.
Avoid the refrigerator for hardened royal icing unless a specific recipe clearly calls for it. In many cases, refrigeration can make the icing soft or sticky because of moisture and condensation. Room temperature is usually the better drying zone.
Place cookies on flat trays or racks in a dry space where they can sit undisturbed. For simple flood work, the surface may set relatively quickly, but detailed designs usually need more time. If you plan to package or stack cookies, wait until the icing is fully dry, not just dry-looking.
Mistakes That Make Royal Icing Dry Slower
Even good bakers accidentally sabotage drying time. Here are the most common reasons royal icing drags its feet:
- Decorating warm cookies
- Adding too much water to flood icing
- Working in a humid kitchen with open windows
- Piping thick layers for every section
- Adding new colors before earlier sections have set
- Covering or stacking cookies too soon
- Using the refrigerator as a shortcut
Fixing even one of these can improve your results. Fixing three or four can make you feel like you suddenly leveled up as a cookie decorator.
How Long Does Royal Icing Usually Take to Dry?
The answer depends on thickness, humidity, room temperature, and the type of decoration. A very light layer may crust fairly quickly, while a more detailed or thicker application can take much longer to harden all the way through.
As a practical guide, thin flood icing on cookies often sets enough for light handling within a couple of hours, while layered details may need at least several more hours. Heavier decorations, transfers, flowers, or thick piped accents can take overnight or even longer. If you need cookies for gifting or packaging, overnight drying is often the safest call.
In other words, “fast” in royal icing world usually means helping the icing set better, not turning it into instant cement. The goal is cleaner, more dependable drying, not unrealistic speed.
A Smart Setup for Faster Royal Icing Drying
If you want the easiest reliable routine, try this combination:
- Bake cookies ahead and cool them completely.
- Mix outline and flood icing separately so you do not over-thin everything.
- Decorate in a cool, dry room.
- Use a small clean fan on low after flooding.
- Let sections crust before adding extra colors or raised details.
- Dry cookies uncovered overnight before stacking or packaging.
This setup is realistic for home bakers, does not require a professional studio, and gives royal icing the best chance to dry faster without sacrificing appearance.
Real-World Experiences: What Bakers Learn the Hard Way
One of the most common experiences bakers share with royal icing is the moment they realize drying time is not just about the recipe. At first, many people assume that if the icing recipe is good, the cookies will naturally dry fast. Then they decorate one batch on a cool, dry day and everything looks perfect. The next week, they make the same recipe during humid weather and suddenly the icing takes forever, colors bleed, and the surface loses that smooth finish. That is usually the moment when royal icing stops being “just icing” and starts becoming a tiny weather experiment.
Another frequent lesson comes from over-thinning the flood icing. Many beginners want it to spread quickly, so they keep adding water until it flows like a dream. For about thirty seconds, it feels brilliant. Then the icing takes longer to set, drifts toward the edges, and dries softer than expected. Experienced bakers often say that learning restraint with water is one of the biggest improvements they ever made. A slightly thicker icing may feel slower while decorating, but it often dries faster and looks neater in the end.
Then there is the fan discovery. Plenty of cookie decorators describe this like a small life event. They decorate a tray, place it in front of a gentle fan, and suddenly the icing crusts more evenly and the dreaded crater problem becomes less dramatic. It is not that the fan performs miracles. It just helps the surface firm up before gravity has time to ruin the party. For many people, that single change makes cookie decorating less stressful almost immediately.
Humidity is another big theme in real experience. Bakers in dry climates often have an easier time getting royal icing to behave, while decorators in humid areas learn to adapt fast. Some move their setup to a bedroom with better air conditioning. Some run a dehumidifier. Some avoid decorating on especially damp days unless they absolutely have to. The shared lesson is simple: the room matters more than most beginners expect.
Many bakers also learn patience through failure. They try to add details too soon, package cookies too early, or stack them because the tops look dry. Then they come back to smudges, dents, or color transfer and realize royal icing has a very annoying distinction between “dry on top” and “actually dry.” Once that lesson sinks in, most people start leaving more time between layers and more drying time before storage.
Perhaps the most encouraging experience is this: almost everyone gets better results after a few batches. Royal icing can feel fussy in the beginning, but it becomes much more manageable once you understand consistency, airflow, and timing. The decorators who seem effortlessly good usually are not using secret wizard methods. They have just made enough cookies to know when the icing is too thin, when the room is too humid, and when to step away and let the cookies dry in peace.
Conclusion
If you want royal icing to dry faster, focus on the factors you can control. Cool cookies completely, keep the icing at the right consistency, lower humidity, add gentle airflow, use a dehydrator or dehumidifier when helpful, work in thinner layers, and let the finished cookies dry uncovered at room temperature. Those seven steps will not turn royal icing into an instant-setting product, but they will make the drying process faster, cleaner, and far less frustrating.
The real win is not just speed. It is consistency. When royal icing dries well, your cookies look smoother, details stay sharp, colors behave better, and packaging becomes much less risky. And honestly, that is a beautiful thing. Because after spending all that time decorating tiny edible masterpieces, you deserve cookies that dry like professionals instead of dramatic little puddles.


