
Table of Contents >> Show >> Hide
- First, Know Which Amazon Credit Card You Are Actually Applying For
- How to Apply for an Amazon Credit Card: 10 Steps
- Step 1: Decide Why You Want the Card
- Step 2: Check Whether You Meet the Basic Eligibility Requirements
- Step 3: Review Your Credit Before You Apply
- Step 4: Compare the Card’s Current Rewards, APR, and Financing Terms
- Step 5: See Whether Prequalification or Preapproval Is Available
- Step 6: Sign In to Your Amazon Account and Navigate to the Right Card Page
- Step 7: Gather the Information You Will Need Before You Start
- Step 8: Complete the Application Carefully and Honestly
- Step 9: Read the Terms One More Time Before You Submit
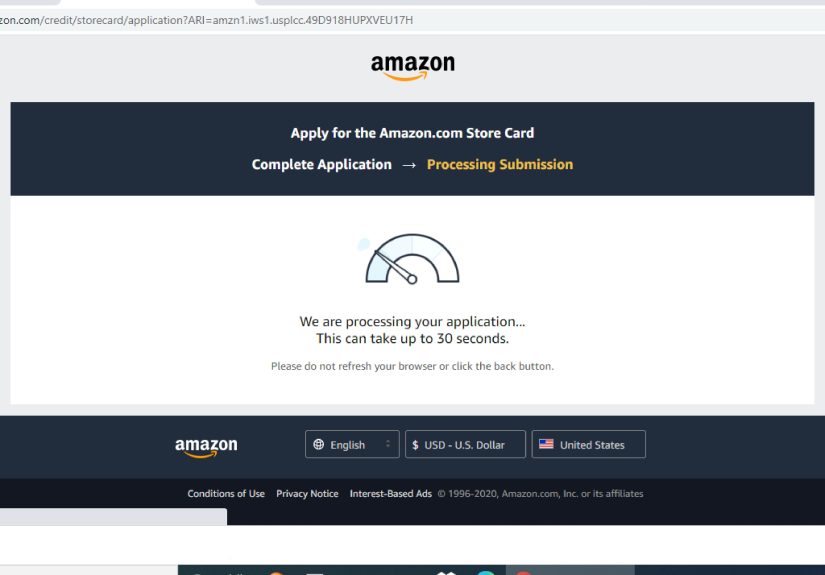
- Step 10: Submit, Watch for a Decision, and Set Up Your Account
- What Can Improve Your Odds of Approval?
- Common Mistakes to Avoid
- What to Do After You Get the Card
- Experiences People Commonly Have When Applying for an Amazon Credit Card
- Conclusion
- SEO Tags
Note: This article is for educational purposes and reflects current U.S. card information at the time of writing. Credit card terms can change faster than your cart total during Prime Day, so always confirm the latest details on the official application page before you apply.
If you shop on Amazon often enough that the delivery driver feels like a distant cousin, an Amazon credit card can look pretty tempting. The good news is that applying is usually straightforward. The less-good news is that “Amazon credit card” is not just one card. There are several options, and choosing the wrong one is like showing up to a black-tie event in flip-flops: technically possible, but not your best move.
This guide breaks down how to apply for an Amazon credit card in 10 practical steps, what information you will need, which version may fit your situation, and what to expect after you hit submit. We will also cover common mistakes, approval tips, and real-world experiences people often have during the application process.
First, Know Which Amazon Credit Card You Are Actually Applying For
Before you start filling out an application, take a minute to identify the product. Amazon-branded cards are issued by different financial institutions, and the right choice depends on your membership status, credit profile, and shopping habits.
1. Prime Visa
This is the consumer card many people mean when they say “Amazon credit card.” It is issued by Chase and is aimed at shoppers with an eligible Prime membership. Its biggest selling point is elevated rewards on Amazon purchases and select categories, plus it can be used anywhere Visa is accepted.
2. Amazon Visa
This is also issued by Chase, but it is generally the version for customers without Prime. It still earns Amazon rewards, but at a lower rate than the Prime version. If you do not want a Prime membership, this card is often the more logical fit.
3. Amazon Store Card and Amazon Secured Card
These are tied to the Amazon ecosystem and issued through Synchrony. They can be useful for financing offers or for people building or rebuilding credit. If you are not approved for the Amazon Store Card, you may automatically be considered for the Amazon Secured Card, which requires a refundable security deposit.
4. Amazon Business Prime Card
If you run a business and make regular Amazon Business or AWS purchases, the business version may be worth a look. It has a separate application flow and is geared toward business spending, not personal shopping.
In plain English: if you want broad acceptance and strong rewards, the Visa products usually get the spotlight. If your credit is still under construction, the Store Card or Secured Card may be more realistic.
How to Apply for an Amazon Credit Card: 10 Steps
Step 1: Decide Why You Want the Card
Start with your goal, not the shiny banner ad. Are you trying to earn cash back on Amazon orders? Use special financing on big-ticket purchases? Build credit? Separate business expenses? Your answer determines which card deserves your attention.
For example, someone who orders groceries from Amazon Fresh, shops at Whole Foods, and already pays for Prime may find the Prime Visa appealing. Someone with limited credit history may be better off looking at the Amazon Secured Card path instead of aiming for a rewards card that might be a stretch.
Step 2: Check Whether You Meet the Basic Eligibility Requirements
Most credit card applications ask for standard personal and financial details such as your full legal name, address, Social Security number, date of birth, income, and housing payment. You also need to be old enough to apply and have a valid U.S. address and identifying information.
On top of that, some Amazon cards have extra conditions. The Prime Visa requires an eligible Prime membership to unlock Prime-tier rewards. The business version requires that you are authorized to make financial decisions for the business. The Amazon Secured Card requires a security deposit if approved under that structure.
Step 3: Review Your Credit Before You Apply
This step saves a lot of disappointment. A credit card application usually triggers a hard inquiry, which can temporarily affect your score. That is why it makes sense to check your credit reports and get a sense of your score before you apply.
You do not need a dramatic movie montage for this. Just review your credit reports for errors, check whether you have missed payments, and look at how much of your existing credit limit you are using. If your utilization is high or you have applied for several cards recently, it may be smarter to slow down before adding another application to the pile.
Step 4: Compare the Card’s Current Rewards, APR, and Financing Terms
Now that you know which card family fits you, read the current offer carefully. This is where many applicants get distracted by a welcome bonus and forget to read the rest of the movie script.
Look at:
- Rewards on Amazon purchases
- Rewards outside Amazon
- Annual fee, if any
- Variable APR
- Special financing or equal monthly payment options
- Foreign transaction fees
- Whether the card works everywhere or only within the Amazon ecosystem
If you carry a balance, the APR matters more than the headline rewards. If you always pay in full, the rewards structure may matter more. Either way, this is the moment to read the disclosures like a grown-up, even if the grown-up inside you is only awake on weekdays.
Step 5: See Whether Prequalification or Preapproval Is Available
Some issuers offer prequalification or preapproved offers that let you see whether you may be a fit before you complete a full application. This does not guarantee final approval, but it can reduce guesswork. Chase notes that checking for preapproved offers itself does not impact your credit score, while a full application can.
If you see a prequalified path, use it. Think of it as peeking at the test format before the exam. You still have to take the test, but at least you are not walking in blind.
Step 6: Sign In to Your Amazon Account and Navigate to the Right Card Page
The easiest way to apply is usually through Amazon’s card pages or checkout prompts. Sign in to your Amazon account first. That can make the process smoother, especially if the offer is tied to your Prime membership or if the system can preload some account information.
Be sure you are on the correct application page for the exact card you want. Prime Visa, Amazon Visa, Store Card, Secured Card, and business cards do not share one-size-fits-all applications.
Step 7: Gather the Information You Will Need Before You Start
Nothing kills application momentum like pausing halfway through to hunt for your monthly housing payment or business tax information. Get your paperwork ready first.
You may need:
- Full legal name
- Date of birth
- Social Security number or taxpayer identification details
- Residential address
- Email and phone number
- Employment status
- Total annual income
- Monthly rent or mortgage payment
- Business information, if applying for a business card
Accuracy matters. Issuers verify information, and small mistakes can slow a decision or trigger additional review.
Step 8: Complete the Application Carefully and Honestly
Now fill out the application. This is not the part where you suddenly become a fictional millionaire with a beach house and three consulting firms. Enter honest, current information.
Pay close attention to:
- Income fields
- Housing status
- Business structure, if relevant
- Authorized user choices
- Consent language and credit check authorization
If you are applying for the Prime Visa or Amazon Visa, you may receive an instant decision. Amazon notes that instant approvals may come with immediate account information. If the application goes pending, do not panic. It may simply mean the issuer wants to verify details.
Step 9: Read the Terms One More Time Before You Submit
Yes, one more time. This is where you confirm the current welcome offer, the rewards rate, the APR range, balance transfer language if any, and the difference between rewards and financing options.
Some Amazon cards allow eligible purchases to be paid through equal monthly payments instead of earning rewards. That trade-off matters. A lot. Clicking past that detail because you are in a hurry is how people end up saying, “Wait, I thought I was getting points.”
Step 10: Submit, Watch for a Decision, and Set Up Your Account
After you submit, one of three things usually happens: approved, denied, or pending review.
If you are approved: follow the setup steps right away. Link the card to your Amazon account if needed, create or connect your online issuer login, add autopay, and review your first statement date. This is the financial equivalent of putting the lid back on the blender before pressing start.
If your application is pending: check your email, postal mail, or application status page for follow-up requests. Chase notes that digital applications often lead to faster decisions, but manual review can still happen when information needs to be verified.
If you are denied: read the adverse action notice. It may cite credit history, income, recent inquiries, or other factors. Use that information before applying again. Reapplying too quickly without fixing the issue is like repeatedly pulling on a locked door and acting surprised every time it stays locked.
What Can Improve Your Odds of Approval?
No card issuer publishes a magic number that guarantees approval, but several habits help:
- Pay all bills on time
- Keep credit utilization low
- Avoid applying for multiple new cards in a short period
- Review your credit reports for errors before applying
- Match the card to your credit profile instead of aiming too high
- Use prequalification tools when available
If your credit is still developing, the secured route may be more realistic than jumping straight to a premium rewards product. There is no shame in starting where the math actually works.
Common Mistakes to Avoid
- Applying for the wrong Amazon card: Prime Visa and Store Card are not interchangeable.
- Ignoring APR: Rewards lose their sparkle if interest charges pile up.
- Submitting inaccurate income information: This can delay or derail your application.
- Applying too often: Multiple hard inquiries in a short time can hurt your profile.
- Missing the financing-versus-rewards choice: Always read the purchase options carefully.
- Forgetting account setup after approval: No autopay plus no reminder equals unnecessary stress.
What to Do After You Get the Card
Approval is not the finish line. It is the starting gun.
Once your Amazon credit card is active:
- Set up online access with the issuer
- Add autopay for at least the minimum payment
- Check whether the card is linked properly in your Amazon wallet
- Read how rewards are earned and redeemed
- Track your utilization so the new account helps, not hurts
- Use the card with intention, not impulse
The smartest Amazon card strategy is simple: use it for spending you were already going to do, pay it on time, and do not let a rewards program talk you into buying a waffle maker at 2:13 a.m. just because it is “basically free.” It is not free. It is a waffle maker wearing a clever disguise.
Experiences People Commonly Have When Applying for an Amazon Credit Card
Many applicants say the process feels quick when they are already signed in to Amazon and know exactly which card they want. The smoothest experiences usually happen when the applicant has already checked their credit, gathered their income information, and read the offer details ahead of time. In those cases, the application can feel almost suspiciously easy. A few clicks, a short wait, and then an instant decision appears on the screen.
Another common experience is confusion over the different card names. People often assume every Amazon-branded card works the same way, then realize halfway through that one card is a Visa you can use almost anywhere, while another is a store card tied mainly to Amazon purchases. That mix-up can change the entire value of the card. Someone hoping to use the card for gas, dining, and travel may be disappointed if they accidentally focus on a store-card style option instead of a general-purpose Visa product.
Applicants also frequently mention the Prime membership question. For some shoppers, the Prime Visa makes immediate sense because they already use Prime heavily and buy from Amazon, Whole Foods, or Amazon Fresh on a regular basis. For others, the math is less obvious. They pause and ask, “Do I really want another subscription just to boost my rewards rate?” That is actually a smart pause. The best application experiences usually come from people who do the membership math before applying, not after the first statement arrives.
People with strong credit histories often describe the process as routine. They submit the application, get an instant decision, and move straight into account setup. People with thinner credit files or recent credit activity, however, may experience a pending decision instead of instant approval. That can feel stressful, but it is not automatically bad news. Sometimes the issuer simply wants to verify identity, income, or other details. Patience matters here. So does checking email and application status instead of panic-applying for three other cards in the same afternoon.
Another real-world lesson is that rewards excitement can overshadow terms and conditions. Some applicants focus on the welcome offer or the headline cash-back rate and forget to look at APR, financing choices, or how rewards are redeemed. Later, they realize they selected a financing option instead of earning rewards on a purchase, or they discover the card is best only when paired with habits they already have. The happiest cardholders are usually the ones who treat the application like a comparison decision, not a checkout impulse.
Finally, many people say the most underrated part of the process happens after approval: setting up autopay, alerts, and account access right away. That one move can turn a good card into a genuinely useful tool. Without it, even a strong rewards card can become a headache. In other words, the best Amazon credit card experience is not just getting approved. It is getting approved, understanding the card, and then using it like a financially responsible adult who still enjoys free shipping.
Conclusion
Applying for an Amazon credit card is not difficult, but applying for the right Amazon credit card takes a little strategy. Start by identifying the card that matches your spending habits, Prime status, and credit profile. Check your credit before you apply, gather your information, compare current terms, and read the fine print before you hit submit. If you do that, the process becomes far less mysterious and much more useful.
The headline lesson is simple: do not chase the card just because it says “Amazon.” Choose the one that fits how you actually shop and pay. That is how rewards stay rewarding, financing stays manageable, and your wallet avoids unnecessary drama.


