
Table of Contents >> Show >> Hide
- Why Cleaning Your Humidifier Matters
- How Often Should You Clean a Humidifier?
- Supplies You Need to Clean a Humidifier
- How to Clean a Humidifier Step by Step
- Step 1: Turn It Off and Unplug It
- Step 2: Empty the Water Tank and Base
- Step 3: Take Apart Removable Pieces
- Step 4: Rinse Everything with Clean Water
- Step 5: Descale with White Vinegar
- Step 6: Rinse Until the Vinegar Smell Is Gone
- Step 7: Disinfect When Needed
- Step 8: Dry All Parts Completely
- Step 9: Reassemble and Refill with Fresh Water
- What to Do Daily to Keep a Humidifier Clean
- How to Clean Different Types of Humidifiers
- Common Humidifier Cleaning Mistakes to Avoid
- How to Prevent Mold in a Humidifier
- Can You Use Essential Oils in a Humidifier?
- How to Know Your Humidifier Needs Cleaning
- Daily, Weekly, and Monthly Humidifier Cleaning Schedule
- Real-Life Experience: What Actually Helps Keep a Humidifier Clean
- Conclusion
A humidifier is one of those small home appliances that can feel almost magical when the air is dry. Your nose stops staging a protest, your throat feels less scratchy, your skin calms down, and suddenly your bedroom no longer feels like a desert with throw pillows. But here is the tiny catch: a humidifier only helps when it is clean. If you let old water sit in the tank, ignore mineral crust, or skip routine maintenance, that soothing mist can turn into a not-so-charming cloud of bacteria, mold, and hard-water residue.
The good news? Learning how to clean a humidifier is simple. You do not need fancy equipment, a chemistry degree, or a heroic Saturday afternoon. With distilled white vinegar, fresh water, a soft brush, and a daily habit that takes less time than scrolling through weather apps, you can keep your humidifier fresh, efficient, and safe to use.
This guide explains how to clean a humidifier step by step, what to do daily to keep it clean, how often to disinfect it, what products to avoid, and how to prevent that mysterious slimy film that seems to appear out of nowhere. Spoiler: the slime was not invited.
Why Cleaning Your Humidifier Matters
A humidifier works by turning water into moisture and sending it into your indoor air. That is exactly why cleanliness matters so much. Anything sitting inside the water tank or base can potentially become part of the mist. Standing water creates a friendly little spa day for bacteria, mold, and mildew. Mineral-heavy tap water can also leave chalky white scale inside the machine and, in some ultrasonic models, may contribute to fine white dust around the room.
Regular cleaning helps your humidifier do three important jobs: produce cleaner mist, run more efficiently, and last longer. A dirty humidifier may smell musty, produce weaker mist, make odd noises, or leave residue behind. Worse, it may aggravate allergies, asthma, or respiratory irritation for sensitive people. In other words, the machine designed to make breathing easier should not become the reason you side-eye the air.
How Often Should You Clean a Humidifier?
The best schedule depends on how often you use your unit, the type of humidifier you own, and whether your water is hard. As a practical rule, empty and dry the tank every day, rinse it before refilling, and do a more thorough cleaning every few days during regular use. If the humidifier runs nightly, a weekly deep clean is the bare minimum, and every three days is even better for busy households, nurseries, allergy-prone users, or anyone who notices buildup quickly.
Daily Maintenance
Every day, empty leftover water, rinse the tank, wipe accessible surfaces, and let the parts air dry when the humidifier is not in use. Refill it with fresh water only when you are ready to run it again. This one habit prevents most humidifier drama before it begins.
Every Three Days
During frequent use, clean the tank and base with vinegar or the cleaner recommended in your owner’s manual. Scrub away scale, film, and residue. Rinse thoroughly and dry before reassembling.
Weekly Deep Cleaning
Once a week, descale and disinfect the humidifier. Vinegar helps remove mineral deposits, while a manufacturer-approved disinfecting method helps reduce germs. Never mix vinegar, bleach, hydrogen peroxide, or other cleaning chemicals together. Your humidifier wants to moisturize the air, not audition for a science-lab warning label.
Supplies You Need to Clean a Humidifier
Before you start, gather a few simple tools:
- Distilled white vinegar
- Clean water
- A soft-bristle brush or old toothbrush
- Microfiber cloth or clean towel
- Cotton swabs for tight corners
- Dish soap, if allowed by the manufacturer
- 3% hydrogen peroxide or diluted bleach, only if approved in your manual
- Replacement filter or wick, if your model uses one
Always read your humidifier’s manual before using bleach, hydrogen peroxide, soap, or cleaning tablets. Some models have delicate parts, ultrasonic plates, wicks, or filters that can be damaged by the wrong product.
How to Clean a Humidifier Step by Step
Step 1: Turn It Off and Unplug It
Safety first. Turn off the humidifier and unplug it before touching the tank, base, cord, or internal components. Water and electricity are a terrible couple. Do not try to clean the unit while it is running, even if you are “just giving it a quick rinse.” Quick rinses are how chaos gets a foothold.
Step 2: Empty the Water Tank and Base
Remove the water tank and pour out any leftover water. Empty the base or reservoir as well. Do not leave old water sitting overnight and then simply top it off in the morning. That is like adding fresh salad to yesterday’s soggy leftovers and calling it meal prep.
Step 3: Take Apart Removable Pieces
Remove the tank cap, nozzle, mist outlet, tray, float, filter housing, or other detachable parts according to the manual. Place small pieces on a towel so they do not roll into the sink drain, which is apparently where all tiny household parts dream of going.
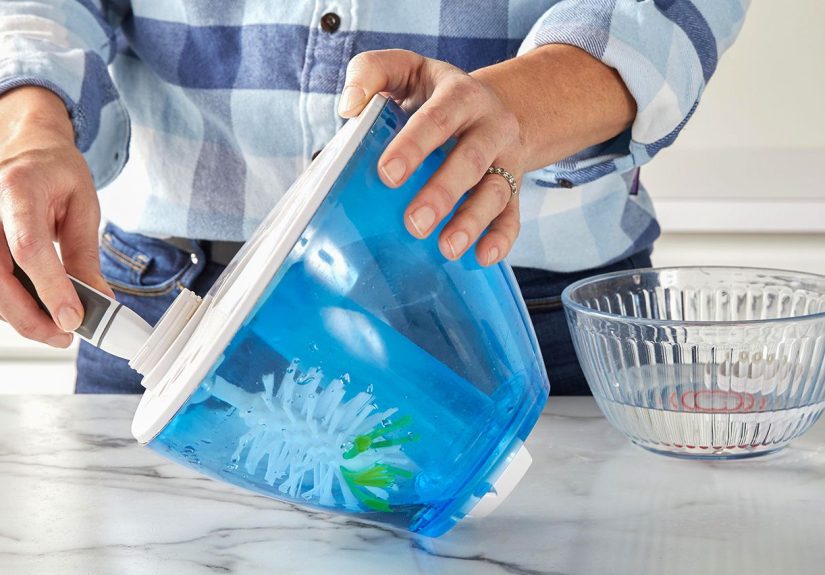
Step 4: Rinse Everything with Clean Water
Rinse the tank and removable parts with clean water. This removes loose dust, surface residue, and any stale water film. Avoid soaking electrical bases or control panels. The base usually contains the motor or ultrasonic components, so clean it carefully without submerging it.
Step 5: Descale with White Vinegar
Pour enough distilled white vinegar into the tank to coat the bottom and reach areas with mineral buildup. For the base, add vinegar only to the water reservoir area, keeping it away from electrical parts. Let the vinegar sit for 15 to 30 minutes. If scale is thick, give it a little more time, but do not abandon it for the entire weekend.
Vinegar helps dissolve mineral deposits, especially the white, crusty buildup caused by hard water. After soaking, use a soft brush or toothbrush to gently scrub corners, seams, the tank cap, and the mist outlet. For narrow crevices, cotton swabs work well.
Step 6: Rinse Until the Vinegar Smell Is Gone
Pour out the vinegar and rinse the tank, base reservoir, and removable parts several times with clean water. Keep rinsing until you no longer smell vinegar. This step matters because leftover vinegar odor can linger in the mist and make your bedroom smell like a very clean pickle jar.
Step 7: Disinfect When Needed
For periodic disinfecting, follow your owner’s manual. Some manufacturers recommend a diluted bleach solution; others suggest 3% hydrogen peroxide; some prefer avoiding harsh disinfectants entirely. If using bleach is allowed, use a very diluted solution, rinse thoroughly, and let the unit air out completely before the next use. Never combine bleach with vinegar, hydrogen peroxide, ammonia, or any other cleaner.
Disinfection is especially useful if you see mold, smell mildew, have been using the humidifier daily, or are bringing it out of storage. If mold keeps returning despite proper cleaning, the unit may have hidden areas you cannot fully reach. At that point, replacing the humidifier may be the healthier choice.
Step 8: Dry All Parts Completely
Drying is not optional. Wipe accessible surfaces with a clean towel, then let the tank and parts air dry fully before reassembling. Moisture left in seams and corners encourages more growth. Think of drying as the final boss of humidifier cleaning. Win that fight, and the rest is easier.
Step 9: Reassemble and Refill with Fresh Water
Once everything is dry, reassemble the humidifier. Refill it with fresh distilled or demineralized water if possible. Distilled water helps reduce mineral buildup and may reduce white dust from ultrasonic models. If you use tap water, expect to clean scale more often, especially in hard-water areas.
What to Do Daily to Keep a Humidifier Clean
Daily humidifier care is simple, but it is the part most people skip. The daily routine is what keeps a humidifier from becoming a tiny indoor swamp with a power cord.
Empty Old Water Every Morning
After each use, pour out leftover water from the tank and base. Do not let water sit all day. Germs grow more easily in stagnant water, and stale water can leave a slick film inside the tank.
Rinse the Tank Before Refilling
Give the tank a quick rinse before adding new water. This removes loose residue and keeps the inside fresher between deep cleanings.
Wipe the Base Dry
Use a clean cloth to wipe the reservoir and accessible surfaces. Pay attention to corners where water tends to hide. If your humidifier has a mist nozzle, wipe that too.
Use Fresh Water Every Time
Refill only when you are ready to use the humidifier. Fresh water is better than “topping off” yesterday’s water. For best results, use distilled or demineralized water, especially in ultrasonic and cool-mist models.
Keep the Area Around the Humidifier Dry
Check the table, floor, wall, and nearby furniture. If they feel damp, lower the mist setting, move the unit, or run it for a shorter time. Moisture on surfaces can encourage mold growth in the room, which rather defeats the purpose.
Monitor Indoor Humidity
Use a hygrometer to keep indoor humidity generally between 30% and 50%. Too little humidity can dry out skin and airways, but too much can encourage mold, dust mites, condensation, and musty odors. The goal is comfortable air, not rainforest cosplay.
How to Clean Different Types of Humidifiers
Cool-Mist Humidifiers
Cool-mist humidifiers are popular for bedrooms and children’s rooms because they do not release hot steam. However, they need consistent cleaning because the water is not boiled during operation. Empty and dry them daily, clean every few days, and use distilled water to reduce mineral residue.
Ultrasonic Humidifiers
Ultrasonic models use high-frequency vibrations to create a fine mist. They are quiet and efficient, but they can release minerals from tap water into the air as white dust. Use distilled or demineralized water, clean the ultrasonic plate gently, and avoid abrasive brushes.
Warm-Mist Humidifiers
Warm-mist humidifiers heat water to produce steam, but they still require cleaning. Minerals can collect on heating elements, and the tank can still develop film. Let the unit cool completely before cleaning, then descale according to the manual.
Evaporative Humidifiers
Evaporative humidifiers use a wick or filter to pull water into the airflow. Replace the wick as recommended, usually more often if water is hard or the unit runs daily. Do not scrub or wash disposable wicks unless the manufacturer specifically says it is safe.
Common Humidifier Cleaning Mistakes to Avoid
Mistake 1: Leaving Water in the Tank
This is the big one. Old water is the root of many humidifier problems. Empty, rinse, and dry the tank daily.
Mistake 2: Using Too Much Cleaner
More bleach, vinegar, or peroxide does not mean cleaner. It can damage the unit or leave residue. Use the correct dilution and rinse thoroughly.
Mistake 3: Mixing Cleaning Products
Never mix vinegar with bleach. Never mix bleach with ammonia. Never freestyle with cleaning chemicals. Use one cleaning method at a time, rinse well, and ventilate the area.
Mistake 4: Ignoring the Filter
If your humidifier has a filter, wick, cartridge, or pad, check it regularly. A dirty filter can smell bad, reduce mist output, and spread contaminants. Replace it according to the manufacturer’s schedule.
Mistake 5: Running the Humidifier Too High
If windows fog, walls feel damp, or bedding feels clammy, humidity is too high. Lower the setting or shorten runtime. Clean mist is only helpful when the room itself stays dry enough to resist mold.
How to Prevent Mold in a Humidifier
Preventing mold is easier than removing it. Start with daily drying, fresh water, and regular descaling. Keep the humidifier on a raised, water-resistant surface with good airflow around it. Do not place it directly against a wall, curtain, upholstered headboard, or stack of books unless you enjoy creating damp little surprises.
At the end of humidifier season, clean and dry the unit completely before storing it. Remove filters or wicks and replace them if needed. Store the humidifier with the tank cap loosened or off so trapped moisture does not turn storage into a mold incubator.
Can You Use Essential Oils in a Humidifier?
In most standard humidifiers, no. Essential oils can damage plastic tanks, clog parts, degrade filters, and create residue inside the machine. They may also irritate airways for some people or pets. Only use essential oils if your humidifier is specifically designed with an aroma tray or oil pad, and follow the instructions exactly. A humidifier is not automatically a diffuser, even if the lavender bottle is making persuasive eye contact from the shelf.
How to Know Your Humidifier Needs Cleaning
Your humidifier is probably due for cleaning if you notice any of these signs:
- Musty, sour, or stale odor
- White crust or chalky buildup
- Pink, green, black, or brown film
- Lower mist output than usual
- Water that looks cloudy
- Dust around the machine
- Noisy operation or sputtering
- Condensation near the unit
If cleaning does not remove odor, visible mold, or residue trapped in unreachable areas, it may be time to replace the humidifier. Some old units are simply not designed to be cleaned well forever.
Daily, Weekly, and Monthly Humidifier Cleaning Schedule
Daily
- Empty leftover water.
- Rinse the tank.
- Wipe the base reservoir.
- Let parts air dry when not in use.
- Refill with fresh distilled water.
Every Three Days
- Unplug and disassemble the unit.
- Soak the tank and reservoir with white vinegar.
- Scrub scale and film with a soft brush.
- Rinse thoroughly.
- Dry completely before reuse.
Weekly
- Do a full descale and, if approved, disinfect.
- Check the filter, wick, cartridge, or pad.
- Clean the mist nozzle and tank cap.
- Inspect for mold, odor, or hard-water deposits.
Monthly
- Replace filters if needed.
- Inspect the cord and base for damage.
- Check whether mineral buildup is getting harder to remove.
- Review the humidity level in the room and adjust usage.
Real-Life Experience: What Actually Helps Keep a Humidifier Clean
Here is the honest experience many people have with humidifiers: the first week is beautiful. The air feels softer, sleep feels better, and everyone congratulates themselves for being the kind of person who owns a wellness appliance. Then, about two weeks later, someone opens the tank and finds a cloudy film, a suspicious smell, or a ring of white crust that looks like the humidifier has been secretly aging cheese.
The biggest lesson is that humidifier cleaning works best when it becomes a routine, not an emergency response. Waiting until there is slime in the tank makes the job harder and much less pleasant. A daily empty-rinse-dry habit takes about two minutes, but it prevents the dreaded weekend deep-clean session where you stand at the sink questioning your life choices.
One practical trick is to clean the humidifier at the same time every day. For example, empty it right after waking up, rinse the tank while coffee brews, and place it upside down on a towel to dry. At night, refill it with fresh distilled water before bed. This rhythm keeps water from sitting all day and makes the task feel automatic.
Another helpful experience-based tip: keep vinegar near your cleaning supplies, not buried behind holiday baking ingredients. If vinegar is easy to grab, you are more likely to use it every few days. A small soft brush is also worth keeping just for the humidifier. Label it if necessary, because nobody wants the humidifier brush accidentally joining the toothbrush family.
People with hard water often notice mineral buildup much faster. If the tank gets crusty within days, switching to distilled water can make a dramatic difference. It may cost a little more, but it usually reduces scale, white dust, and scrubbing time. If distilled water is not realistic every day, using it at least during heavy-use seasons can still help.
Placement also matters more than people expect. A humidifier shoved against a wall or placed on carpet can create damp surfaces, which may lead to mold outside the machine. A better setup is a water-resistant table or stand, several inches away from walls, curtains, bedding, and electronics. Aim the mist into open air, not directly at furniture or your face.
It also helps to use a hygrometer. Without one, many people run the humidifier longer than needed. The room feels cozy at first, then suddenly the windows sweat, the air feels heavy, and the machine is blamed for being “too much.” Usually, the issue is humidity control. Keeping indoor humidity in the comfortable 30% to 50% range helps prevent dampness while still relieving dry air.
Finally, do not underestimate storage cleaning. Many humidifiers get cleaned during winter but stored while slightly damp. Months later, they emerge from the closet smelling like a basement with ambition. Before storing, descale, disinfect if appropriate, rinse, dry completely, discard old filters, and store with airflow. Future-you will be grateful, and future-you deserves nice things.
Conclusion
A clean humidifier can be a wonderful tool for making dry indoor air more comfortable, especially during winter or in dry climates. The key is consistency. Empty the tank daily, rinse it, dry it, refill with fresh water, and deep clean regularly with vinegar or the method recommended by your manufacturer. Use distilled water when possible, monitor humidity levels, replace filters on schedule, and never mix cleaning chemicals.
Once the routine becomes a habit, humidifier maintenance is not a big production. It is just a small daily reset that keeps your mist fresh, your machine working well, and your indoor air from becoming questionable. Treat your humidifier like the helpful little appliance it isnot a self-cleaning miracle boxand it will reward you with cleaner, more comfortable air.
Note: Always follow your specific humidifier manual first, especially for disinfecting, filter replacement, and cleaning delicate ultrasonic or warm-mist components.


