
Table of Contents >> Show >> Hide
- First: What You’re Cleaning (and Why It Matters)
- Safety and Setup: Don’t Skip This Part
- Step-by-Step: How to Clean Up the Old Wax Seal
- 1) Remove the toilet (carefully) and contain the mess
- 2) Plug the drain opening immediately
- 3) Remove the bulk wax from the flange
- 4) Clean wax off the toilet outlet (the “horn”)
- 5) Deal with stubborn residue the smart way
- 6) Clean and inspect the flange (this is where you catch bigger problems)
- 7) Clean the floor around the flange (and check for hidden damage)
- How to Dispose of Wax and Dirty Materials
- Common Cleanup Mistakes (and How to Avoid Them)
- Quick Troubleshooting: When Cleanup Reveals a Bigger Issue
- Wax Ring vs. Waxless Seal: Does Cleanup Change?
- One-Page Cleanup Checklist
- of Real-World Experience: The Stuff People Only Learn Once
- Conclusion
Toilet wax seals (aka wax rings) are the unsung heroes of your bathroom: they keep water in the pipe, sewer gas out of your house, and your dignity mostly intact. The downside? When it’s time to replace one, you’re about to meet wax in its natural habitat: everywhere you didn’t want it.
This guide walks you through cleaning up an old toilet wax seal safely and thoroughlywithout smearing it across your tile, your tools, or your soul. Expect practical steps, a little humor, and the kind of “why didn’t anyone tell me that?” tips that make the job go faster.
First: What You’re Cleaning (and Why It Matters)
A toilet wax seal is a compressible ringusually wax, sometimes reinforcedthat sits between the toilet outlet (the “horn”) and the floor flange (the ring that connects to the drainpipe). Once the toilet is set, the wax compresses to form a watertight, gas-tight seal. That compression is also why it’s considered single-use: once disturbed, it typically won’t reseal reliably.
Cleanup isn’t just about neatness. Leftover wax chunks can prevent the next seal from seating correctly, and grime around the flange can hide cracks, rust, or subfloor damage that caused the leak in the first place.
Safety and Setup: Don’t Skip This Part
Gear you’ll be glad you had
- Disposable gloves (nitrile or waterproof cleaning gloves)
- Putty knife or plastic scraper (plastic is gentler on surfaces)
- Paper towels / shop towels and a trash bag (two, ideally)
- Old rag or towel to plug the drain opening
- Bucket or shallow pan (for drips)
- All-purpose cleaner + disinfectant
- Optional: mineral spirits (for stubborn residue), plus ventilation
- Optional: hair dryer (low heat) to soften stubborn wax
Prep the area like you’re about to paint (because you kind of are)
Lay down cardboard or a drop cloth near the toilet. Wax has a special talent for transferring itself to anything you love. Clear the bathroom floor around the toilet, and keep a lined trash can nearby.
Shut off water and drain the toilet
Turn off the supply valve, flush to empty the tank, and sponge out remaining water in the tank and bowl if you can. Less water = less mystery puddles = less blaming the wax ring for everything.
Step-by-Step: How to Clean Up the Old Wax Seal
1) Remove the toilet (carefully) and contain the mess
Disconnect the supply line, remove bolt caps, and loosen the nuts. Rock the toilet gently to break the seal and lift it straight up. Set it on cardboard or an old towel. (Do not set it directly on your nice bathmat unless you secretly hate it.)
2) Plug the drain opening immediately
Once the toilet is off, stuff a rag into the drain opening. This blocks sewer gas and keeps small tools, bolts, and “oops” from dropping into the pipe. Make sure the rag is big enough that it won’t slip down the drain.
3) Remove the bulk wax from the flange
Use a putty knife to scrape wax off the flange and surrounding area. Aim to remove thick chunks first. Scoop wax directly into a trash bag. Try not to flick wax across the roomwax flakes travel farther than they should, like they’re seeking a better zip code.
If there was caulk around the toilet base, scrape away loose caulk now too. Old caulk can trap grime and can make it harder to see if leaks are coming back later.
4) Clean wax off the toilet outlet (the “horn”)
Flip or tilt the toilet carefully (this is where cardboard earns its pay) and scrape wax residue from the toilet outlet. You want the outlet clean and smooth so the next seal can compress evenly.
5) Deal with stubborn residue the smart way
Some wax comes off in satisfying curls. Some clings like it pays rent. If wax is stubborn, soften it:
- Warm approach: Hold a hair dryer on low heat a safe distance away for short bursts.
- Wipe approach: Press a paper towel against the wax to lift softened residue as you scrape.
For a thin film that won’t budge, a small amount of mineral spirits on a rag can help lift residue from the flange or porcelain. Use sparingly, ventilate the room, and keep it off finished flooring that might be sensitive. Always test in a tiny hidden area first.
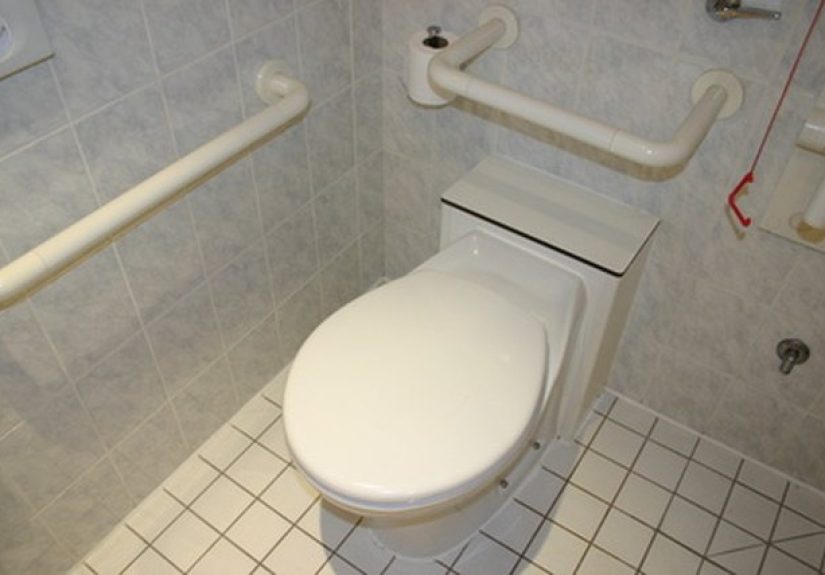
6) Clean and inspect the flange (this is where you catch bigger problems)
With wax removed, clean the flange and surrounding floor with an all-purpose cleaner, then disinfect. Now inspect the flange:
- Is it cracked, badly rusted, or loose?
- Are the slots for the closet bolts intact?
- Is the flange sitting at the right height relative to the finished floor?
If the flange is damaged or sits too low (common after new tile), you may need a flange extender or a thicker wax ring, rather than doubling up rings like it’s a wax-layer cake. If the flange is broken, that’s a repair jobnot a “maybe caulk fixes it” job.
7) Clean the floor around the flange (and check for hidden damage)
If there was a leak, wipe and dry the floor thoroughly. Look for:
- Soft spots in subflooring
- Staining or swelling near the toilet footprint
- Mildew or persistent odor
If the floor feels spongy or looks swollen, address that before reinstalling the toilet. A fresh wax ring won’t fix a rotten subfloorit’ll just seal in your regret.
How to Dispose of Wax and Dirty Materials
Throw wax scraps and waxy towels in the trashideally double-bagged. Do not wash wax down a drain; wax can cool, harden, and contribute to clogs in plumbing. If you used any solvent, follow the label directions for disposal of solvent-soaked rags (some require drying flat in a safe, ventilated area before disposal).
Common Cleanup Mistakes (and How to Avoid Them)
- Not plugging the drain: Hello sewer gas, goodbye peace of mind. Plug it immediately after lifting the toilet.
- Scratching the flange or floor: Metal scrapers can gouge plastic flanges or mar tile. Use controlled pressure and consider a plastic scraper for delicate surfaces.
- Leaving wax chunks behind: Remaining wax can prevent an even seal and cause future leaks. Remove thick residue and wipe down surfaces until smooth.
- Reusing a wax ring: Wax rings are designed to compress once. If you lift the toilet after setting it, plan to use a new seal.
- Caulking all the way around the toilet base: A full caulk bead can hide leaks. Many pros leave a small gap at the back so leaks show themselves instead of pooling unseen.
- Over-tightening the bolts: Snug is good; “gorilla tight” can crack porcelain. Tighten evenly, alternating sides.
Quick Troubleshooting: When Cleanup Reveals a Bigger Issue
If your bathroom smelled like sewage
A failed wax seal can allow sewer gases to escape. But odor can also come from a loose toilet, flange issues, or moisture trapped under the base. After cleanup, make sure the flange and bolts can hold the toilet solidlyno rocking.
If water appears only when you flush
That often points to a compromised seal or a toilet that isn’t seated level. Wax seals don’t love movement; if the toilet rocks, fix the wobble with shims and proper tightening before declaring victory.
If the flange is below the finished floor
A flange that’s flush withor belownew tile may need a thicker wax ring or a flange extender to make up the difference. Don’t guess: dry-fit the toilet, check for rocking, and choose a seal designed for your flange height.
If the flange is cracked or the subfloor is soft
Stop and repair the structure. A new wax ring won’t compensate for a flange that can’t hold bolts or a floor that flexes. If you’re unsure, this is a good time to call a plumberbefore the next leak becomes a flooring project.
Wax Ring vs. Waxless Seal: Does Cleanup Change?
Traditional wax rings are inexpensive and reliable when installed correctly, but they’re messy and typically single-use. Waxless seals (often rubber or foam) are cleaner and can sometimes be repositionedhandy if you’re new to “lowering a toilet perfectly over two bolts while holding your breath.”
Cleanup for waxless seals is usually simpler: less scraping, less residue. But you still need to clean and inspect the flange, because the flange is the real stage where all toilet dramas happen.
One-Page Cleanup Checklist
- Shut off water, flush, and sponge out remaining water
- Remove toilet and set it on cardboard/towel
- Plug the drain opening with a rag
- Scrape bulk wax from flange and toilet outlet
- Wipe and soften stubborn wax (low heat or careful solvent use)
- Clean + disinfect flange and surrounding floor
- Inspect flange condition and height; check subfloor
- Bag and dispose of wax and dirty towels properly
of Real-World Experience: The Stuff People Only Learn Once
The first time you clean up a toilet wax seal, you assume it’s a simple scrape-and-go situation. Then you lift the toilet and discover the wax ring has achieved a level of chaos normally reserved for glitter and toddler snacks. The most common surprise isn’t the wax itself it’s how far it spreads when you’re not paying attention. One tiny brush against the side of the bowl and suddenly your glove is waxy, your wrench is waxy, and your phone (why is your phone in here?) is waxy.
Here’s what experienced DIYers do differently: they set up a “clean zone” and a “gross zone.” The gross zone is where the toilet lands (cardboard, old towel, whatever you don’t mind throwing away). The clean zone is where your tools and replacement parts live. If you let waxy gloves touch clean tools, you’ll spend half the job cleaning tools instead of cleaning wax.
Another lesson: wax is temperature-sensitive. In cold bathrooms, old wax can be stiff and crumbly, which feels like a win until the crumbs scatter into grout lines and textured vinyl flooring. A few seconds of gentle heat turns that brittle mess into something you can lift in bigger pieces. The key is restraintlow heat, short bursts, and patience. You’re softening wax, not auditioning the flange for a role in a modern art installation.
People also underestimate the importance of plugging the drain. Sure, it blocks sewer gas (which is a solid benefit for your lungs and your relationships), but it also prevents the “dropped bolt” incident. That bolt will fall into the pipe like it was born to do it. Then your simple wax-ring job becomes an interpretive dance called “fishing metal out of a drain.”
My favorite real-life example is the “mystery leak” after reinstalling the toilet. Someone cleans the wax perfectly, installs a new seal, and then sees water at the base and panics. Often it’s not the seal at allit’s leftover water from the tank-to-bowl area or residual water from the bowl sloshing out when the toilet was moved. The best trick is to dry everything completely before testing, then flush and watch carefully. If water returns only on flushing, suspect the seal or movement. If it appears gradually over time, consider condensation or a slow supply line drip.
Finally, the biggest “pro move” is taking 60 seconds to inspect the flange after cleanup. That’s when you notice the flange is cracked, too low after new tile, or not anchored well. Catching that now can save you from replacing the wax ring twicebecause nothing builds character like doing the same messy job again next weekend.


