
Table of Contents >> Show >> Hide
- What You Need Before You Start
- How to Connect a Guitar or Bass Guitar to a MacBook in 12 Steps
- Step 1: Choose Your Connection Method
- Step 2: Use the Right Cable
- Step 3: Connect the Interface or USB Device to the MacBook
- Step 4: Plug the Guitar or Bass into the Correct Input
- Step 5: Confirm the MacBook Sees the Device
- Step 6: Grant Microphone and Audio Input Permission
- Step 7: Open GarageBand or Your DAW and Select the Audio Device
- Step 8: Create the Right Track Type
- Step 9: Set Your Gain Properly
- Step 10: Turn On Monitoring the Smart Way
- Step 11: Adjust Buffer Size and Playback Settings
- Step 12: Record a Test Take and Troubleshoot Before the Real Performance
- Troubleshooting Common Problems
- Guitar vs. Bass: Does the Setup Change?
- Final Thoughts
- Bonus Section: Real-World Experiences When Connecting a Guitar or Bass to a MacBook
- SEO Tags
If you have ever stared at your MacBook, your guitar, your bass, and one suspiciously tangled cable pile and thought, “Surely modern technology has made this easier,” good news: it mostly has. The bad news is that your MacBook still refuses to understand rock-and-roll telepathy. You need the right hardware, the right settings, and about ten minutes of patience.
Whether you want to record a crunchy guitar riff, practice silently with headphones, lay down a clean bass track, or just prove to your friends that your bedroom is absolutely a “studio,” connecting a guitar or bass guitar to a MacBook is very doable. The trick is knowing which connection method makes sense, how to set up the audio input correctly, and how to keep latency, clipping, and weird silence from ruining the mood.
This guide breaks the process into 12 clear steps. It covers electric guitar and bass guitar, works well with GarageBand and other DAWs, and keeps the explanation simple enough that you do not need an audio engineering degree or a wizard robe.
What You Need Before You Start
Before diving into the steps, gather the basics:
- An electric guitar or bass guitar
- A MacBook
- A standard 1/4-inch instrument cable
- An audio interface, USB-equipped amp, or USB guitar device
- Headphones or speakers
- A recording app such as GarageBand
- Any required USB-C, Thunderbolt, or adapter cables for your MacBook
Could you try to MacGyver a direct connection with odd adapters? Sometimes. Should you build your recording life on that foundation? Probably not. The cleanest, easiest, and most reliable method is a proper audio interface with an instrument or Hi-Z input.
How to Connect a Guitar or Bass Guitar to a MacBook in 12 Steps
Step 1: Choose Your Connection Method
You have three realistic ways to connect a guitar or bass to a MacBook.
The best option is an audio interface. This is the little box that translates your instrument signal into something your MacBook and recording software can understand. It usually gives you better sound, cleaner gain control, headphone monitoring, and less frustration.
The second option is a USB-equipped amp or modeler. Many modern practice amps and effects units can send audio straight to a MacBook over USB. If you already own one, this can be a great shortcut.
The third option is an older Mac with a true audio input. If your computer actually has an audio input port, you may be able to use it with the right adapter, but the signal can be weak and less ideal. For most modern MacBooks, an interface is still the smart move.
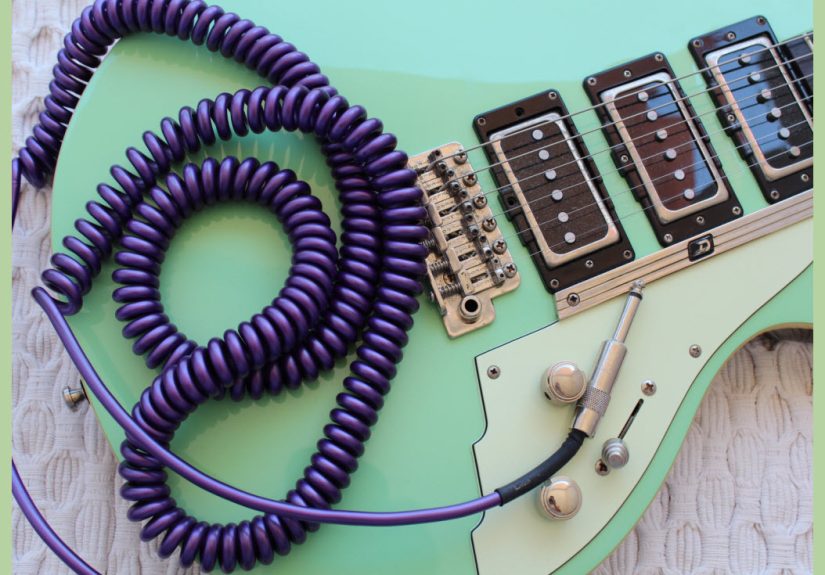
Step 2: Use the Right Cable
Your guitar or bass usually connects with a regular 1/4-inch instrument cable. That cable goes into the interface’s instrument input, often labeled Inst, Instrument, or Hi-Z.
If you are using a bass guitar, the same rule applies. Bass is not a mystical creature that needs its own moonlit cable. It also wants a proper instrument-level input so the tone stays full and the high end does not disappear into sadness.
If your MacBook only has USB-C ports, make sure your interface cable or adapter matches your MacBook. Many setup problems are not “audio problems” at all. They are “wrong dongle, wrong century” problems.
Step 3: Connect the Interface or USB Device to the MacBook
Now connect your audio interface, USB amp, or modeler to the MacBook. If the device includes manufacturer software or a driver, install it if needed. Some interfaces are class compliant and work right away on macOS, while others work best with their official software.
If you are using a bus-powered interface, it may draw power directly from the MacBook. If it has an external power option, follow the manufacturer’s setup instructions. After connecting, wait a few seconds so macOS can recognize the device.
Step 4: Plug the Guitar or Bass into the Correct Input
This step matters more than beginners expect. Plug your guitar or bass into the instrument input, not a random line input if your interface separates them. Instrument inputs are designed for the high-impedance signal coming from pickups.
If your interface has a Hi-Z switch, enable it for direct guitar or bass recording. If it has combo jacks, double-check the channel is set for instrument use. The difference between “this sounds awesome” and “why does my tone sound like a blanket over a toaster” can be one tiny button.
Step 5: Confirm the MacBook Sees the Device
On your MacBook, open your sound settings and make sure the interface, USB amp, or device appears as an input option. If it does not show up, unplug and reconnect it, try a different cable, avoid low-quality hubs, and restart the MacBook if needed.
You can also open Audio MIDI Setup on macOS to verify the device is recognized. This is a useful checkpoint because it tells you whether the problem is with the MacBook, the device, or the recording app.
If the device still does not appear, check compatibility with your macOS version. This is especially important with older interfaces and brand-new operating system updates.
Step 6: Grant Microphone and Audio Input Permission
Yes, even your guitar may be held hostage by privacy settings. On macOS, many apps need microphone permission to receive audio input from an interface.
Go to your MacBook’s Privacy & Security settings, then Microphone, and make sure your recording app is allowed to use audio input. If GarageBand or another DAW is blocked, you may see the interface in settings but still get no sound in the app.
This step solves a surprising number of “my cable is haunted” moments.
Step 7: Open GarageBand or Your DAW and Select the Audio Device
Once the hardware is connected, open GarageBand or your preferred DAW. Then go into the app’s audio settings and select your interface or USB amp as the input device. For output, you can usually select the same interface if your headphones are plugged into it.
If you are using GarageBand, also check that the input source matches the correct channel on the interface. For example, if your guitar is plugged into input 1, select input 1. If your bass is in input 2, use that channel instead.
Do not leave the app set to the MacBook’s internal microphone unless your goal is to record a nice performance of your pick scraping the strings from three feet away.
Step 8: Create the Right Track Type
Create a new audio track for your guitar or bass. In most DAWs, guitar and bass should be recorded to mono audio tracks unless you are intentionally using a stereo source or stereo effects chain from hardware.
This is one of the most important settings for clean results. A standard guitar or bass plugged directly into one input is a mono source. Choosing the proper mono input prevents strange channel behavior and keeps the signal centered and solid.
In GarageBand, you can then choose a guitar or bass-friendly preset, amp simulation, or clean recording patch depending on what you want to hear.
Step 9: Set Your Gain Properly
Now play your instrument as loudly as you expect to during recording and raise the input gain on the interface until the signal is strong but not clipping. You want healthy level, not digital chaos.
If your interface has a clip light, avoid turning it red. If the DAW meter spikes into red, back the gain down. A clean input gives you better tone, less noise, and more room to shape the sound later.
For bass guitar, this step is especially important because aggressive picking or slapping can hit the input much harder than a casual fingerstyle line. Test the loudest part, not the calmest part.
Step 10: Turn On Monitoring the Smart Way
Monitoring lets you hear yourself while you play. In GarageBand and other DAWs, you can enable input monitoring on the track so the signal passes through the software and any amp sims or effects.
That is great when you want to hear distortion, reverb, amp tone, or a bass patch while tracking. But software monitoring can introduce latency, which feels like your instrument is arriving late to its own performance.
If your interface has direct monitoring, try that when latency is annoying. Direct monitoring routes the sound straight from the interface to your headphones with far less delay. If you want to hear software effects live, keep DAW monitoring on and use headphones to reduce feedback.
Step 11: Adjust Buffer Size and Playback Settings
If your recording feels delayed, choppy, or weirdly echoey, check the buffer size in your DAW’s audio settings. A lower buffer size usually reduces latency while recording, though setting it too low can cause clicks, pops, or digital ugliness.
A practical approach is to start low for recording and raise it later when mixing if your session becomes heavier with plug-ins. This gives you a more responsive feel while playing without forcing your MacBook to do gymnastics it did not agree to.
Also use headphones instead of speakers during tracking. That helps prevent feedback and makes it easier to hear details in your playing.
Step 12: Record a Test Take and Troubleshoot Before the Real Performance
Before recording your masterpiece, do a quick test. Record 10 to 20 seconds of playing, then listen back for the following:
- Is the signal clean and strong?
- Is there clipping or distortion you did not intend?
- Is the track too quiet?
- Is there hiss, hum, or buzz?
- Does the sound arrive late while monitoring?
- Is the input channel correct?
If the test take sounds wrong, fix the issue now instead of after recording a brilliant once-in-a-lifetime riff you will never reproduce again. That is one of music technology’s oldest and rudest traditions.
Troubleshooting Common Problems
No Signal at All
Check that the interface is selected in macOS and in the DAW. Make sure the guitar is plugged into the right input, the cable works, the track is record-enabled, and the app has microphone permission.
The Sound Is Too Quiet
Raise the interface gain, verify you are using an instrument or Hi-Z input, and confirm the track input is correct. If you are relying on an older built-in audio input, the signal may simply be weak compared with a real interface.
The Sound Is Distorted
Back down the gain. If you are using a hot active bass, give yourself extra headroom. Also check whether the distortion is coming from an amp sim, pedal plug-in, or an overloaded input stage.
There Is a Delay While Playing
Lower the buffer size, close unnecessary apps, and use direct monitoring if your interface supports it. This is one of the most common issues, and thankfully one of the easiest to improve.
There Is Buzz or Hum
Try a different cable, move away from power bricks, dimmers, and fluorescent lighting, and use the interface directly instead of through a questionable hub. If your interface includes a ground-related control, follow the manufacturer’s instructions.
Guitar vs. Bass: Does the Setup Change?
Not much. Electric guitar and bass guitar follow almost the same signal path when connecting to a MacBook. Both typically use a 1/4-inch instrument cable, both work best through an interface with a Hi-Z or instrument input, and both should usually be recorded as mono sources.
The real differences show up in gain and tone decisions. Bass can hit harder at the input, so watch your levels carefully. Guitar often leans more on amp sims, pedal chains, and effects while tracking. Bass often benefits from a clear direct signal, then tone shaping after recording. Still, the basic connection process is nearly identical.
Final Thoughts
Connecting a guitar or bass guitar to a MacBook is not difficult once you stop fighting the laws of audio and give your instrument the path it actually wants. Use an audio interface if possible, pick the proper input, set the gain cleanly, and manage monitoring so the instrument feels responsive while you play.
After that, the MacBook becomes less of a mysterious aluminum rectangle and more of a useful recording partner. Not as cool-looking as a vintage tube amp, maybe, but much easier to fit on a desk.
Bonus Section: Real-World Experiences When Connecting a Guitar or Bass to a MacBook
The first time most people connect a guitar or bass to a MacBook, the experience falls into one of two categories. Category one is magical: you plug everything in, the interface lights up, GarageBand opens, and within minutes you are hearing your instrument through headphones with an amp sound that makes you feel like a genius. Category two is educational: nothing happens, then the input meter twitches once, then you realize the app has no microphone permission, then your cable is in input 2 while your track is set to input 1, and suddenly you have learned more about signal flow than you ever planned to before lunch.
That awkward first setup is actually useful. It teaches you that recording is not just about playing well. It is about understanding the chain: instrument, cable, interface, MacBook, software, track, monitoring, output. Once that chain clicks, everything gets easier. You stop randomly unplugging things and start solving problems in order. That alone feels like leveling up.
A lot of beginners are shocked by how different live playing and recorded playing feel. Through an amp in a room, your guitar or bass feels immediate and physical. Through a MacBook, especially if latency is not dialed in yet, it can feel like the notes are half a step behind your hands. That is why the first good low-latency setup is such a relief. Suddenly the instrument responds naturally, your timing improves, and you stop making that confused face at the screen after every note.
There is also a fun psychological shift once you start hearing your instrument through software. Guitarists often discover they have been hiding behind volume and room sound. Bass players often realize how much string noise, finger attack, and muting detail the computer hears. The MacBook can be brutally honest, but that honesty is useful. It helps you clean up technique, control dynamics, and make better tone choices.
Another common experience is falling down the tone rabbit hole. You start with, “I just want to record one clean riff,” and twenty minutes later you are comparing amp models, changing cabinets, adding compression, then removing compression, then wondering whether your bass needs chorus. This is normal. Mildly dangerous, but normal. The good news is that once the connection itself is stable, creative experimentation becomes the fun part instead of the frustrating part.
For home players, one of the biggest wins is convenience. A MacBook setup lets you practice silently, record ideas quickly, and revisit parts later without needing to mic a loud amp. That is huge for apartment musicians, late-night writers, students, and anyone whose neighbors do not appreciate a 1:00 a.m. bass solo. Quiet recording is not less “real.” It is often the difference between making music consistently and not making it at all.
Over time, the process becomes routine. Plug in. Open the project. Check the input. Tune up. Record. The technology fades into the background, which is exactly what you want. When that happens, your MacBook stops being a technical puzzle and becomes part of your creative workflow. And that is the sweet spot: less fiddling, more playing, better ideas captured before they disappear forever into the great cosmic void where unfinished riffs go.


