
Table of Contents >> Show >> Hide
- Why Decoupage a Bread Basket?
- What You Need
- Choose the Right Basket First
- The Best Papers for a Bread Basket
- How to Decoupage a Bread Basket Step by Step
- Common Mistakes to Avoid
- Design Ideas That Look Especially Good on Bread Baskets
- How to Make It Last
- Conclusion
- Experience and Practical Lessons From Real Bread Basket Decoupage Projects
If your bread basket is currently giving “hotel breakfast buffet, circa 2009,” there is good news: decoupage can fix that. With a little paper, a little glue, and a modest amount of patience, you can turn a plain basket into a charming, customized piece that looks far more expensive than it really is. It is one of those rare crafts that feels both fancy and forgiving. Even better, you do not need a craft room that looks like a rainbow exploded. A kitchen table, a brush, and a good playlist will do just fine.
This guide walks you through exactly how to decoupage a bread basket, from choosing the right basket and paper to avoiding bubbles, wrinkles, and the dreaded “why is everything sticky?” moment. Along the way, you will also get design ideas, troubleshooting tips, and practical advice for making your finished basket look polished instead of accidentally “homemade” in the suspicious sense of the word.
Why Decoupage a Bread Basket?
A bread basket is the kind of household item that quietly does its job and rarely gets any glory. But it sits right there on your table, in plain sight, holding dinner rolls, croissants, muffins, biscuits, and whatever carb-based comfort your day requires. So why not let it look good?
Decoupage gives a bread basket personality. It can make a thrifted find look intentional, tie your basket into your kitchen decor, create a custom gift, or help you match seasonal tablescapes without buying new accessories every few months. A floral basket works for spring brunches, a blue-and-white one looks great in a cottage kitchen, and a neutral linen-print basket can suddenly make even store-bought rolls look vaguely artisanal.
That is the magic of decoupage: it turns basic objects into small visual stories. Also, it is cheaper than redecorating your whole dining room, which is always a plus.
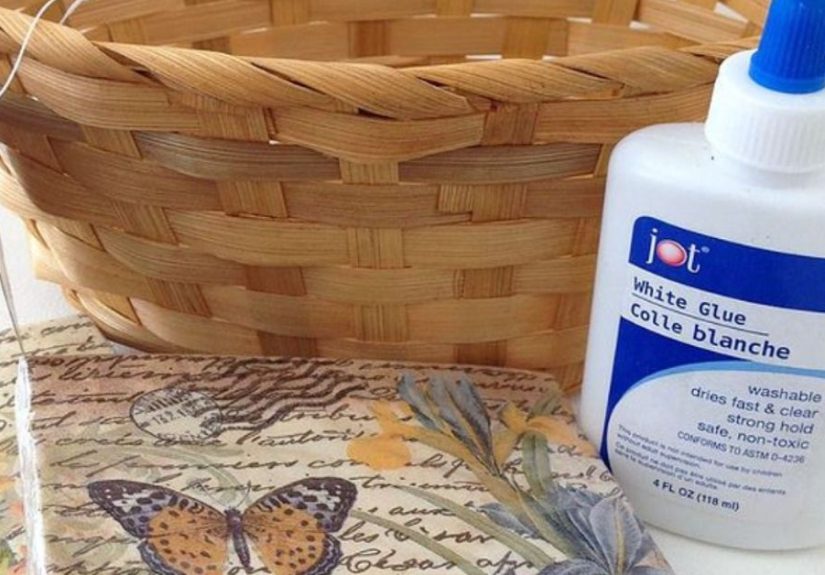
What You Need
- A bread basket made of wood, bamboo, wicker, rattan, or sturdy paperboard
- Decoupage medium or Mod Podge in matte, satin, or gloss
- Decorative paper napkins, tissue paper, wrapping paper, scrapbook paper, or thin printed paper
- Soft paintbrush or foam brush
- Small scissors or craft knife
- Clean cloth
- Optional: acrylic paint for a base coat
- Optional: brayer, old gift card, or your fingertips for smoothing
- Optional: clear finishing sealer for added durability
- Optional: removable fabric or paper liner for serving bread
Choose the Right Basket First
Not every basket is equally cooperative. If this is your first time, choose a bread basket with a fairly even surface. A flat-bottomed wooden basket or tightly woven wicker basket is much easier to work with than one with dramatic curves, deep gaps, loose weaving, or enough texture to snag a sweater from three feet away.
Here is the important practical note: if the basket will hold bread directly, treat decoupage as decorative and keep the finished surface away from direct food contact. The easiest fix is to decoupage the outside, the rim, or selected panels, then use a removable cloth liner, parchment, or napkin inside. That way your basket stays pretty and your dinner rolls are not hanging out on craft sealer.
In other words, let the basket be beautiful, but let the bread have boundaries.
The Best Papers for a Bread Basket
You can decoupage with almost any thin decorative paper, but some choices are friendlier than others.
Paper Napkins
These are a favorite for a reason. They are thin, easy to wrap around curves, and come in beautiful prints. Florals, lemons, toile, stripes, herbs, or vintage labels all work beautifully on a bread basket. Just separate the printed layer from the plain backing layers before applying.
Tissue Paper
Tissue creates a soft, almost painted look. It is great if you want subtle layering, faded color, or a less defined edge. It tears easily, which sounds bad until you realize torn edges often blend better than sharply cut ones.
Scrapbook Paper or Wrapping Paper
These give you bold pattern and structure, but they are thicker. They work best on flatter surfaces or when cut into smaller pieces. If you try wrapping one large piece around a curvy wicker basket, the paper may stage a full rebellion.
Book Pages, Sheet Music, or Printed Graphics
These are excellent for farmhouse, vintage, or French-country styles. They pair beautifully with white paint and distressed edges. Just remember that subtle backgrounds usually look more elegant than a basket covered in fifty visible headlines about tax policy or celebrity scandals.
How to Decoupage a Bread Basket Step by Step
1. Clean the Basket
Start by wiping the basket thoroughly with a dry or slightly damp cloth to remove dust, crumbs, and mystery debris. If the basket is slick, glossy, or varnished, a very light sanding can help the medium grip better. Let everything dry completely before you begin. Decoupage and damp dust are not a dream team.
2. Decide Where the Design Will Go
Before you open the glue, plan your layout. You can cover the entire exterior, decorate only the rim, add medallion-style motifs to the sides, or line the bottom panel with a pattern and leave the rest natural. For a more professional look, repeat one motif around the basket rather than pasting random pieces wherever your hand lands.
This is also the moment to decide whether you want a base coat of paint. White or cream paint underneath napkins often makes colors pop, while a tan or brown base keeps things warmer and more rustic.
3. Cut or Tear Your Paper
Cut out the parts of the pattern you want to use, or tear the edges for a softer, more blended look. Smaller pieces are much easier to manage on baskets than one giant sheet. If you are using napkins, peel away the backing layers so you are left with the thin printed layer only.
Lay all the pieces on the basket without glue first. This dry fit saves you from the deeply humbling experience of realizing your prettiest flower is upside down right in the front center.
4. Apply the First Coat of Decoupage Medium
Work in sections. Brush a thin to medium layer of decoupage medium onto the first area of the basket. Do not try to coat the entire basket at once unless you enjoy racing glue while it dries. Smaller sections give you more control and better placement.
5. Place the Paper and Smooth It
Set the paper onto the wet medium and gently smooth it with your fingers, a brayer, or a soft tool. Start in the center and work outward to push out air bubbles. On a woven basket, press the paper carefully into shallow texture rather than forcing it deep into every gap.
If the paper wrinkles slightly, do not panic. Thin napkins wrinkle more easily than thicker paper. Many minor wrinkles flatten visually as the piece dries, and small imperfections often disappear into the handmade charm. That is not a craft excuse. That is a design principle with good manners.
6. Add a Top Coat
Once the paper is in place, let it sit briefly so it does not shift, then brush a light top coat over it. Use gentle strokes so you do not tear delicate paper. If you are working with napkins, less brushing is usually better. Aggressive brushing can turn your pretty pattern into abstract sadness.
7. Repeat in Layers
Continue section by section until the design is complete. Let the basket dry between coats, then add at least one or two more protective coats over the finished decoration. If you want a smoother finish, let each coat dry thoroughly and sand very lightly between coats with fine sandpaper.
8. Let It Cure
Dry and cured are not the same thing. Your basket may feel dry fairly quickly, but it still needs extra time to harden fully. Give it a good curing period before regular use so the surface becomes more durable and less likely to feel tacky.
Common Mistakes to Avoid
Using Paper That Is Too Thick
Thicker paper is harder to wrap around curves and textured surfaces. If you love the pattern, cut it into smaller pieces.
Applying Too Little Medium
Many beginners think less glue means less mess. In reality, too little medium can lead to wrinkles, poor adhesion, and edges that lift later.
Using Too Much Pressure on Thin Napkins
Napkins are delicate. Smooth gently, and avoid overbrushing the top coat.
Skipping Dry Time
Crafting in a hurry is how perfectly nice projects become sticky, smeary, and oddly aggressive. Let each layer dry before adding the next.
Decorating the Food-Contact Area
For a bread basket, keep your decoupage on the exterior or use a liner inside. It is the prettier and smarter move.
Design Ideas That Look Especially Good on Bread Baskets
- French bakery style: vintage script, labels, muted cream paint, and distressed edges
- Farmhouse style: grain sack stripes, botanical prints, neutral tones, and matte finish
- Cottage kitchen style: florals, herbs, blue-and-white patterns, and soft satin sealer
- Holiday table style: holly, plaid, winter greenery, or autumn leaves on a seasonal basket
- Lemon-and-olive Mediterranean style: bright fruit motifs, blue trim, and cheerful summer energy
You can also personalize a basket with a monogram, family name, or a simple phrase on the liner, such as “break bread,” “fresh rolls,” or “carb loading station.” That last one is not classic, but it is honest.
How to Make It Last
Once your bread basket is finished, treat it like decorative serveware rather than something you scrub in the sink. Wipe it gently with a dry or barely damp cloth. Do not soak it. Do not stack heavy things inside it. Do not leave it near a steamy stovetop if you can help it. And if the basket is part of your outdoor patio setup, protect it from constant rain and direct weather exposure.
A removable liner does a lot of the heavy lifting here. It protects the interior, keeps crumbs from settling into the basket, and lets you serve bread, pastries, or wrapped snacks without stressing about the finish.
Conclusion
Learning how to decoupage a bread basket is one of those satisfying home crafts that delivers a surprisingly high return on very modest effort. The basic process is simple: clean the basket, plan the design, apply paper in manageable sections, smooth it carefully, and build up protective coats with patience. The real magic happens in the styling. A plain basket becomes a charming table accent, a giftable handmade piece, or a custom detail that makes your kitchen feel more thoughtful and personal.
The best part is that there is room to play. You can go elegant, rustic, seasonal, colorful, vintage, or delightfully weird. If the basket ends up holding sourdough on Sunday, muffins on Monday, and unopened snack packs on Tuesday, that is fine too. A good bread basket should be versatile. A great decoupaged bread basket should be versatile and cute.
Experience and Practical Lessons From Real Bread Basket Decoupage Projects
After working on a few bread basket makeovers, one thing becomes very clear: the project always looks easier in your head than it does in the first five minutes. That is not because it is hard. It is because baskets are sneaky. They seem simple, but the moment you start wrapping paper around woven curves, you realize you are negotiating with texture, gravity, and a brush that suddenly has opinions.
The first useful lesson is to slow down the layout stage. The most successful baskets usually are not the ones with the fanciest materials. They are the ones where the pattern placement feels intentional. A cheap floral napkin can look elegant if the main motifs are spaced evenly and the front of the basket has a clear focal point. On the other hand, a premium paper can still look messy if flowers, stripes, and labels all collide like they are fighting for parking.
Another real-world tip: smaller pieces almost always behave better. Large sheets look efficient, but on an actual basket they wrinkle faster, tear more easily, and tend to bunch at the corners. Smaller cutouts take longer to place, yet they usually create a cleaner finish. This is especially true for wicker, bamboo, and rattan baskets where the surface is not perfectly flat. Breaking a design into smaller sections gives you control, and control is a lovely thing when glue is involved.
Many crafters also discover that matte finishes are more forgiving than gloss on a bread basket. Gloss can be beautiful, but it highlights texture, brush strokes, and every dramatic wrinkle. Matte and satin finishes tend to soften imperfections and make the basket look a little more natural, especially in cozy kitchens or farmhouse-style dining rooms.
One of the smartest choices people make is adding a liner after decoupaging. It solves several problems at once. The basket stays practical, the decorated surface is protected, and the whole thing looks more polished. A simple linen napkin or cotton tea towel can make the basket feel styled instead of merely crafted. It is the visual equivalent of putting on earrings before guests arrive.
There is also a surprising emotional side to projects like this. A bread basket is not a grand furniture makeover. It is small, useful, and visible every day. That means the payoff feels immediate. You finish it, set it on the table, and suddenly an ordinary dinner setup has more character. That tiny upgrade can be weirdly satisfying. It is a reminder that not every creative project needs to be monumental to matter.
Finally, the best experience-based advice is to accept that handmade does not mean flawless. Tiny wrinkles, slightly softened edges, and the occasional imperfect overlap are normal. In fact, when the basket is styled with a cloth liner and a pile of warm rolls, nobody is going to inspect it like a museum conservator. They are going to think it looks charming, ask where you got it, and be mildly impressed when you say you made it yourself. That alone is worth the glue on your fingers.


